
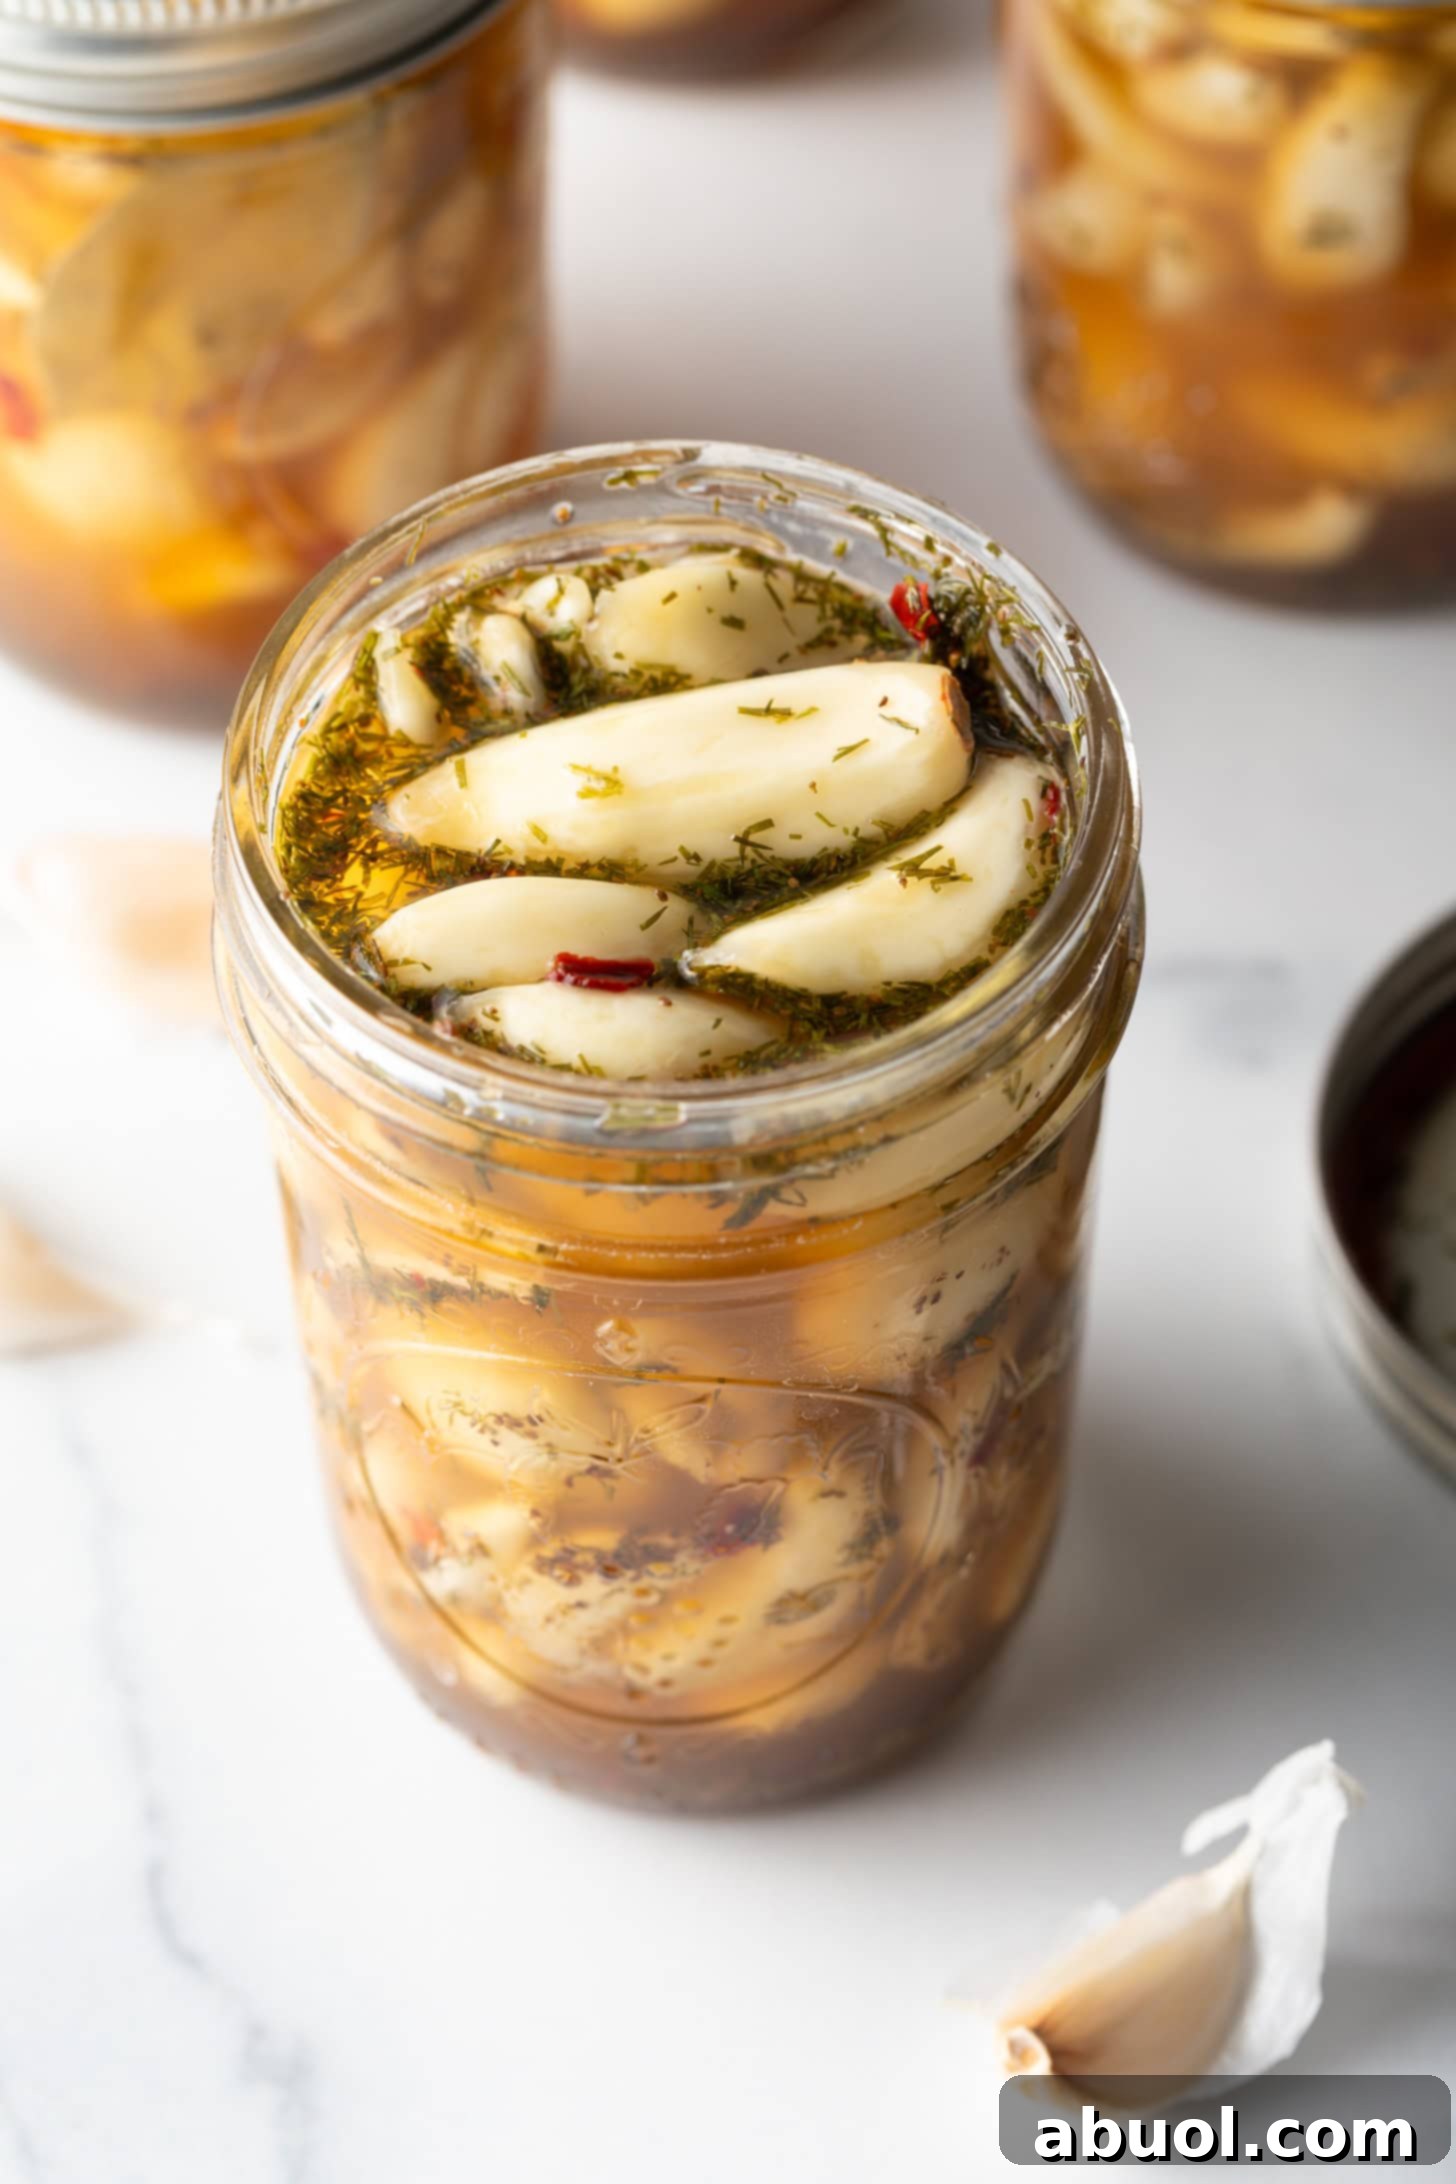
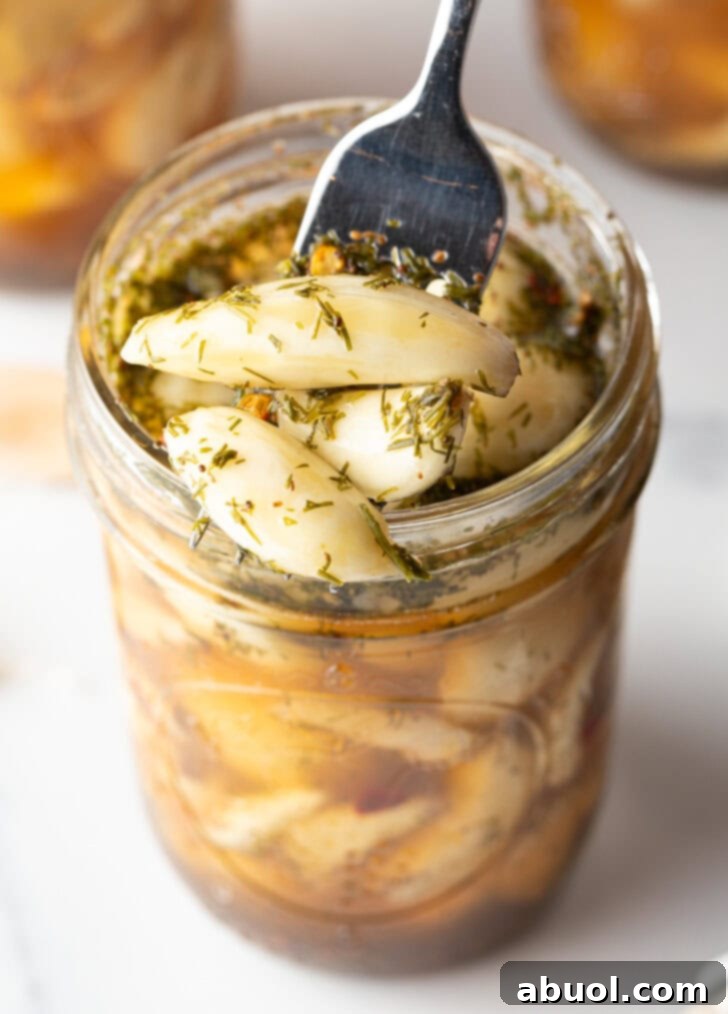
Transform your kitchen experience with this classic, quick refrigerator pickled garlic recipe! In just a few simple steps, you can create the most incredibly tangy, savory, and robust pickled garlic cloves. These delightful bites are perfect for effortless snacking straight from the jar or as a vibrant addition to a multitude of savory dishes, elevating every meal with their unique flavor profile.
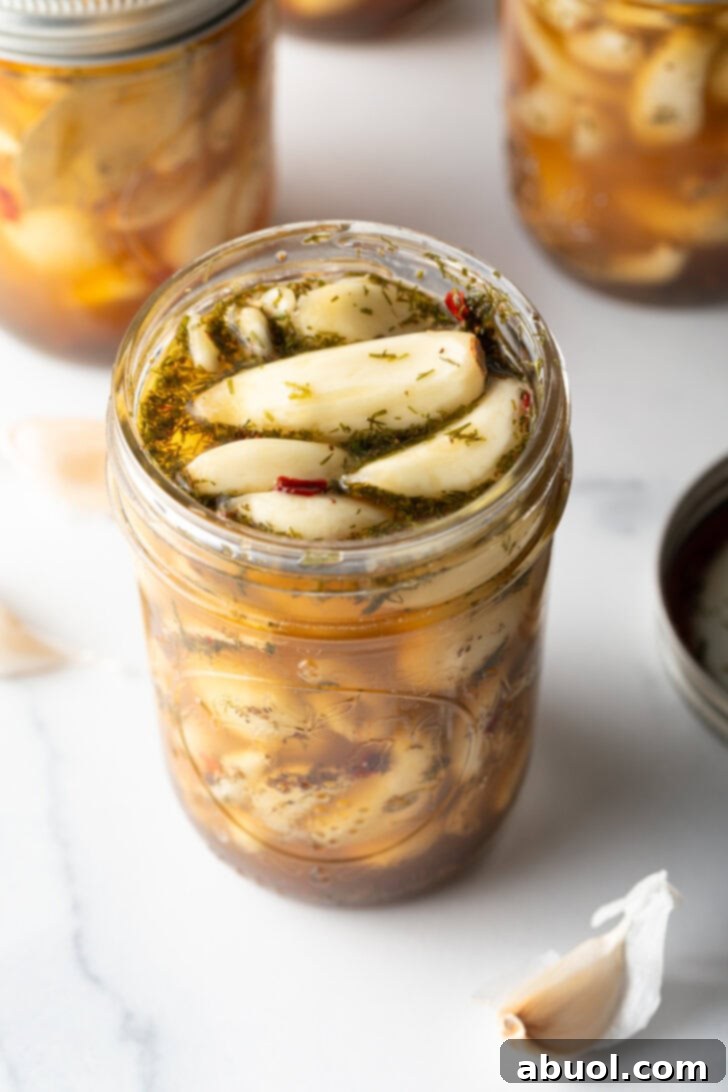
Why You’ll Love This Homemade Pickled Garlic Recipe
There’s nothing quite like the satisfaction of preserving the bounty of your garden, and if you find yourself with an abundance of fresh garlic this season, this quick pickling method offers an exceptional opportunity. Our homemade pickled garlic recipe allows you to capture the essence of fresh garlic, transforming it into a versatile pantry staple that lasts for months.
So, why go through the effort of pickling garlic? The reasons are plentiful and incredibly rewarding! Firstly, pickling significantly extends the life of your fresh garlic cloves, preventing waste and ensuring you have this flavorful ingredient on hand whenever inspiration strikes. Beyond mere preservation, the pickling process infuses the garlic with an extraordinary depth of flavor – a delightful balance of tangy, savory, and subtly sweet notes that fresh garlic simply doesn’t offer.
One of the most remarkable benefits is how pickling “desensitizes” the garlic. This means you can enjoy these tangy cloves raw without the intense, pungent bite often associated with fresh garlic. The acetic acid in the pickling brine mellows the sharpness, making the garlic much more palatable. Best of all, this transformation dramatically reduces the notorious post-garlic breath, allowing you to savor its flavors without lingering worries. Imagine enjoying garlic in a whole new, less assertive, yet equally delicious way!
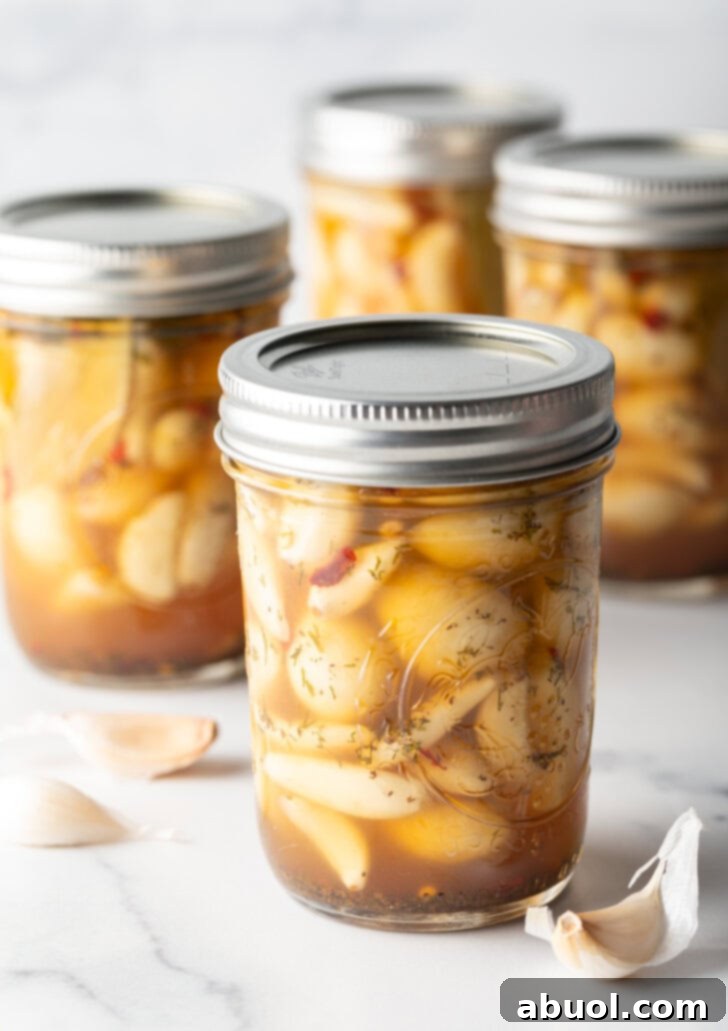
This recipe focuses on creating delicious refrigerator garlic pickles. We’ll be working with approximately 1 ½ to 2 pounds of fresh garlic, which typically yields about four 8-ounce (half-pint) jars. These jars, once prepared, can be safely stored in your refrigerator for an impressive 9-12 months. It is crucial to understand and adhere to food safety guidelines: according to the USDA, you should absolutely not attempt to can garlic cloves using traditional water bath canning methods to make them shelf-stable outside the refrigerator. Garlic is a low-acid food, and improper canning can lead to the growth of dangerous bacteria, including those that cause botulism. Always keep your homemade pickled garlic refrigerated for safety!
Essential Ingredients for Perfect Pickled Garlic
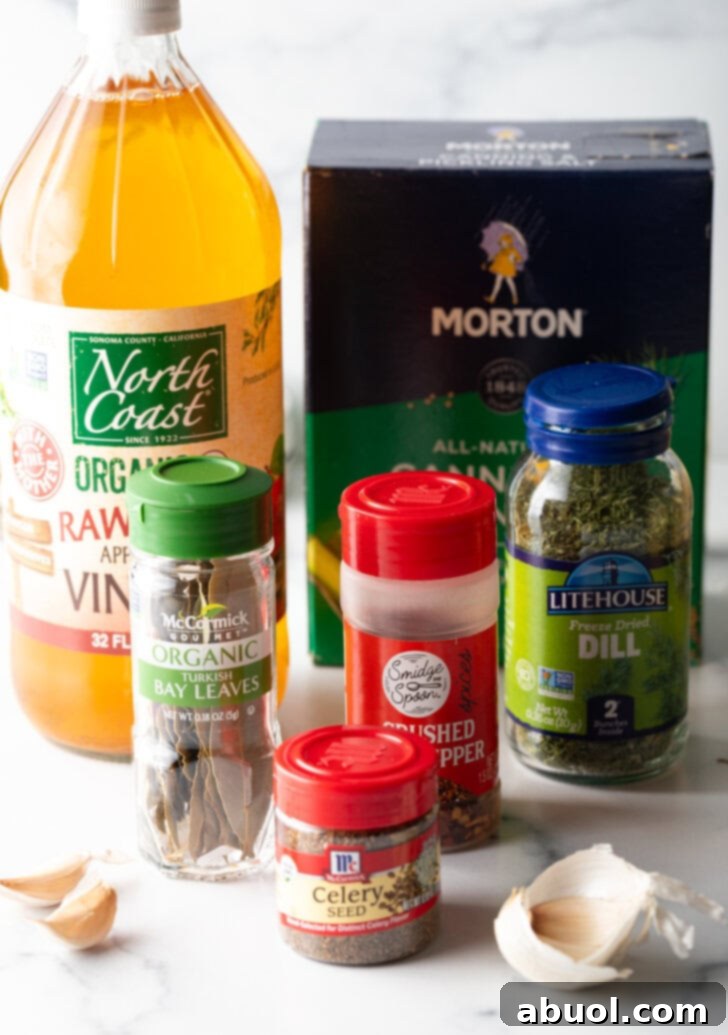
Crafting exceptional pickled garlic requires just a handful of quality ingredients. Each component plays a vital role in developing the unique flavor and ensuring proper preservation. Here’s what you’ll need:
- Fresh Garlic Heads: You’ll need 1.5-2 pounds of fresh garlic. This typically translates to roughly 15-30 medium-sized heads, depending on their size. Opt for firm, plump garlic heads without any sprouts or soft spots. The fresher the garlic, the better your pickled cloves will taste. If your garlic heads have very heavy, thick wrappings, consider purchasing closer to 2 pounds to ensure enough usable cloves.
- Apple Cider Vinegar: Approximately 32 ounces (4 cups) of apple cider vinegar forms the base of our pickling brine. We choose apple cider vinegar for its mildly sweet, fruity notes that perfectly complement and soften the garlic’s natural pungency without being overly sharp. While apple cider vinegar is highly recommended for its balanced flavor, you can also use white wine vinegar or rice vinegar for slightly different flavor profiles. Avoid plain distilled white vinegar, as its harsher acidity can overpower the delicate flavors we’re trying to achieve.
- Canning & Pickling Salt: A quarter cup of canning and pickling salt is essential. This type of salt is pure sodium chloride and is specifically designed for pickling as it contains no iodine or anti-caking agents. Iodine can cause discoloration in pickles, and anti-caking agents can make your brine cloudy. Regular table salt, which often contains these additives, should be avoided for pickling.
- Bay Leaves: You’ll need four bay leaves, one for each jar. These aromatic leaves add a subtle, earthy, and slightly floral undertone to the brine, enhancing the overall complexity of the pickled garlic. Remember, bay leaves are for flavor infusion and are typically not consumed.
- Dill: Two teaspoons of dried dill (or 2 tablespoons of fresh dill) will infuse your pickles with a classic, fresh, and slightly anisy flavor. Dill is a traditional pickling herb that pairs beautifully with garlic, adding a bright note to the tangy brine.
- Celery Seeds: One teaspoon of celery seeds is a secret ingredient that works wonders. Celery seeds offer a warm, slightly bitter, and earthy flavor that helps to mellow the intense garlic notes even further, contributing to a wonderfully balanced pickle.
- Crushed Red Pepper Flakes: One teaspoon of crushed red pepper flakes is an optional but highly recommended addition for those who appreciate a nice kick of spicy heat. Adjust the amount to your preference – omit it entirely for a mild pickle or add more for an extra fiery batch.
Step-by-Step Guide: How to Preserve Garlic
Making delicious pickled garlic is a straightforward process that anyone can master. Follow these steps carefully to ensure a safe and flavorful batch of refrigerator pickles:
Step 1: Prepare Jars and Garlic
Begin by preparing your canning jars. You will need four sanitized 8-ounce canning jars (also known as half-pint jars). Ensure they are thoroughly cleaned and sterilized. You can achieve this by washing them in hot, soapy water and rinsing well, or by running them through a dishwasher on a hot cycle. It’s best to sanitize them just before use to ensure they are hot when filled.
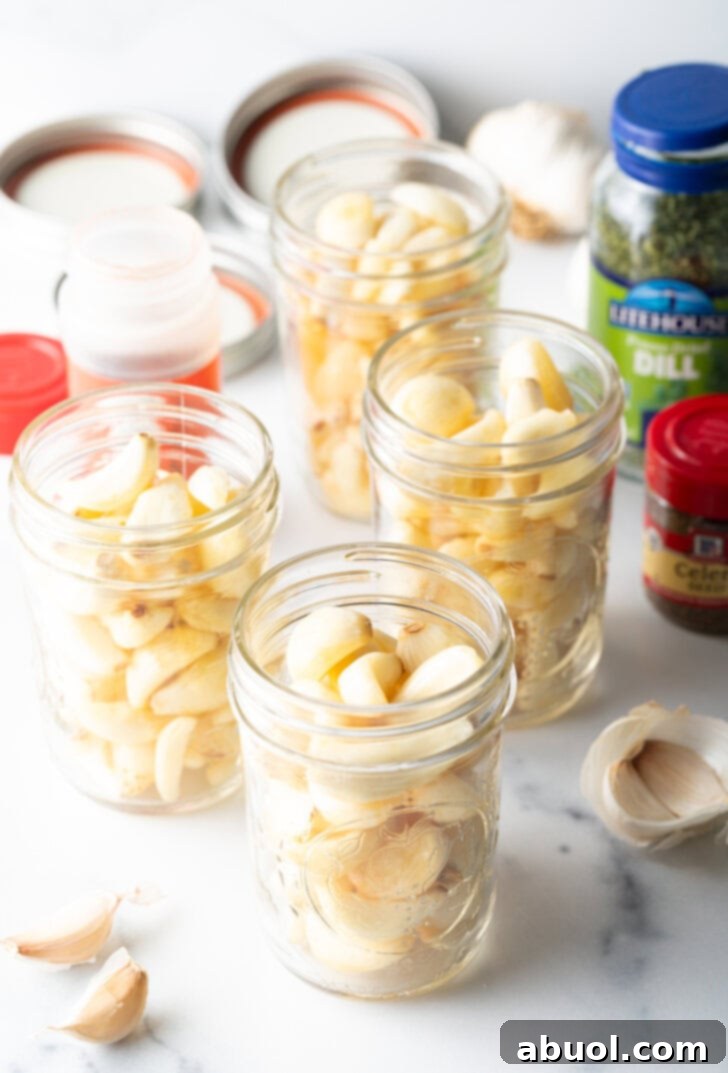
Next, tackle the garlic. Separate all the heads of garlic into individual cloves. This can be done by gently twisting the head or by giving it a firm smash with the heel of your hand. Once separated, peel all the cloves. Peeling garlic can be tedious, but a few tricks can help: try soaking the cloves in warm water for 15-20 minutes, or place them between two metal bowls and shake vigorously to loosen the skins. Once peeled, ensure all cloves are clean and free of any skin remnants. Carefully stuff the clean, peeled garlic cloves into the sanitized canning jars, leaving a little room at the top.
Step 2: Add Spices to Jars
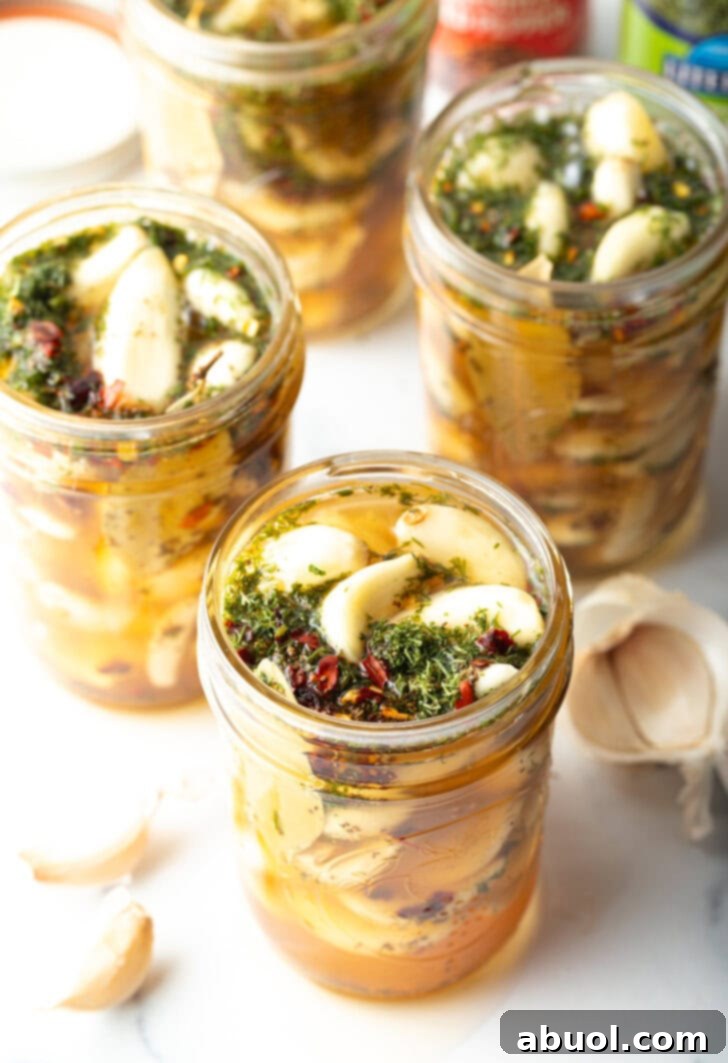
With the garlic cloves nestled in their jars, it’s time to add the flavor-enhancing spices. To each individual jar, add one bay leaf, ½ teaspoon of dried dill (or a ½ tablespoon of fresh dill), ¼ teaspoon of celery seeds, and ¼ teaspoon of crushed red pepper flakes (if using). Distribute the spices evenly among the jars. These spices will infuse the garlic with their aromatic qualities as they pickle, contributing to a complex and irresistible flavor.
For a complete, printable recipe with precise measurements, scroll down below. It’s time to enjoy your culinary creation!
Step 3: Prepare the Pickling Brine
Now, prepare your pickling brine. Set a medium saucepan on high heat on your stovetop. Carefully pour in the apple cider vinegar and the canning and pickling salt into the pot. Stir the mixture well to ensure the salt dissolves completely. Bring the brine to a rolling boil, ensuring it is vigorously bubbling before proceeding to the next step. This boiling action is crucial for sterilizing the brine and ensuring proper infusion.
Step 4: Fill Jars and Seal
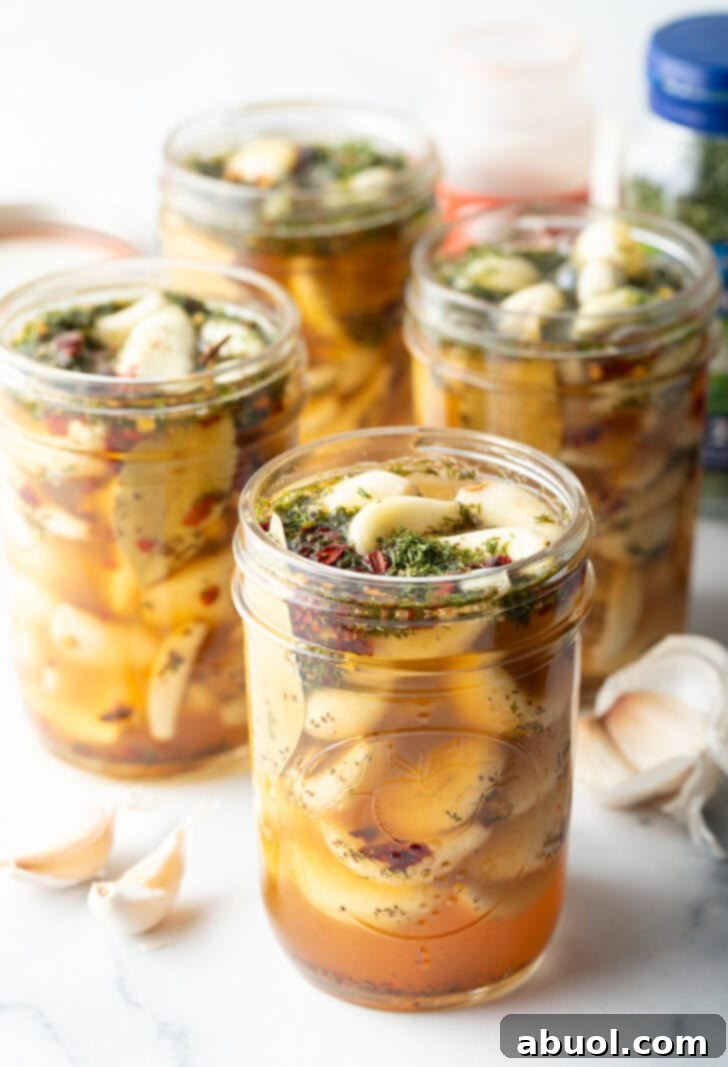
Once the pickling brine is boiling hot, carefully ladle it over the garlic and spices in each canning jar. Fill the canning jars, leaving approximately ½-inch of headspace from the very top rim of the jar. This headspace is important to allow for expansion and to help create a proper seal. Using a canning funnel can make this step easier and prevent spills. Ensure all garlic cloves are fully submerged in the brine.
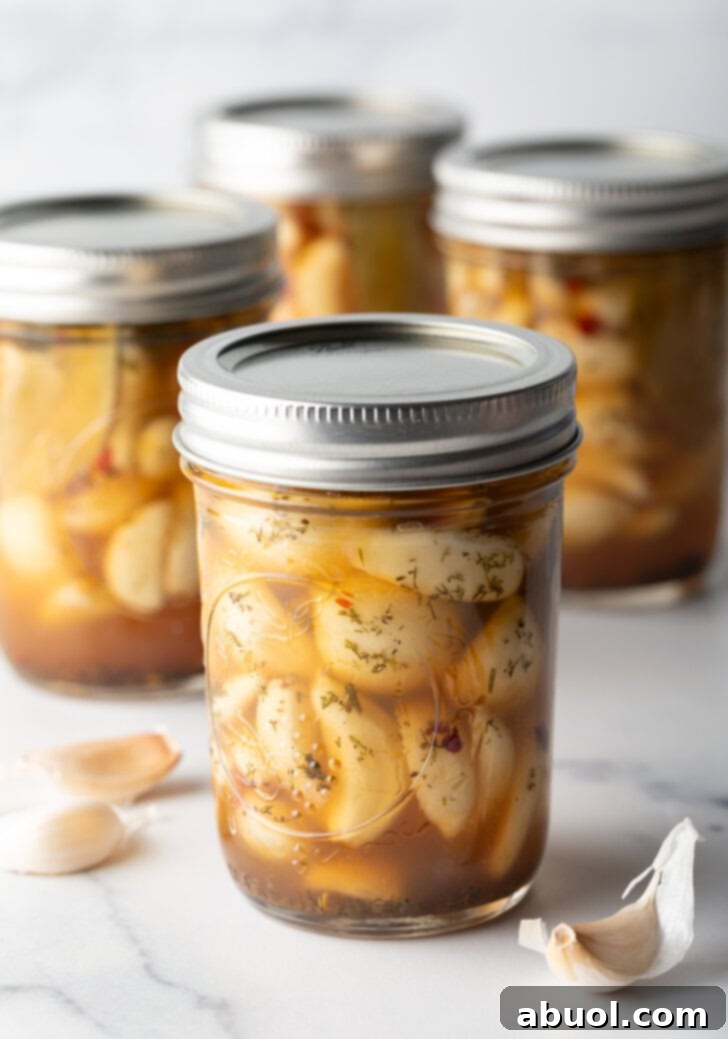
While the jars are still hot, carefully screw the lids on tightly. Allow the jars to cool completely to room temperature on your countertop. Once cooled, immediately transfer them to the refrigerator for storage. It is essential to let the pickled garlic sit in the refrigerator for at least 48 hours before serving. This crucial curing time allows the garlic cloves to begin the desensitizing process, mellowing their flavor and absorbing the delicious tangy brine. The longer they sit in the pickling brine, the more mellow, flavorful, and tender they will become, developing a truly exceptional taste and texture. Enjoy your homemade preserved garlic!
Creative Ways to Enjoy Your Pickled Garlic
Once you’ve made a batch of these delectable pickled garlic cloves, you might wonder, “How do I use pickled garlic?” The good news is, these tangy gems are incredibly versatile and can be incorporated into your diet in countless ways. Think of them as you would any other pickled item, ready to add a burst of flavor and a delightful texture to both everyday meals and special occasions.
You can certainly enjoy them cold, straight out of the jar, as a refreshing and zesty snack. But the possibilities extend far beyond! Here are just a few of our favorite creative ways to use preserved garlic:
- Elevate Sandwiches, Wraps, and Pizzas: Slice or finely chop pickled garlic and layer it onto your favorite sandwiches and wraps for an unexpected zing. Scatter them over homemade or store-bought pizzas before or after baking for a gourmet touch.
- Brighten Up Salads: Pickled garlic is a fantastic addition to various salads. Toss them into hearty antipasto salad, earthy farro salad, or classic pasta salad. Their tangy flavor cuts through richness and adds a wonderful brightness.
- Enhance Charcuterie Boards and Snack Plates: These beautiful, glistening cloves are a perfect addition to any charcuterie board, cheese platter, or casual snack plate. They pair wonderfully with cured meats, cheeses, and olives, offering a refreshing counterpoint.
- Boost Grain and Protein Bowls: Chop and sprinkle pickled garlic over grain bowls, protein bowls, or Buddha bowls for an extra layer of flavor and texture that truly makes the dish pop.
- Incorporate into Cooked Dishes: Don’t limit them to raw applications! You can also finely chop and cook pickled garlic just as you would fresh garlic cloves. Add them to stir-fries, sauces, marinades, soups, stews, or roasted vegetables. The pickling process mellows their intensity, offering a sweeter, tangier, and less pungent garlic flavor to your cooked creations.
- Mix into Dips and Dressings: Blend a few cloves into homemade hummus, aioli, or salad dressings for a unique and zesty twist.
- Garnish for Soups and Stews: A few thinly sliced pickled garlic cloves can make an excellent garnish for creamy soups or hearty stews, adding a sophisticated visual and flavor element.
With its unique tangy and mellow profile, homemade pickled garlic is sure to become a cherished ingredient in your culinary repertoire!
Frequently Asked Questions About Pickled Garlic
Is preserved garlic as good as fresh garlic?
While both fresh and preserved garlic are delicious, they offer different culinary experiences. Fresh garlic is typically hard and crisp, delivering a strong, pungent, earthy bite. Pickled garlic, on the other hand, is softer, more tender, and has a distinct tangy, savory, and slightly herbaceous flavor. It’s not necessarily “better” or “worse,” just different! Each has its place in cooking, offering unique profiles to your dishes. Pickled garlic is perfect when you want a mellow garlic flavor with an acidic punch.
How do you mellow the taste of garlic effectively?
The pickling process itself is the primary way to mellow garlic. The acetic acid in the vinegar breaks down the compounds responsible for garlic’s intense pungency. If you desire garlic cloves that are exceptionally mellow, you can take an extra step: after peeling, place the garlic cloves directly into the boiling brine on the stovetop and let them boil for about 5 minutes. After this quick blanching, carefully ladle both the cloves and the brine into your prepared jars. This pre-cooking step will soften the garlic significantly and further reduce its sharp bite.
Can you just eat pickled garlic straight from the jar?
Absolutely, and it’s a truly delightful experience! Pickled garlic is incredibly flavorful and much less intense than raw fresh garlic, making it a perfect snack on its own. Many people enjoy popping a few cloves for a quick burst of tangy flavor. A typical serving size is roughly 2-3 tablespoons, but you might find yourself reaching for more!
How long does preserved garlic last in the refrigerator?
When properly prepared and stored, jars of homemade pickled garlic will last wonderfully in the refrigerator for an impressive period of 9 to 12 months. Always ensure your jars are tightly sealed and kept consistently cold for optimal freshness and safety. Remember, these are refrigerator pickles and are not shelf-stable.
Why shouldn’t I water bath can pickled garlic to make it shelf-stable?
Garlic is a low-acid food, meaning it doesn’t naturally contain enough acid to prevent the growth of harmful bacteria, particularly Clostridium botulinum, the bacteria that causes botulism. While the pickling brine adds acidity, it’s very difficult to ensure the acidity penetrates the dense garlic cloves sufficiently for safe room-temperature storage without specialized pressure canning equipment and tested recipes. For home canners, the risk of botulism is too high with water bath canning garlic. Therefore, it is strongly recommended by the USDA and food safety experts to always store homemade pickled garlic in the refrigerator.
What if my pickled garlic turns blue or green? Is it still safe to eat?
Occasionally, pickled garlic can turn blue or green. This is a natural, harmless chemical reaction that occurs when sulfur compounds in garlic react with trace minerals (like copper) present in water, vinegar, or even the garlic itself. It’s purely cosmetic and does not affect the safety or flavor of your pickled garlic. As long as the jars were properly sealed and stored in the refrigerator, and there are no signs of mold or off-odors, your colorful garlic is perfectly safe to enjoy.
Looking for More Perfectly Pickled Recipes? Be Sure to Try:
If you’ve fallen in love with the tangy, zesty world of pickling, there are many more delicious creations waiting for you! Expand your pickling repertoire with these fantastic recipes:
- Quick Pickled Jalapeños: Add a spicy kick to your meals with these easy-to-make pickled peppers.
- Pickled Radish Recipe: Enjoy the crisp, peppery bite of radishes enhanced by a tangy brine.
- Chamoy Pickles: A unique and flavorful twist for adventurous palates.
- Spicy Beet Pickled Eggs: Beautifully colored and subtly spicy, these eggs are a fantastic snack or appetizer.
- Pickled Banana Peppers: Sweet, tangy, and mildly spicy, perfect for sandwiches and salads.
- Pickled Green Tomatoes: A wonderful way to use up unripe tomatoes from the garden.
- Quick Pickled Red Onions: An essential condiment that adds crunch and zing to almost any dish.
- Pickled Watermelon Rind: A surprisingly delicious and often overlooked pickle, offering a sweet and tangy crunch.
Print Recipe
Pickled Garlic (Preserved Garlic)
This classic quick refrigerator pickles recipe makes the most tangy, bold, and delicious pickled garlic in just four easy steps. They’re perfect for snacking or adding to all kinds of savory dishes!
Ingredients
- 1 ½ – 1 ¾ pounds fresh garlic heads, peeled and separated into cloves
- 32 ounces apple cider vinegar
- ¼ cup canning & pickling salt (iodine free salt)
- 4 bay leaves
- 2 teaspoons dried dill (or 2 tablespoons fresh dill)
- 1 teaspoon celery seeds
- 1 teaspoon crushed red pepper flakes (optional)
Instructions
- Set out four sanitized 8-ounce canning jars. Separate the heads of garlic and peel all the cloves. Then stuff the clean cloves into the canning jars.
- To each jar, add one bay leaf, ½ teaspoon of dried dill, ¼ teaspoon of celery seeds, and ¼ teaspoon of crushed red pepper (if using).
- Set a medium sauce pot on high heat. Pour in the apple cider vinegar and pickling salt into the pot. Bring to a boil.
- Once boiling, carefully ladle the boiling-hot pickling brine over the top of the canning jars. Fill the canning jars up to ½ inch headspace from the top.
- While the jars are hot, screw the lids on tight. Cool to room temperature and then store in the refrigerator for at least 48 hours before serving. This allows time for the garlic cloves to start desensitizing. The longer they sit in the pickling brine, the more mellow and flavorful they become!
Notes
If the heads of garlic you find have very heavy wrappings, buy 2 pounds to ensure you have enough peeled cloves.
For exceptionally mellow garlic cloves, you can place them in the boiling brine on the stovetop and boil them for 5 minutes before ladling the cloves and brine into the jars.
This recipe makes approximately four 8-ounce jars of pickled garlic. These jars can be safely kept in the refrigerator for 9-12 months. As a crucial reminder, according to the USDA, it’s best not to attempt to can garlic cloves using traditional water bath methods for shelf-stable storage due to botulism risk. Always keep them in the fridge!
Nutrition
Serving: 2tb, Calories: 15kcal, Carbohydrates: 3g, Protein: 1g, Fat: 0.1g, Saturated Fat: 0.01g, Polyunsaturated Fat: 0.02g, Monounsaturated Fat: 0.01g, Sodium: 356mg, Potassium: 44mg, Fiber: 0.2g, Sugar: 0.1g, Vitamin A: 10IU, Vitamin C: 3mg, Calcium: 17mg, Iron: 0.2mg