
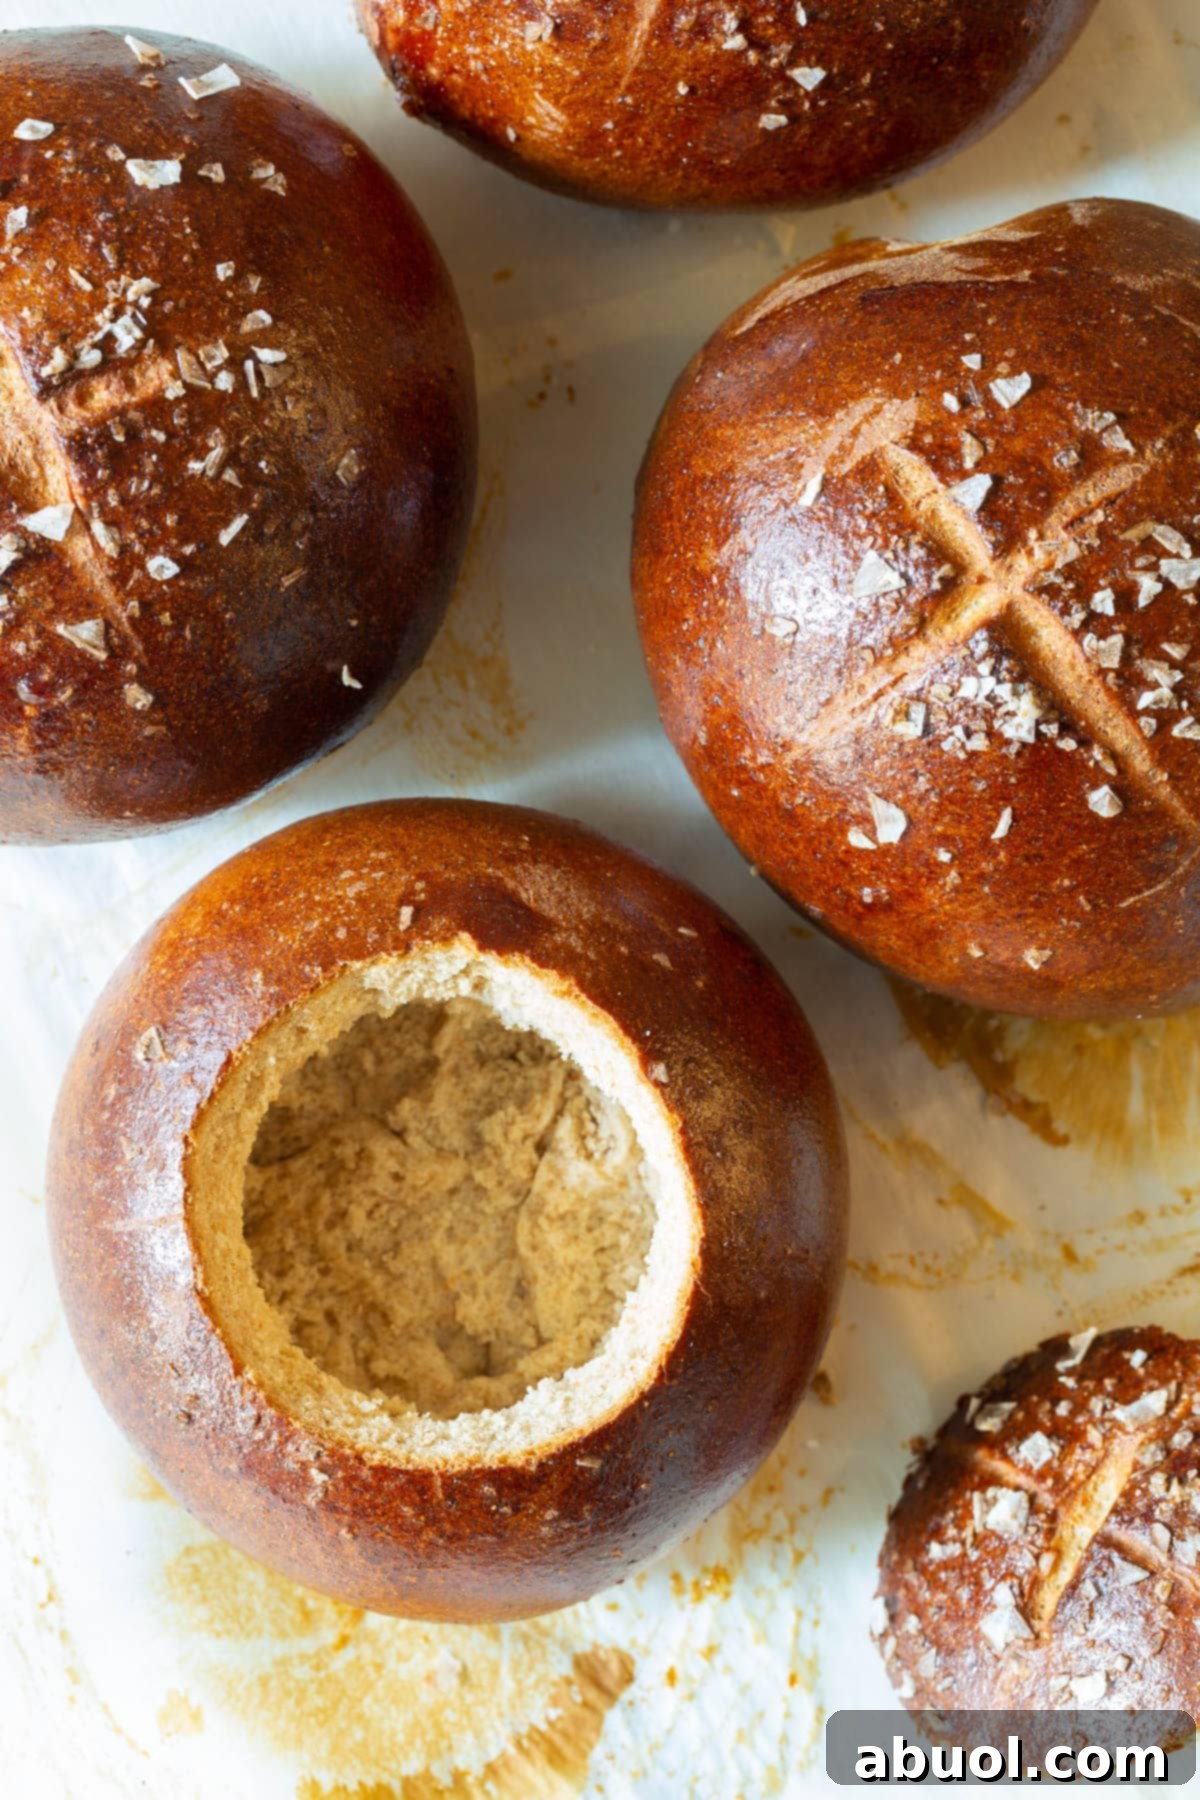
Welcome to the ultimate guide for crafting your very own homemade Honey Wheat Bread Bowls! Imagine serving your favorite creamy soup or decadent dip in a warm, crusty, and slightly sweet bread bowl that you baked from scratch. This isn’t just a meal; it’s an experience; it’s a celebration of comfort food. Forget those frustrating trips to the bakery where bread bowls are always sold out; with this surprisingly easy recipe, you’ll discover the immense joy and satisfaction of baking perfect bread bowls right in your own kitchen, any time you wish.
Mastering Honey Wheat Bread Bowls: Your Ultimate Homemade Recipe
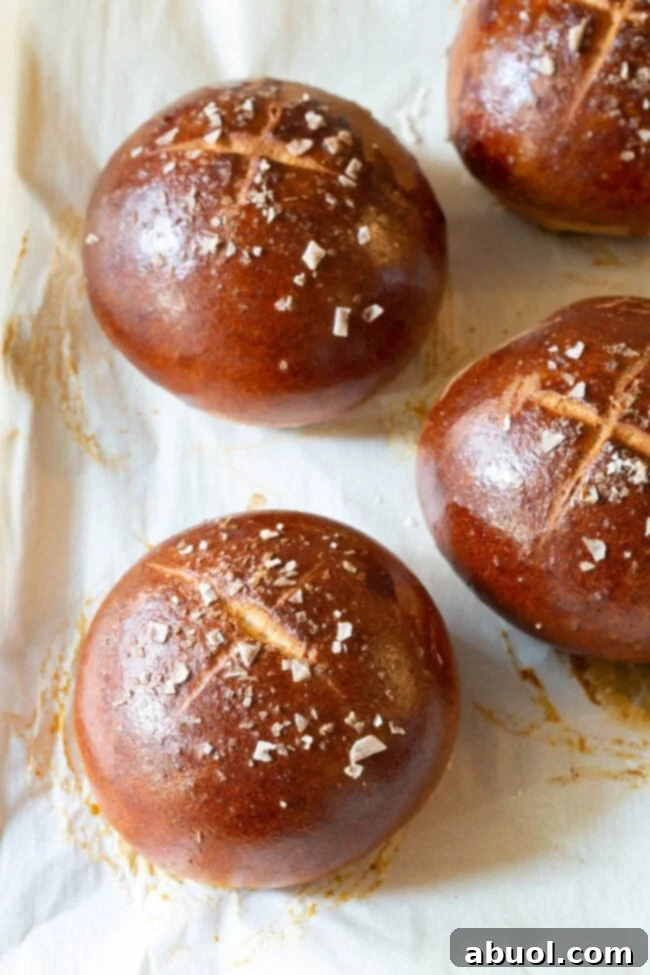
Do you think baking bread bowls is an intricate challenge reserved solely for professional bakers? It’s time to set that notion aside! This straightforward yet incredibly rewarding Honey Wheat Bread Bowl Recipe is designed for home cooks of all experience levels. With just a little patience, standard kitchen ingredients, and the invaluable assistance of an electric stand mixer, you’ll be creating bread bowls that easily rival those from any artisan bakery. These magnificent creations boast a beautiful, dark glossy glaze, a delightful sweet-wheaty flavor, and an inviting aroma that will envelop your home, making every meal a special occasion.
I once frequented a charming bakery in Asheville, often stopping by to pick up their freshly baked bread bowls. They were my go-to for pairing with a rich, creamy soup on a cool evening. However, my excitement would frequently turn to disappointment as I often found them completely sold out. It became a frustrating ritual of missing out on that perfect culinary pairing. It was this recurring challenge that spurred me to take matters into my own hands, leading me to discover the surprising accessibility and immense pleasure of baking homemade bread bowls.
The truth is, crafting bread bowls from scratch is far simpler than you might imagine. The key lies in utilizing a reliable electric stand mixer equipped with a sturdy dough hook. This powerful appliance handles all the laborious kneading, transforming what could be a tiresome and time-consuming task into an almost effortless process. While the mixer diligently works on the dough, you can focus on the thoughtful details that make this particular recipe truly exceptional and uniquely flavorful.
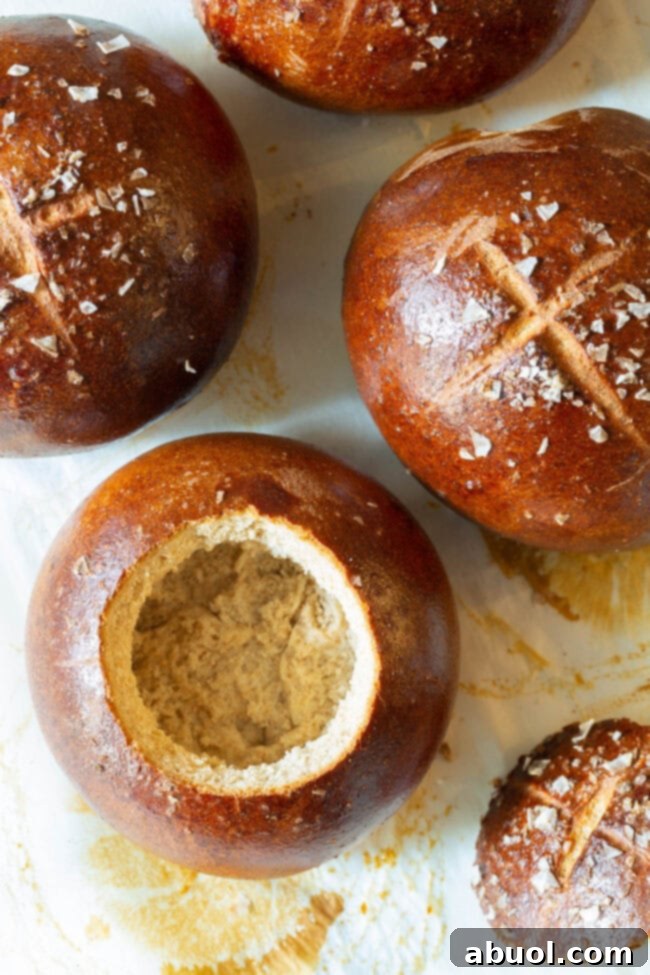
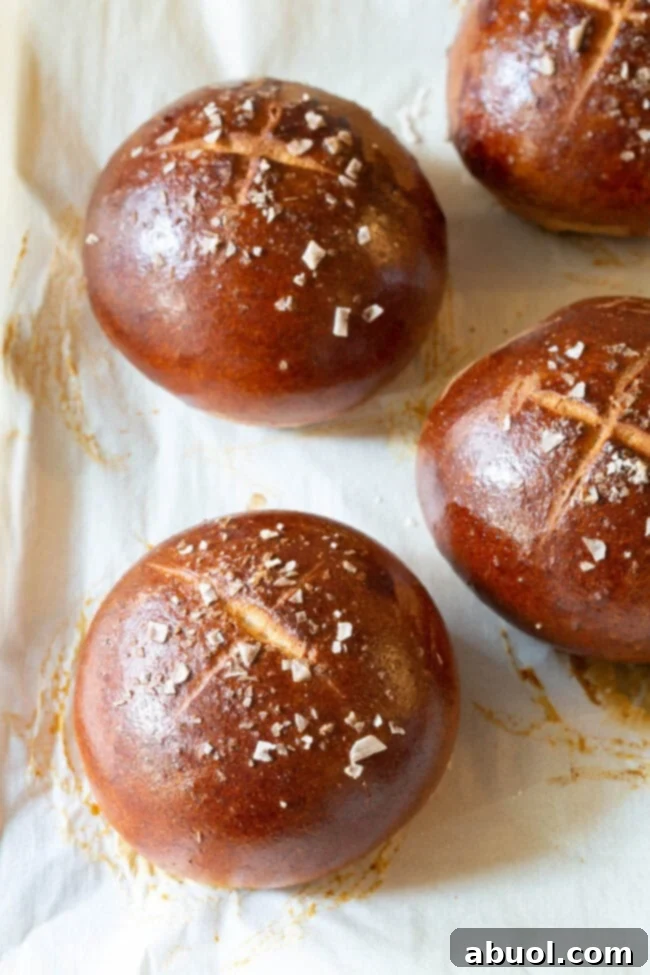
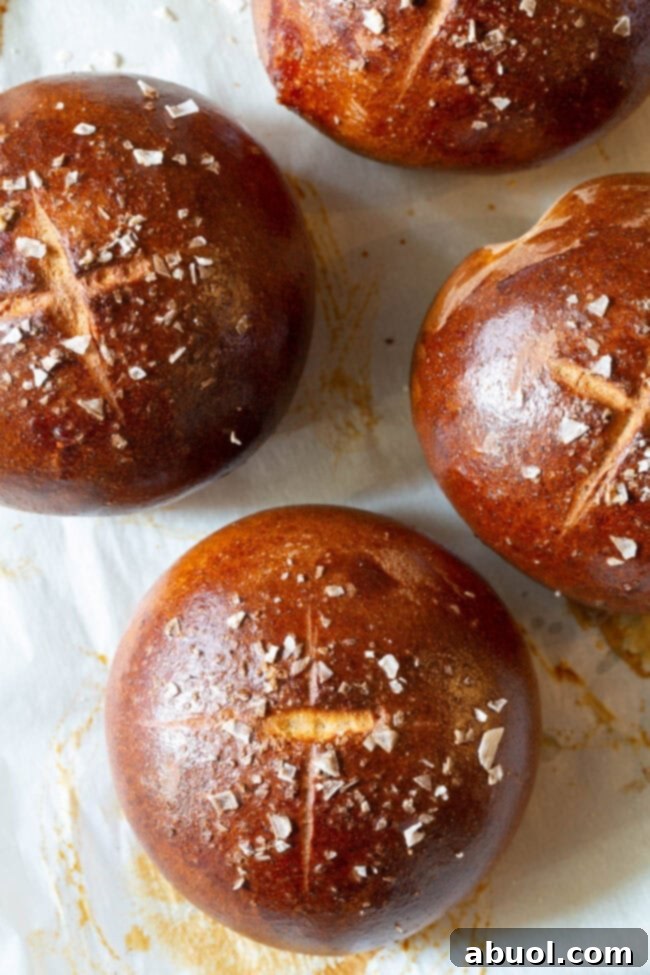
This specific Honey Wheat Bread Bowl Recipe holds a special place in my culinary repertoire. Its signature subtle sweetness, derived from natural honey, creates a harmonious balance with the wholesome, earthy undertones of whole wheat flour. This combination yields a rich, comforting, and deeply satisfying flavor profile that sets it apart. Each individual dough ball is meticulously brushed with a simple yet effective egg wash just before baking. This step is not merely for aesthetics; it is crucial for achieving that coveted dark, glossy, and wonderfully crisp crust that makes these bowls so irresistible. A final sprinkle of flaky sea salt on top adds a delightful textural contrast and a burst of savory counterpoint, enhancing both the flavor complexity and the visual appeal. Once baked to perfection, you’ll easily cut out a core to create the ideal vessel for your chosen culinary creations, leaving you with delicious salty-sweet bread centers that are perfect for snacking or dipping!
Beyond the delightful taste and texture, there’s an immense sense of accomplishment and pride that accompanies baking your own bread. The incredible aroma alone, wafting through your kitchen, is enough to make anyone feel like a master baker. Moreover, choosing to bake at home grants you complete control over the ingredients, ensuring a wholesome, fresh, and additive-free product for your family and guests. It’s an act of love and creativity. Are you ready to embark on this delicious and rewarding baking adventure? Let’s gather our essential ingredients and transform simple flour into spectacular, edible bread bowls!
Essential Ingredients for Your Perfect Honey Wheat Bread Bowls
Crafting the ideal bread bowl begins with selecting fresh, high-quality ingredients that work in harmony to produce both exceptional flavor and perfect texture. This recipe expertly balances simplicity with a rich flavor profile, utilizing a thoughtful blend of all-purpose and whole wheat flours to ensure a tender crumb encased in a robust, satisfying crust. Here’s a detailed list of what you’ll need to create four magnificent, bakery-quality bread bowls:
- 1 2/3 cups Lukewarm Water: The precise temperature of your water is absolutely crucial for successfully activating the yeast. It should feel pleasantly warm to the touch – akin to a baby’s bath – but never hot, as excessive heat will destroy the yeast, preventing any rise.
- 1/2 cup Honey: This ingredient is the undisputed star, defining the “honey” in our honey wheat bread bowls! Beyond its delightful sweetness, honey plays a vital role in contributing to the bread’s beautiful golden-brown crust, its moist and tender interior, and its unique flavor complexity.
- 2 tablespoons Flavorless Oil: Opt for neutral-flavored oils such as vegetable oil, canola oil, or grapeseed oil. These choices are ideal because they don’t impart any strong, competing flavors to the bread, allowing the distinctive honey and wheat notes to truly shine through.
- 2 tablespoons Dry Active Yeast: Ensure your dry active yeast is fresh and potent. This microscopic marvel is the leavening agent responsible for giving your bread its impressive rise, airy structure, and characteristic bread texture. A simple test (as described in the instructions) will confirm its vitality.
- 2 teaspoons Sea Salt: Salt is far more than just a seasoning in bread making; it is absolutely essential for enhancing and developing the bread’s overall flavor profile. It also helps control the yeast activity. Use fine-grain sea salt for a cleaner, more nuanced taste, or regular fine-grain table salt if that’s what you have readily available.
- 3 cups All-Purpose Flour: There’s no need to seek out specialty bread flour for this recipe. Good quality all-purpose flour provides an excellent foundation, contributing to the dough’s structure and ensuring a tender, soft crumb within the finished bread.
- 2 1/2 cups Whole Wheat Flour: This ingredient is key to the “wheat” aspect of our recipe. Whole wheat flour introduces a lovely nutty flavor, significantly boosts the fiber content, and provides a heartier, more substantial texture that distinguishes these bread bowls from their white flour counterparts.
- 1 Large Egg: This single egg is indispensable for creating the essential egg wash. When brushed onto the dough, it acts as a magical sealant, developing that coveted glossy, deep brown, and slightly crispy crust that is a hallmark of truly great bread.
- Salt Flakes (for garnish, if desired): A final, delicate sprinkle of flaky sea salt on top of the egg-washed dough before baking serves two purposes: it elevates the visual appeal with a glistening finish and adds a delightful burst of salty crunch that perfectly complements the bread’s inherent sweetness.
Step-by-Step Guide: Crafting Your Homemade Honey Wheat Bread Bowls
Follow these comprehensive and detailed instructions to create perfectly golden, gloriously glossy, and unbelievably delicious honey wheat bread bowls every single time. The process is broken down into easy-to-manage steps, ensuring a smooth and successful baking experience, even for those new to bread making.
Phase 1: Preparation and Yeast Activation
- Step 1: Prepare Your Baking Surface. Begin by lining a large, sturdy baking sheet with a sheet of parchment paper. This simple step is a game-changer, preventing any sticking and making cleanup wonderfully effortless. Set this prepared sheet aside.
- Step 2: Hydrate the Yeast. In the spacious bowl of your electric stand mixer, carefully pour in the lukewarm water. This temperature is absolutely vital: it should feel comfortably warm to the touch, similar to a baby’s bath, but never hot, as excessive heat will destroy the delicate yeast, rendering it inactive and preventing your bread from rising.
- Step 3: Combine Initial Ingredients. To the lukewarm water in the mixer bowl, add the honey, flavorless oil, dry active yeast, sea salt, and precisely 1 cup of the all-purpose flour. These initial ingredients will create the foundational “sponge” for our dough.
- Step 4: Gentle Mix. Attach the dough hook attachment to your stand mixer. Mix these ingredients on the lowest speed for approximately 30 seconds, just long enough for them to be thoroughly combined.
- Step 5: Proof the Yeast. Turn off the mixer and allow the mixture to rest undisturbed for 10 minutes. During this crucial resting period, the yeast should activate and begin to “bloom” – you’ll observe a frothy, foamy layer forming on the surface. This visible foaming is your confirmation that your yeast is alive, active, and ready to perform its magic. If you don’t see any foaming after 10 minutes, your water may have been too hot or too cold, or your yeast might be old and inactive, and you’ll need to start this step over.
Phase 2: Kneading and First Rise (Bulk Fermentation)
- Step 6: Incorporate Remaining Flours. After the yeast has successfully bloomed, add the remaining 2 cups of all-purpose flour and all 2 1/2 cups of the whole wheat flour to the mixer bowl.
- Step 7: Intense Kneading. Turn the mixer on low speed and allow it to diligently knead the dough with the dough hook for a full 10 to 15 minutes. This extended kneading time is critically important for developing the gluten structure within the flour. Gluten is what creates the bread’s essential elasticity, strength, and wonderfully chewy texture. The dough should transform into a smooth, supple, and pliable mass that pulls cleanly away from the sides of the mixing bowl.
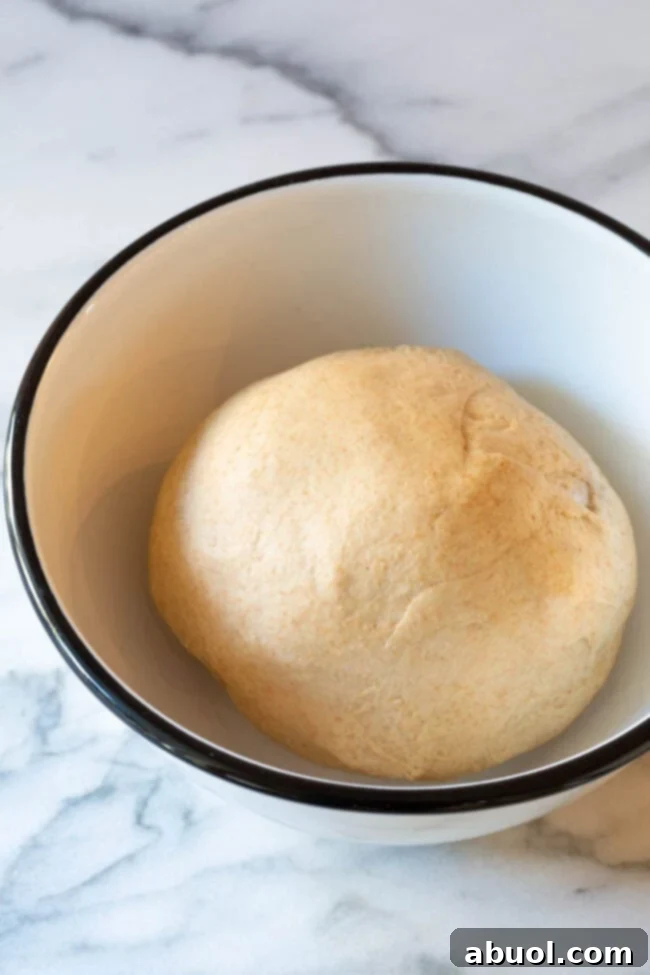
- Step 8: Prepare for Rising. Lightly grease a large, clean mixing bowl with a small amount of olive oil or another flavorless oil. Transfer the thoroughly kneaded dough into this prepared bowl, turning it over once to ensure all sides are coated with a thin film of oil. This prevents the dough from sticking to the bowl as it rises.
- Step 9: First Rise (Bulk Fermentation). Cover the bowl tightly with plastic wrap or a clean kitchen towel. Place the bowl in a warm, draft-free spot within your kitchen. Allow the dough to rise undisturbed until it has visibly doubled in size. This process, known as bulk fermentation, typically takes between 60 to 90 minutes, though the exact time can vary depending on the ambient warmth of your kitchen. This first rise is absolutely essential for developing the bread’s complex flavor and its characteristic airy texture.
Phase 3: Shaping and Second Rise (Proofing)
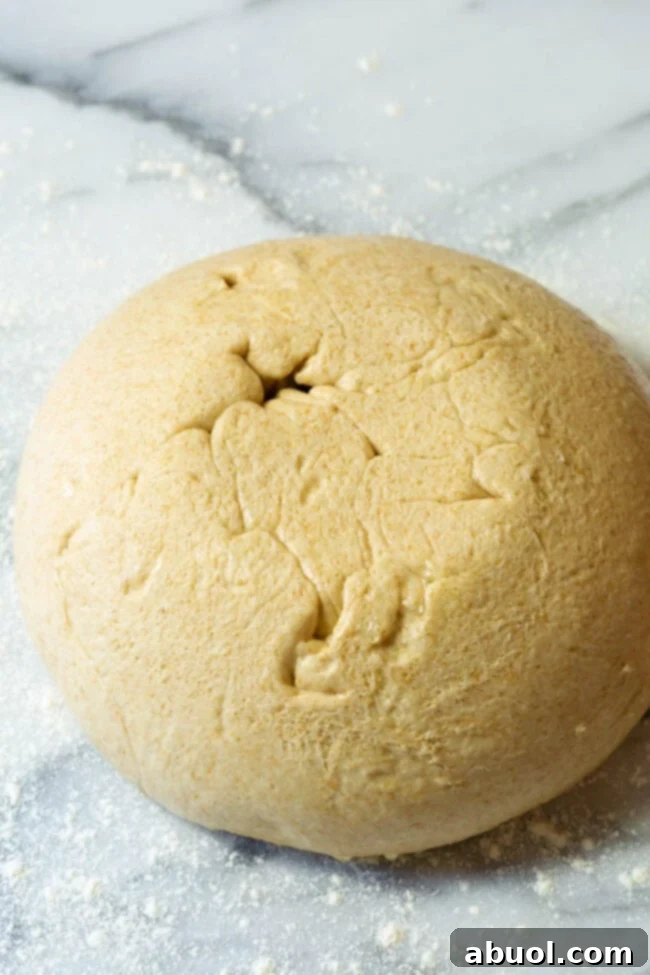
- Step 10: Degas the Dough. Once the dough has proudly doubled in size, gently “punch” it down to release the accumulated gases. This crucial step helps to create a finer, more even crumb structure in the finished bread, preventing large, irregular air pockets.
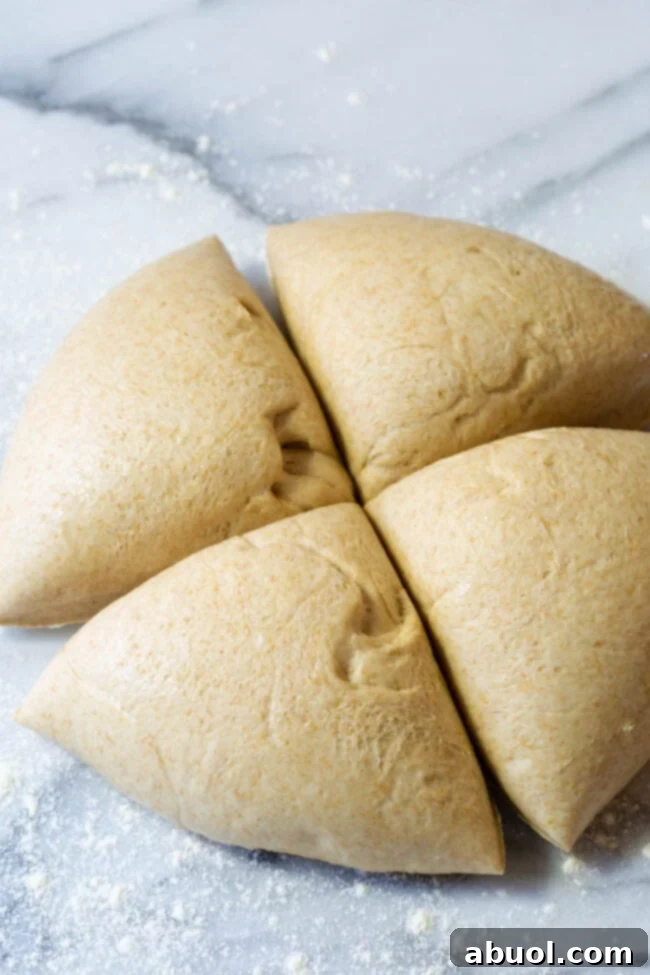
- Step 11: Divide and Portion. Lightly dust a clean work surface with a small amount of flour. Turn the degassed dough out onto this floured surface. Using a sharp knife or a dough scraper, accurately divide the dough into four equal portions. Precision here helps ensure uniform bread bowls.
- Step 12: Form the Bowls. Take each individual dough portion and expertly roll it into a tight, smooth, round ball. The objective is to create significant surface tension, which is vital for helping the bread hold its beautiful spherical shape during both the second rise and the intense heat of baking. Ensure that any seams or rough creases are neatly tucked underneath the dough ball, resting against your work surface.
- Step 13: Second Rise (Proofing). Carefully place the uniformly shaped dough balls onto your prepared parchment-lined baking sheet, ensuring they are spaced approximately 3-4 inches apart. This generous spacing allows ample room for them to expand without touching during the second rise and baking. Loosely cover the dough balls with a clean kitchen towel or plastic wrap. Allow them to rise again for an additional 30 minutes in a warm, draft-free environment. This second rise, known as proofing, is instrumental in contributing to the bread’s final impressive lift and its exquisitely soft interior texture. While your dough is undergoing its final rise, begin preheating your oven to 425°F (220°C). A properly preheated oven is essential for achieving a robust crust and optimal oven spring.
Phase 4: Egg Wash, Scoring, and Baking
- Step 14: Prepare the Egg Wash. In a small bowl, whisk one large egg until the yolk and white are thoroughly combined and smooth. This is your magic egg wash.
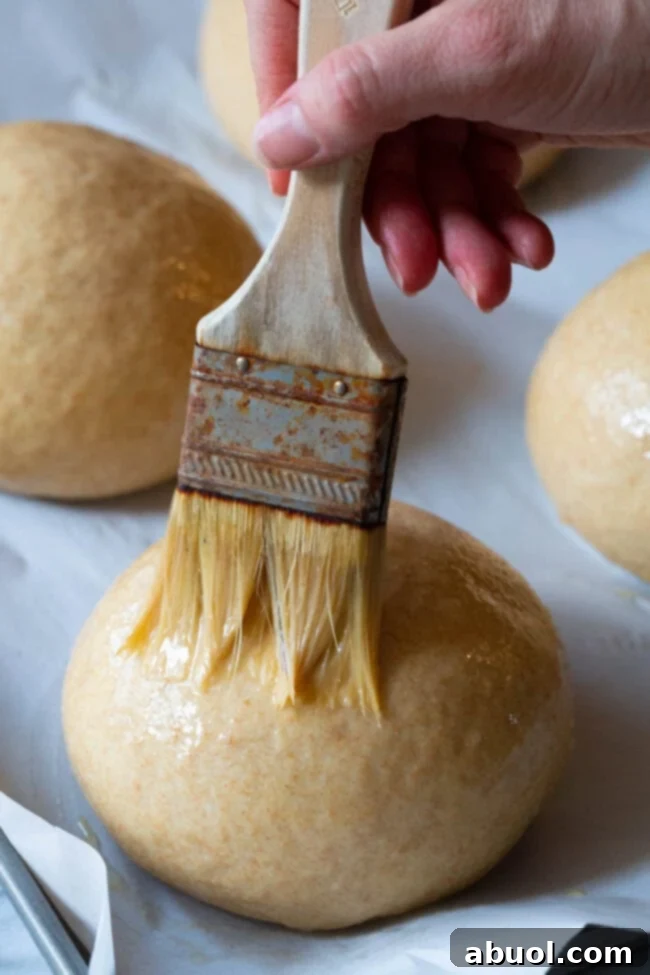
- Step 15: Apply Egg Wash. Using a pastry brush, thoroughly and evenly coat each dough ball with the prepared egg wash. This step is absolutely critical for creating that highly desirable deep brown, incredibly glossy, and slightly crispy crust. It’s imperative to coat the entire visible surface of each dough ball, brushing all the way down to the parchment paper. Any missed spots will result in an unevenly colored, dull crust. The glossy exterior also serves a practical purpose: it helps seal the crust, which is vital for preventing any soup or dip from seeping out over time, and it also contributes to keeping the bread fresh for a longer period.
- Step 16: Add Salt Flakes (Optional). If desired, delicately sprinkle the tops of the egg-washed dough balls with flaky sea salt. This not only adds a beautiful, professional-looking sparkle but also provides a wonderful textural and salty contrast to the bread’s inherent honey sweetness.
- Step 17: Score the Dough. Carefully use a very sharp knife or a clean razor blade to score a shallow “X” on the top surface of each dough ball. Scoring is a deliberate cut that allows the bread to expand predictably and beautifully in the oven, preventing uncontrolled tearing and ensuring a more aesthetically pleasing final shape.
- Step 18: Bake to Perfection. Gently transfer the baking sheet, with your prepared bread bowls, into your preheated 425°F (220°C) oven. Bake for approximately 25 to 30 minutes, or until the crust develops a rich, deep brown color. Don’t be shy about letting them get a little darker than just golden brown; this deep hue indicates a perfectly developed, highly flavorful, and delightfully crusty exterior.
Phase 5: Cooling and Serving
- Step 19: Thorough Cooling. Once your bread bowls emerge from the oven, immediately remove them from the hot baking sheet and transfer them to a wire cooling rack. Allow them to cool completely and thoroughly. Patience is key here; attempting to cut into them or fill them while they are still warm can lead to a gummy interior and a less stable, potentially collapsing bowl.
- Step 20: Prepare for Filling. When you’re ready to serve, use a sharp serrated knife to carefully cut a deep, circular core out of the center of each cooled bread bowl. You can then use your hands or a spoon to gently tear out additional bread from the interior, creating ample space for your soup or dip. Don’t discard the removed bread; it makes fantastic croutons, delicious dipping pieces, or a chef’s treat!
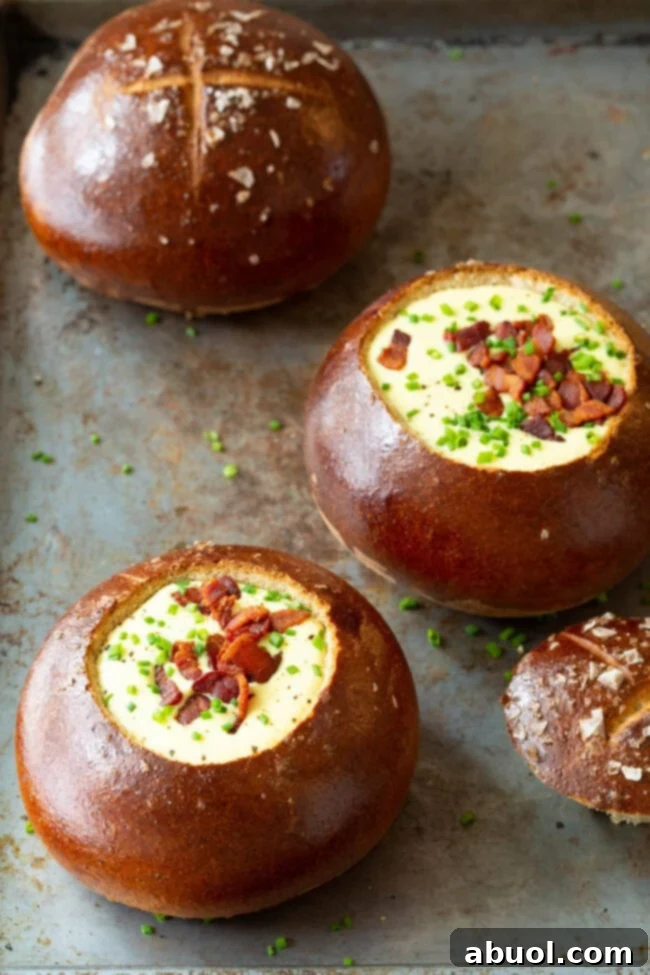
- Step 21: Fill and Enjoy! Finally, fill your freshly hollowed honey wheat bread bowls with your favorite thick, creamy soup, hearty chili, or decadent dip. Prepare for an unparalleled comfort food experience that will impress everyone at your table!
You’ll be delighted to discover that the actual hands-on preparation time for these gorgeous honey wheat bread bowls is remarkably short – typically just 20 minutes or even less. The majority of the process involves passive waiting for the yeast to work its magic and the dough to rise, leaving you free to attend to other tasks or simply relax. You are absolutely going to adore this Honey Wheat Bread Bowl Recipe, not just for its surprising ease of execution but for the sheer deliciousness and comforting warmth it brings to your table. Just imagine all the culinary possibilities: from rich, hearty stews to luscious, bubbly cheese dips, every single dish transforms into an extraordinary, memorable event when served within these impressive, edible homemade vessels.
Discover the full printable recipe details below for precise measurements and timings. Enjoy baking!
Perfect Pairings: Thick Soups or Dips for Your Bread Bowls
Honey wheat bread bowls are incredibly versatile, offering a unique and delightfully slightly sweet and savory canvas for a wide array of delectable fillings. Their robust, crusty exterior and soft, yielding interior make them an ideal choice for holding thick, creamy concoctions without the worry of them becoming soggy too quickly. Here are some fantastic and inspiring ideas for soups and dips to elevate your next bread bowl meal:
- Irish Beer Cheese Soup (As beautifully pictured in this article, this rich, deeply savory, and delightfully cheesy soup is an absolute quintessential pairing for bread bowls!)
- Slow Cooker Chicken and Wild Rice Soup: A wonderfully comforting and hearty option, brimming with tender chicken, wholesome wild rice, and creamy broth, perfect for a chilly evening.
- Turkey Chili: A flavorful and satisfying choice that offers a delightful kick of spices and robust ingredients, a lighter alternative to traditional beef chili.
- Lightened-Up Broccoli Cheddar Soup: Savor a creamy, classic favorite with a healthier, yet equally indulgent, twist.
- Creamy Poblano Pepper Soup: For those who appreciate a touch of smoky heat, nuanced flavor, and luxurious creaminess in their soup.
- Healthy Butternut Squash Soup: A vibrant, naturally sweet, and incredibly nutritious option, especially appealing during the autumn and winter months, complementing the wheat notes beautifully.
- Creamy Wild Mushroom Soup: Earthy, deeply rich, and wonderfully aromatic, this sophisticated soup transforms into a gourmet delight when served in a homemade bread bowl.
- Creamy Carrot Soup: A subtly sweet and exceptionally smooth soup that perfectly complements the honey wheat flavor of the bread, offering a delicate balance.
- Spinach Artichoke Dip: Transform your bread bowl into an edible serving dish for a warm, bubbly, and incredibly popular cheesy dip – perfect for sharing!
- French Onion Soup: While traditionally served in ceramic crocks, a bread bowl can offer a charmingly rustic and unique alternative (just be mindful of the delicious liquid absorption over time).
- White Bean Chicken Chili: A lighter yet equally satisfying chili option that brings a different textural and flavor dynamic, pairing beautifully with the wholesome bread.
- Creamy Tomato Soup: A timeless classic, the sweetness of the honey wheat bread provides a perfect foil for the tangy richness of a good tomato soup.
Remember to explore the complete printable recipe card presented below for all the detailed nutritional information and precise instructions. We absolutely love seeing your culinary creations, so don’t forget to share your homemade bread bowl masterpieces with us on your social media channels! Tag your stunning photos on Facebook, Instagram, and Pinterest to inspire fellow home bakers and food enthusiasts to embark on their own journey of crafting these delightful, edible vessels. Happy baking!

Print Recipe
Rated 5 stars by 3 reviewers.
Leave a Review »
Honey Wheat Bread Bowl Recipe
20 minutes
25 minutes
45 minutes
This easy Honey Wheat Bread Bowl Recipe shows you how to make gorgeous, glazed bread bowls with a sweet, wheaty flavor, perfect for serving your favorite soups and dips.
4 bowls
Ingredients
Unit system: US Customary
- 1 2/3 cups lukewarm water
- 1/2 cup honey
- 2 tablespoons flavorless oil (vegetable oil, grapeseed, etc.)
- 2 tablespoons dry active yeast
- 2 teaspoons sea salt
- 3 cups all-purpose flour
- 2 1/2 cups whole wheat flour
- 1 large egg
- Salt flakes for garnish, if desired
Instructions
- Line a large baking sheet with parchment paper and set aside. Pour the lukewarm water into the bowl of an electric mixer. Add the honey, oil, dry active yeast, sea salt, and 1 cup all-purpose flour. Using a bread hook, mix the ingredients for 30 seconds. Then turn off the mixer and let the mixture sit and foam for 10 minutes. (If the water is too hot, it will kill the yeast and it won’t foam.)
- Turn the mixer on low and add the remaining all-purpose flour and the whole wheat flour. Allow the mixer to “knead” the dough for at least 10 minutes to develop the gluten. Then cover the bowl with plastic wrap and allow it to rise until double in size, 60-90 minutes, in a warm kitchen.
- Once the dough has doubled, preheat the oven to 425 degrees F (220°C). Punch the dough down and cut it into four equal pieces. Roll each piece into a tight ball and place them on the baking sheet 3-4 inches apart. Make sure any creases are on the bottom, against the baking sheet. Allow the dough to rise another 30 minutes.
- Whisk one egg, then thoroughly brush the dough balls with egg wash. Brush all the way down to the parchment. Then sprinkle the tops with salt flakes and carefully score an X on the top of each ball.
- Bake for 25-30 minutes, until the crust is a rich deep brown. Cool completely. When ready to fill with soup, use a serrated knife to cut a deep core out of the center. Use your hand to rip out additional space in the bread bowls, then fill with creamy soup and enjoy!
Nutrition Information (per serving)
Serving Size: 1 bowl
- Calories: 603 kcal
- Carbohydrates: 126g
- Protein: 20g
- Fat: 3g
- Saturated Fat: 0.5g
- Polyunsaturated Fat: 1g
- Monounsaturated Fat: 0.4g
- Sodium: 1172mg
- Potassium: 392mg
- Fiber: 11g
- Sugar: 1g
- Vitamin A: 7 IU
- Vitamin C: 0.01mg
- Calcium: 44mg
- Iron: 7mg
Bread
American
Sommer Collier