
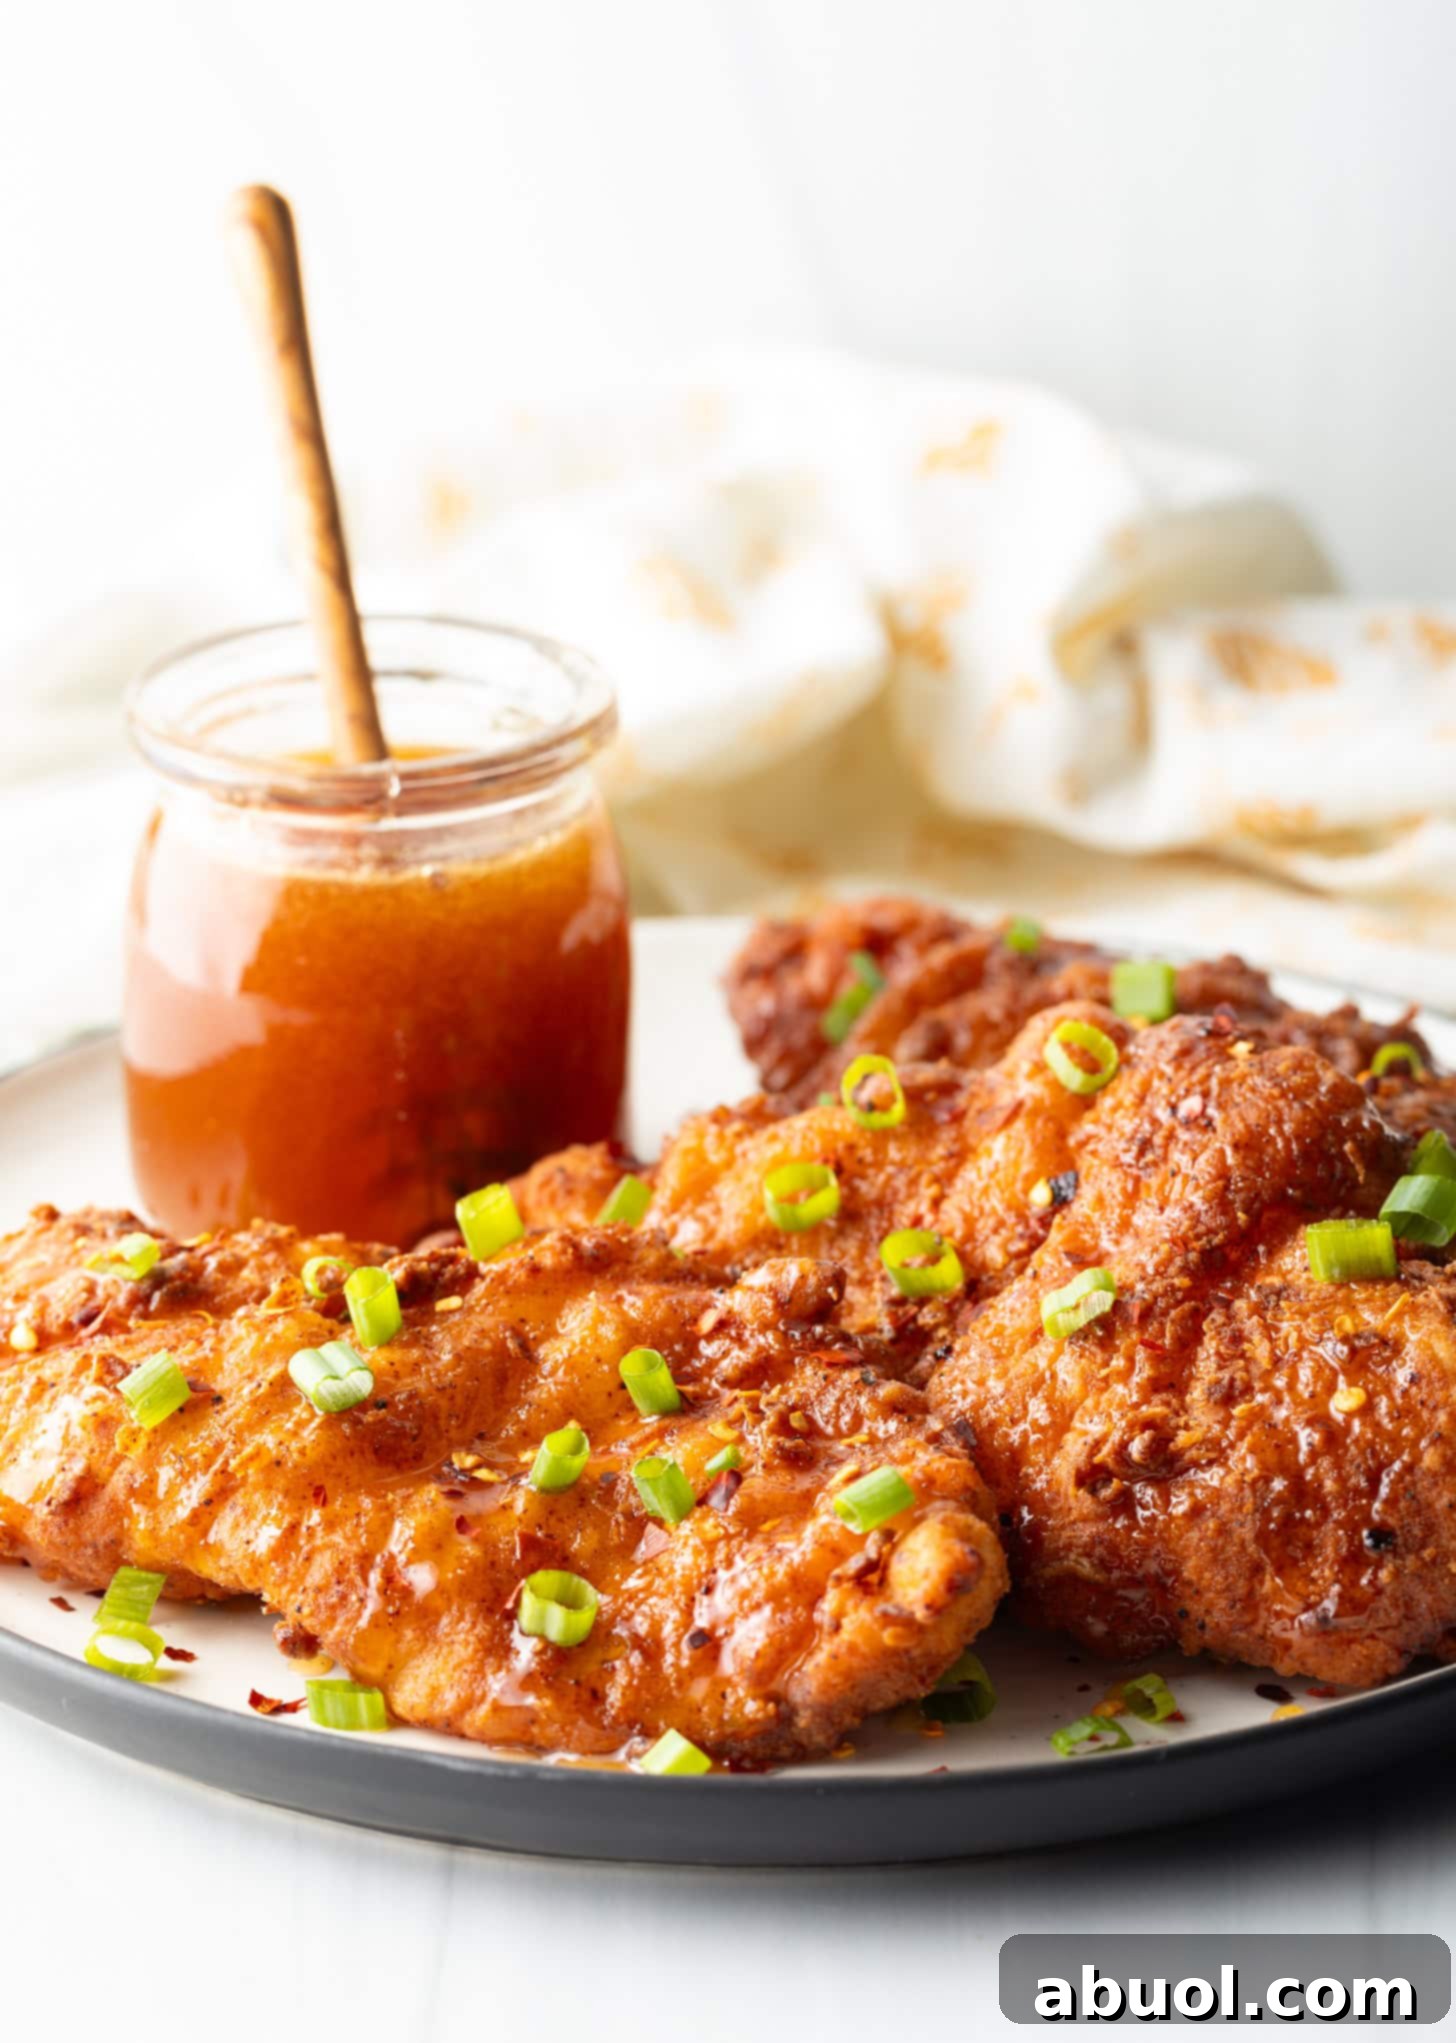
Experience the tantalizing blend of sweet and spicy with our ultimate Hot Honey Chicken recipe. This guide will walk you through creating perfectly crispy fried chicken, generously drizzled with a fiery hot honey sauce. Whether you crave a robust standalone meal paired with classic Southern sides or desire an unforgettable, crunchy chicken sandwich, this recipe is designed to deliver maximum flavor and satisfaction. Prepare to elevate your home cooking and impress your taste buds!
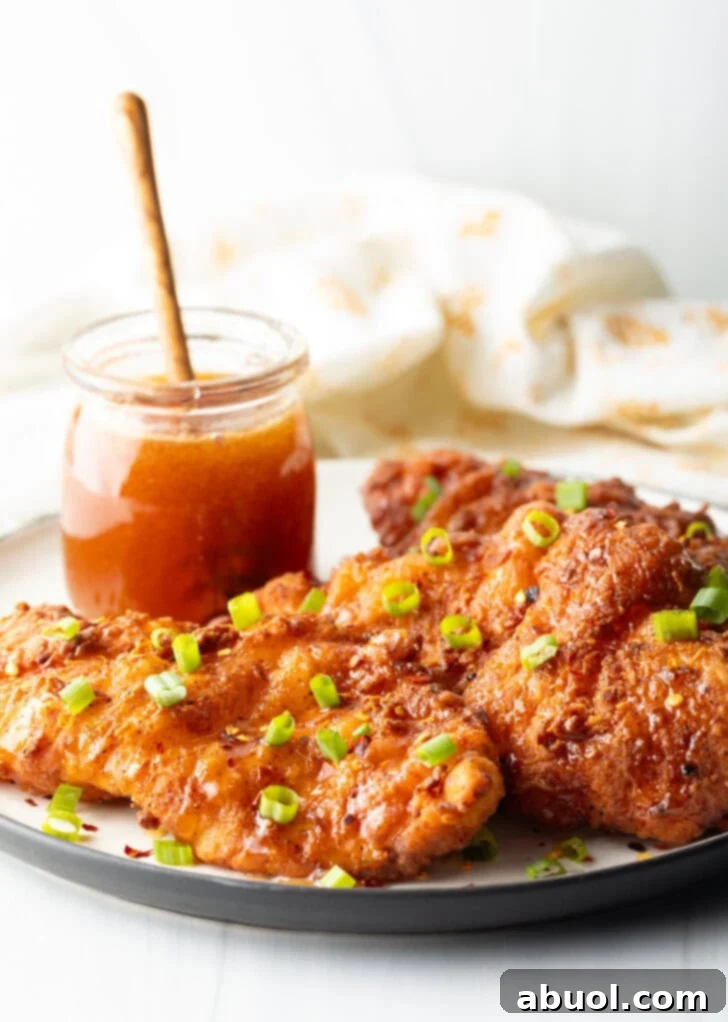
Why Hot Honey Chicken Has Captured Our Hearts (and Palates!)
There’s a reason Hot Honey Chicken has transcended its Southern roots to become a national sensation: it’s an explosion of flavors and textures in every bite. Imagine biting into a piece of chicken that’s audibly crunchy, yielding to perfectly juicy meat, all while a symphony of sweet, spicy, and savory notes dances on your tongue. This dish isn’t just food; it’s an experience, a delightful contradiction that keeps you coming back for more.
While many crave the restaurant-quality experience, the good news is that mastering this delectable dish at home is entirely achievable with our straightforward recipe. We’ve specifically chosen to use thin, crispy chicken cutlets for this preparation. Their slender profile ensures an extra-crispy exterior-to-meat ratio, making them incredibly satisfying and quick to cook. However, the versatility of hot honey extends beyond cutlets; feel free to adapt this fiery drizzle to our classic bone-in fried chicken or even a lighter, grilled chicken option for a touch of smoky sweetness.
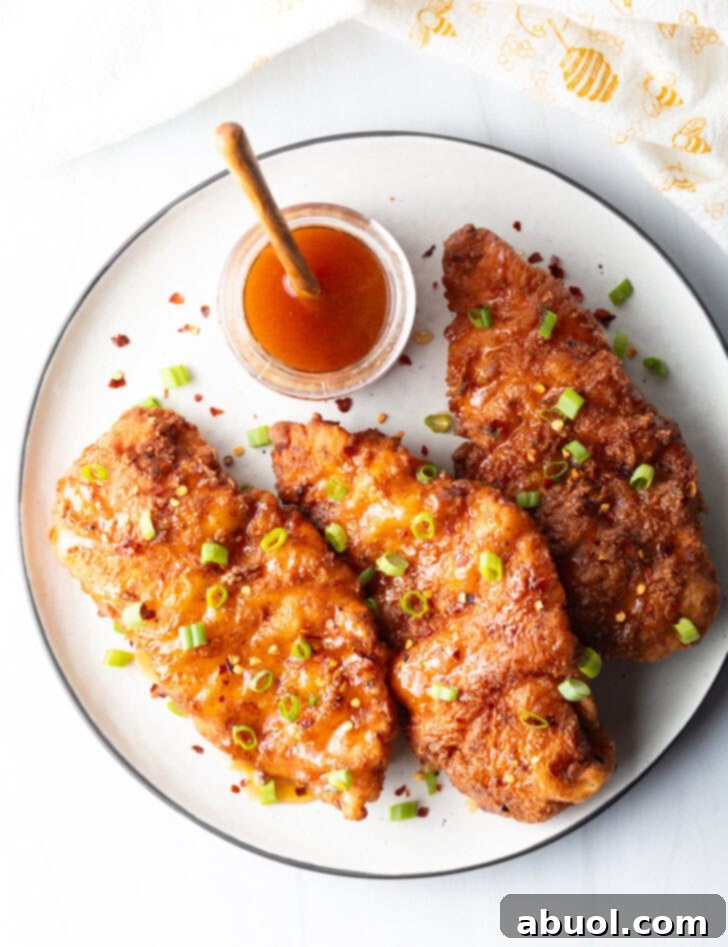
This Hot Honey Chicken recipe is a chameleon in the kitchen. Serve it simply with an array of comforting Southern side dishes for a hearty family meal, or take it to the next level by transforming the crispy cutlets into epic Hot Honey Chicken Sandwiches. The possibilities are endless, and the satisfaction is guaranteed.
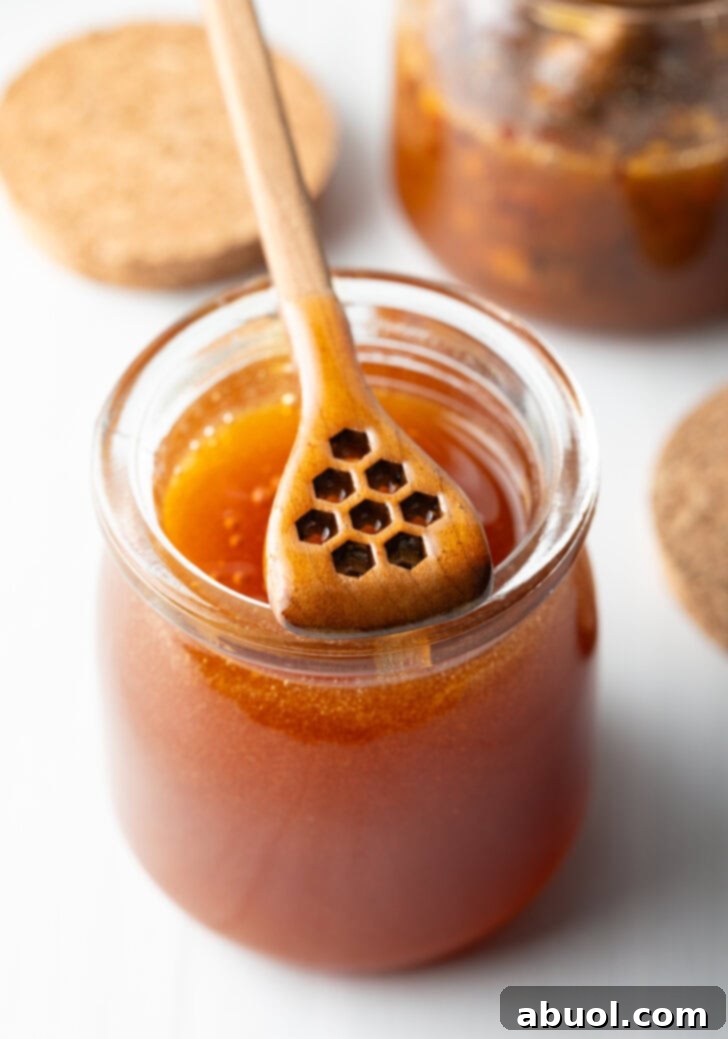
Chef’s Note: While store-bought hot honey offers convenience, we wholeheartedly recommend trying our homemade hot honey recipe. It boasts a significantly bolder, more nuanced, and perfectly balanced flavor profile that will make you want to drizzle it over everything from pizza to roasted vegetables. It’s truly a game-changer!
Essential Ingredients for Perfect Hot Honey Chicken
Crafting the perfect Hot Honey Chicken begins with selecting quality ingredients that work in harmony to create that signature crispy, juicy, sweet, and spicy experience. Here’s a breakdown of what you’ll need and why each component is crucial:
- Chicken Breasts: Boneless and skinless chicken breasts are our choice for this recipe, ideally pounded thin or purchased as pre-cut cutlets. This ensures even cooking and maximizes the surface area for that incredible crispy coating.
- Dill Pickle Juice: This might sound unconventional, but it’s our secret weapon for unbelievably juicy fried chicken. The acidity and brine tenderize the meat, infusing it with a subtle tangy flavor that complements the hot honey beautifully. Look for quality pickle juice without excessive artificial flavors.
- Granulated Sugar: A touch of sugar helps balance the robust flavor of the pickle juice in the brine, creating a more mellow and effective tenderizing solution.
- All-Purpose Flour: The foundation of our crispy breading. It forms the initial layer that clings to the chicken.
- Cornstarch: The true hero for extra crispiness! Adding cornstarch to the flour mixture ensures a lighter, shatteringly crisp coating that stays crunchy long after frying.
- Spices: A blend of paprika, garlic powder, black pepper, and salt forms the savory backbone of our breading. Paprika adds a lovely color and mild warmth, while garlic powder and black pepper provide aromatic depth. Adjust salt to taste, but remember the pickle juice also contributes to salinity.
- Milk: Whole or 2% milk (or buttermilk, if you prefer) is combined with eggs to create the perfect dredge for our double-coating method, helping the dry breading adhere flawlessly.
- Eggs: Act as a binding agent, ensuring the flour mixture adheres to the chicken cutlets, creating a thick and even coating.
- Peanut Oil: Ideal for frying due to its high smoke point and neutral flavor. This allows the chicken’s true taste and the breading’s texture to shine through without any off-flavors. Vegetable oil or canola oil can also be used as alternatives.
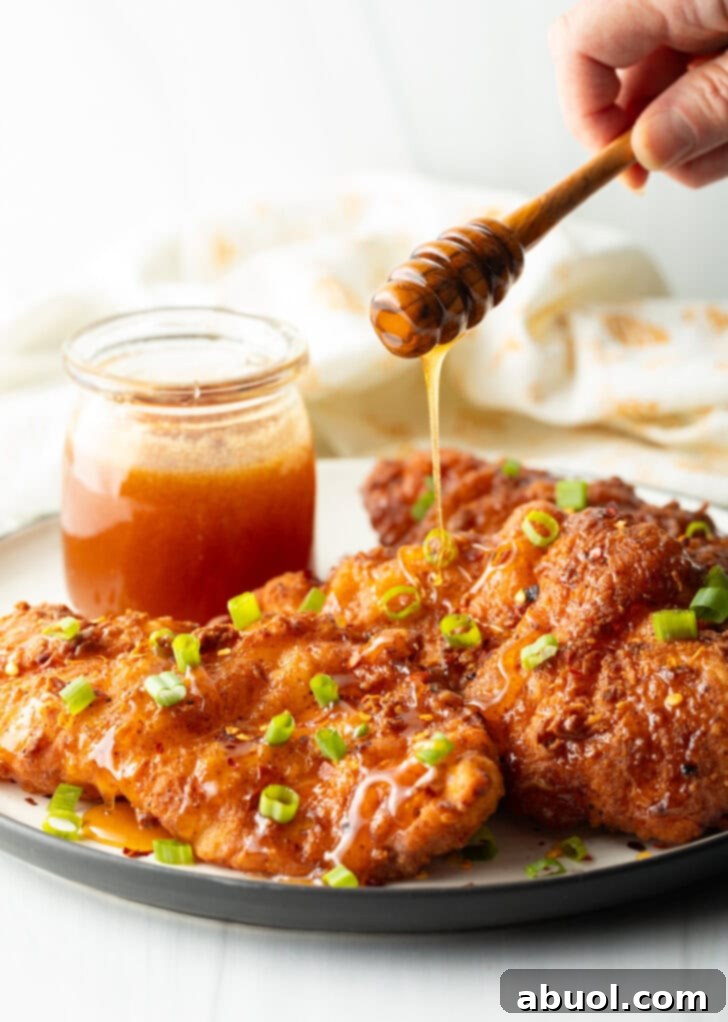
- Hot Honey: The star of the show! Whether you opt for a quality store-bought brand or make our fabulous homemade hot honey recipe, this sweet and spicy drizzle is what transforms ordinary fried chicken into a sensational experience.
- Garnishes: Freshly chopped green onions and a sprinkle of crushed red pepper flakes are optional but highly recommended. The green onions add a fresh, vibrant pop of color and mild oniony bite, while the red pepper flakes offer an extra kick and visual appeal.
Step-by-Step Guide to Making Irresistible Honey Hot Chicken
Creating this iconic dish involves a few key steps, each contributing to the ultimate crispy, juicy, and flavor-packed result. Follow these instructions carefully for the best homemade Hot Honey Chicken:
1. Preparing the Chicken and Brine
Begin by preparing your chicken breasts. If using whole breasts, carefully slice each one horizontally through the middle to create two thin chicken breast cutlets. This ensures they cook quickly and evenly, and maximizes the crispy surface area. From four small chicken breasts, you should yield a total of eight cutlets.
Next, prepare the pickle brine. Pour the dill pickle juice into a microwave-safe bowl. Warm it in the microwave until it’s hot to the touch, but not boiling. This helps the sugar dissolve more easily. Stir in the granulated sugar until it is completely dissolved. Allow the pickle juice mixture to cool down to room temperature before adding the chicken. Once cooled, add the chicken cutlets to the brine, ensuring they are fully submerged. Let them soak for a minimum of 30 minutes. For even juicier, more flavorful results, you can brine them overnight. Always place the bowl in the refrigerator while brining.
2. Assembling the Breading
While your chicken is brining, prepare the dry breading mixture. In a medium-sized bowl, combine the all-purpose flour, cornstarch, paprika, garlic powder, black pepper, and salt. Whisk everything together thoroughly to ensure the spices are evenly distributed. Once the chicken has finished brining, remove it from the pickle juice and drain off any excess liquid. It’s absolutely crucial to pat each chicken breast cutlet thoroughly dry with paper towels. This step cannot be skipped, as a dry surface is key for the breading to adhere properly and create that coveted crispy crust during frying.
3. The Double-Dredge Technique for Maximum Crunch
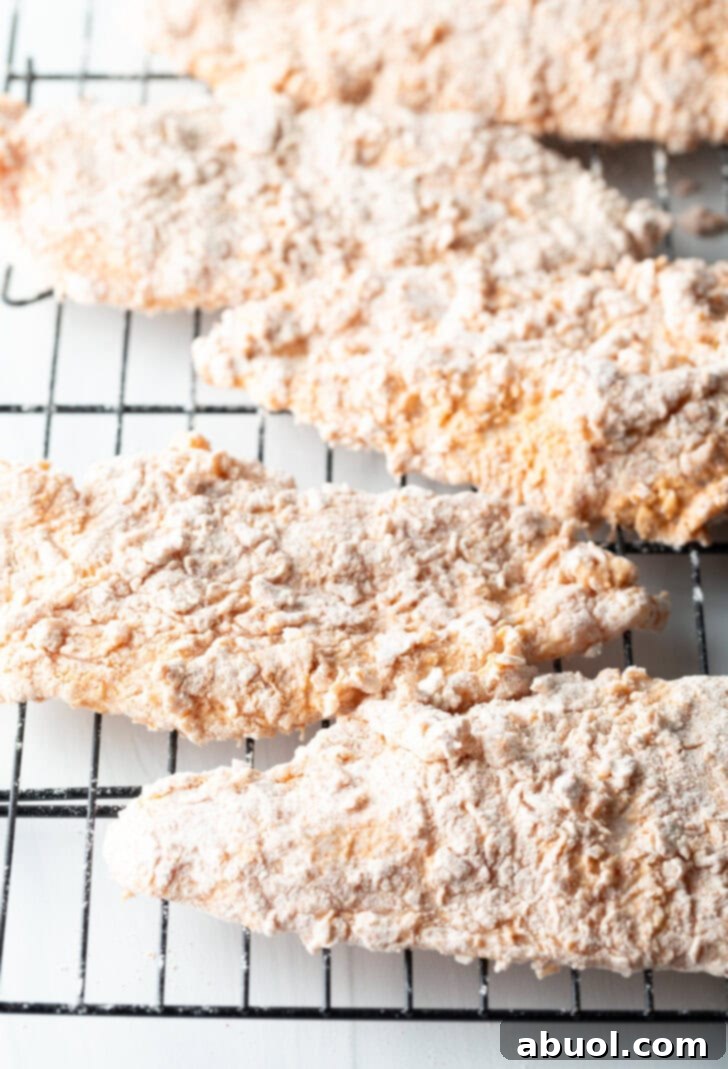
Set up a drying or cooling rack near your breading station. Take each thoroughly dried chicken cutlet and dredge it completely in the flour mixture, shaking off any excess so the coating is thin and even. Lay the coated chicken pieces on the drying rack. Repeat this process for all chicken pieces before moving on.
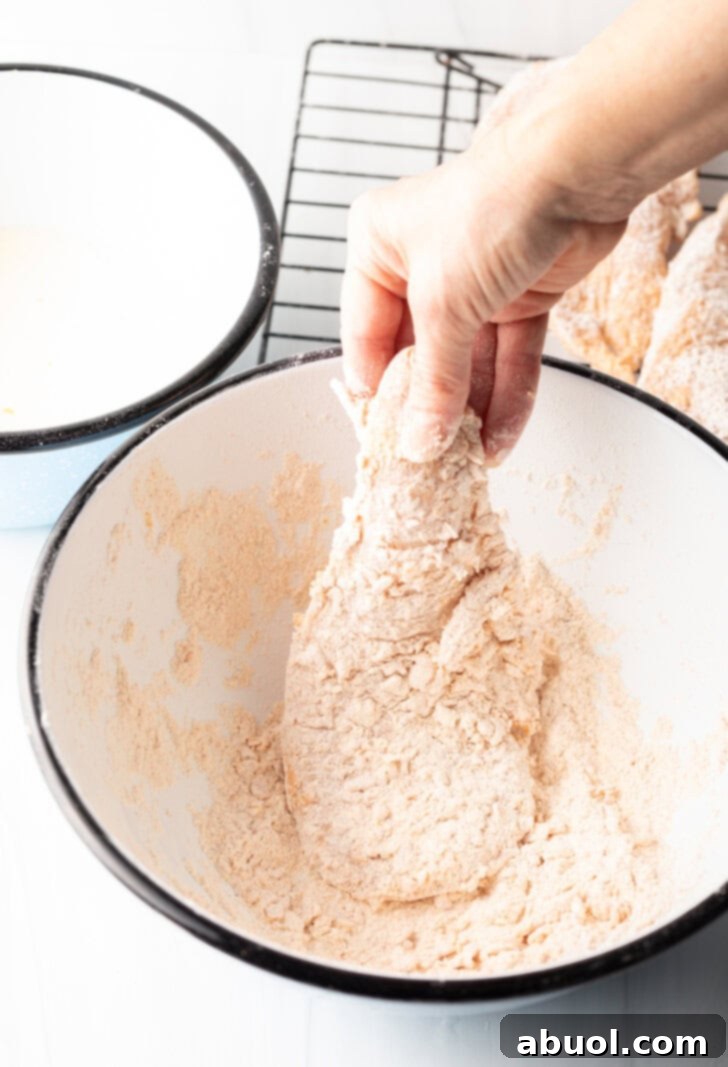
In a separate bowl, whisk together the milk and eggs to create the egg wash. Now, here’s a pro tip for extra texture: pour about 2 tablespoons of this egg wash into the remaining dry flour mixture. Use your fingers to work it into small “pebbles” – these little clumps will create delightful extra crunch on your fried chicken. Next, dunk each flour-dredged chicken cutlet into the egg wash, allowing any excess to drip off. Immediately transfer it back into the “pebbled” flour mixture, ensuring it’s thoroughly coated. Shake off the excess flour once more and return the double-dredged cutlets to the drying rack.
Pro Tip: Patience is a virtue here! Do not rush the process. Allowing the double-dredged chicken to rest on the drying rack for at least 15-20 minutes before frying significantly improves the adhesion and texture of the breading, making it even crispier and less likely to fall off.
4. Frying to Golden Perfection
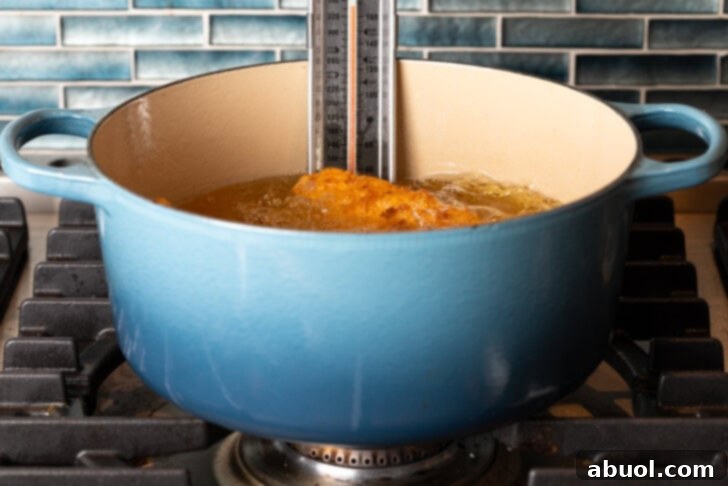
Once all your chicken is double-dipped and rested, it’s time to fry. Pour the peanut oil into a large, heavy-bottomed sauce pot or a deep sauté pan, ensuring there’s enough oil to submerge the chicken pieces without overflowing. Attach a clip-on thermometer to the side of the pot and heat the oil over medium-high heat until it reaches a consistent temperature of 350 degrees F (175 degrees C).
When the oil is at the correct temperature, carefully place 2-3 chicken pieces into the hot oil, being careful not to overcrowd the pan, which can drop the oil temperature too quickly. Fry the chicken for 4-5 minutes, or until it’s beautifully golden brown and cooked through. Flip the chicken once after about 3 minutes to ensure even browning. It’s critical to monitor the oil temperature; if it dips below 345 degrees F, the breading can become greasy, and if it gets too high, the outside will burn before the inside cooks. Adjust the heat as needed to maintain that ideal 350-degree F temperature.
Pro Tip: For absolute certainty that your chicken is cooked safely, use a meat thermometer. The internal temperature of the thickest part of the chicken should reach 165 degrees F (74 degrees C).
Once cooked, use a spider skimmer or tongs to carefully remove the chicken cutlets from the oil. Place them on a paper towel-lined plate or baking sheet to drain any excess oil. Allow the oil temperature in the pot to return to 350 degrees F before adding the next batch of chicken. Repeat this process with the remaining chicken pieces.
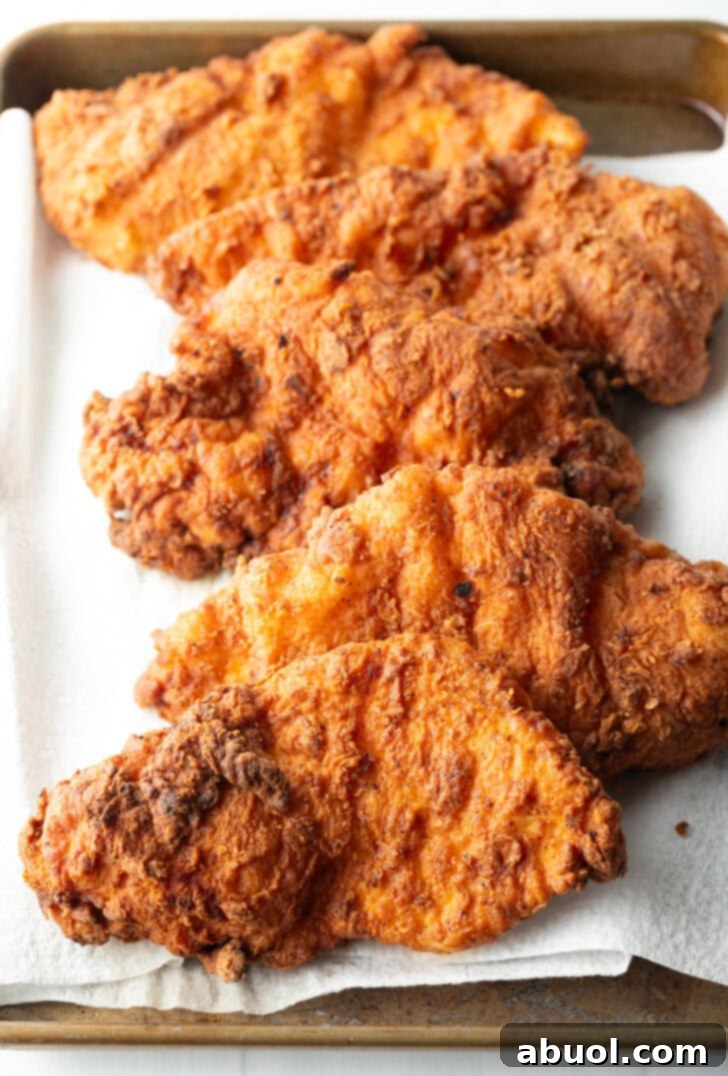
To keep the previously fried chicken pieces warm and crispy while you finish the remaining batches, you can transfer them to a baking sheet and place them in a preheated oven set to 200 degrees F (95 degrees C). This low temperature will maintain their crispness without further cooking or drying them out.
5. The Finishing Touch: Hot Honey and Garnishes
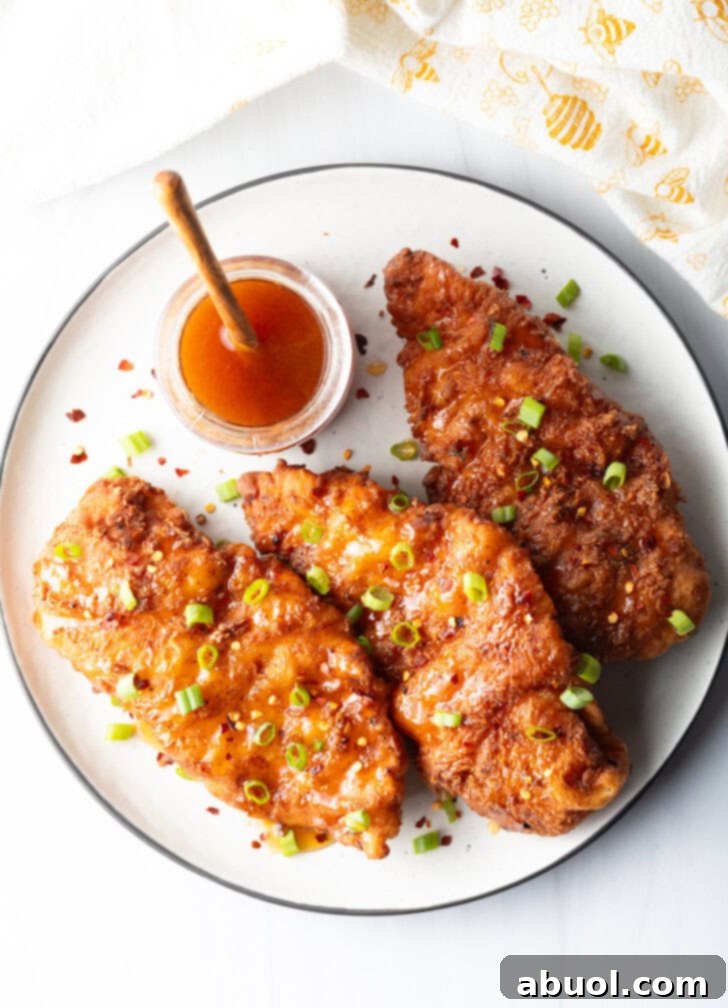
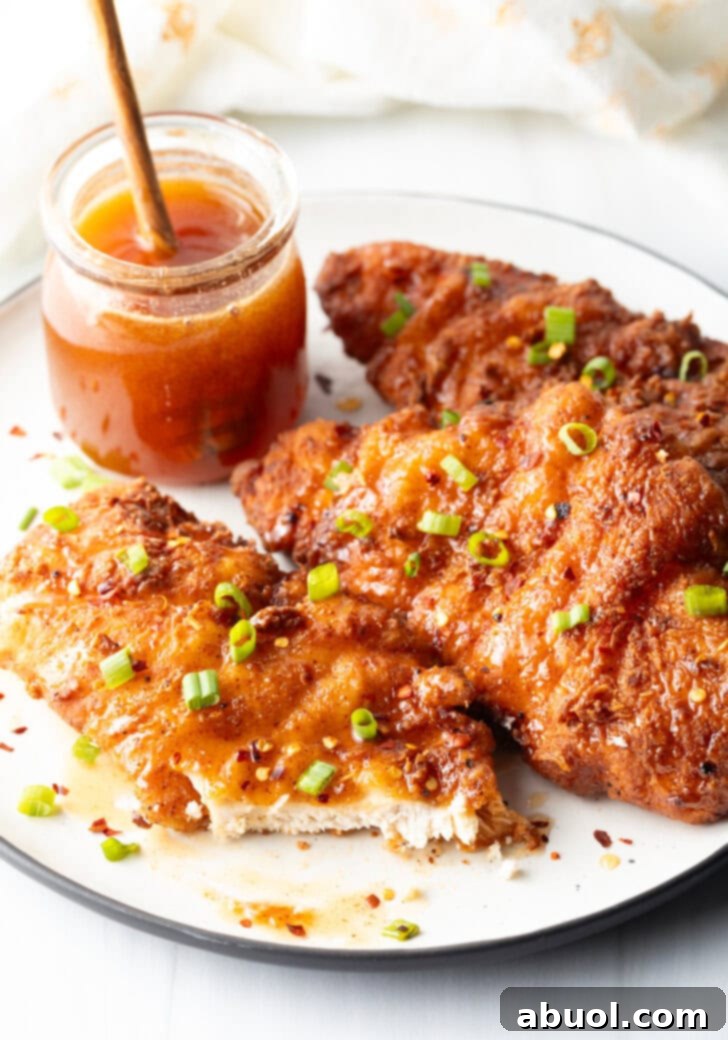
Once all the chicken is fried and ready, it’s time for the grand finale. When ready to serve, arrange the crispy chicken pieces on a platter. Drizzle a generous amount of hot honey over the top of each piece, ensuring every bite gets that perfect sweet and spicy kick. Finally, sprinkle with freshly chopped scallions (green onions) and an extra touch of crushed red pepper flakes for an added burst of color, freshness, and heat. Serve immediately and enjoy!
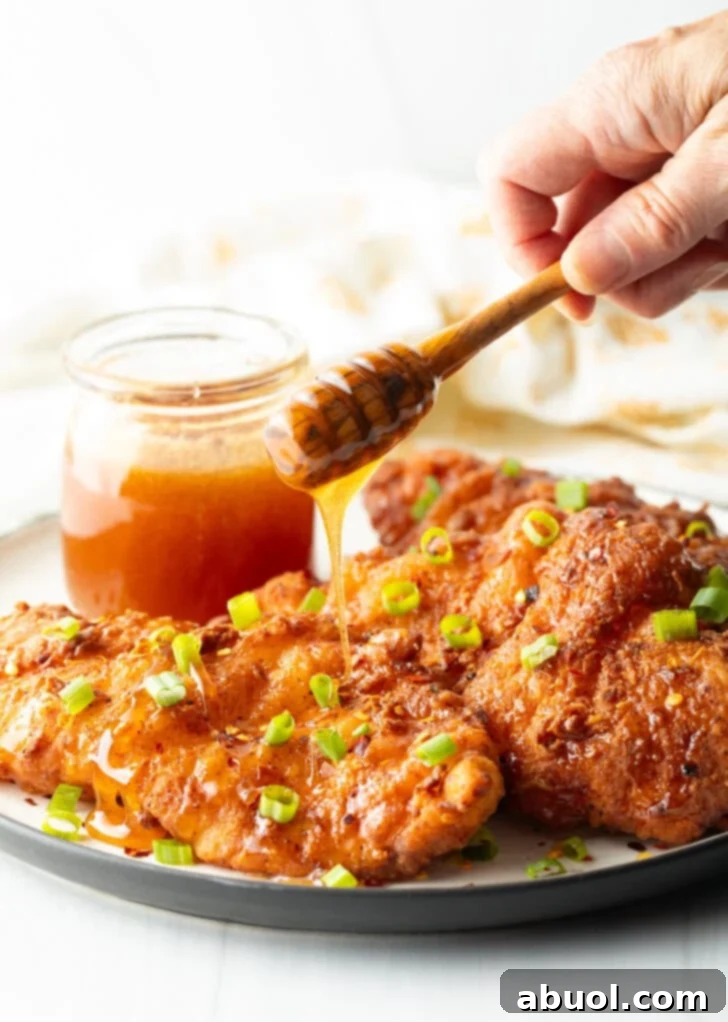
Delightful Serving Suggestions for Hot Honey Chicken
Our sticky-sweet and spicy fried chicken cutlets are incredibly versatile and pair wonderfully with a variety of dishes. Here are some of our favorite ways to enjoy them:
Classic Southern Comfort
Embrace the Southern charm by serving your Hot Honey Chicken with beloved comfort food side dishes. You can never go wrong with creamy mashed potatoes, rich deviled egg potato salad, gooey homemade mac and cheese, velvety mashed sweet potatoes, or a hearty corn spoon bread. Because fried chicken can be quite rich, I often like to balance the meal with some fresh vegetables, keeping them Southern-inspired, of course! Think savory collard greens, crisp roasted okra, tangy coleslaw, or a refreshing creamy cucumber salad with dill.
The Ultimate Hot Honey Chicken Sandwich
Transform these crispy delights into the best hot honey chicken sandwiches you’ll ever make at home! Pile a generous piece onto your choice of bread. My personal favorites include toasted hamburger buns for a classic feel or warm, crusty hoagie rolls for a more substantial bite. This creates the perfect foundation for a truly incredible sandwich. For a real treat, use this chicken as the star of our spicy Honey Pepper Pimento Chicken Sandwich, a fantastic Chick-fil-A copycat recipe that combines sweet heat with creamy pimento cheese.
Frequently Asked Questions About Hot Honey Chicken
The most common reason for breading separation is insufficient drying of the chicken before dredging. After you brine the chicken, it’s absolutely crucial to drain off all the pickle juice and then thoroughly pat each chicken breast cutlet dry with paper towels. Any residual moisture will create a barrier, preventing the breading from adhering tightly as it fries in the hot oil. Ensure the chicken surface is as dry as possible for a perfectly crisp and attached coating.
The fried chicken cutlets themselves, prepared with our savory breading, are not spicy. The heat exclusively comes from the hot honey drizzled on top after frying. This is fantastic because it gives you complete control over the spice level! You can apply a generous amount for a fiery kick, or just a light touch for a subtle warmth. This customization makes it perfect for everyone at the table, regardless of their spice preference.
Fried chicken leftovers are truly delicious! For best results and to maintain crispness, I highly recommend waiting to drizzle on the hot honey until you’re ready to serve and reheat. Transfer any cooled, leftover fried chicken (without honey) to an airtight container and store it in the refrigerator for up to 3-4 days. To bring the breading back to its original crisp glory, reheat leftovers in an air fryer at 350 degrees F (175 degrees C) for 5-10 minutes, or in a conventional oven at the same temperature until heated through and crispy. The air fryer is my absolute favorite method for reheating fried chicken as it achieves superior crispness!
Our base spice blend is classic, but you can certainly customize it! For added depth and warmth, consider incorporating a teaspoon of onion powder or a pinch of ground cumin. If you desire more heat within the breading itself (in addition to the hot honey), try adding a quarter to half a teaspoon of cayenne pepper or a full teaspoon of chili powder. Experiment to find your perfect balance!
Absolutely, boneless, skinless chicken thighs are an excellent alternative and often yield even juicier results due to their higher fat content. You won’t need to cut them into cutlets; simply stretch them out slightly to an even thickness for optimal dredging and cooking. Follow the brining and breading steps as outlined in the recipe, and they will cook beautifully within a similar timeframe.
While hot honey is the star, these crispy chicken cutlets are delicious with a variety of other sauces! If you enjoy dipping, try them with a classic hot sauce for an extra fiery kick, cool and creamy ranch dressing to temper the heat, or a robust blue cheese dressing for a savory contrast. A sweet and tangy BBQ sauce would also be a fantastic pairing!
Yes, you absolutely can! To make this recipe gluten-free, simply substitute the all-purpose flour with your favorite gluten-free baking mix or a blend of gluten-free flours (such as rice flour, potato starch, and tapioca starch). Follow all other steps in the recipe as written, including the brining, double-dredging, and frying, for delicious gluten-free hot honey chicken.
Explore More Classic Southern Recipes!
If you’ve loved the flavors and comfort of our Hot Honey Chicken, you’re in for a treat! The Southern kitchen is rich with incredible recipes that celebrate hearty ingredients and bold tastes. Expand your culinary repertoire with some of our other favorite Southern-inspired dishes:
- Homemade Cornmeal Fish Fry Seasoning: Perfect for crispy fish every time.
- Mind-Blowing Nashville Hot Chicken: For those who crave serious heat!
- Tender Brisket Burnt Ends (Oven Recipe): Smoky, succulent, and utterly delicious.
- Crispy Broasted Chicken: A unique take on fried chicken with incredible texture.
- Fluffy Southern Cathead Biscuits: The perfect accompaniment to any meal.
- The Creamiest Cheese Grits: A foundational Southern staple.
- Irresistible Cornbread Muffins: Sweet or savory, always a hit.
- Crispy Oven Baked “Fried” Pickles: A healthier twist on a Southern classic.
- Flavorful Pulled Pork Tenderloin (with Sweet Chili Sauce): Tender, juicy, and packed with flavor.
- Perfect Crispy Fried Steak (Country Fried Steak): A hearty, comforting classic with gravy.

Print Recipe
⭐
⭐
⭐
⭐
Leave a Review »
Hot Honey Chicken Recipe
1 hour
15 minutes
1 hour
15 minutes
4
(or 8 small) servings
Ingredients
- 4 small boneless skinless chicken breasts or 8 cutlets
- 1 cup dill pickle juice
- 2 tablespoons granulated sugar
- 2 cups all-purpose flour
- ¼ cup cornstarch
- 1 tablespoon paprika
- 1 tablespoon garlic powder
- 1 tablespoon black pepper
- 2 teaspoons salt
- 1 cup milk
- 2 large eggs
- 1 quart peanut oil
- ½ cup hot honey store-bought or homemade
- Garnishes: ¼ cup chopped green onion and crushed red pepper
Instructions
-
Brine the Chicken: Begin by preparing your chicken. Cut each chicken breast horizontally into two thin cutlets, aiming for 8 pieces in total. In a microwave-safe bowl, warm the pickle juice until hot to the touch (but not boiling). Stir in the sugar until fully dissolved. Allow the mixture to cool completely to room temperature before adding the chicken cutlets. Submerge the chicken and brine for at least 30 minutes, or up to overnight, in the refrigerator.
-
Prepare Breading Mixture: While the chicken brines, combine flour, cornstarch, paprika, garlic powder, black pepper, and salt in a medium bowl; whisk well. Once brined, drain the chicken cutlets and thoroughly pat each piece completely dry with paper towels. This step is crucial for crispy breading adhesion!
-
First Dredge: Set up a drying/cooling rack. Dredge each chicken cutlet in the seasoned flour mixture, shaking off any excess to ensure a thin, even coat. Place the chicken on the rack and repeat for all pieces.
-
Second Dredge: In a separate bowl, beat the milk and eggs together. Pour 2 tablespoons of this egg wash into the remaining flour mixture and work it with your fingers to create small, crunchy “pebbles.” Dip each flour-coated chicken cutlet into the egg wash, then back into the pebbled flour mixture. Shake off excess and return to the drying rack. Allow the chicken to rest on the rack for at least 15-20 minutes to improve breading adhesion and texture.
-
Fry the Chicken: In a large, deep pot, heat the peanut oil to 350 degrees F (175 degrees C). Use a clip-on thermometer to monitor the temperature closely. Gently place 2-3 chicken pieces into the hot oil, ensuring not to overcrowd the pan. Fry for 4-5 minutes, flipping once after 3 minutes, until golden brown and cooked through (internal temperature 165 degrees F / 74 degrees C). Adjust heat as needed to maintain 350 degrees F.
-
Use a spider skimmer to remove the fried chicken from the oil, placing it on a paper towel-lined plate to drain. Allow the oil temperature to return to 350 degrees F before frying the next batch. Repeat with remaining chicken.
-
Serve: Keep fried chicken warm in a 200 degree F (95 degrees C) oven while completing other batches. When ready to serve, generously drizzle hot honey over each piece of chicken. Garnish with chopped scallions and crushed red pepper flakes. Serve warm and enjoy!
Notes
For delicious leftovers, defer drizzling the hot honey until just before serving the reheated chicken. Store cooled, plain fried chicken in an airtight container in the refrigerator for up to 3 days.
To restore the breading’s crispness, reheat leftovers in an air fryer (my preferred method!) or conventional oven at 350 degrees F (175 degrees C) for 5-10 minutes, or until heated through and crispy.
Nutrition
Serving:
1
pc
,
Calories:
880
kcal
,
Carbohydrates:
106
g
,
Protein:
36
g
,
Fat:
35
g
,
Saturated Fat:
7
g
,
Polyunsaturated Fat:
10
g
,
Monounsaturated Fat:
15
g
,
Trans Fat:
0.02
g
,
Cholesterol:
173
mg
,
Sodium:
2246
mg
,
Potassium:
718
mg
,
Fiber:
3
g
,
Sugar:
44
g
,
Vitamin A:
1138
IU
,
Vitamin C:
2
mg
,
Calcium:
123
mg
,
Iron:
5
mg
Main, Main Course
American, Southern
Sommer Collier
Cook It? Love It? Rate It!
Help this recipe shine! If you enjoyed making and eating this dish, please consider leaving a 5-star rating so other food lovers can discover it too. Your feedback is greatly appreciated!