

Do you love the charm of beautifully decorated sugar cookies but often feel daunted by intricate piping techniques? You’re not alone! Many home bakers find themselves short on time or specialized skills to create those picture-perfect treats for parties, picnics, or festive holiday gatherings. But what if we told you that stunning, delicious cut-out cookies are well within your reach? Forget the hours of painstaking decoration; today, we’re sharing our absolute favorite and incredibly easy Sugar Cookie Icing and the Best Cut-Out Sugar Cookie Recipe that promises amazing results without the fuss.

Unlock the Secret to Amazing Cut-Out Cookies: Easier Than You Think!
We all admire the intricate beauty of expertly decorated sugar cookies, adorned with elaborate royal icing designs that look like edible works of art from a professional bakery. The artistry involved is truly impressive!
However, for most home bakers, achieving such detailed designs often requires significant time, practice, and a steady hand – resources that aren’t always available when you need a batch of festive cookies for an upcoming event or celebration.
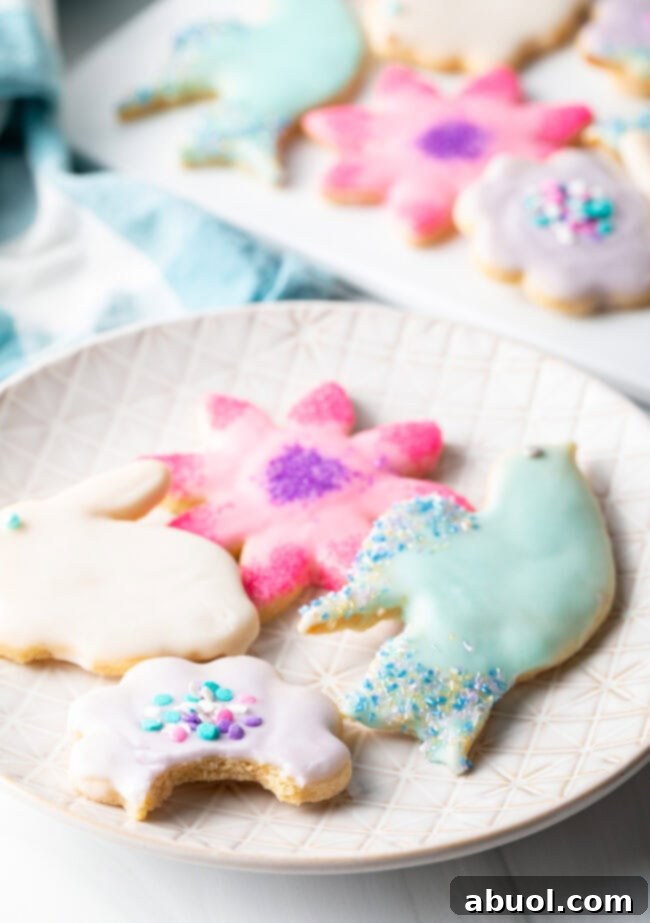
That’s where our recipe shines! Our super easy cut-out sugar cookies are designed for simplicity without sacrificing flavor or appeal. Instead of complex piping, these delightful cookies are elegantly dipped in our personal favorite sugar cookie icing, then lightly adorned with a sprinkle of joy. The best part? Absolutely no piping skills are required! This method ensures that anyone, regardless of their decorating experience, can create a batch of cookies that look as good as they taste.

Discover Our Best Cut-Out Sugar Cookie Recipe for Unforgettable Flavor
This recipe holds a special place in our hearts, standing out as our most cherished cut-out cookie recipe coupled with its perfect sugar cookie icing. Why? Because the unfortunate truth is that many “pretty” cookies prioritize appearance over taste. And honestly, we can’t stand that! We believe a cookie should be both a visual delight and a truly delicious treat.
Why Our Original Sugar Cookie Recipe Will Become Your Go-To:
- Delicate, Tender Texture: Unlike some stiff cut-out cookies, our recipe yields delicate and tender cookies that practically melt in your mouth. They hold their shape perfectly for cutting but remain delightfully soft after baking.
- Subtle Spice for a Signature Flavor: While these can certainly be true vanilla-flavored sugar cookies (simply omit the spice), we highly recommend the optional mild spice blend. This faint “pumpkin spice” note adds a unique warmth and depth that truly makes these cookies stand out from the crowd, making them irresistible any time of year.
- Prepare Ahead Convenience: The cookie dough is incredibly forgiving and can be made days in advance. This feature is a game-changer for busy schedules, allowing you to easily roll and bake when the moment is right, not when you’re under pressure.
- Silky, Satin Icing: Our sugar cookie icing boasts a beautifully silky texture and dries to a lovely satin sheen. It provides a smooth, elegant finish without being overly hard or brittle.
- Versatile Flavor and Color: The icing can be effortlessly flavored with any extract you desire – almond, rum, lemon, or classic vanilla are among our personal favorites. Plus, it can be colored to match any theme or occasion, offering endless creative possibilities.
- Effortless Dipping Method: Say goodbye to stressful piping bags! The simplest and most gratifying method for decorating these cookies is dipping them. A quick dip, a gentle wipe of the edges with a toothpick to catch any drips, and you’re done.
- Fun for All Ages: This forgiving and straightforward method makes decorating accessible and enjoyable for bakers of all skill levels, from little ones to seasoned pros. It’s a wonderful activity to share with family and friends.

Gather Your Ingredients: What You’ll Need for Baking Success
Creating these delightful cookies starts with selecting the right ingredients. Here’s a detailed look at what you’ll need for both the cookies and the icing, along with tips for each:
Essential Ingredients for Perfect Cut-Out Sugar Cookies:
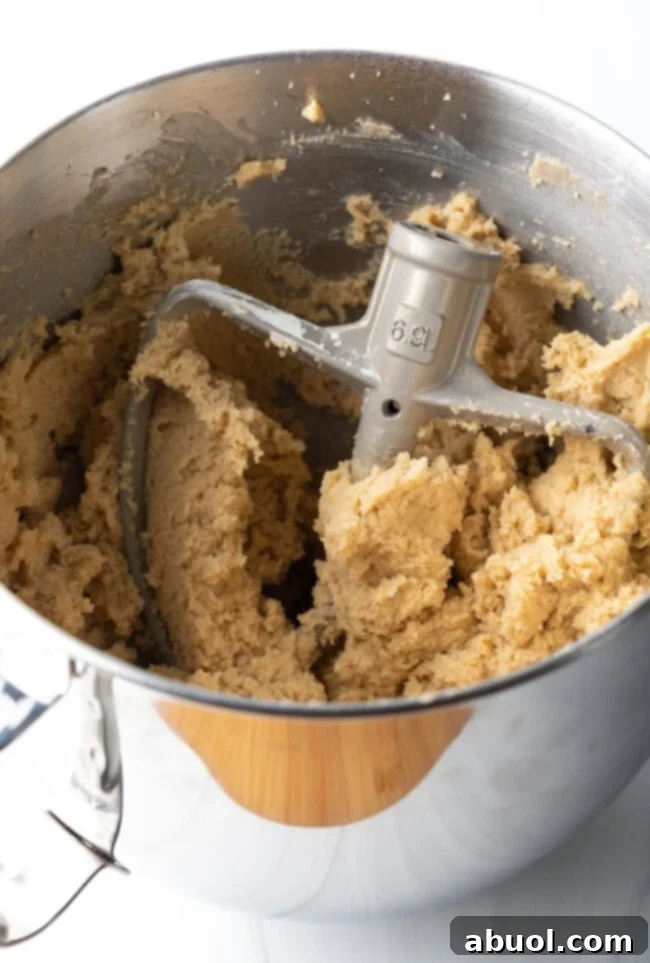
- Unsalted Butter: It’s crucial to use unsalted butter and ensure it’s properly softened at room temperature before you begin. Softened butter, when beaten with sugar, creates air pockets that give the cookies their delicate, tender texture. Avoid melting the butter; it should be pliable but not liquid.
- Granulated Sugar: Super-fine granulated white sugar is ideal here. Its fine crystals dissolve beautifully into the butter, contributing to that smooth, delicate crumb.
- Salt: Whether you choose standard table salt or fine sea salt, a touch of salt is essential to balance the sweetness and enhance all the other flavors in the cookie.
- Pumpkin Pie Spice (Optional, but Recommended!): This spice blend is our secret weapon! It infuses the cookies with a light, warm, and inviting spicy note that truly makes them exceptional, regardless of the season. If you prefer a pure vanilla flavor, feel free to omit it. Alternatively, you can swap the 2 teaspoons of pumpkin pie spice for an apple pie spice blend for a different warm twist.
- Eggs: This recipe calls for two whole large eggs plus one extra egg yolk. The additional yolk adds extra richness and moisture to the dough, contributing to the cookies’ tender texture and lovely golden color.
- Vanilla Extract: Pure vanilla extract is a must for those quintessential comforting undertones that define a classic sugar cookie. Don’t skimp on quality here!
- All-Purpose Flour: Proper flour measurement is key for cut-out cookies. Make sure to stir and fluff your flour in its container, then lightly scoop it into your measuring cups and level it off with a straight edge. This prevents over-measuring, which can lead to tough cookies.
Key Ingredients for Our Silky Sugar Cookie Icing:
- Half & Half: This magical blend of half milk and half cream is the secret to our icing’s incredibly silky smooth texture and appealing satin appearance. It creates a glaze that’s rich without being too heavy.
- Flavor Extract: This is where you can truly customize your icing! Choose any extract you love to complement your cookies. Almond, rum, lemon, and vanilla are fantastic choices that offer distinct and delicious flavor profiles.
- Powdered Sugar: Also known as confectioners’ sugar, this fine sugar is essential for thickening and sweetening the icing. Its powdery texture ensures a smooth, lump-free glaze. If you find your icing too runny, simply add a little more powdered sugar, a tablespoon at a time, until you reach your desired consistency.
Pro Tip for Icing Consistency: This combination of ingredients creates a beautiful, light glaze-style icing that’s perfect for dipping, spreading with a butter knife, or even piping. While it won’t hold its shape as rigidly as traditional royal icing, its flavor is significantly superior. If you desire a slightly stiffer version specifically for intricate piping designs, gradually add an extra 1/2 to 1 cup of powdered sugar until the desired firmness is achieved.
Your Essential Baking Equipment Checklist
Having the right tools makes all the difference in ensuring a smooth and enjoyable baking process. Here’s a list of equipment you’ll need to make this recipe a success:
- Measuring Cups and Spoons: Accurate measurements are crucial for consistent baking results.
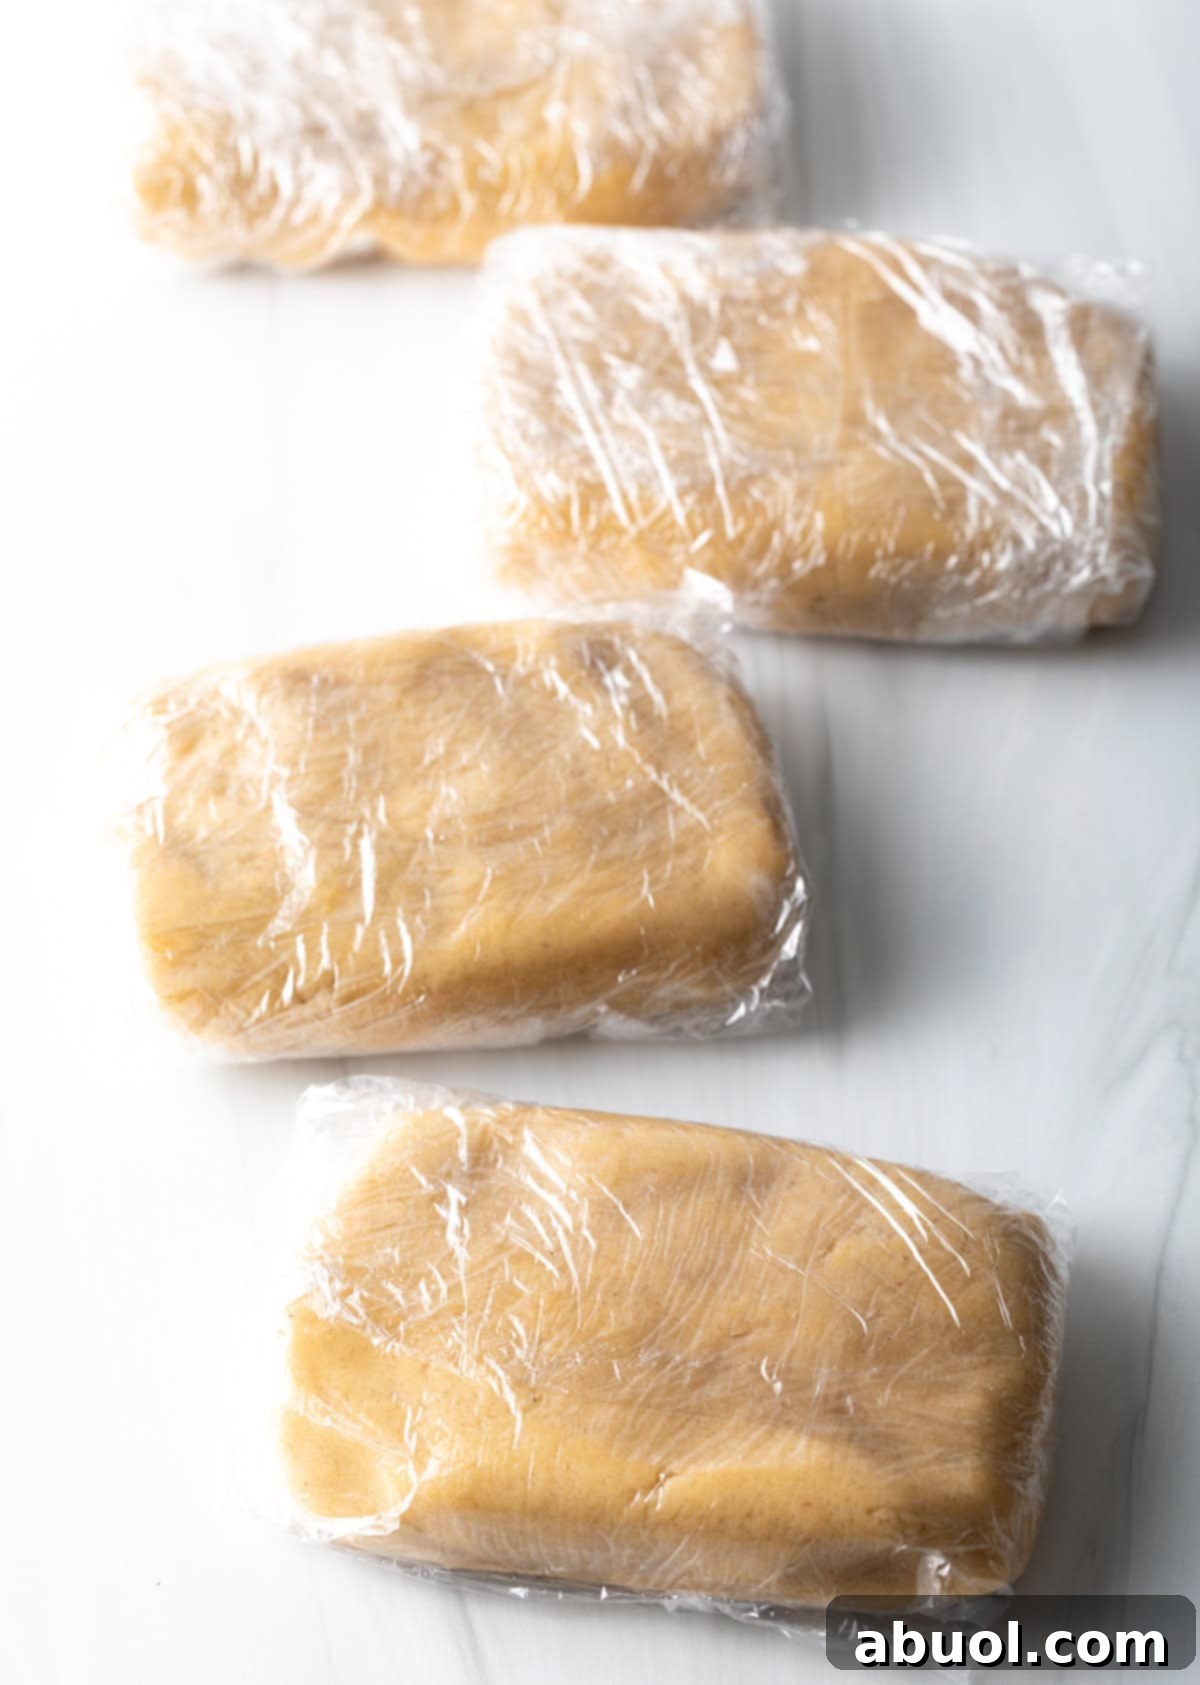
- Plastic Wrap: Essential for wrapping and chilling the cookie dough in manageable sections, ensuring it stays cold and workable.
- Rolling Pin: A good quality rolling pin is needed to achieve an even thickness across your dough, which is key for uniform baking.
- Baking Sheets: You’ll need several baking sheets to bake multiple batches of cookies efficiently.
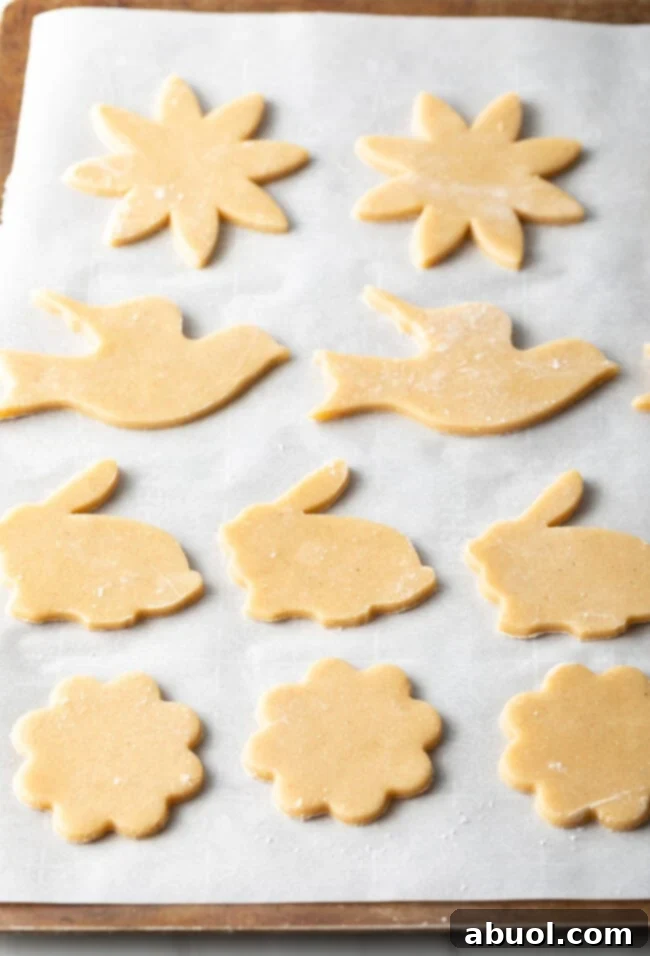
- Parchment Paper: Lining your baking sheets with parchment paper prevents sticking, promotes even baking, and makes it incredibly easy to transfer delicate cookies after they’ve cooled.
- Baking Wire Rack/Cooling Rack (Optional, but Recommended): While not strictly necessary for baking, a cooling rack is extremely helpful for allowing the cookies to dry thoroughly after dipping in icing, preventing sticking and ensuring a perfect set.
- Mixing Bowl(s): At least one large bowl for the cookie dough and a smaller one for mixing the icing.
- Whisk: Perfect for ensuring your icing is smooth and lump-free.
- Food Coloring and Sprinkles (Optional): For adding a pop of color and festive flair to your decorated cookies.
- Toothpicks: A highly underrated but invaluable tool for decorating! Toothpicks are fantastic for popping air bubbles in your icing and for delicately wiping away any excess icing around the edges.
Mastering Your Dough: Expert Tips for Perfect Roll-Out Sugar Cookies
Achieving perfectly shaped and tender cut-out sugar cookies is a science, but with these simple tips and tricks, you’ll be a master in no time. Precision in preparation ensures your cookies hold their shape beautifully and bake evenly.
- Don’t Overmix the Flour: This is a golden rule! While it’s essential to beat (cream) the butter and sugar thoroughly until light and fluffy (about 5 minutes) to break down sugar crystals and incorporate air, resist the urge to overmix once the flour is added. Overmixing develops the gluten in the flour, which leads to tough, chewy cookies. Stop mixing as soon as the flour is just incorporated and the dough comes together smoothly.
- Cold Dough is Your Best Friend: For cut-out cookies that maintain their perfect shape and delightful texture every single time, the dough absolutely MUST be cold. Wrap your prepared dough into several small, flat disks. This allows you to remove one piece at a time from the refrigerator for rolling, keeping the rest of the dough perfectly chilled and easy to work with. Chilling prevents spreading during baking.
- Flour Your Work Surface Generously: Don’t be shy with the flour when rolling out your dough. A well-floured surface, along with a lightly floured rolling pin, is crucial for preventing the dough from sticking. This makes it much easier to lift and transfer the cut-out shapes to your baking sheets without distorting them. Keep a small, thin spatula nearby just in case any stubborn spots adhere to the counter.
- Cut Cookies Close Together: To maximize your batch and ensure the most tender cookies, try to cut your shapes as close together as possible on the first roll. The dough from the initial roll is always the most tender and pliable.
- Gather and Reroll Smartly: After cutting out your first batch, gather the dough scraps gently. Press them together without over-kneading, re-roll, and cut out more cookies. Cookies from the second and third rolls will still be soft and tender, though perhaps ever-so-slightly less so than the first batch due to handling. Avoid more than 2-3 rerolls to maintain quality.
(Also, refer to the full Recipe Instructions below for detailed steps.)
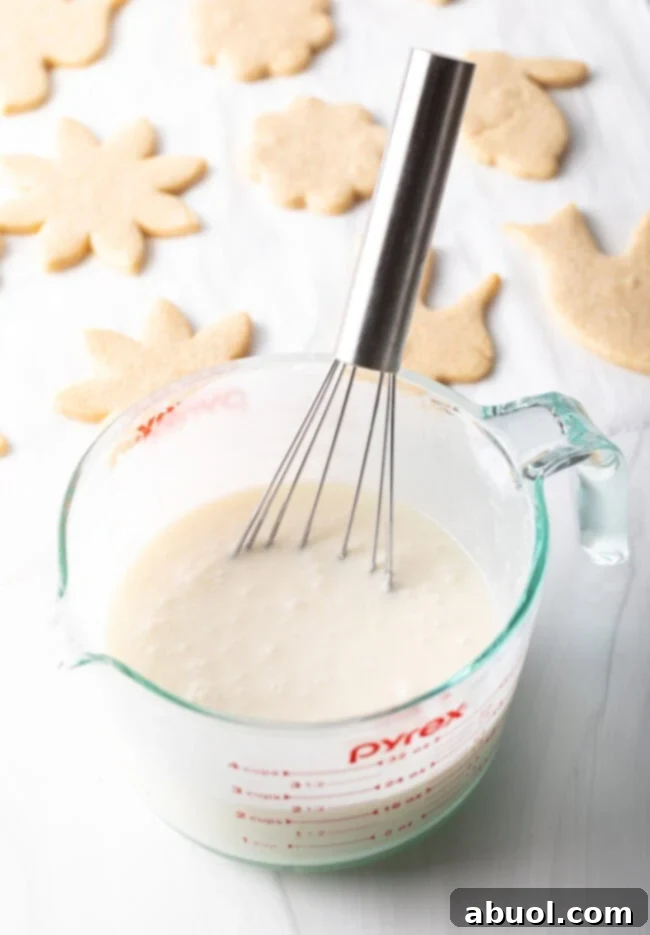
Achieving Icing Perfection: Tips for Our Delicious Sugar Cookie Icing
Our easy sugar cookie icing is designed for simplicity and incredible flavor. Follow these tips for a smooth, beautiful, and delicious finish on your cut-out cookies:
- Whisk Thoroughly: Start by whisking all the icing ingredients together until the mixture is completely smooth and free of any lumps. This ensures an even consistency for dipping and decorating.
- Tap Out Bubbles: While whisking is necessary, it often introduces air bubbles into the icing. Once your icing is well combined, gently tap the bottom of the bowl on your counter a few times. This action helps bring most of the air bubbles to the surface, resulting in a smoother, more professional-looking finish when the icing dries.
- Color Your Creations: If you plan on using multiple colors for your cookies, divide the prepared icing into several smaller bowls. Then, add a few drops of gel food coloring to each bowl, mixing well until you achieve your desired vibrant shades.
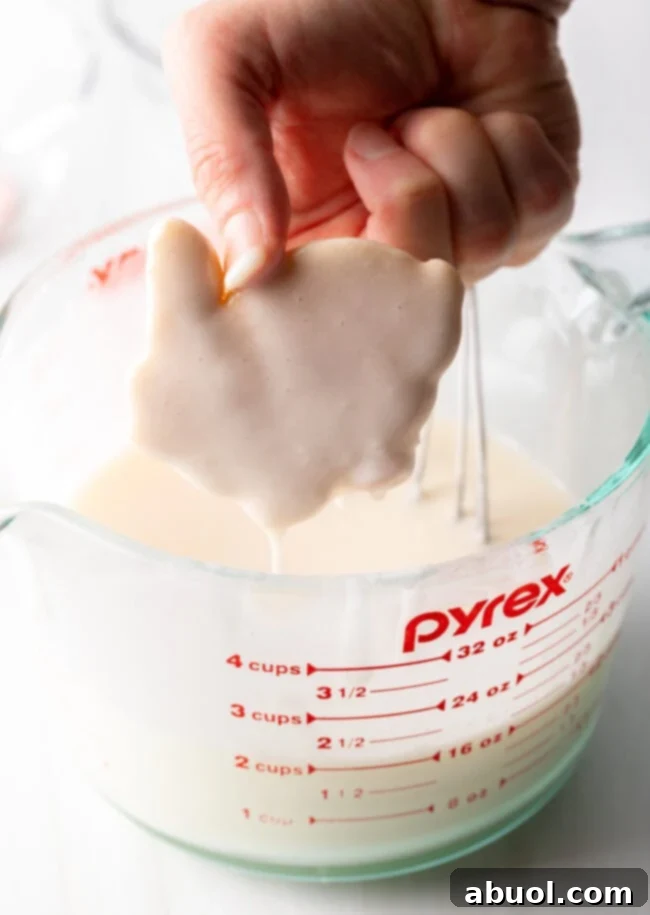
- The Easy Dipping Method: Our icing is perfectly suited for dipping, which is far simpler than piping for most home bakers. Hold a cooled cookie by its sides, gently dip the top surface into the icing, ensuring it’s fully coated. Then, tilt the cookie sideways and allow any excess icing to drip back into the bowl. This creates a clean, even layer.
- Toothpicks: Your Secret Weapon: Toothpicks are a highly underrated tool in the world of cookie decorating! Before the icing sets, use a toothpick to gently pop any unwanted air bubbles that might have appeared on the surface of your glaze. Additionally, you can use the tip of a toothpick to carefully wipe off any excess icing around the edges of the cookie, creating a neat border before placing them on a drying rack.
- Allow for Proper Drying: Our best sugar cookie icing is relatively delicate in the first few hours and might crackle slightly if touched prematurely. For the best results and a perfectly set, durable finish, allow your decorated cookies to dry undisturbed on wire racks for a minimum of 3-4 hours after icing them. For full hardness, leaving them overnight is even better.
For the Decorating Connoisseur: When Royal Icing Might Be Your Choice
Our featured sugar cookie icing is a truly delicious glaze, offering a softer bite and rich flavor that many prefer over traditional, harder icings. However, it’s worth noting that it can be a bit more prone to crackling under pressure compared to a sturdy royal icing, especially if handled frequently or stacked before fully cured. If your goal is meticulous, intricate piping that requires a very firm and durable finish, royal icing might be a better fit for your expert decorating needs.
Simple Royal Icing Recipe for Advanced Designs:
For those times when you need precise lines and a solid, protective coating, here’s a basic royal icing recipe:
- 4 cups powdered sugar
- 3 tablespoons meringue powder
- 10 tablespoons water
Combine all ingredients in the bowl of an electric mixer. Beat on medium-high speed for approximately 2 minutes, or until the icing is thick, smooth, and holds soft peaks. This consistency is ideal for both outlining and flooding designs. After decorating, allow the cookies to dry undisturbed for 2-3 hours, or until completely hardened, before attempting to move or stack them.
Important Notes About Our Icing:
Can Our Favorite Cookie Icing Be Used for Piping?
Absolutely! While our preferred method is dipping for ease, you can certainly pipe this icing if you like. It won’t be as firm or precise as royal icing, but its superior taste and texture make it a fantastic alternative for simpler piped designs. If you need a stiffer consistency for more defined lines, gradually add an additional 1/2 to 1 cup of powdered sugar to the recipe until you achieve the desired thickness. For best results, consider outlining your cookie shapes with a slightly thicker consistency and then “flooding” (filling in) the outlined area with a slightly thinner version of the same icing.
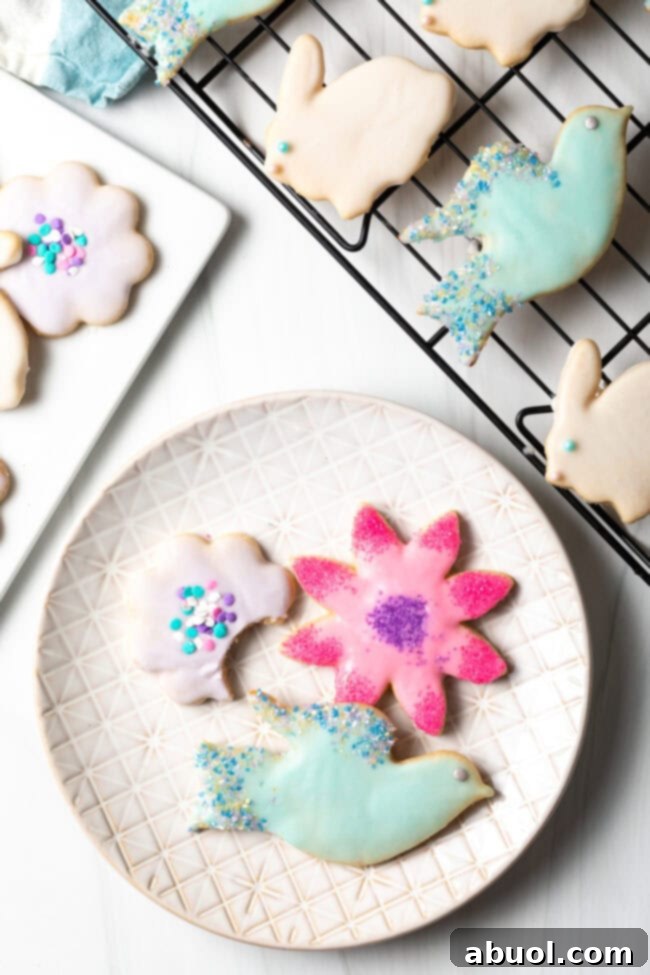
Get Creative: Exciting Sugar Cookie Variations
While we are undeniably crazy about the unique and barely-there pumpkin spice sugar cookie flavor this recipe offers, there’s always room to switch things up and explore new flavor profiles. Here are some fantastic variations to inspire your next baking adventure:
- Classic Vanilla Delight: For those who love the timeless taste of a traditional sugar cookie, simply skip the spice blend in the dough. You’ll be left with wonderfully flavorful vanilla cut-out cookies that are perfect for any occasion.
- Subtle Chocolate Kiss: Introduce a delicate chocolate note by swapping the spice blend for an equal amount of unsweetened cocoa powder in the dry ingredients. This creates a lightly chocolate-flavored cookie that’s incredibly appealing.
- Extract Excitement: Transform the entire flavor profile by swapping the vanilla extract for a different one. Almond extract adds a sophisticated, nutty aroma, while lemon extract provides a bright, zesty burst that’s perfect for spring or summer. Experiment with rum extract for a deeper, more complex flavor.
- Confetti Cookies: For a burst of color and fun, gently fold in a generous amount of jimmie sprinkles (rainbow or themed) into the cookie dough before chilling and rolling. The sprinkles will bake right into the cookies, creating a festive confetti effect.
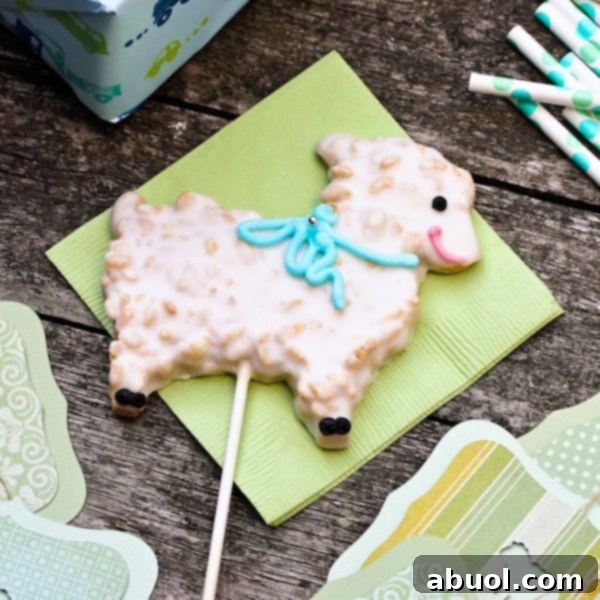
- Fun Cookie Pops: Turn your cookies into delightful lollipops! Before baking, gently press a lollipop stick or sturdy paper straw into the side of each cut-out cookie. Ensure the stick is securely embedded in the dough. Bake as usual, then ice and decorate the cookie pops for an extra special treat, perfect for parties or as edible gifts.
Frequently Asked Questions About Our Sugar Cookies
How To Store Your Delicious Cut-Out Cookies
Once baked and decorated, these cookies can be stored in an airtight container at room temperature for up to five days, or in the refrigerator for up to a week. If they are decorated, ensure you stack them with a layer of wax paper or parchment paper between each cookie to prevent sticking and preserve your beautiful designs.
Freezing Instructions for Future Enjoyment
This versatile recipe is fantastic for preparing ahead! You can freeze it at various stages, allowing you to enjoy fresh cookies whenever the craving strikes, for up to 3 months:
- Freeze the Dough: Wrap the prepared cookie dough tightly in plastic wrap and then again in foil. Store it in the freezer. When ready to bake, thaw in the refrigerator overnight, then roll out and bake as directed.
- Freeze Baked, Undecorated Cookies: Bake the cookies as instructed, let them cool completely, then store them in an airtight container or freezer bag. This allows you to decorate them fresh at a later time, which is perfect for holiday prep.
- Freeze Fully Decorated Cookies: For maximum convenience, you can even freeze cookies that have already been decorated. To protect their appearance, wrap each decorated cookie individually in plastic wrap, then place them in an airtight container before freezing. Thaw at room temperature when ready to serve.
Can I Use Frosting Instead of Icing?
While our recipe specifically calls for icing because it’s thinner and less sweet than traditional frosting, you absolutely can opt for a sugar cookie frosting instead! If you prefer a richer, creamier topping, consider using our buttercream frosting recipe. You can easily add gel food coloring to buttercream frosting to create various designs and colors, offering a different textural experience to your cut-out cookies.
How Do I Double This Recipe?
If you’re planning a big party or simply want more cookies, doubling this recipe is straightforward. The recipe card below typically includes a “serving scale” or adjustable serving size option that allows you to automatically scale the ingredient quantities. Simply adjust the number of servings to your desired amount, and the recipe will calculate the exact measurements for you, ensuring you achieve perfect sugar cookies every time, no matter how many you choose to make!
Explore More Delightful Cookie Recipes
If you’ve loved making these cut-out sugar cookies, you’ll be thrilled to discover more of our favorite cookie creations. Expand your baking repertoire with these irresistible recipes:
- The Best Soft Round Sugar Cookies
- Soft & Chewy Molasses Cookies
- Rich Brown Butter Brown Sugar Cookies
- Authentic Scottish Shortbread (An Easy Recipe)
- Fluffy Lemon Crinkle Cookies
- Classic Best Oatmeal Raisin Cookies
- Perfectly Delicate Linzer Cookies
- Festive Christmas Vanilla Biscuits by RecipeTin Eats
- Delightful Mini Meringues by Cooking LSL
For detailed nutritional information, including calories, carbohydrates, protein, cholesterol, sodium, potassium, calcium, and vitamin percentages, please refer to the printable recipe card below. Don’t forget to share this amazing recipe with your friends and family on Facebook, Instagram, and Pinterest!

Print Recipe
Leave a Review »
Original Sugar Cookie Recipe (with Cookie Icing)
Try our absolute favorite Sugar Cookie Icing and Cut Out Cookie Recipe for your holiday baking endeavors. Make them as simple sugar cookies or mix things up and make delicately spiced “Pumpkin Spice” Sugar Cookies for extra flavor!
Video
Video content for “Best Cut Out Cookies and Sugar Cookie Icing” is available.
Ingredients
For the Cut Out Cookies:
- 1 1/2 cups butter, softened
- 1 1/2 cups granulated sugar
- 1 teaspoon salt
- 2 teaspoons pumpkin pie spice (optional)
- 2 large eggs + 1 extra yolk
- 2 teaspoons vanilla extract
- 3 3/4 cups all-purpose flour
For the Sugar Cookie Icing:
- 2/3 cup half & half
- 1 teaspoon extract, flavor of choice
- 4 cups powdered sugar
Instructions
For the Cut Out Cookie Recipe:
- Using an electric mixer, beat the softened butter and granulated sugar together until light and fluffy—this should take about 5 minutes. Incorporate the salt, pumpkin pie spice (if using), eggs, and vanilla extract. Beat until just combined.
- Slowly add the all-purpose flour to the wet ingredients, mixing only until the dough comes together smoothly. Be careful not to overmix. Divide the dough into 4 separate pieces, wrap each piece tightly in plastic wrap, and chill in the refrigerator for at least one hour. (The dough can be made weeks in advance and stored in the fridge.)
- When you’re ready to bake, preheat your oven to 375 degrees F (190 degrees C). Line several cookie sheets with parchment paper to prevent sticking.
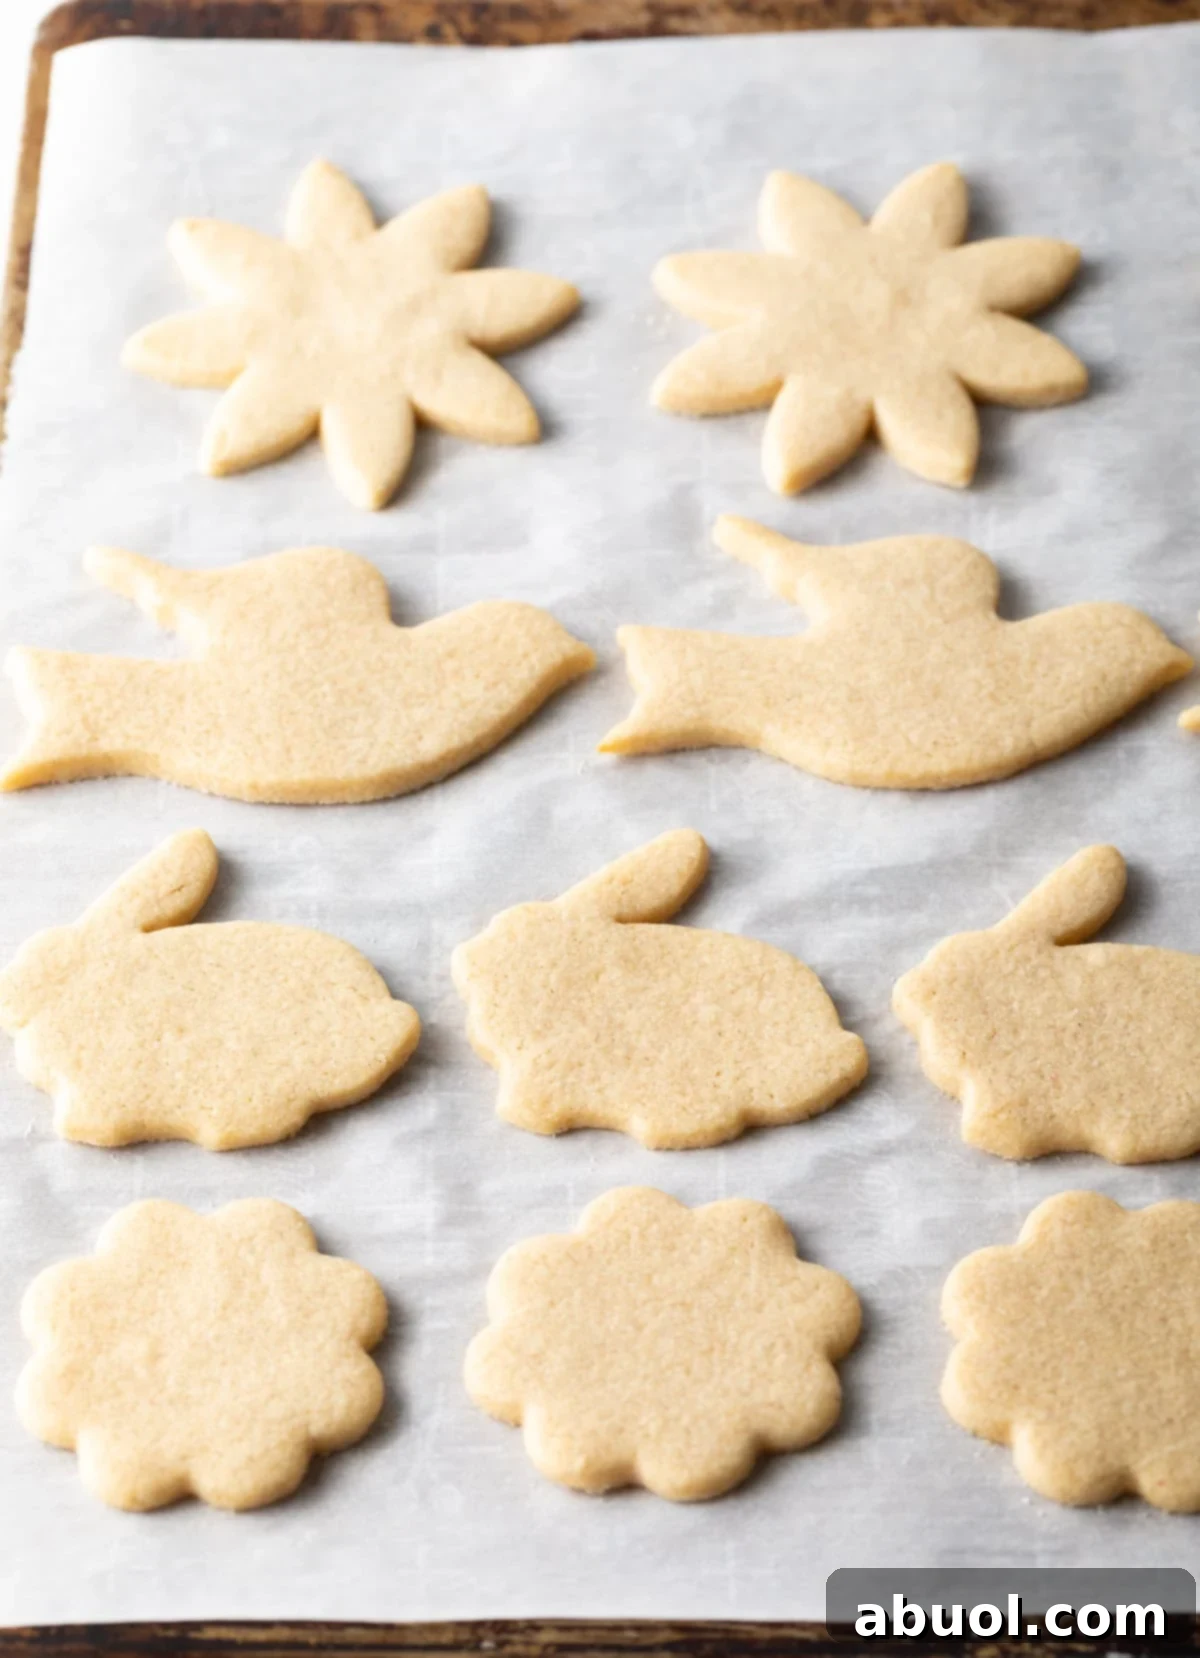
- Remove one disk of chilled dough at a time from the refrigerator. Lightly flour your work surface and your rolling pin, then roll the dough out to an even thickness of 1/8- to 1/4-inch. Work quickly to keep the dough cold. Cut out your cookie shapes as close together as possible to minimize scraps. Use a thin spatula to carefully transfer the cut-out cookies onto the prepared baking sheets. Repeat this process with the remaining dough, gathering and re-rolling scraps gently. Bake for 6-9 minutes, depending on size and thickness, until the edges are lightly golden. Allow the cookies to cool completely on the cookie sheets before attempting to move them.
For the Sugar Cookie Icing:
- In a medium bowl, whisk the half & half, your chosen flavor extract, and powdered sugar together until the icing is completely smooth and free of lumps. If desired, add food coloring to achieve your preferred shades. Dip the face of each cooled cookie into the icing, ensuring it’s evenly coated. Use a toothpick to gently wipe off any excess icing from the edges of the cookie and to pop any visible air bubbles on the surface of the icing. Then, carefully place the iced cookies on a wire rack to dry completely.
Notes
Is this cookie icing good for piping designs? You can also pipe this icing if you like! It is not quite as firm as royal icing, but the taste and texture are MUCH better! Add 1/2 – 1 cup extra powdered sugar if needed until you get to the right consistency. It would be easier to outline the shape with the color needed/wanted and then flood (or fill) in that outline.
Nutrition
Serving: 1 cookie, Calories: 105kcal, Carbohydrates: 16g, Protein: 1g, Fat: 4g, Saturated Fat: 3g, Cholesterol: 16mg, Sodium: 69mg, Potassium: 13mg, Fiber: 1g, Sugar: 11g, Vitamin A: 135IU, Vitamin C: 0.1mg, Calcium: 6mg, Iron: 0.3mg