
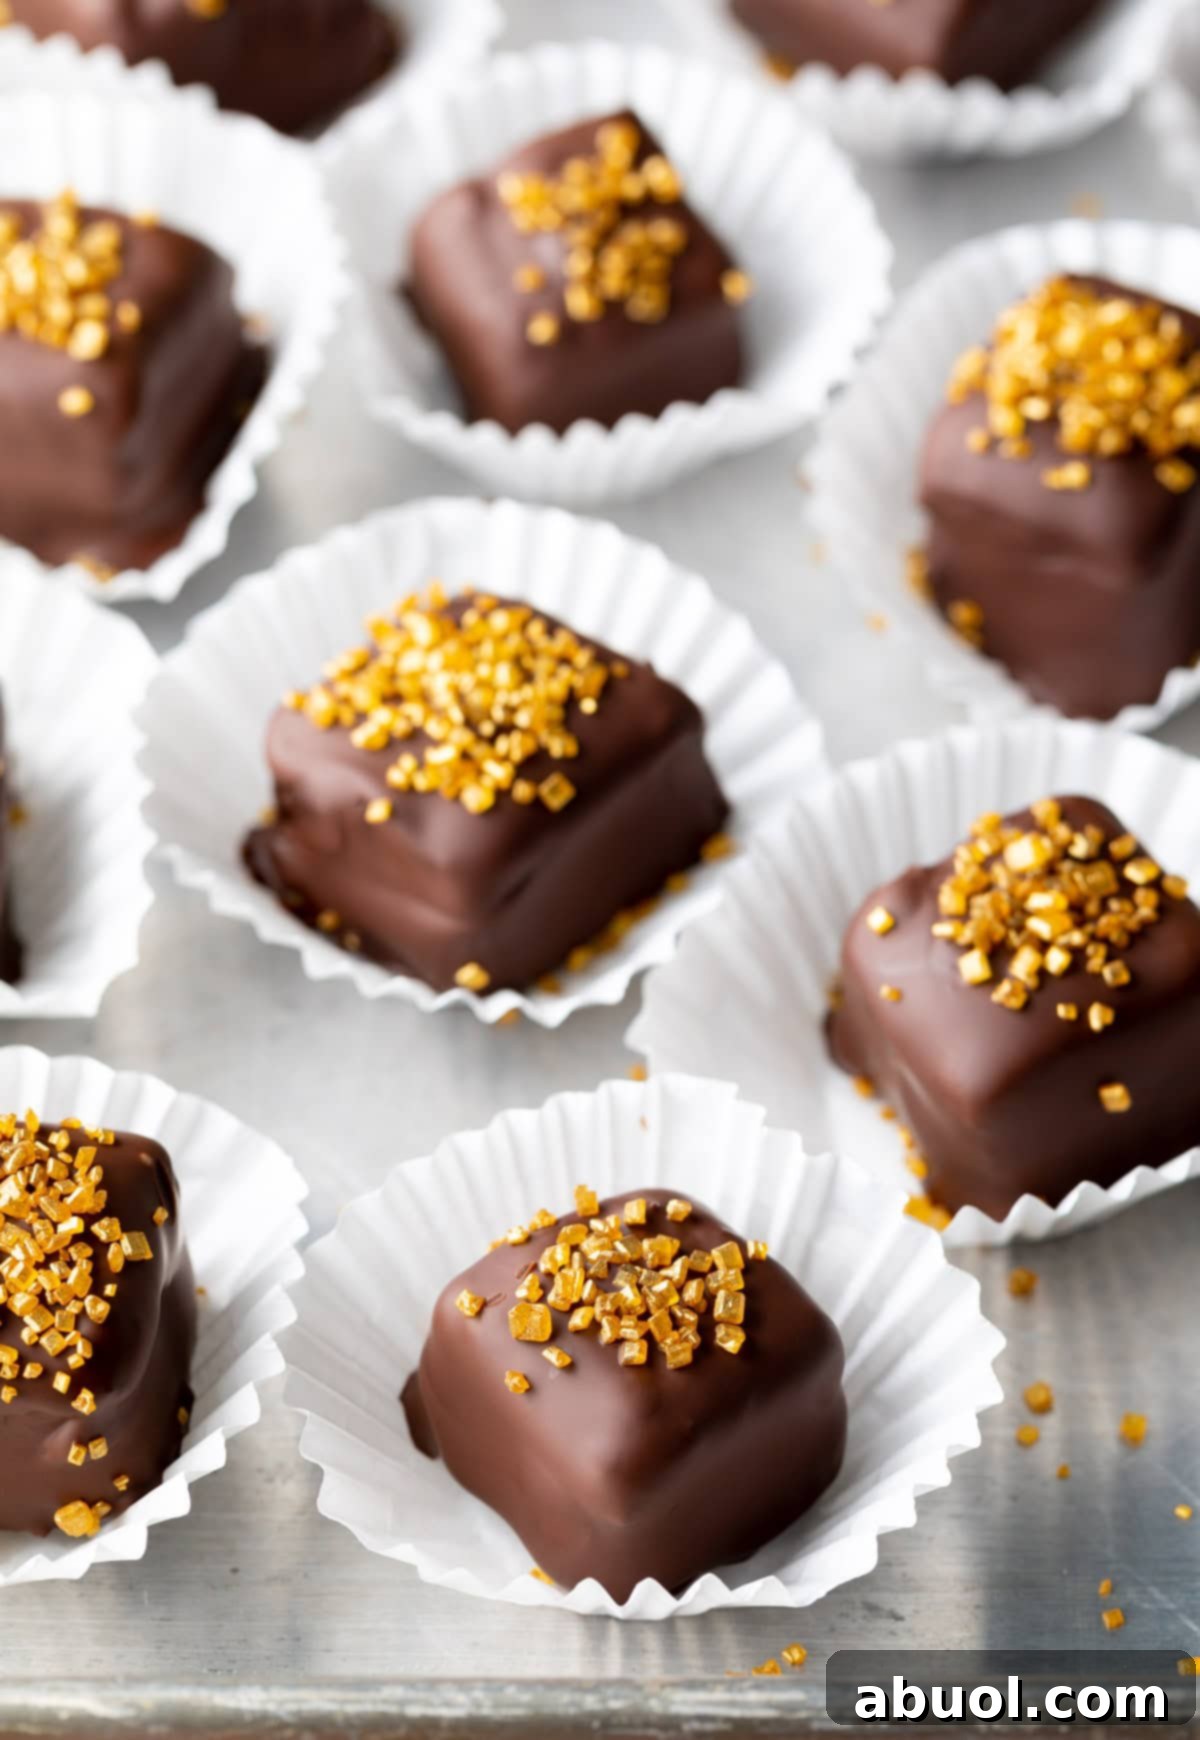
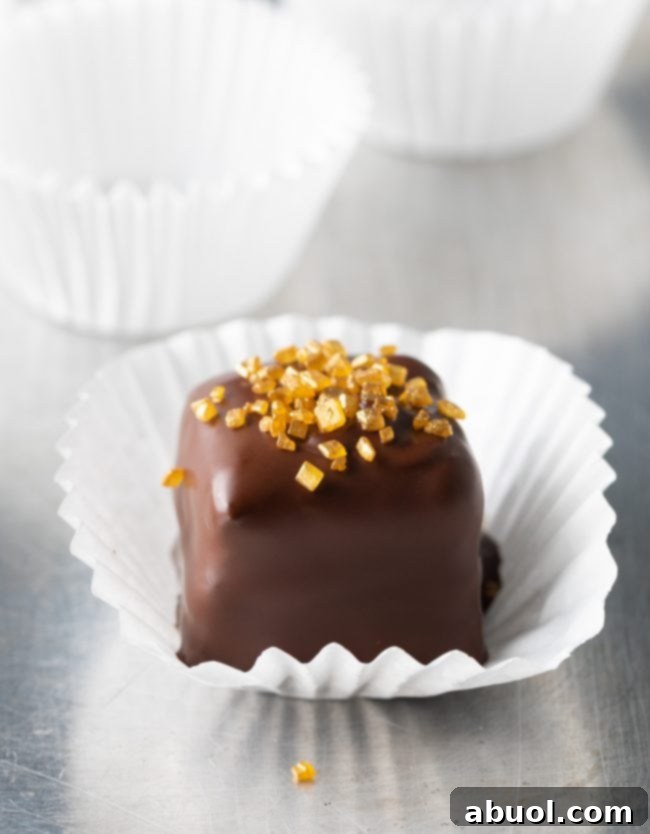
Decadent & Easy Chocolate Petit Fours Recipe – Craft Whimsical and Sweet Chocolate Mini Cakes, Beautifully Filled with Creamy Nutella and Elegantly Coated in a Glossy Melted Chocolate Glaze. These homemade Chocolate Petit Fours are surprisingly simple to make, offering endless opportunities for customization with vibrant sprinkles and stunning edible decorations, perfect for any celebration!
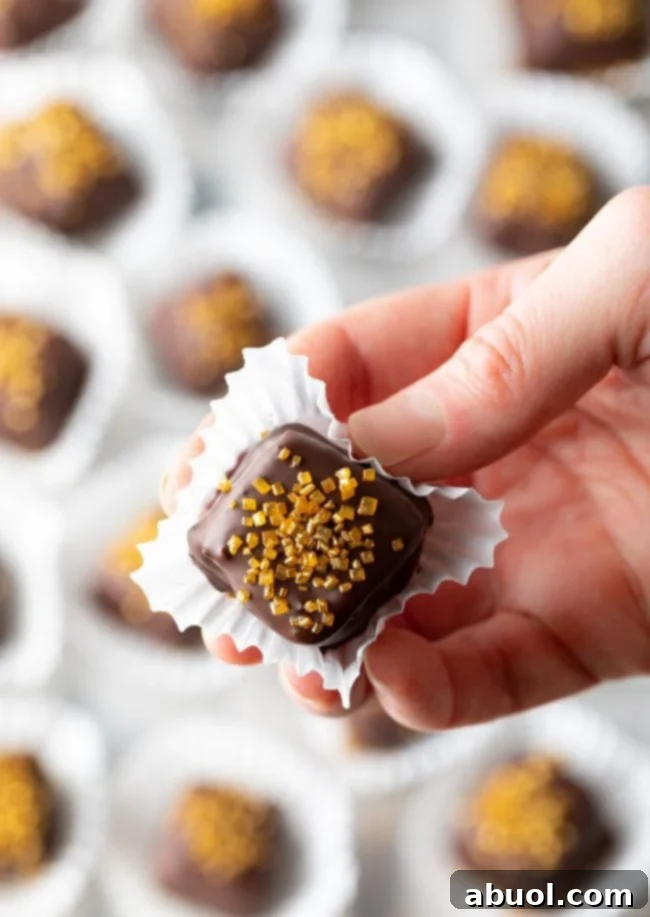
Why You’ll Adore This Easy Chocolate Petit Fours Recipe
There’s an undeniable charm that little square Chocolate Petit Fours bring to any gathering. These exquisite mini cakes instantly elevate the ambiance, adding a touch of elegance and playful sophistication to parties, bridal showers, or even intimate celebrations. Many believe petit fours are reserved for professional bakers or require incredibly complex techniques, often associated with elaborate mousses, delicate baking racks, or notoriously tricky poured fondant.
However, we’re thrilled to present a recipe that shatters that misconception. This guide simplifies the art of making petit fours, proving they are far more accessible than you might imagine. While there are a few distinct steps and crucial chilling times involved, this particular method stands out as the easiest petit four recipe we’ve ever crafted. Forget the fuss of traditional methods; our approach focuses on pure, unadulterated deliciousness.
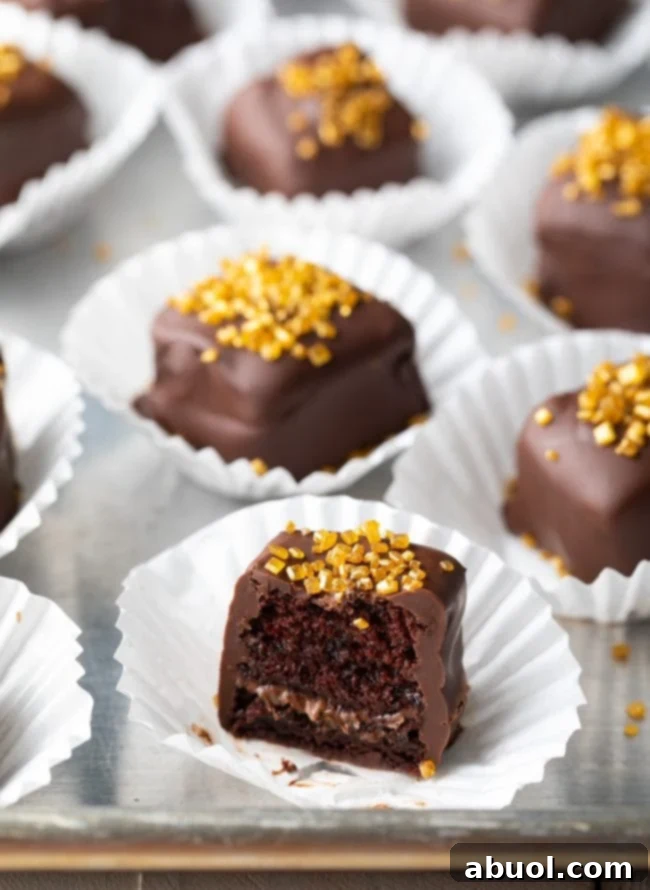
Imagine a classic, intensely moist and tender homemade chocolate cake, generously filled with a rich layer of creamy Nutella, then enveloped in a smooth, glistening melted chocolate coating. The combination of deep chocolate, nutty hazelnut, and the satisfying texture of a perfectly baked cake creates a symphony of flavors in every bite. The beauty of these mini cakes lies not only in their taste but also in their versatility. Garnish your finished petit fours with a shower of colorful sprinkles for a festive touch, or perhaps a hint of luxurious gold food coloring spray for an extra special occasion. The result is a delightful party treat that’s ideal for sharing, sure to impress every guest without the usual stress.
Essential Ingredients for Your Chocolate Petit Fours
Crafting these delectable chocolate mini cakes requires a selection of common baking ingredients, thoughtfully chosen to ensure a perfect balance of flavor and texture. Here’s a detailed look at what you’ll need:
- Granulated Sugar: Provides the fundamental sweetness, balancing the richness of the cocoa and dark chocolate.
- All-Purpose Flour: The structural backbone of our tender chocolate cake. For a gluten-free alternative, you can easily swap this with your favorite gluten-free flour blend.
- Unsweetened Cocoa Powder: Infuses the cake with a deep, robust chocolate flavor. Opt for high-quality cocoa for the best taste.
- Baking Powder: A leavening agent that helps the cake rise, contributing to its light and fluffy texture.
- Baking Soda: Works in conjunction with buttermilk to create a tender crumb and further assist in rising.
- Salt: A crucial ingredient that enhances all other flavors, bringing out the sweetness and chocolatey notes without making the cake taste salty.
- Large Egg: Acts as a binder, adding structure, moisture, and richness to the cake batter. Ensure it’s at room temperature for better incorporation.
- Buttermilk: Its acidity reacts with baking soda to create a beautifully tender cake. If you don’t have buttermilk on hand, you can easily make your own by combining milk and a touch of lemon juice or vinegar.
- Vegetable Oil: Contributes significantly to the cake’s incredible moisture and softness, ensuring a melt-in-your-mouth texture that lasts.
- Vanilla Extract: A splash of high-quality vanilla extract is essential for adding aromatic depth and complexity to the chocolate flavor.
- Hot Coffee (or Hot Water): This secret ingredient doesn’t make the cake taste like coffee, but rather deepens and intensifies the chocolate flavor, creating a richer profile. It also helps to smooth out the batter.
- Dark Chocolate Chips (60% Cacao): Used for the glossy outer coating. The 60% cacao content provides a pleasant bitterness that balances the sweetness of the cake and Nutella, preventing the petit fours from being overly sweet.
- Vegetable Shortening: When melted with chocolate chips, shortening creates a remarkably smooth, fluid chocolate coating that’s easy to dunk the cakes into. It also gives the coating a beautiful, professional-looking shine and helps it set quickly and firmly.
- Nutella Chocolate Hazelnut Spread: The star of our filling! This creamy, decadent spread adds a layer of rich hazelnut and chocolate goodness that perfectly complements the cake.
- Colored Sprinkles: For decorating. Use them to add a fun pop of color and texture, customizing your petit fours for any theme or occasion.
Step-by-Step Guide: How to Make Chocolate Petit Fours
Making these elegant chocolate petit fours is an enjoyable process. Follow these detailed steps for a perfect batch:
- Begin by preheating your oven to 350°F (175°C). Prepare a 13×18-inch rimmed baking sheet by lining it with parchment paper. Lightly spray the parchment paper with nonstick cooking spray to ensure your cake doesn’t stick. This creates a large, thin cake layer ideal for petit fours.
- In the bowl of an electric stand mixer (or a large mixing bowl with a hand mixer), combine all your dry ingredients: granulated sugar, all-purpose flour, unsweetened cocoa powder, baking powder, baking soda, and salt. Mix these together thoroughly until they are well combined and there are no lumps.
- In a separate medium-sized bowl or a large measuring pitcher, whisk together the wet ingredients: the large egg, buttermilk, vegetable oil, and vanilla extract. Ensure they are fully combined.
- With the electric mixer on a low speed, slowly pour the wet ingredient mixture into the dry ingredients. Continue mixing until everything is just incorporated and forms a smooth batter. Then, gradually add the hot coffee (or hot water), mixing until the batter is silky smooth. Be careful not to overmix; overmixing can lead to a tough cake.
- Pour the prepared cake batter evenly into your prepped baking pan. Gently shake the pan side to side to ensure the batter is spread uniformly. Bake for 11-13 minutes, or until the cake is soft and fluffy in the middle and a toothpick inserted into the center comes out clean.
- Once baked, remove the cake from the oven and let it cool in the pan at room temperature for about 15 minutes. This allows it to firm up slightly. After 15 minutes, transfer the cake pan to the freezer and freeze for approximately 1-2 hours, or until the cake is firm and easy to handle. Freezing is crucial for clean cuts.
- When the cake is thoroughly firm, carefully remove it from the pan. Using a long serrated knife, precisely cut the cake in half horizontally, creating two equally thin layers. Evenly spread the Nutella in a thin, smooth layer over one-half of the cake. Gently place the plain cake layer directly over the Nutella-coated layer, pressing down lightly to form a two-layer cake sandwich. Peel off any remaining parchment paper. Using your serrated knife, trim off the rough edges of the cake to create clean, straight lines. Then, carefully cut the cake into precise 1-inch squares. You should yield approximately 100 petit fours. Arrange these mini cakes back on the baking sheet and return them to the freezer for another 1-2 hours, until they are very hard. This second freezing step ensures they maintain their shape during coating.
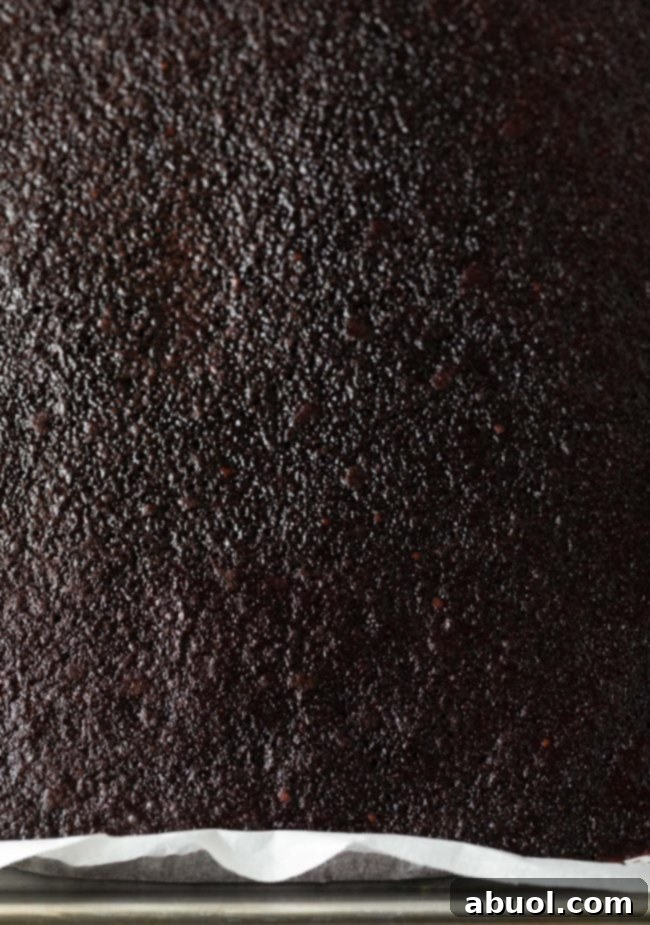
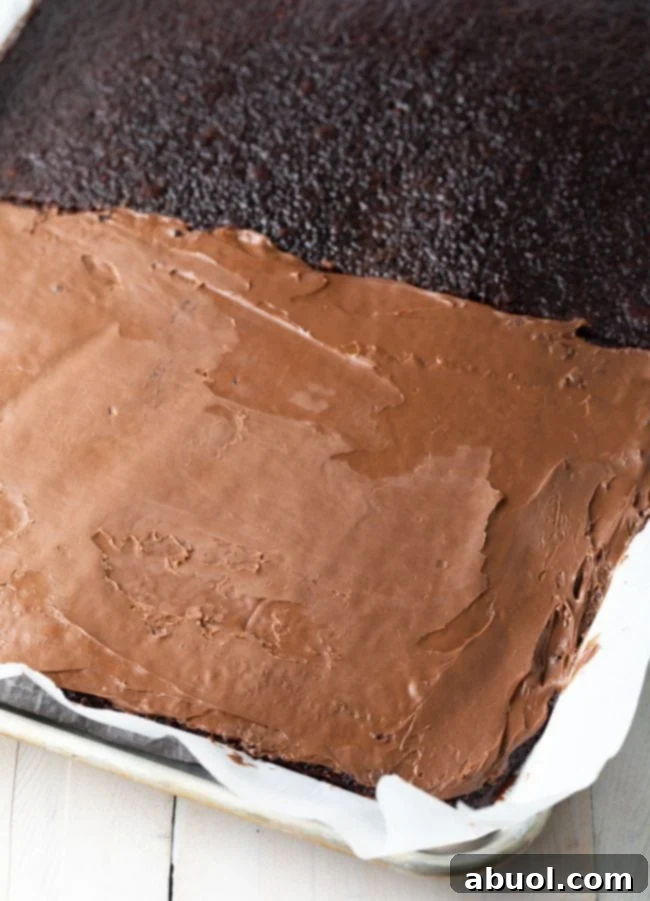
- Once the cakes are rock-hard, it’s time to prepare the chocolate coating. Place the dark chocolate chips and vegetable shortening in a small saucepot or a microwave-safe bowl. If using the stovetop, warm over very low heat, stirring constantly until the chocolate is completely melted and smooth. If using a microwave, heat in 30-second to one-minute increments, stirring well between each interval, until perfectly smooth and glossy.
- Line a large rimmed baking sheet with paper muffin liners, flattening one or two at a time. They may try to pop back up, but don’t worry about pressing more than a couple at once. To ensure the mini cakes remain cold and firm for easy dipping, take only 1-2 cakes out of the freezer at a time. Carefully poke a wooden skewer into the center of one frozen mini cake and quickly dunk it into the melted chocolate, ensuring it is fully coated. For complete coverage, you might find it helpful to use a small rubber spatula to gently spoon and splash chocolate over any uncovered spots. Work quickly to prevent the cake from softening and potentially falling off the skewer.
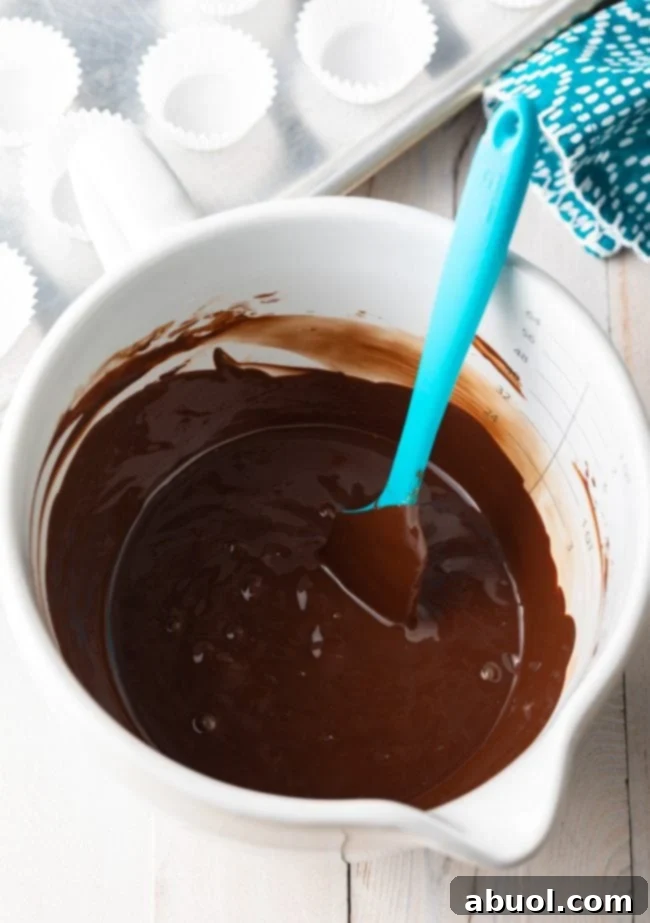
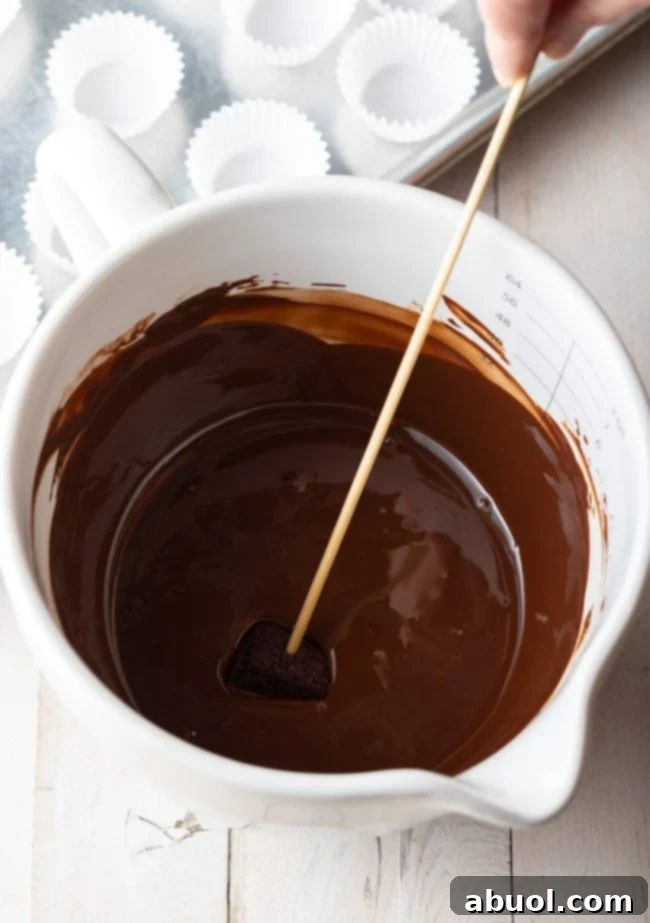
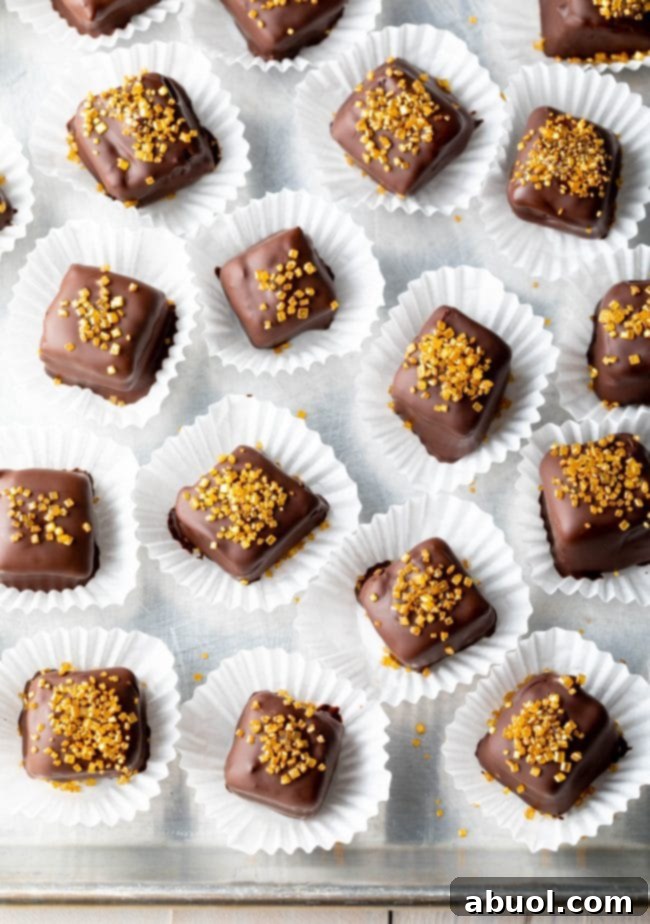
- Gently tap the skewer on the edge of the pot or bowl to remove any excess chocolate. You want a thin, even coating. Then, quickly transfer the chocolate-coated petit four onto one of the flattened paper liners. Carefully twist the skewer to release it from the cake. Use the tip of the skewer or a tiny spoon to quickly fill in the small hole left by the skewer with a dab of melted chocolate. Before the chocolate coating has a chance to set and harden, liberally sprinkle the top of each mini cake with your chosen decorative candy sprinkles.
Pro Tip for Decorating: Speed is key! Work in small batches and apply the sprinkles immediately after coating each petit four. This ensures the sprinkles adhere beautifully before the chocolate ganache begins to set, creating a professional and festive finish.
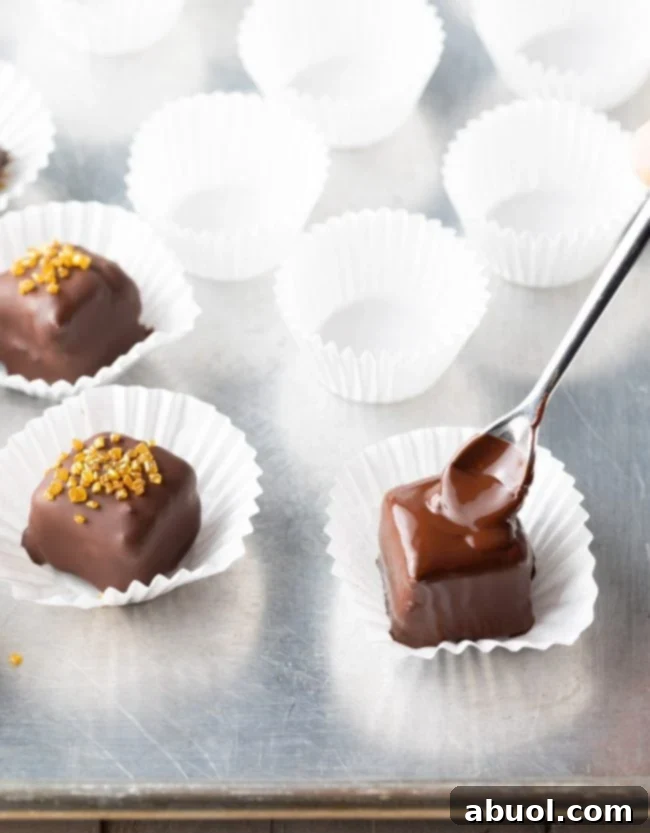
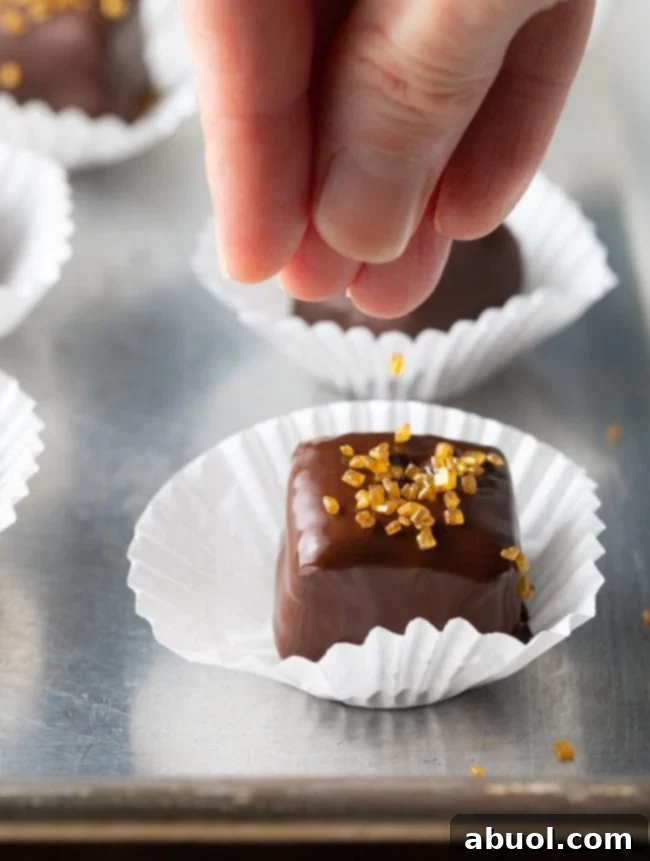
Continue this process, coating and decorating all the petit fours in batches. Remember to keep the majority of the mini cakes frozen until they are ready to be dipped, and rewarm the chocolate coating as needed to maintain its thin, fluid consistency. Once all your petit fours are coated and decorated, cover the baking sheet with plastic wrap to keep them fresh until serving.
Your Complete Chocolate Petit Fours Recipe Awaits Below. Enjoy Crafting These Delightful Treats!
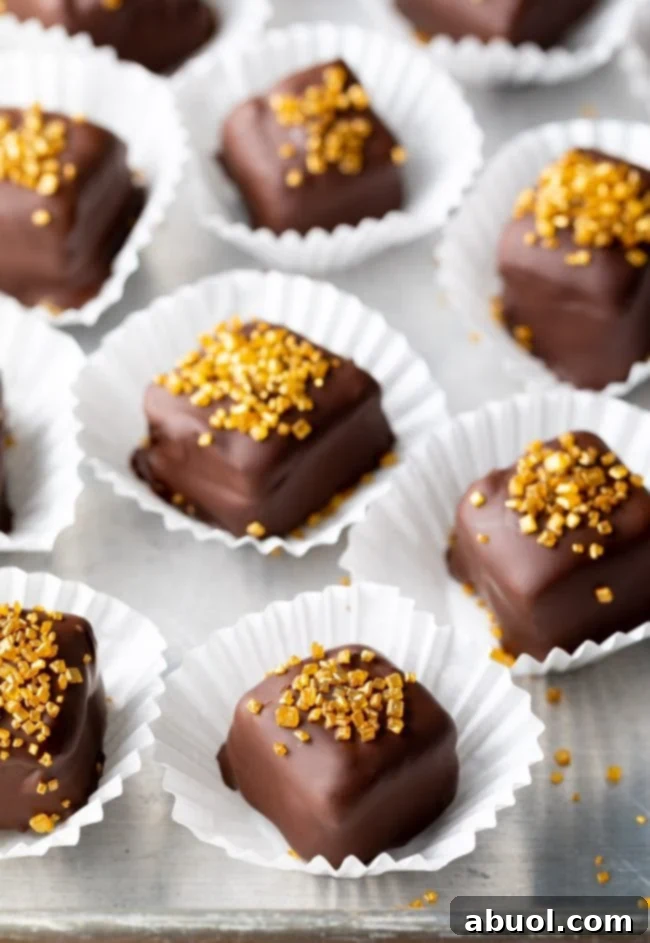
Elegant Serving Suggestions for Your Petit Fours
Chocolate petit fours are more than just dessert; they are miniature works of art that are perfect for almost any occasion. Their sophisticated appearance and delightful taste make them an ideal choice for elevating a variety of parties and get-togethers.
Consider serving these elegant mini cakes at a chic afternoon tea party, where they can be displayed alongside other delicate pastries. They would be absolutely perfect for a small, intimate DIY wedding reception, adding a personal and charming touch, or as a sweet treat for bridal showers, baby showers, or anniversary celebrations. Imagine ringing in the New Year with these festive bites, or celebrating a graduation with a burst of chocolatey sweetness.
For an even more impressive spread, consider offering a fun variety by serving them alongside other complementary flavors, such as Chocolate Pomegranate Petit Fours. Your guests will undoubtedly be impressed by the thoughtfulness and deliciousness of your homemade creations!
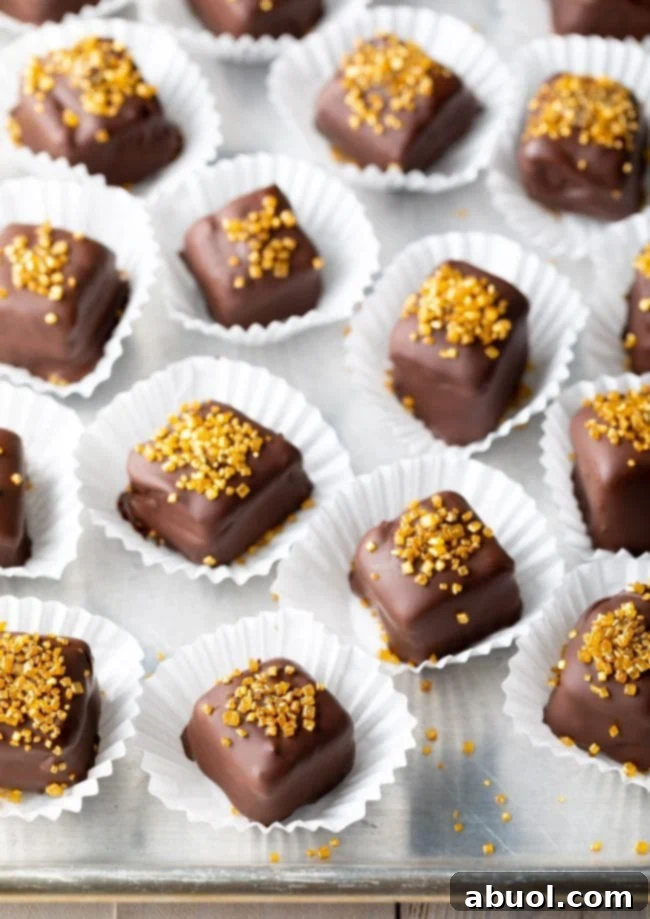
Exciting Recipe Variations to Explore
While our classic Chocolate Petit Fours recipe is a guaranteed hit, these mini cakes are incredibly versatile. Feel free to experiment with these variations to suit different tastes or dietary needs:
- Vegan Chocolate Petit Fours: Easily transform this recipe into a delicious vegan treat. Substitute the egg with an appropriate egg replacer like applesauce, flaxseed ‘egg,’ or a commercial vegan egg substitute. For the buttermilk, use a dairy-free alternative such as almond milk or soy milk curdled with a splash of lemon juice or vinegar. Ensure your chocolate chips are also dairy-free.
- Fruity Fillings: Introduce a burst of fresh flavor by adding a fruit layer. Instead of or in addition to Nutella, spread a thin layer of finely chopped fresh strawberries, sweet raspberry jam, or even a tangy apricot preserve. For an extra citrusy kick, mix a little orange zest into the cake batter or the Nutella filling.
- Alternative Flours: To incorporate a delightful nuttiness and a slightly different texture, swap out the all-purpose flour for almond flour. This also makes the recipe a fantastic gluten-free alternative. Ensure your almond flour is finely ground for the best results.
- Intense Espresso Flavor: For a more profound and robust chocolate taste, try using hot espresso (freshly brewed and strong) instead of regular hot coffee. The concentrated coffee flavor will beautifully enhance the chocolate without overpowering it, creating a richer, more sophisticated profile.
Expert Tips for Flawless Chocolate Petit Fours
Achieving petit fours that look as good as they taste is easier with a few insider tricks. Here are some pro tips to ensure your mini cakes turn out perfectly every time:
- Don’t Rush the Freezing: The most critical step for perfectly shaped petit fours is freezing. Ensuring the cake layers and then the cut mini cakes are rock-hard prevents crumbling during cutting and makes dipping in chocolate a breeze. Partially frozen cakes will fall apart or absorb too much chocolate.
- Sharp Knife is Your Friend: When cutting the cake, always use a very sharp serrated knife. Wipe the blade clean between each cut to get neat, crisp edges. This makes a huge difference in the final presentation of your squares.
- Keep Chocolate at the Right Consistency: The melted chocolate coating should be smooth and fluid, but not too hot. If it cools and thickens, gently rewarm it. If it gets too hot, it might cause the cake to melt slightly. The vegetable shortening is key here for that perfect sheen and easy dipping.
- Work in Batches: Whether you’re cutting the cakes or dipping them, work in small batches. This keeps the remaining cakes frozen and the chocolate at an optimal temperature, ensuring efficiency and quality.
- Thin Coating for Elegance: Aim for a thin, even layer of chocolate coating. A thick layer can overpower the delicate cake and make the petit four too rich. Tapping the skewer gently helps remove excess chocolate.
- Creative Decorations: Beyond sprinkles, consider other decorations. Edible glitter, finely chopped nuts, a drizzle of contrasting white chocolate, or small fondant cutouts can add unique flair for different occasions.
Make-Ahead and Storage Solutions
One of the best features of these chocolate petit fours is their suitability for making ahead, which greatly simplifies party planning. Here’s how to manage them:
- Make Ahead: The cake layers can be baked a day or two in advance and kept well-wrapped in the refrigerator. You can also assemble the cake with the Nutella layer and cut it into squares, then freeze them as instructed. This allows you to prepare the dipping and decorating closer to your event.
- Storing Finished Petit Fours: Once your chocolate mini cakes are fully assembled and decorated, place them on a baking sheet and cover tightly with plastic wrap to prevent them from drying out.
- Room Temperature: These sweet chocolate mini cakes can be kept at room temperature for 2-3 days, especially if your home is cool. However, for best freshness and to prevent the chocolate from softening in warmer climates, refrigeration is often preferred.
- Refrigerator Storage: Store the petit fours in an airtight container in the refrigerator for up to a week. The cold temperature will keep the chocolate coating firm and the cake moist. Bring them to room temperature for about 15-20 minutes before serving for the best flavor and texture.
- Freezing for Longer Storage: For longer preservation, arrange the finished petit fours in a single layer on a baking sheet and freeze until solid. Once frozen, transfer them to an airtight freezer-safe container, separating layers with parchment paper. They can be frozen for up to 1-2 months. Thaw them in the refrigerator overnight or at room temperature for a few hours before serving.
Frequently Asked Questions About Chocolate Petit Fours
How should I store chocolate petit fours?
Once your chocolate mini cakes are complete, arrange them on a baking sheet and cover them securely with plastic wrap to maintain their freshness. You can store these delightful treats at room temperature for 2-3 days. For extended freshness, especially in warmer environments, keep them in an airtight container in the refrigerator for up to a week. For longer storage, they can be frozen for 1-2 months, then thawed before serving.
Can I make gluten-free chocolate petit fours?
Absolutely! It’s quite simple to adapt this recipe to be gluten-free. Just swap the all-purpose flour with your preferred gluten-free flour blend. For optimal texture and structure, we highly recommend using a blend that contains a combination of starches, such as potato starch and tapioca starch, which often mimic the properties of traditional wheat flour very well.
How can I decorate these petit fours?
A simple yet effective decoration involves adding sprinkles to the top of each petit four before the chocolate coating hardens. This allows the sprinkles to adhere perfectly. You can customize the type and color of sprinkles to match the season, holiday, or special occasion. Alternatively, for an even fancier presentation, pipe a small dollop of buttercream frosting or a contrasting chocolate drizzle on top of each mini cake. Edible glitter or finely crushed nuts are also wonderful options for adding sparkle and texture.
How many petit fours should I plan per person?
When you’re planning for a gathering, it’s generally a good idea to estimate about 2-3 mini petit fours per person. Since this particular recipe yields a generous batch of approximately 100 petit four cakes, it’s an excellent choice for larger events or parties with around 30 people. The beauty is, if you happen to have any delicious leftovers, they store wonderfully in the refrigerator, allowing you to enjoy them over several days.
Craving More Classic Sweet Treat Recipes? Be Sure To Try:
- Chocolate Pomegranate Petit Fours
- Chocolate Dipped Lace Cookies
- Easy Marshmallow Fondant Recipe
- Nutella Chocolate Fondue Recipe
- Snowball Party Mix
- Blackout Mini Cake Recipe
- Chocolate Dipped Strawberries (Strawberry Pops)
- Ultimate Brownie Mix Cookies
- Red Velvet Cookie Pops
- Ghirardelli Brownie Mix (Homemade Brownies)
- Chocolate Budino
Chocolate Petit Fours Recipe

Prep Time: 1 hour
Cook Time: 15 minutes
Chill Time: 3 hours
Total Time: 4 hours 15 minutes
Whimsical and sweet chocolate mini cakes filled with Nutella and coated in melted chocolate. Petit Fours are easier to make than you might think, and are great for customizing with colored sprinkles!
Servings: 100 petit fours
Ingredients
For the Chocolate Cake –
- 1 cup granulated sugar
- 1 cup all-purpose flour
- 1/3 cup unsweetened cocoa powder
- 1 teaspoon baking powder
- ½ teaspoon baking soda
- ½ teaspoon salt
- 1 large egg
- ½ cup buttermilk
- ¼ cup vegetable oil
- 1 teaspoon vanilla extract
- ½ cup hot coffee (or hot water)
For the Filling –
- 2/3 cup Nutella chocolate hazelnut spread
For the Coating –
- 10 ounces dark chocolate chips (60% cacao)
- 2 tablespoons vegetable shortening
Instructions
- Preheat the oven to 350 degrees F (175°C). Set out a 13X18 rimmed baking sheet and line it with parchment paper. Spray the parchment with nonstick cooking spray.
- In the bowl of an electric mixer, add the sugar, flour, cocoa powder, baking powder, baking soda, and salt. Mix well to combine all dry ingredients.
- In a separate bowl (or measuring pitcher), combine the egg, buttermilk, oil, and vanilla extract. Whisk thoroughly until well combined.
- Turn the mixer on low speed and slowly pour the wet mixture into the dry mixture. Once fully incorporated, increase mixer speed to medium and beat for 1 minute. Scrape down the sides of the bowl with a rubber spatula. Then, return to low speed and beat in the hot coffee until the batter is smooth. Turn off the mixer.
- Pour the cake batter into the prepared pan. Gently shake the pan to evenly distribute the batter. Bake for 11-13 minutes, or until the cake is soft and fluffy in the middle and a toothpick comes out clean.
- Cool the cake for 15 minutes at room temperature. Then, transfer the cake pan to the freezer and freeze until the cake is firm, approximately 1-2 hours.
- Once the cake is firm, carefully cut it in half horizontally. Spread a thin, even layer of Nutella over one-half of the cake. Then, use the parchment paper to gently lift the plain cake half and place it over the Nutella layer, creating a two-layer cake. Peel off any remaining parchment paper. Use a serrated knife to trim off the rough edges, then cut the cake into 1-inch squares. You should have approximately 100 petit fours. Place the baking sheet with the mini cakes back into the freezer until they are very hard (about 1-2 hours).
- Once the cake is rock-hard, prepare the chocolate coating. Place the dark chocolate chips and vegetable shortening in a small saucepot or a microwave-safe bowl. Warm over low heat, stirring continuously until the mixture is fully melted and smooth. Alternatively, microwave in 30-60 second increments, stirring well after each, until smooth and glossy.
- Lay paper muffin liners on a large rimmed baking sheet, pressing 1-2 liners flat at a time. To ensure the cakes remain cold and firm for dipping, remove only 1-2 mini cakes from the freezer at a time. Poke a wooden skewer into the center of one cake and quickly dunk it into the melted chocolate, ensuring it’s fully coated. A spatula can help splash chocolate over any uncovered spots. Work quickly to prevent the cake from softening.
- Tap the skewer on the edge of the pot to remove any excess chocolate, aiming for a thin coating. Quickly transfer the petit four to one of the flattened paper liners. Gently twist the skewer to remove it, then immediately use the skewer or a small spoon to fill the small hole with melted chocolate. Before the chocolate hardens, sprinkle with decorative candy sprinkles.
- Repeat this process for all petit fours, working in batches to keep the mini cakes frozen and rewarming the chocolate as needed to maintain its thin consistency.
- Once finished, cover the baking sheet with plastic wrap to keep the petit fours fresh.
Notes
Store at room temperature for 2-3 days or in the refrigerator for up to a week. For longer storage, freeze for 1-2 months.
Nutrition
Serving: 1 mini cake, Calories: 48kcal, Carbohydrates: 6g, Protein: 1g, Fat: 2g, Saturated Fat: 2g, Trans Fat: 1g, Cholesterol: 2mg, Sodium: 23mg, Potassium: 39mg, Fiber: 1g, Sugar: 4g, Vitamin A: 5IU, Vitamin C: 1mg, Calcium: 15mg, Iron: 1mg