
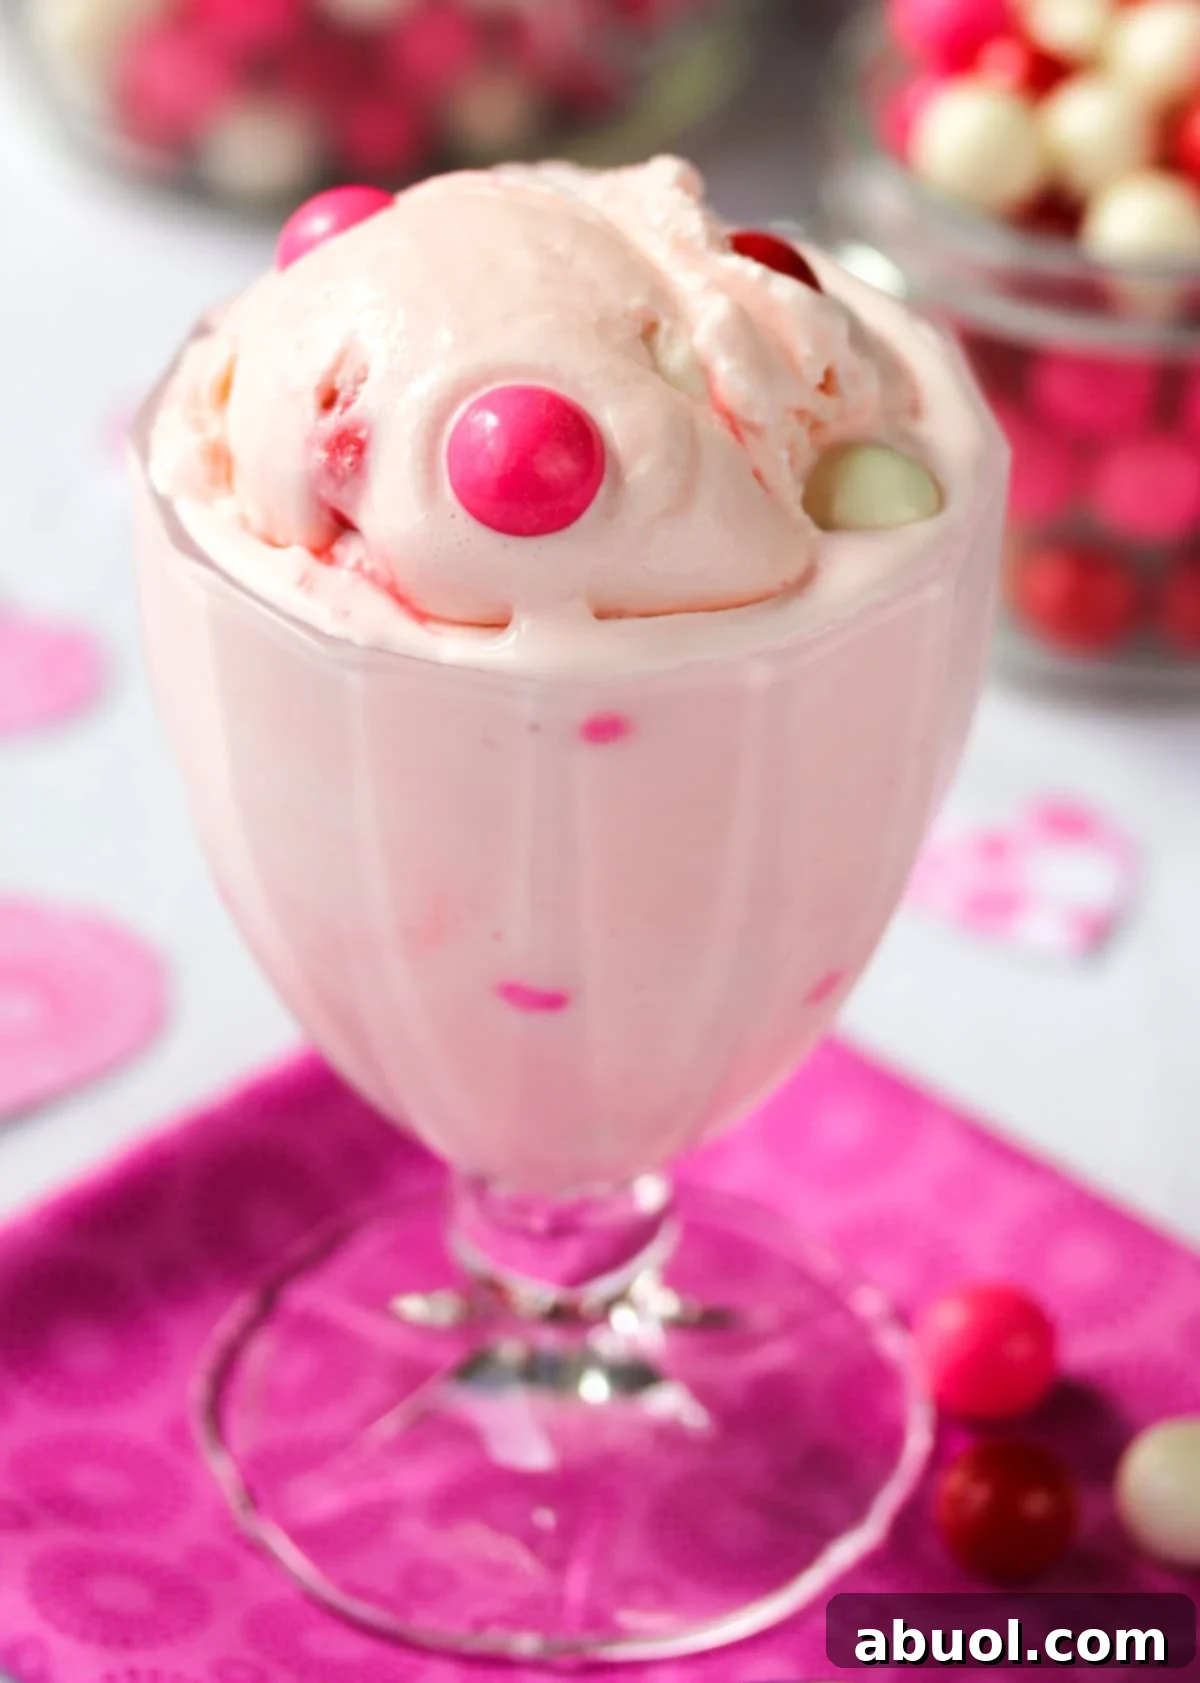
Step into a world of vibrant color and nostalgic flavor with our incredible Homemade Bubble Gum Ice Cream Recipe. Imagine a dessert so delightful, so perfectly pink, and so bursting with the sweet, iconic taste of bubblegum that it transports you straight back to your happiest childhood memories. Forget those long lines at your favorite ice cream parlor; this creamy, dreamy treat is not only easy to whip up in your own kitchen but promises a flavor experience even better than what you remember from places like Baskin Robbins! Crafted with real bubblegum pieces that infuse every scoop with authentic flavor, this vibrant ice cream is an absolute showstopper. It’s the ultimate dessert for birthdays, Valentine’s Day, summer gatherings, or any occasion where a touch of whimsical fun and irresistible sweetness is called for. Get ready to churn up pure joy!
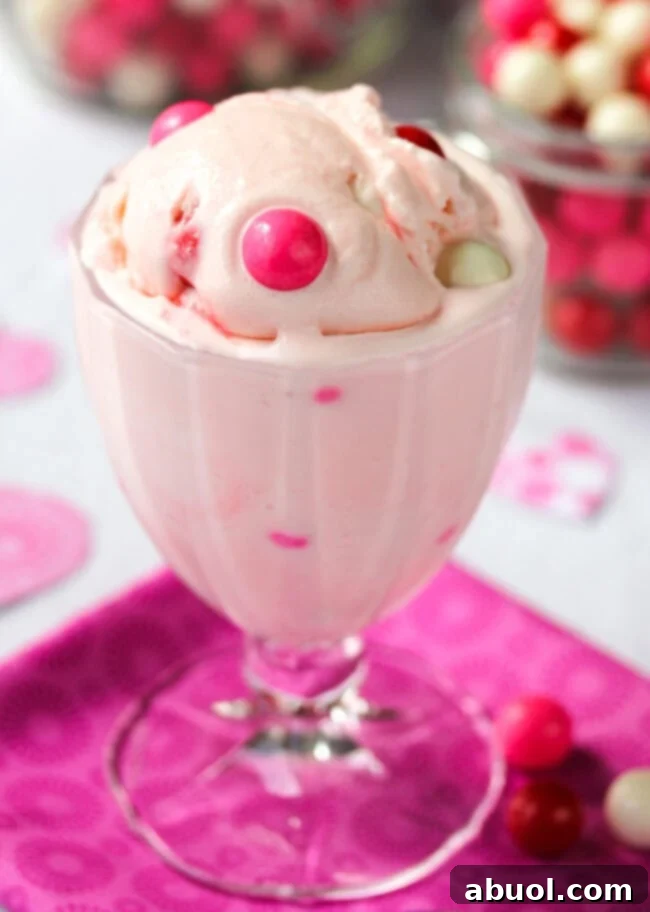
Why You’ll Adore This Homemade Bubble Gum Ice Cream
There’s something truly magical about food that captures the essence of childhood, and for me, this Homemade Bubble Gum Ice Cream does exactly that. It’s more than just a dessert; it’s a sensory journey back in time, filled with delightful memories.
I can vividly recall those exciting trips to the local ice cream shop with my parents. I’d slowly drift along the glass case, mesmerized by the myriad of flavors – Rocky Road, Butter Pecan, Mint Chocolate Chip. Each visit brought the dilemma of trying something new, yet deep down, I always knew my heart belonged to that iconic, cheerful pink bubblegum ice cream. It was an unspoken tradition, a sweet secret between my younger self and the frosty treats.
The allure wasn’t just in the sweet, creamy bubblegum-flavored base, but in the thrilling treasure hunt for those rock-hard gumballs hidden within. I’d meticulously scoop around them, carefully preserving each one for the grand finale. The best part? When everyone else had long finished their cones or cups, I was still happily chomping away on my giant wad of bubblegum, a triumphant smile on my face. That unique, lingering delight truly epitomized my childhood joy. Sigh… those were the days.
What makes this particular homemade Baskin Robbins copycat bubblegum ice cream recipe truly exceptional is that the ice cream base itself is infused with genuine bubblegum flavor. While you could opt for artificial bubblegum extract found at cake supply stores, our secret to an authentic, deep flavor lies in infusing real bubblegum pieces directly into the ice cream mixture. This method ensures a taste that’s both vibrant and authentic, making every spoonful a pure delight. Of course, you could technically omit the gumballs, but why would you want to miss out on that iconic surprise at the bottom of your bowl? It even has a little protein in it, which is a bonus!
This recipe is designed for ease, made perfectly with the help of an ice cream maker, ensuring a smooth, rich consistency that’s simply divine. So simple, in fact, that your inner child could practically make it! Get ready to relive those cherished moments with every delicious bite.
Essential Ingredients for Your Pink Perfection
Crafting the perfect homemade bubblegum ice cream begins with selecting the right ingredients. Each component plays a vital role in achieving that creamy texture, vibrant color, and unforgettable flavor. Here’s what you’ll need to gather:
- Half & Half AND Heavy Whipping Cream: This dynamic duo is the secret to an incredibly rich, luxurious, and utterly delicious ice cream base. The combination provides the perfect balance of fat and dairy for that signature creamy mouthfeel. Do not skimp on these for the best results.
- Granulated Sugar: Simple white granulated sugar is ideal for sweetening our ice cream, ensuring the bubblegum flavor shines through without any competing notes. It dissolves easily, contributing to a smooth texture.
- Egg Yolks: These are crucial for creating a custard-style base, which lends a silky, dense texture to the ice cream and prevents it from freezing into an icy block. Don’t worry about the leftover egg whites; they’re perfect for making a light and airy Angel’s Food Cake or a batch of meringues!
- Vanilla Extract: Use a high-quality pure vanilla extract. While bubblegum is the star, vanilla enhances the overall sweetness and rounds out the flavor profile, adding depth and warmth.
- Pinch of Salt: A tiny bit of salt is absolutely essential when making ice cream. It brightens all the flavors and, surprisingly, helps to prevent the mixture from freezing rock-solid, ensuring a scoopable consistency.
- Red Food Coloring (Optional): This is entirely optional, but a few drops will help achieve that iconic vibrant pink hue. The infused gum pieces will naturally impart a light pink, but for a truly eye-catching shade, food coloring is your friend.
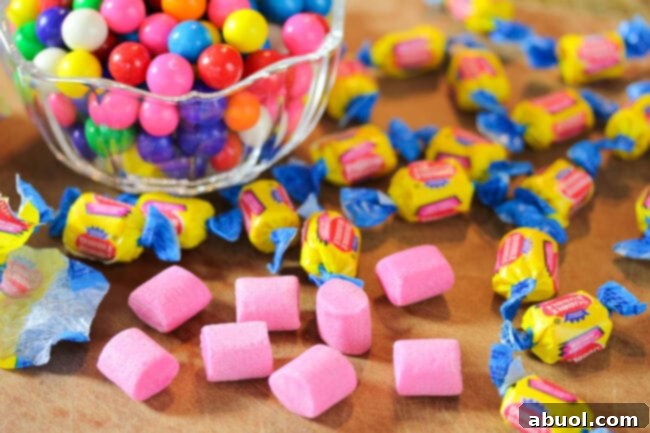
- Pink Bubblegum (like Dubble Bubble): This is where the magic happens! My personal favorite is Dubble Bubble for its classic flavor, but feel free to use any other brand of “pure” bubblegum that you love. Make sure it’s genuine bubblegum, not a chewing gum with a different flavor. The flavor release from these pieces is key to our unique infusion method.
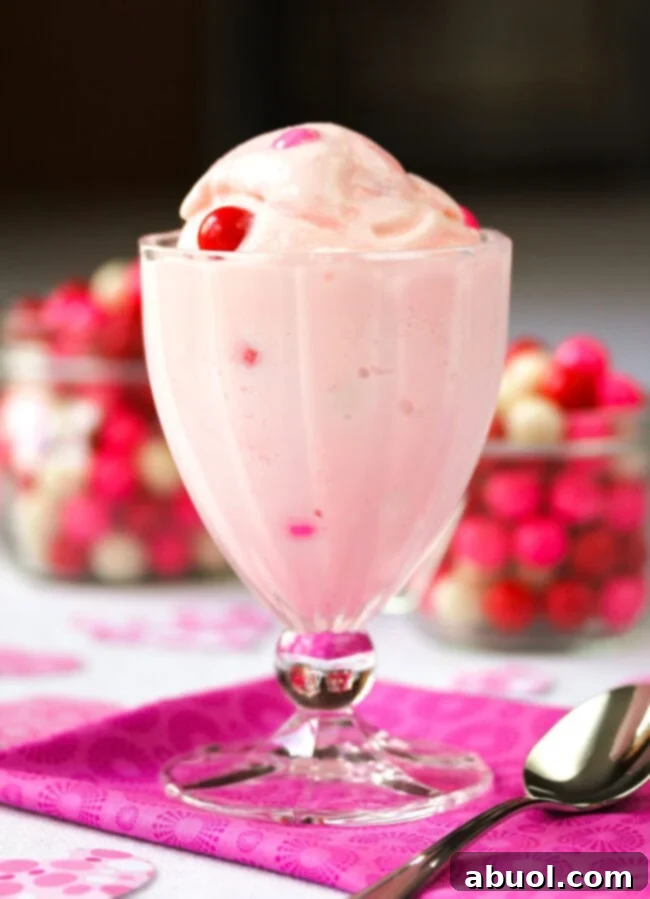
- Small Gum Balls: Also optional, but highly recommended for decorating and for adding that authentic “Baskin Robbins” experience. These are the delightful little surprises that make eating bubblegum ice cream so much fun.
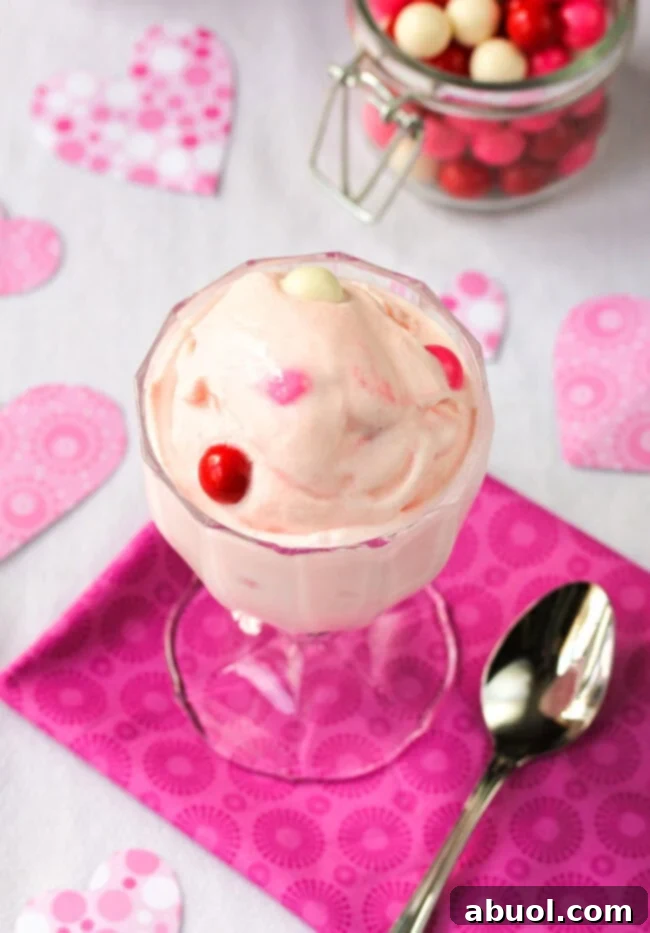
Pro Tip for a Festive Touch: For a special occasion like Valentine’s Day, I like to hand-pick through the bag of gumballs, selecting only the red, white, and pink ones. This creates a charming and festive surprise that adds an extra layer of delight to your homemade ice cream. Of course, any color combination works just as wonderfully!
Crafting Your Dream: How to Make Pink Bubble Gum Ice Cream
Creating this irresistible pink bubblegum ice cream is a rewarding process that combines a touch of culinary science with a whole lot of fun. Follow these simple steps to churn your way to a perfect batch:
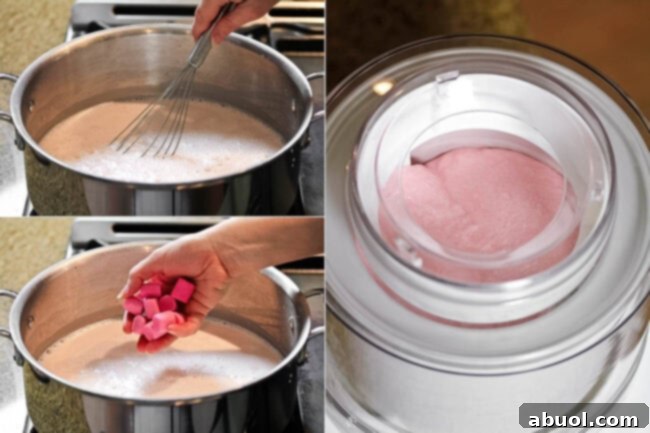
- Prepare the Base: In a medium saucepan, combine the half & half, heavy whipping cream, granulated sugar, egg yolks, vanilla extract, and a pinch of salt. Whisk all these ingredients together thoroughly over medium heat. Ensure the egg yolks are completely incorporated and the mixture is smooth before proceeding. Continuously stir to prevent scorching, especially at the bottom of the pan.
- Infuse the Bubblegum Flavor: Once your base mixture is warm and smooth, add the pieces of pink bubblegum to the saucepan. Continue to whisk the mixture constantly as you bring it to a light boil. The heat will cause the gum to soften and release its distinct flavor and some of its color into the creamy base. Keep whisking until the gum pieces are very soft, almost dissolving, and the base has visibly thickened to a custard-like consistency. This process usually takes about 5-7 minutes after reaching a simmer.
- Chill the Mixture: Remove the pot from the heat immediately after the base has thickened. Cover the saucepan with a lid or plastic wrap, making sure the wrap touches the surface of the mixture to prevent a skin from forming. Place the covered pot in the refrigerator to chill completely. This step is crucial for the final texture of your ice cream. Allow it to chill for at least 3 hours, but for the best results and deepest flavor infusion, letting it chill overnight is highly recommended. The colder the base, the better your ice cream maker will perform.
- Strain for Smoothness: Before you pour the chilled ice cream base into your ice cream maker, you’ll need to remove the softened gum residue. Place a paper towel or a fine-mesh sieve into a colander, and position the colander over a large bowl or pitcher. Carefully pour the chilled ice cream base through the paper towel/sieve to strain out all the gum particles. This ensures your final ice cream will have a perfectly smooth, delightful texture, with only the pure bubblegum flavor remaining.
- Churn the Ice Cream: Pour the smooth, thoroughly chilled base mixture into the frozen bowl of your ice cream maker. Follow your ice cream maker’s instructions for churning. Typically, this process takes about 20 to 30 minutes, or until the ice cream reaches the consistency of soft-serve. The churning process introduces air, creating that wonderful, creamy texture.
- Add the Gumballs & Enjoy: Once the ice cream has finished churning and has a soft, frozen consistency, you can fold in your small gumballs. This is where the childhood magic truly comes to life! Gently mix them in, distributing them evenly. You can enjoy your homemade bubblegum ice cream immediately for a soft-serve experience, or transfer it to an airtight container and freeze for a few more hours (at least 2-4) to achieve a firmer, scoopable consistency.
Ready to create your own batch of happiness? Get the Complete (Printable!) Bubble Gum Ice Cream Recipe details below. Enjoy!
Frequently Asked Questions About Bubble Gum Ice Cream
While the small gumballs added at the end are meant for chewing (and are what give this ice cream its unique charm!), the original bubble gum pieces used to flavor the base are removed. During the cooking process, the warm ice cream base melts the real pieces of bubble gum, extracting their sugar, flavor, and some of their vibrant color. After cooling in the fridge, the ice cream base is then strained to remove any bubble gum residue. This leaves you with a perfectly smooth, nostalgically flavored ice cream base, while the chewable gumballs are added separately at the end for that delightful surprise!
It’s easy to customize! Simply swap the red food coloring for blue food coloring when you’re making the homemade bubblegum ice cream base. Since the natural pink gum pieces will impart a slight pinkish tint, you’ll likely need to use several drops of blue food coloring to achieve a deep, vibrant blue color that truly stands out. Experiment with the amount until you reach your desired hue!
This sweet treat is already a party in a bowl with its built-in goodies, but if you’re feeling a little “extra,” there are some fantastic options! Consider a generous swirl of classic whipped cream, topped with a bright red maraschino cherry for a traditional sundae feel. For added texture and fun, a sprinkle of colorful sprinkles or mini chocolate chips can also be delightful. Think vibrant and playful toppings to complement the ice cream’s cheerful nature!
Surprisingly, cleaning gum residue from your saucepan is much easier than you might think! Simply fill the dirty pot with water and bring it to a boil. The heat will soften and loosen any remaining gum particles, causing them to float to the top or easily scrape off. A quick wash with soap and water afterward will leave your pot sparkling clean.
Bubblegum ice cream has a fascinating history! It was first introduced by Baskin-Robbins in 1970, conceived as a playful tribute to all the bubblegum enthusiasts. The original flavor featured a vanilla base infused with bubblegum flavoring and studded with bubblegum candy pieces. Baskin-Robbins hoped it would become an iconic American favorite, and indeed, it quickly captured the hearts (and taste buds) of many, becoming a beloved nostalgic treat.
For optimal freshness and texture, store your delightful pink bubblegum ice cream in an airtight container in the freezer for up to one month. Beyond that, it might start to lose some of its creamy texture and flavor vibrancy due to ice crystal formation. When you’re ready to enjoy, simply let the container soften on the counter for about 10-15 minutes before scooping, allowing it to reach that perfect, creamy consistency.
Expert Tips for Your Best Bubble Gum Ice Cream
Achieving perfectly creamy and flavorful homemade ice cream is all about a few key techniques. Keep these tips in mind as you embark on your bubble gum ice cream adventure:
- Thorough Chilling is Key: The most crucial step for any homemade ice cream is ensuring your base mixture is thoroughly chilled before churning. If the base isn’t cold enough (ideally refrigerator temperature for several hours or overnight), your ice cream maker will struggle to freeze it properly, resulting in a less creamy, more icy texture.
- Pre-Freeze Your Ice Cream Maker Bowl: Always make sure your ice cream maker’s bowl has been in the freezer for the recommended time (usually 12-24 hours) until it’s completely solid. A well-frozen bowl is essential for efficient churning and the best consistency.
- Don’t Rush the Infusion: Allow enough time for the bubblegum pieces to soften and infuse their flavor into the base. Gentle, continuous whisking over medium heat prevents scorching and ensures maximum flavor extraction.
- Strain Diligently: The straining step is non-negotiable for a smooth ice cream. Even small bits of gum residue can affect the final texture. A paper towel in a colander works wonders for a super-fine strain.
- Quality Ingredients Matter: While simple, the quality of your heavy cream, half & half, and vanilla extract will make a noticeable difference in the richness and overall flavor of your ice cream. Opt for good quality ingredients when possible.
- Experiment with Color: Don’t be afraid to adjust the amount of food coloring to achieve your desired shade of pink (or even blue!). Start with a drop or two and add more until you’re happy with the intensity.
Looking for More Delightful Dessert & Main Course Treats? Be Sure to Also Try:
- Best Cream Cheese Pound Cake Recipe: A rich and tender cake, perfect for any celebration.
- Standing Rib Roast Recipe (Prime Rib Au Jus): An impressive main course for a special occasion.
- Best Strawberry Pretzel Salad Recipe: A sweet and savory dessert with a delightful crunch.
- Stuffed Tomatoes with Cheese Soufflé: An elegant and unique appetizer or side dish.
- Ultimate Frozen Hot Chocolate Beverage: A luxurious, icy chocolate treat that’s perfect any time.
- Homemade Strawberry Cake from Scratch: A moist and flavorful cake bursting with fresh strawberry goodness.
- Epic Cacio e Pepe Pasta: A simple yet incredibly flavorful classic Italian pasta dish.
- Valentine’s Day Snack Trail Mix: A fun and easy snack mix with a festive twist.
- Chocolate Dipped Strawberries (Strawberry Pops): An easy and elegant sweet treat, perfect for gifting or sharing.
- Nutella Chocolate Fondue Recipe: A decadent and interactive dessert experience.
- Best Strawberry Cookie Pizza: A delightful and playful dessert with a sweet cookie crust.
- Mexican Brownies: Brownies with a spicy kick, a unique and memorable dessert.
- Hummingbird Cupcakes with Sour Cream Frosting: A tropical-inspired cupcake, moist and flavorful.
You’ve waited long enough! Get the Full, Easy-to-Follow, and Printable Bubble Gum Ice Cream Recipe Below. Prepare to be delighted!
Print Recipe
Bubble Gum Ice Cream Recipe
Ingredients
- 2 1/2 cups half & half
- 1 1/2 cups heavy cream
- 3/4 cup granulated sugar
- 2 egg yolks
- 1 teaspoon vanilla extract
- Pinch salt
- 1-2 drops red food coloring optional
- 10 pieces pink bubble gum Dubble Bubble recommended
- 1 cup small gumballs
Instructions
-
Whisk all the ingredients (half & half, heavy cream, sugar, egg yolks, vanilla, salt, and optional red food coloring), excluding the bubble gum pieces and gumballs, in a saucepan over medium heat. Ensure the egg yolks are well combined and the mixture is smooth. Stir continuously to prevent sticking.
-
Add the 10 pieces of pink bubble gum to the mixture. Continue whisking as you bring the mixture to a light boil. Whisk until the gum softens and releases its flavor, and the ice cream base has thickened to a custard-like consistency (about 5-7 minutes after simmering).
-
Remove the saucepan from the heat, cover it with a lid or plastic wrap, and place it in the fridge. Allow it to chill completely until very cold – at least 3 hours, but chilling overnight is highly recommended for best results.
-
Before pouring the chilled ice cream base into the frozen bowl of your ice cream maker, place a paper towel or fine-mesh sieve in a colander. Strain the base through the colander to remove all the gum particles, leaving a smooth, flavorful liquid.
-
Pour the strained, smooth base into your ice cream maker and churn for 20-30 minutes, or according to your machine’s instructions, until it reaches a soft-serve consistency.
-
Once churned, gently fold in the small gumballs. Serve immediately for a soft texture, or transfer to an airtight container and freeze for an additional 2-4 hours to firm up before scooping and enjoying.