
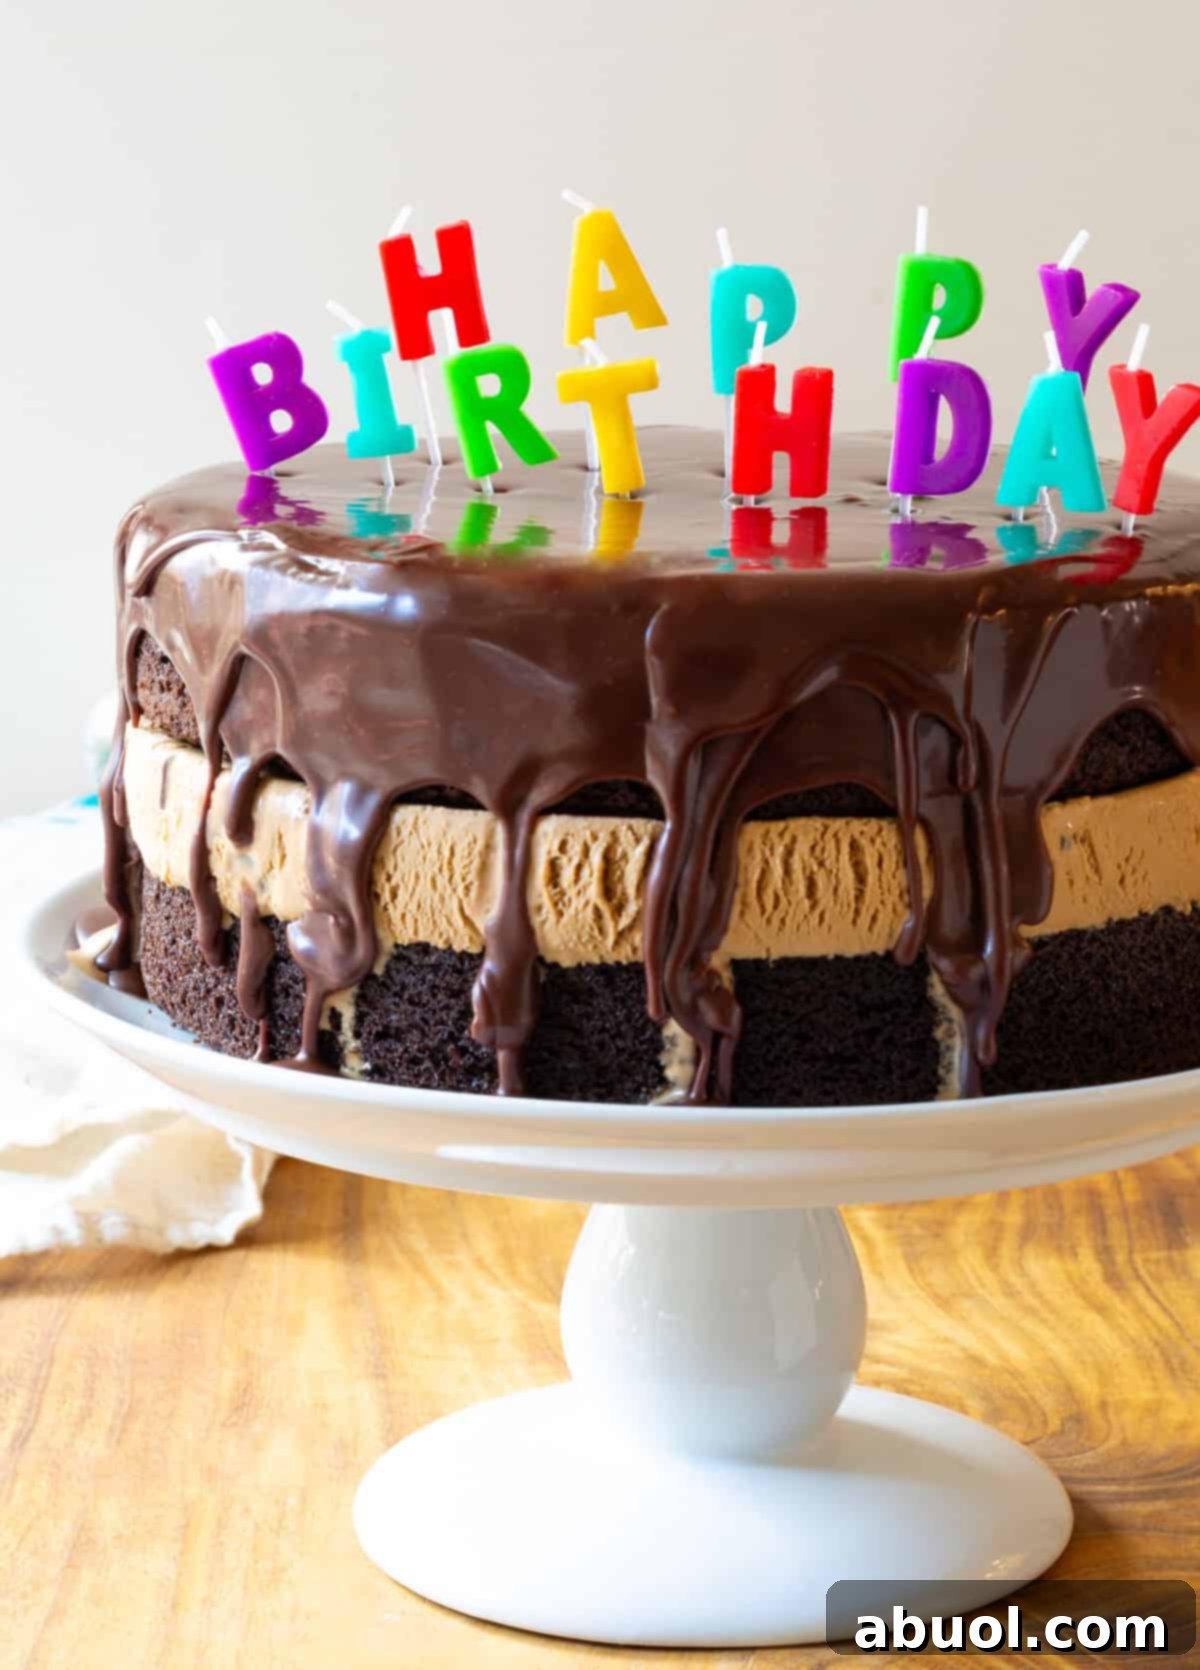
Unleash your inner baker with this spectacular homemade ice cream cake recipe, a surefire hit for any celebration, from birthday parties to festive gatherings. This decadent dessert features rich, tender chocolate cake layers embracing a thick, creamy center of luscious caramel ice cream, all crowned with an irresistible, glossy chocolate ganache. Beyond its stunning presentation, this recipe offers incredible versatility, allowing you to easily customize it with your favorite cake and ice cream flavors for a truly personalized treat.
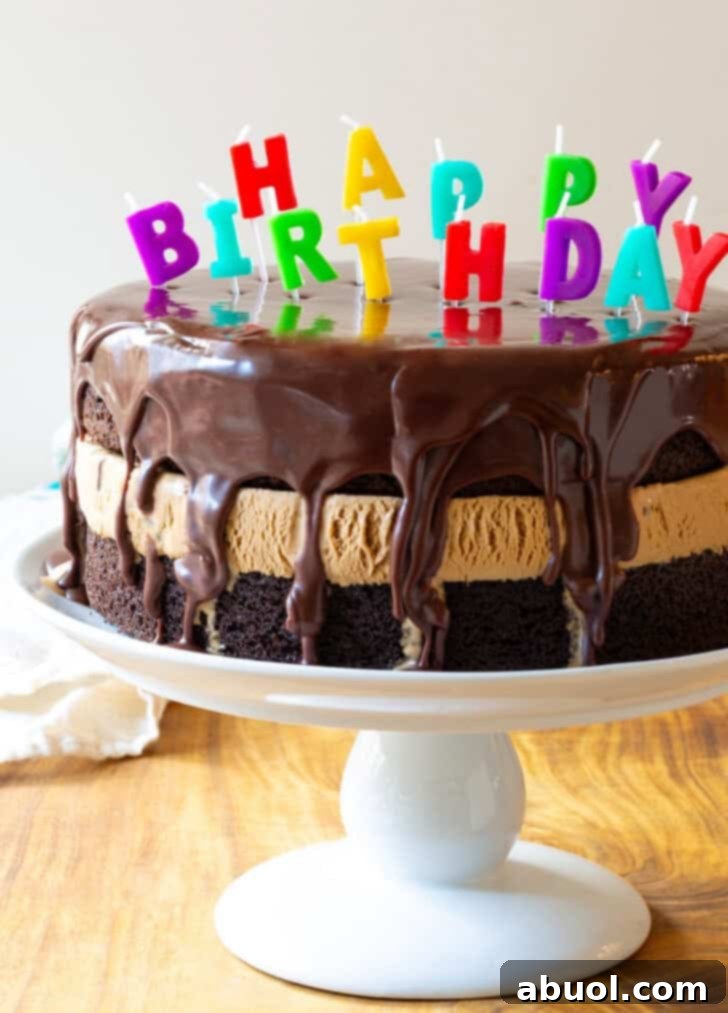

Sommer’s Sweet Secrets: Why This Ice Cream Cake is a Must-Try
There’s an undeniable magic that happens when you combine two classic celebratory treats: cake and ice cream. This homemade ice cream cake recipe perfectly marries these elements into a single, show-stopping dessert that promises convenience and pure delight. For years, homemade ice cream cakes have been a staple at our family’s birthday celebrations, always tailored with different ice cream flavors to suit the birthday star’s wishes.
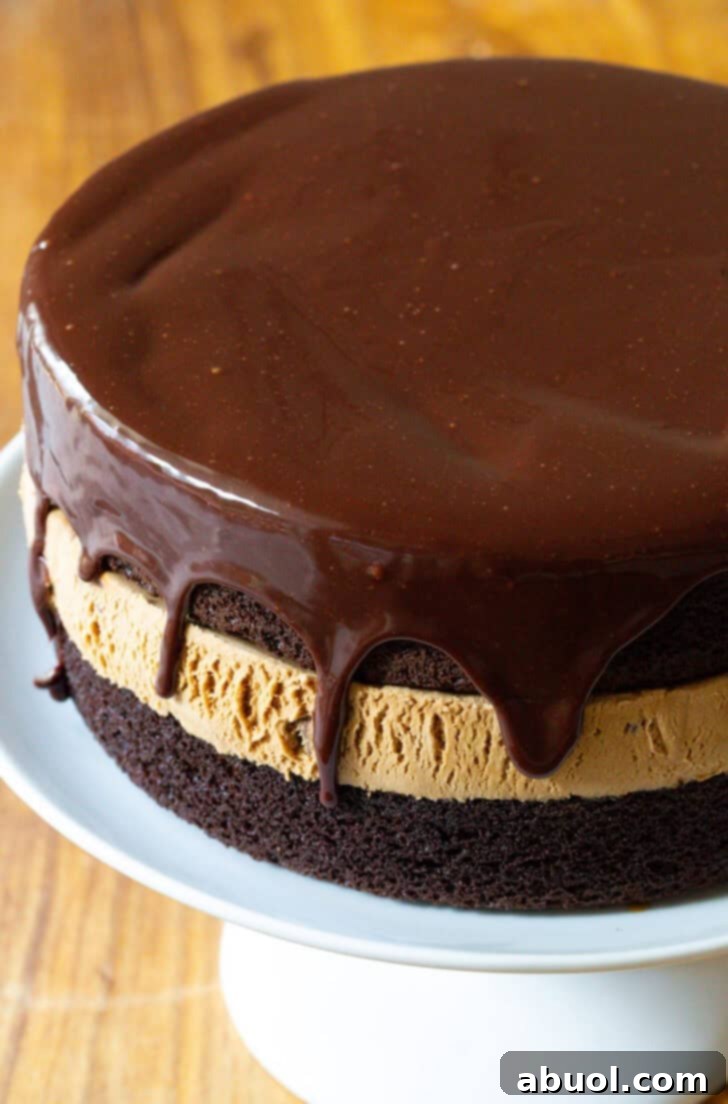
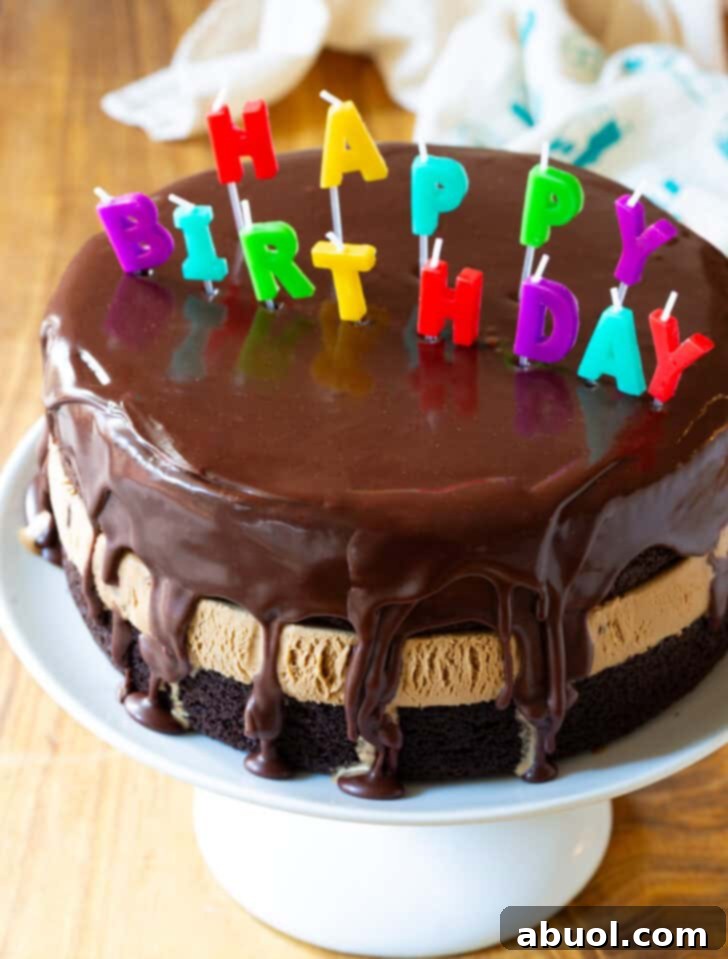
However, this specific combination of moist, rich chocolate cake paired with sweet and slightly salty caramel ice cream remains a timeless family favorite. To elevate the “wow” factor even further, we finish this magnificent cake with a thick, beautifully shiny dark chocolate ganache, artfully drizzled down the sides. It’s a dessert that not only tastes incredible but also looks like it came straight from a gourmet bakery.
Key Reasons to Love This Irresistible Ice Cream Cake Recipe
- A Perfect Make-Ahead Dessert: Planning a party can be hectic, but your dessert doesn’t have to add to the stress! This ice cream cake is designed to be made in stages, allowing you to bake the cakes, freeze the ice cream layer, and assemble everything well in advance. Once fully constructed, simply keep it stored in the freezer until your event, freeing you up to enjoy the festivities without last-minute dessert preparations. It’s the ultimate stress-free party treat!
- Infinitely Customizable for Every Palate: While our classic chocolate cake and caramel ice cream pairing is a guaranteed crowd-pleaser, this recipe serves as a versatile canvas for your culinary creativity. Feel free to experiment with a myriad of ice cream flavors and cake bases. Whether you crave fruit, nuts, or another chocolate variety, this recipe effortlessly adapts to your family’s favorite tastes and seasonal availability.
- The Ultimate Party Showstopper: Imagine presenting a stunning homemade dessert adorned with glossy ganache drips, knowing you created such a masterpiece! This decadent chocolate ice cream cake is more than just a dessert; it’s a centerpiece that ignites joy and celebration. Its impressive appearance and delightful flavor profile make it an unforgettable finale to any gathering, guaranteeing smiles and compliments from all your guests.
Indeed, this fabulous frozen dessert is so spectacular, it’s reason enough to throw a party all on its own!
Essential Ingredients for Your Delicious Ice Cream Cake
Crafting the perfect homemade ice cream cake begins with selecting quality ingredients. Here’s a breakdown of what you’ll need and some valuable tips to ensure the best results:
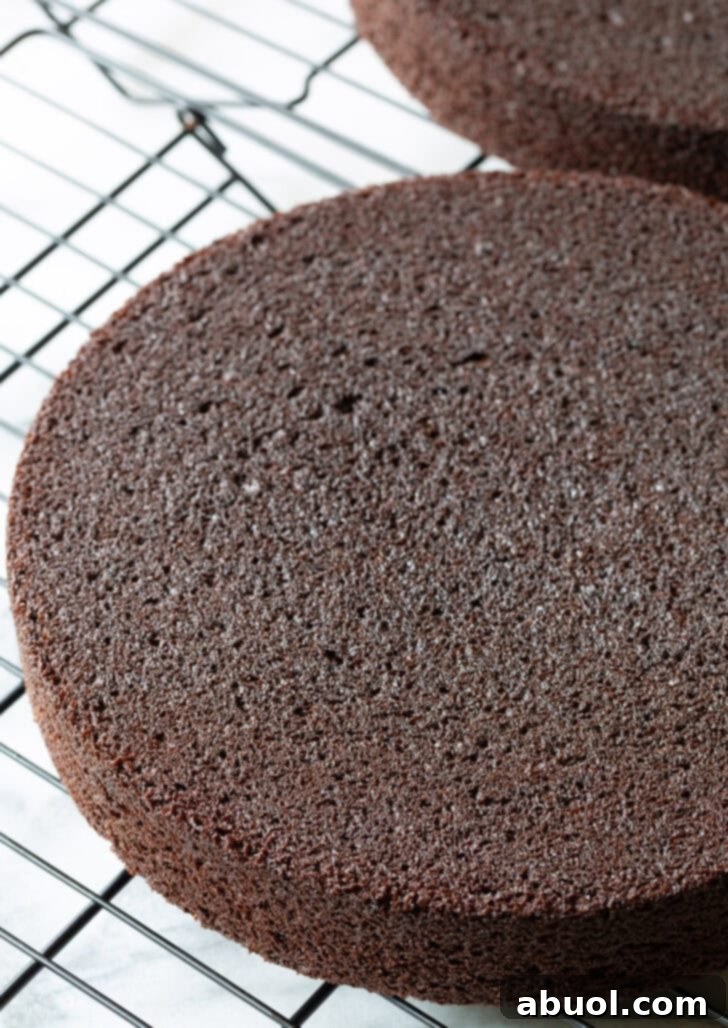
- For the Rich Chocolate Cake Layers: You’ll need standard dry baking ingredients such as granulated cane sugar, all-purpose flour, unsweetened cocoa powder for deep chocolate flavor, baking powder, baking soda, and a pinch of salt to balance the sweetness. For the wet ingredients, we use sour cream to infuse moisture and tenderness, large eggs for structure, vegetable oil (or coconut oil) for richness, pure vanilla extract for aromatic depth, and, crucially, very hot coffee. The hot coffee isn’t just for moisture; it “blooms” the cocoa powder, intensifying the chocolate flavor without making the cake taste like coffee.
- The Creamy Ice Cream Filling: Our go-to choice for this recipe is sweet and lightly salty caramel ice cream or gelato, which perfectly complements the chocolate cake. However, this is where you can truly make the cake your own! Feel free to choose any flavor that speaks to you – from classic vanilla bean to refreshing mint chip or vibrant strawberry. The key is to select a high-quality ice cream that will stand up to freezing and slicing.
- For the Irresistible Chocolate Ganache Topping: The stunning, drippy ganache is surprisingly easy to make. You’ll need good quality dark chocolate pieces (chips or a chopped bar work well), heavy cream for richness, and a touch of corn syrup. The corn syrup is optional but highly recommended as it gives the ganache a beautiful, professional-looking gloss and helps it maintain its smooth texture even when frozen.
Unlock Endless Flavor Possibilities: Customize Your Ice Cream Cake
One of the best aspects of this easy ice cream cake recipe is its incredible adaptability. Here are some ideas to inspire your next creation, allowing you to tailor this dessert to any preference or occasion:
- Gluten-Free Perfection: Easily transform this into a gluten-free dessert by simply substituting the all-purpose flour with your favorite 1:1 gluten-free baking mix. Ensure your chosen mix contains xanthan gum for optimal texture, and follow the rest of the recipe as instructed.
- Creative Cake Bases: While our rich chocolate cake is sublime, don’t hesitate to experiment with different cake flavors. Try a light and airy strawberry cake for a fruity twist, a classic vanilla cake for timeless appeal, or even a convenient store-bought or boxed cake mix for a quicker assembly. The possibilities are truly endless!
- Ice Cream Dream Combinations: The heart of any ice cream cake is its frozen layer. Unleash your imagination beyond caramel! Opt for store-bought favorites like refreshing mint chip, tangy raspberry swirl, or creamy coffee. For an even more homemade touch, consider crafting your own ice cream flavors such as easy homemade vanilla, exotic lavender dark chocolate chip, or a summery blueberry pie ice cream.
- Ganache Without Corn Syrup: If you prefer to omit corn syrup from your ganache, you certainly can. Be aware, however, that the ganache may lose some of its signature glossy sheen and might not drip quite as smoothly. The flavor will still be delicious!
- Delightful Toppings & Decorations: Before your ganache fully sets in the freezer, consider sprinkling extra toppings over the cake for added texture and visual appeal. abuol.com choices include crushed Oreo cookies, chopped candy bars, colorful sprinkles, toasted nuts, or even fresh fruit for a touch of elegance.
Crafting Your Homemade Ice Cream Cake: A Detailed Guide
Making a spectacular homemade ice cream cake is a rewarding process. Follow these step-by-step instructions to ensure a perfect result every time:
Pro Tip for Success: Thoroughly freeze each component and the assembled cake. Patience during freezing ensures clean layers and easy handling. When ready to enjoy, remove the cake from the freezer and allow it to soften slightly at room temperature for 10-15 minutes before slicing. This will make cutting effortless and the ice cream perfectly scoopable.
Baking the Perfect Chocolate Cake Layers
-
Preheat your oven to 350°F (175°C). Prepare two 8-9 inch round cake pans by coating them with nonstick cooking spray. For easy removal, cut parchment paper circles to fit the bottom of each pan and press them firmly into place. This small step makes a big difference!
-
In the spacious bowl of an electric stand mixer, combine all the dry ingredients: granulated sugar, all-purpose flour, unsweetened cocoa powder, baking powder, baking soda, and salt. Mix these on low speed just until they are well combined. Next, add the wet ingredients: sour cream, eggs, vegetable oil (or coconut oil), and vanilla extract. Beat the mixture on medium speed until just combined, ensuring no overmixing. Scrape down the sides of the bowl with a rubber spatula. With the mixer on low speed, slowly pour in the hot coffee. Continue to beat until the batter is uniformly thin and smooth.
-
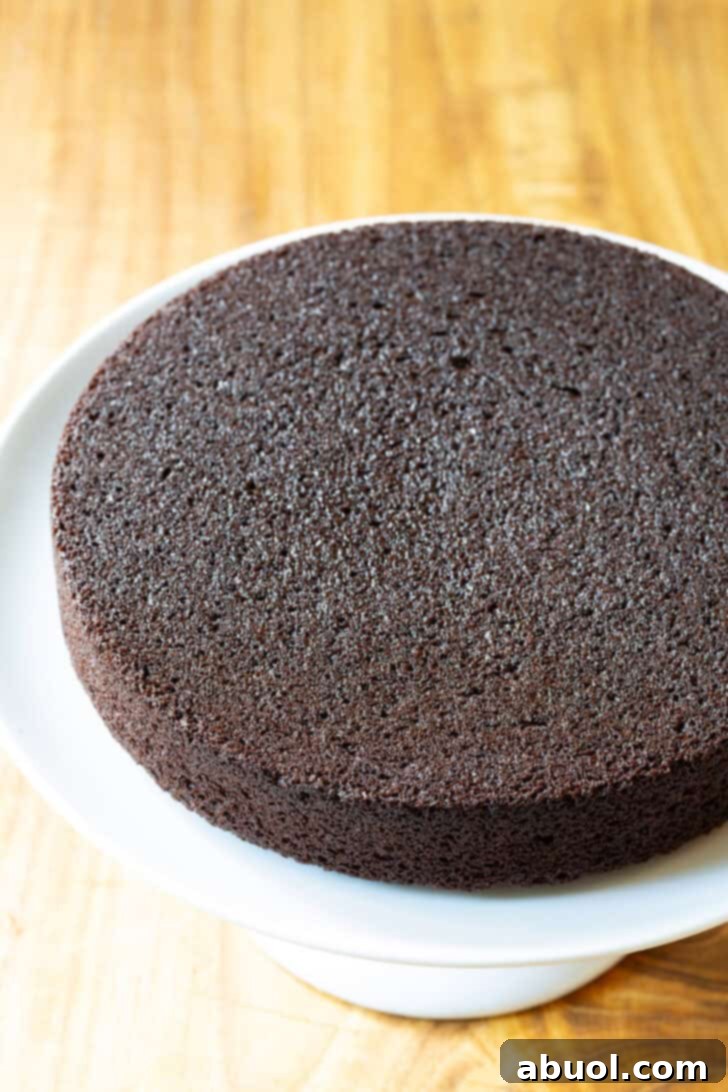
Evenly divide the chocolate cake batter between your two prepared cake pans. Bake for approximately 30-35 minutes, or until a wooden toothpick inserted into the center of the cake comes out clean. Allow the cakes to cool in their pans for a brief 5 minutes before carefully inverting them onto wire cooling racks. Gently peel off the parchment paper and let the cakes cool completely at room temperature. This cooling process is crucial before freezing.
Preparing the Creamy Ice Cream Layer
-
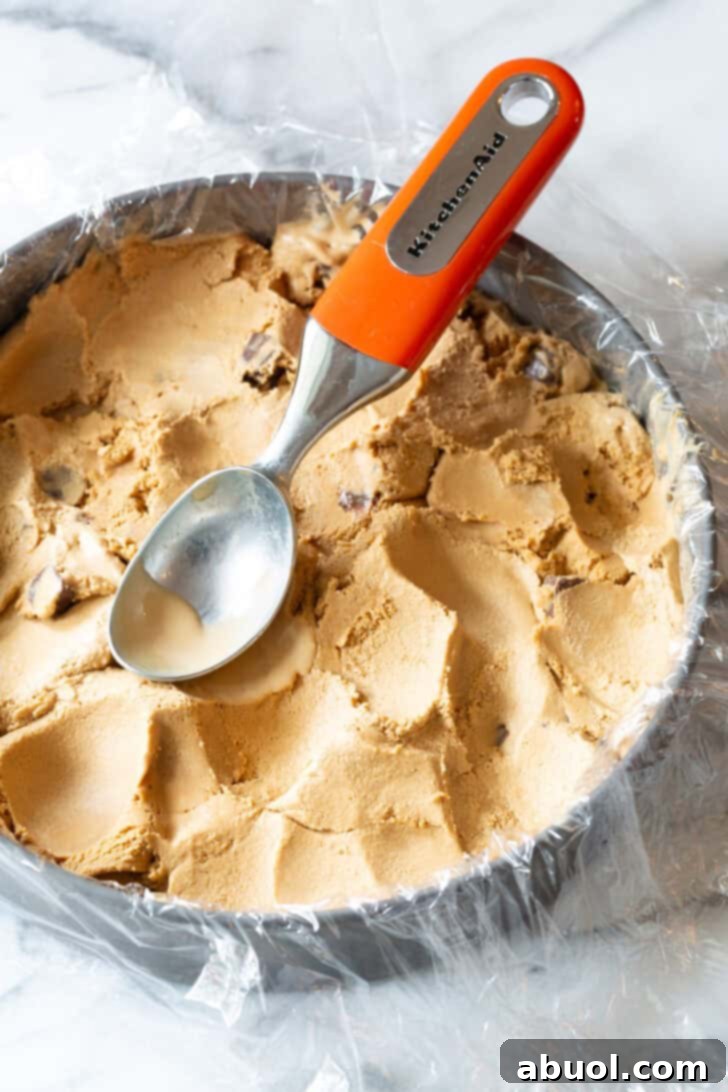
While your cakes are cooling, prepare the ice cream layer. Line a separate 8-9-inch cake pan with plastic wrap, ensuring plenty of overhang to easily lift the frozen disc later. Scoop your chosen ice cream flavor into the lined pan. Using a spatula, press down firmly and evenly to create a smooth, solid layer of ice cream. Place this pan back into the freezer to allow the ice cream to firm up completely – this usually takes at least 2 hours.
Freezing for Flawless Assembly
-
Once the cake layers are completely cool, wrap each layer individually and tightly in plastic wrap. Transfer these wrapped cake layers to the freezer. Freeze them until they are thoroughly cold and hard to the touch, which typically takes around 2 hours. This step is vital for easy handling and assembly, preventing the cake from crumbling.
Whipping Up the Silky Chocolate Ganache
-
For the Ganache: In a small saucepan, gently heat the heavy cream until it just begins to simmer around the edges – do not let it boil vigorously. Remove the saucepan from the heat immediately. Add your broken or chopped dark chocolate pieces to the hot cream. Let the mixture sit undisturbed for about 10 minutes; this allows the chocolate to melt without scorching. After 10 minutes, add the corn syrup (if using) and gently stir the mixture with a spatula until it is completely smooth and homogeneous. Avoid vigorous whisking, as this can introduce air bubbles and make the ganache less smooth. Allow the ganache to cool down to room temperature before you proceed with assembly; it should be pourable but not hot.
Assembling Your Spectacular Ice Cream Cake
-
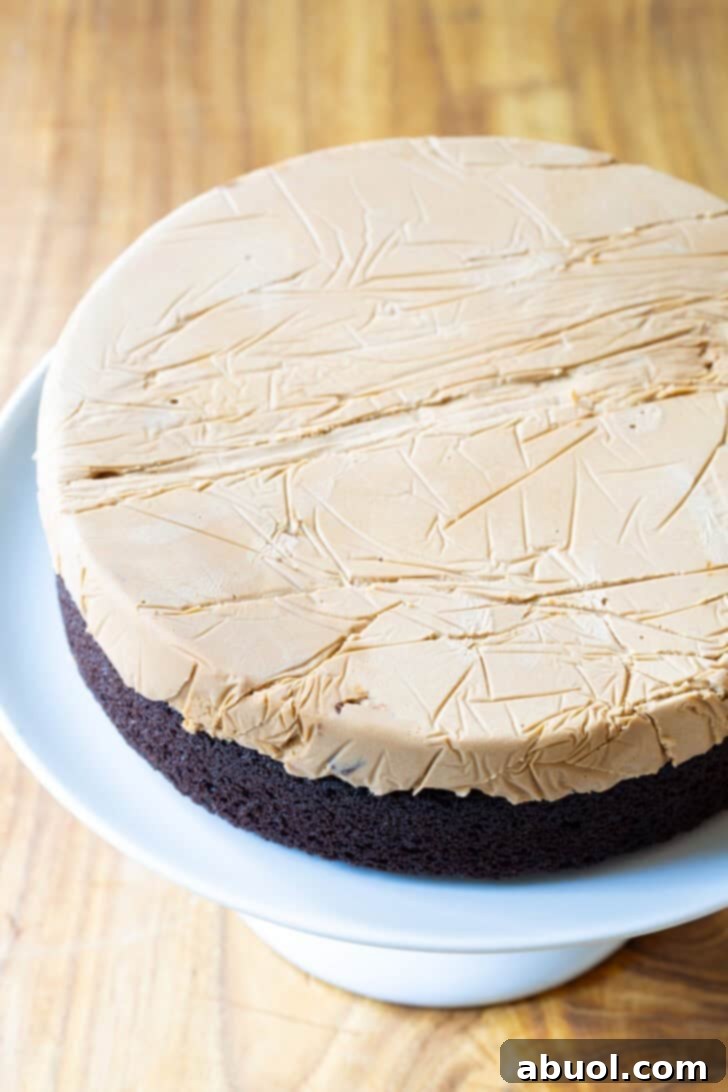
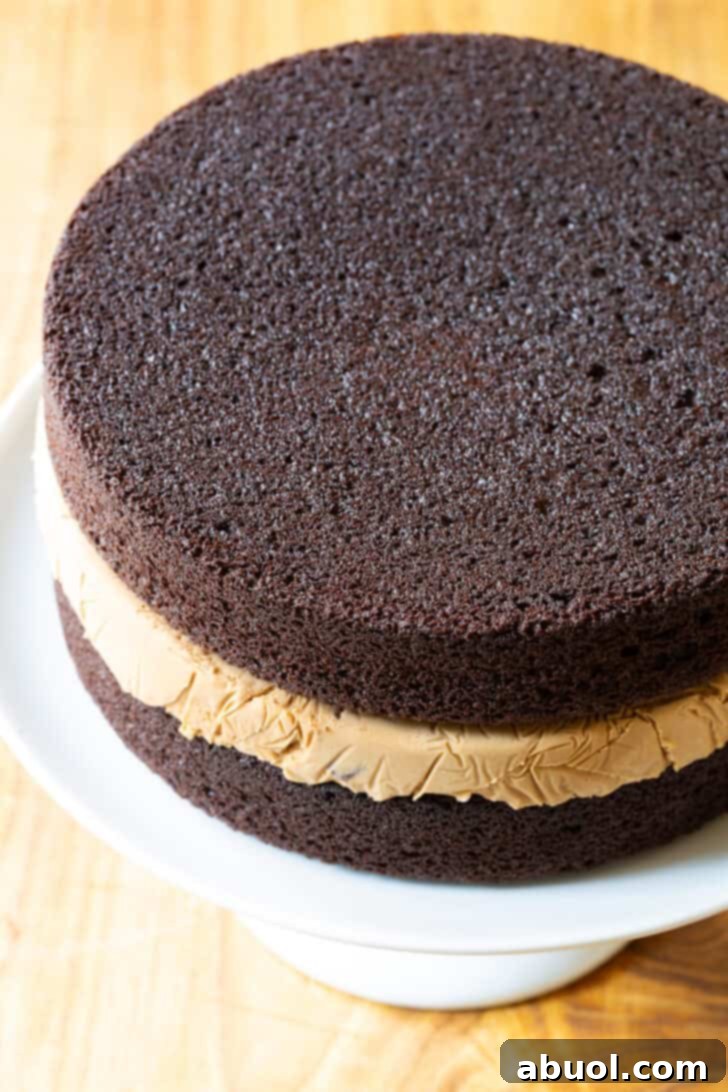
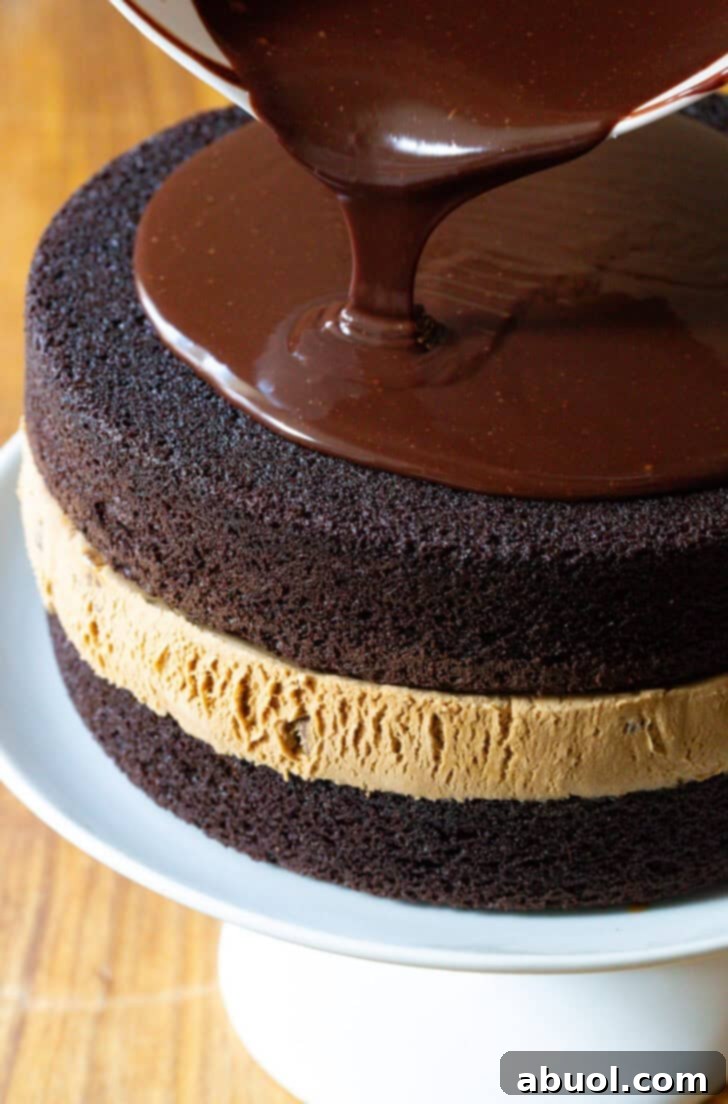
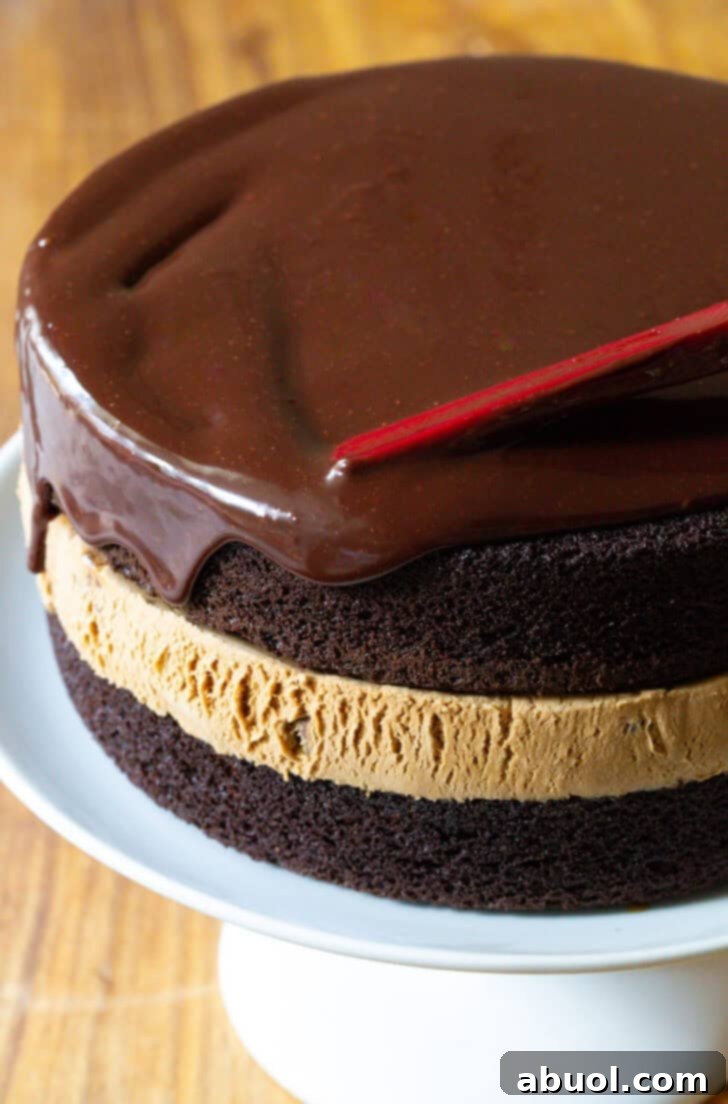
To Assemble: Carefully unwrap your two frozen cake layers. Place one chocolate cake layer on your chosen cake stand or serving plate. Next, retrieve the frozen ice cream disc from the freezer, gently flip it on top of the first cake layer, and peel off the plastic wrap. Position the second chocolate cake layer on top of the ice cream and gently press down to ensure an even, level cake. Use a flat spatula to smooth out any seams between the ice cream and cake layers around the edges, creating a seamless look. Finally, pour the cooled ganache over the top of the cake. Gently spread it towards the edges if needed, encouraging elegant drips down the sides. Immediately transfer the assembled cake back into the freezer until it’s completely firm and ready to serve. This final freeze allows the ganache to set beautifully.
Tips for Serving and Storing Your Frozen Delight
To ensure your chocolate ice cream cake remains as delicious as the day you made it, proper serving and storage are key:
Perfect Slices Every Time
For the best texture and easiest slicing, remove the ice cream cake from the freezer approximately 10-15 minutes before you plan to serve it. This brief time at room temperature allows the ice cream and cake layers to soften just enough, making it easier for a sharp knife to glide through without cracking the ganache or squishing the layers.
Storage Secrets for Longevity
To preserve your leftover ice cream cake, wrap any remaining slices or the whole cake tightly in plastic wrap. For optimal freshness and to prevent freezer burn, place the plastic-wrapped cake in a larger, airtight freezer-safe container. Stored properly, this magnificent frozen dessert can be kept in the freezer for up to 2 months, allowing you to enjoy a taste of celebration whenever the craving strikes!
Frequently Asked Questions About Ice Cream Cakes
For an ice cream cake, the freezer is its natural habitat! You should absolutely keep it in the freezer as much as possible, right up until you’re almost ready to serve. Refrigeration will cause the ice cream to melt and soften too much, compromising the cake’s structure and texture. A brief sit on the counter at room temperature (about 10-15 minutes) is recommended just before serving to achieve the perfect slicing consistency, but never store it long-term in the fridge.
One of the top pitfalls when crafting a homemade ice cream cake is not ensuring an evenly thick and firm ice cream layer. If the ice cream isn’t pressed down uniformly or allowed to freeze thoroughly, your cake might be lopsided or difficult to slice cleanly. Another common error is not allowing the cake layers to cool and freeze long enough before assembly. Soft cake layers can tear or create a messy outcome. Always ensure all components are well-chilled and firm for seamless assembly and a beautifully layered result.

Print Recipe
Leave a Review »
Homemade Ice Cream Cake
20 minutes
30 minutes
50 minutes
16
slices
Video
Ingredients
For the Chocolate Cake:
-
2
cups
granulated sugar -
1 3/4
cups
all-purpose flour -
3/4
cups
unsweetened cocoa powder -
1 1/2
teaspoons
baking powder -
1 1/2
teaspoons
baking soda -
1
teaspoon
salt -
1
cup
sour cream -
2
large
eggs -
1/2
cup
vegetable oil
or coconut oil -
1
teaspoon
vanilla extract -
1
cup
hot coffee -
2
pints
salted caramel ice cream
or gelato
For the Chocolate Ganache:
-
8
ounces
dark chocolate -
1 1/2
tablespoons
corn syrup,
for shine -
3/4
cup
heavy cream
Instructions
-
Preheat the oven to 350 degrees F. Spray two 8-9 inch round cake pans with nonstick cooking spray. Cut parchment paper circles to fit in each pan and press them against the bottoms.
-
In the bowl of an electric mixer, combine the sugar, flour, cocoa powder, baking powder, baking soda, and salt. Mix on low to combine. Add the sour cream, eggs, oil, and vanilla. Beat on medium until just combine. Then scrape the bowl with a rubber spatula, turn the mixer on low, and slowly add in the hot coffee. Beat until the batter is thin and smooth.
-
Pour the batter evenly into the two prepared cake pans. Bake for 30-35 minutes, until a toothpick inserted into the center of the cake comes out clean. Cool the cakes in the pans for 5 minutes. Then flip the cakes out onto cooling racks, remove the parchment paper, and cool completely.
-
Meanwhile, line an 8-9-inch cake pan with plastic wrap. Scoop the ice cream into the cake pan and press down with a spatula to make a smooth solid ice cream layer. Place the ice cream layer back into the freezer to firm up.
-
Once the cakes are cool, wrap each layer individually in plastic and freeze them until they are cold and hard to the touch, around 2 hours.
-
For the ganache: Heat the cream until it nearly simmers. Then remove from heat and add broken chocolate pieces to the cream. Allow the mixture to sit for 10 minutes. Then add the corn syrup and gently stir until completely smooth. (Whisking adds bubbles, so stir gently instead.) Allow the ganache to cool to room temperature before proceeding.
-
To assemble: Unwrap the frozen cakes. Lay one cake on a cake stand, then flip the ice cream layer on top of it and peel off the plastic. Top with the second cake layer and press down a little to level the cake. Use a flat spatula to smooth out the seams between the ice cream and cake all the way around the edges. Then pour the ganache over the top. Spread to the edges, if needed, to help the ganache drip over the sides. Freeze until ready to serve.
Notes
- This cake can be made with any variety of ice cream or gelato.
- You can skip the corn syrup in the ganache, but it will not look as glossy.
- Allow the cake to rest on the counter for about 10 minutes before cutting.
- Keep the cake wrapped in plastic wrap, and ideally in a larger airtight freezer-safe container. Freeze for up to 2 months.
Nutrition
Serving:
1
pc
,
Calories:
503
kcal
,
Carbohydrates:
61
g
,
Protein:
7
g
,
Fat:
28
g
,
Saturated Fat:
18
g
,
Cholesterol:
70
mg
,
Sodium:
325
mg
,
Potassium:
376
mg
,
Fiber:
4
g
,
Sugar:
43
g
,
Vitamin A:
540
IU
,
Vitamin C:
0.6
mg
,
Calcium:
136
mg
,
Iron:
3.1
mg
Dessert
American
Sommer Collier