
Are you tired of serving dry, overcooked meat? Do you constantly second-guess yourself when trying to achieve that perfect medium-rare steak or a succulent, juicy chicken breast? Mastering the art of cooking meat to its ideal doneness is a culinary skill that can transform your meals from good to extraordinary. Today, we’re diving deep into an age-old technique that experienced chefs swear by: the simple yet incredibly effective finger test for meat doneness. This method allows you to gauge the internal temperature of your meat with just a touch, ensuring perfectly cooked, moist results every single time without the need for constantly poking your precious cuts.
Forget the days of anxiously cutting into your steak, only to watch all those delicious juices drain away, leaving you with a dry, disappointing piece of meat. Many home cooks, myself included, have made this common blunder. In the early days of my cooking journey, I often resorted to slicing open my cuts of meat to visually inspect their internal doneness. The result? A perfectly cooked steak on the inside, perhaps, but one that lacked the juiciness and tender texture it deserved.
Later, I graduated to using a meat thermometer. While undeniably more accurate than guesswork or slicing, even a thermometer can be a double-edged sword. Each poke creates a small puncture, an escape route for the flavorful internal juices. For smaller, thinner cuts of meat, this repeated piercing can still lead to a noticeable loss of moisture, detracting from the overall eating experience. The goal, after all, is a tender, succulent bite, not just a safe one.
It was through trial, error, and a keen desire for culinary perfection that I finally discovered the brilliance of the finger test for meat temperature. This tactile method, often referred to as the “touch test,” felt like sheer magic. It allowed me to assess the internal texture and firmness of the meat without any damage, keeping every precious drop of juice exactly where it belonged. Once you learn this simple trick, you’ll be able to confidently cook everything from a sizzling steak to a delicate fish fillet, ensuring ideal doneness and maximum flavor every time.
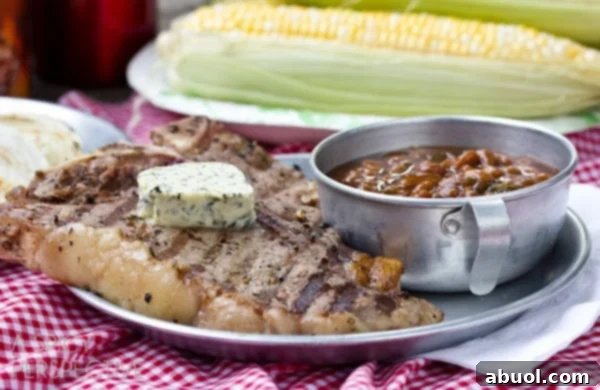
For every home cook who dreads the thought of serving undercooked meat or, conversely, is heartbroken by an overcooked, dry steak, this guide is for you. We’ll demystify meat doneness, equip you with the knowledge to understand precise internal temperatures, and then teach you the incredibly intuitive finger test. With a little practice, you’ll develop a sense for perfectly cooked meat that will elevate your home cooking to a new level.
Understanding Safe Internal Meat Temperatures: A Foundation for Success
Before we delve into the tactile art of the finger test, it’s absolutely crucial to have a clear understanding of the USDA-recommended internal temperatures for various types of meat. Food safety is paramount, and knowing these benchmarks provides a critical foundation for confident cooking. While the finger test is a fantastic gauge for texture and doneness, it’s always wise to cross-reference with these guidelines, especially when you’re still gaining confidence, or for larger cuts where internal temperatures can vary.
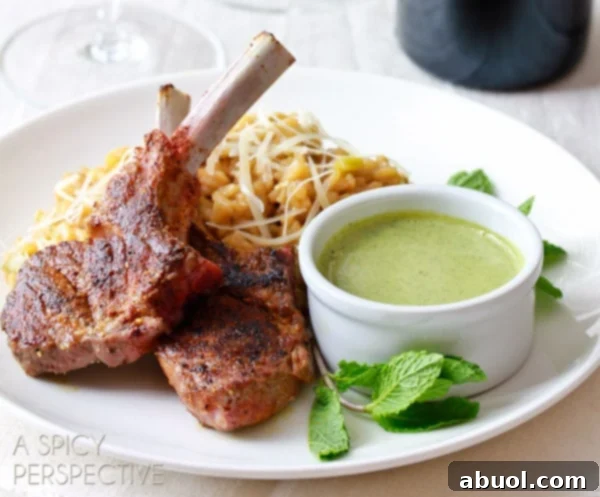
Here’s a detailed breakdown of the internal temperatures to aim for, keeping in mind that meat will continue to cook for a few minutes after being removed from the heat source (this is known as carryover cooking). Always factor in a few degrees of rise when planning your target temperature:
For Beef and Most Red Meats (Steak, Lamb, Venison):
Achieving the perfect doneness for red meats is a matter of personal preference, ranging from a vibrant rare to a thoroughly cooked well-done. The USDA recommends a minimum internal temperature of 145°F (63°C) for whole cuts of beef, followed by a 3-minute rest, to ensure safety. However, many prefer beef at lower temperatures for optimal tenderness and juiciness.
- Rare – 120 to 125 degrees F (49-52°C): Cool red center, very tender.
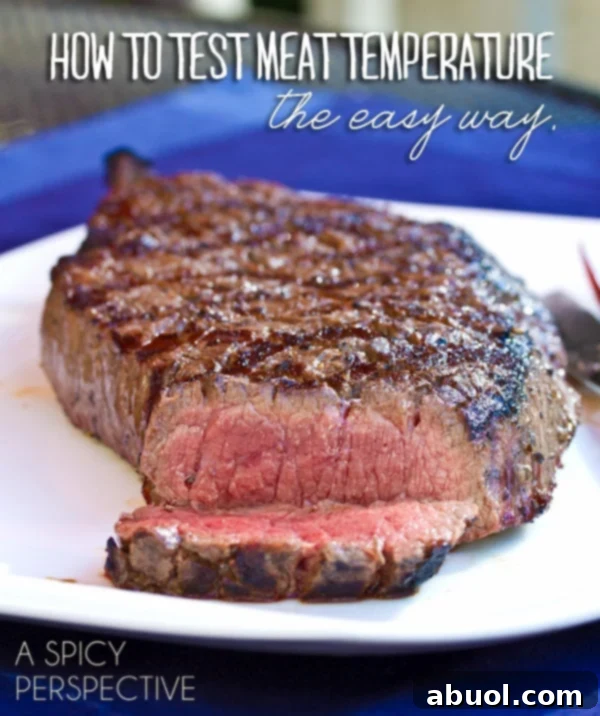
- Medium Rare – 130 to 135 degrees F (54-57°C): Warm red center, exceptionally juicy and tender, often considered the sweet spot for steak lovers.
- Medium – 140 to 145 degrees F (60-63°C): Warm pink center, slightly firmer.
- Medium Well – 150 to 155 degrees F (66-68°C): Slightly pink center, quite firm.
- Well Done – over 160 degrees F (71°C): No pink, very firm, can be less juicy.
For Pork:
Gone are the days when pork had to be cooked to a shoe-leather consistency. Modern farming practices have made pork safe to enjoy with a hint of pink, allowing for much juicier and more flavorful results. The USDA updated its recommendation for whole cuts of pork to 145°F (63°C) with a 3-minute rest.
- Medium – 145 to 150 degrees F (63-66°C): Slightly pink center, very tender and moist. (Yes, pork is safe to consume a little pink!)
- Medium Well – 155 to 160 degrees F (68-71°C): Just a trace of pink, firm.
- Well Done – 165+ degrees F (74°C): No pink, very firm. While safe, it risks dryness.
For Poultry (Chicken, Turkey, Duck):
For all poultry, safety is paramount. The USDA mandates a minimum internal temperature of 165°F (74°C) for all cuts, including breasts, thighs, and whole birds. This ensures any harmful bacteria are destroyed.
- Done – 165 to 170 degrees F (74-77°C): White meat should be opaque throughout, juices run clear. For dark meat, reaching slightly higher temperatures (170-175°F) can enhance tenderness.
For Fish:
Fish cooks very quickly and can go from perfectly done to dry and rubbery in a matter of seconds. It’s often recommended to remove fish from heat just before it reaches its target temperature, as carryover cooking will do the rest.
- Medium Well – 140 to 145 degrees F (60-63°C): Flakes easily with a fork, still very moist and tender.
- Well Done – 150+ degrees F (66°C): Fully opaque, flakes easily. Often quite dry if overshot.
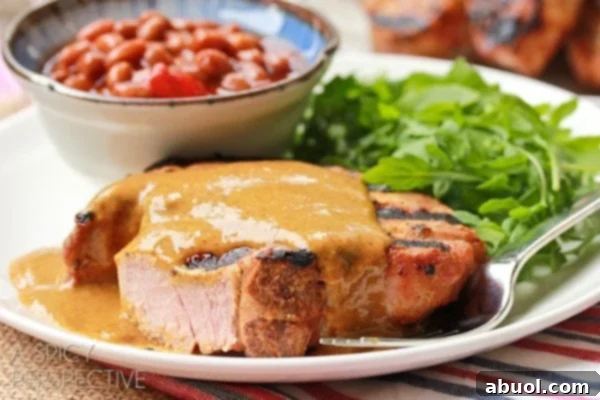
The Intuitive Finger Test: Feeling Your Way to Perfect Doneness
Now that we understand the critical internal temperature benchmarks, let’s unlock the secret to gauging meat doneness with your own hands. The finger test is a brilliant method that teaches you to recognize the subtle changes in a meat’s firmness as it cooks. This technique is especially useful for cuts like steaks, pork chops, chicken breasts, and even denser fish fillets such as tuna and swordfish, where a thermometer might be overkill or intrusive.
The principle behind the finger test is elegantly simple: as meat cooks, the muscle fibers contract and tighten, making the meat feel firmer. We can mimic these varying degrees of firmness by pressing different parts of our own hand, specifically the fleshy pad at the base of your thumb, which changes in tautness as you touch different fingers to your thumb. Here’s how to practice and master this invaluable technique:
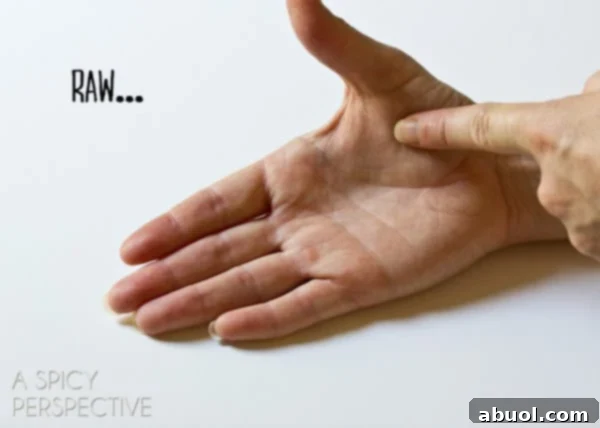
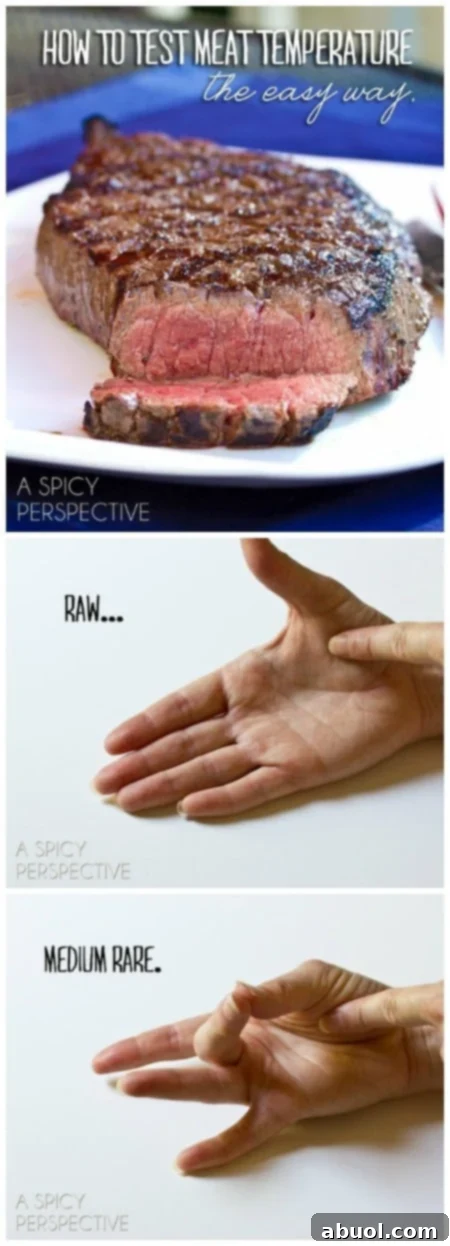
1. Raw (Relaxed Hand)
Begin by relaxing your hand. Feel the thickest, fleshiest area of your palm, directly below your thumb (the thenar eminence). This soft, yielding texture is precisely what raw meat feels like – very pliable and squishy. This is your baseline for understanding the test.
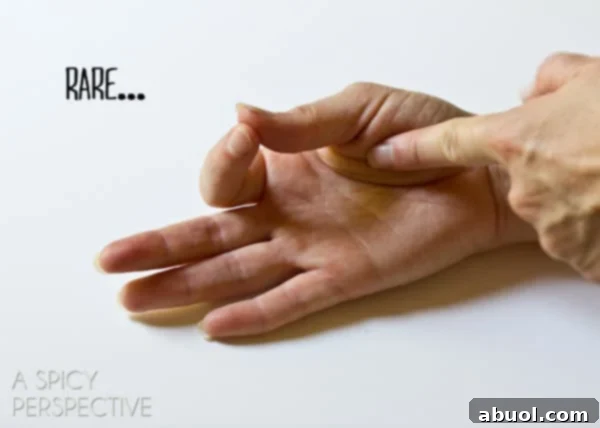
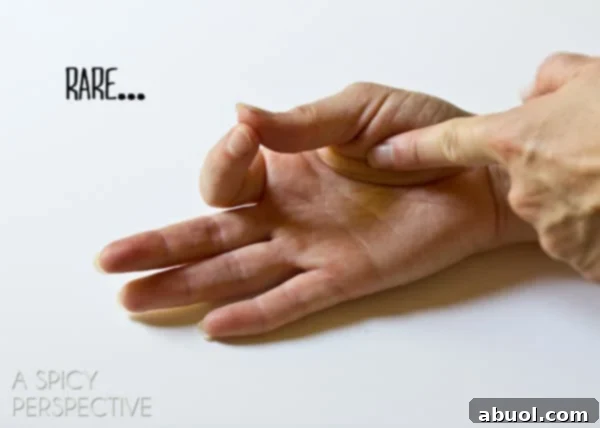
2. Rare (Thumb to Index Finger)
Now, gently touch the tip of your index finger to the tip of your thumb. With your other hand, press the same fleshy pad at the base of your thumb. Notice how it firms up slightly compared to your fully relaxed hand? This is the texture you’re looking for when checking a rare steak. It’s still very soft and yields easily to pressure, but with a definite springiness.

3. Medium Rare (Thumb to Middle Finger)
Move on to touching the tip of your middle finger to your thumb. Again, press the fleshy part of your palm. You’ll feel it has firmed up a bit more, offering slightly more resistance. This is the perfect consistency for a medium-rare piece of meat – tender yet with a gentle bounce back when pressed.
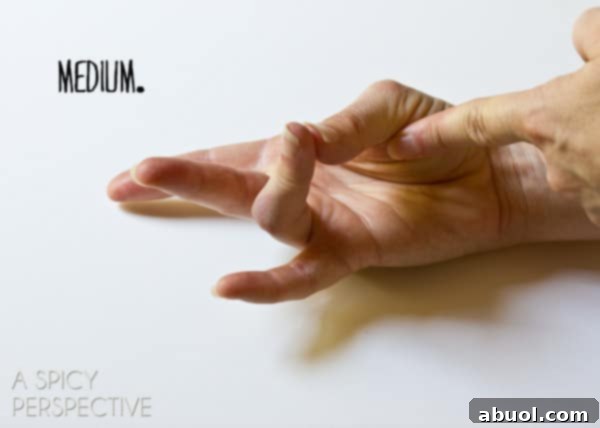
4. Medium (Thumb to Ring Finger)
Next, touch your ring finger to your thumb and press the base of your palm once more. The pad will now feel noticeably firmer, with a distinct spring. This level of firmness corresponds to a medium doneness. It offers good resistance but still feels supple.
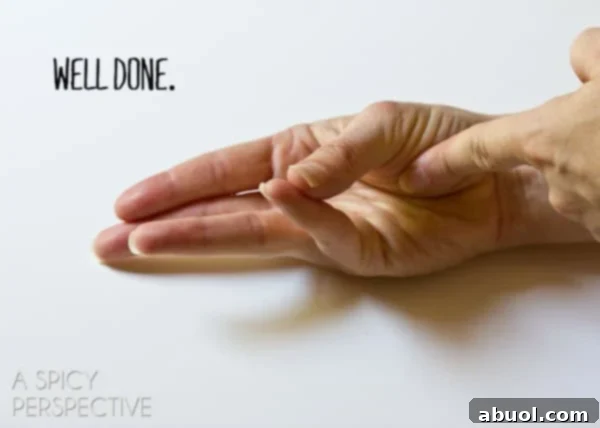
5. Well Done (Thumb to Pinky Finger)
Finally, bring your pinky finger to meet your thumb and feel the same area of your hand. This will be the firmest point, with very little give. This robust texture is indicative of well-done meat. While Medium Well feels just slightly less firm than Well Done, for practical purposes, this firmest point represents the fully cooked stage. It offers substantial resistance with minimal bounce.
Practice this comparison a few times until you can easily distinguish between the different levels of firmness. Then, as your meat cooks, gently press the center of the thickest part of the meat with your clean finger. Compare the sensation to your palm. What does it feel like? Is it rare, medium-rare, medium, or well done? Remove your meat from the heat source when it reaches the desired firmness, always remembering to account for carryover cooking.
The Critical Art of Resting Meat: Lock in Juices and Flavor
The journey to a perfect, juicy cut of meat doesn’t end when it leaves the heat. One of the most overlooked, yet absolutely crucial, steps in meat preparation is allowing it to rest. This simple act can make the difference between a dry, disappointing meal and a succulent, flavor-packed experience. If you cut into your meat immediately after cooking, you will almost certainly lose all those lovely juices, no matter how perfectly you cooked it.
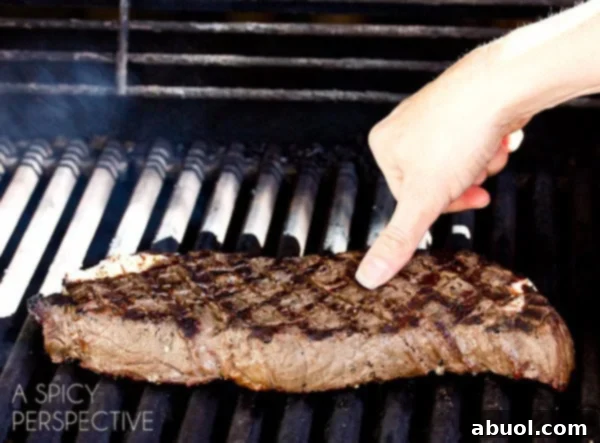
Here’s why resting is so important: When meat cooks, its muscle fibers contract, pushing the internal juices towards the center. If you slice into it right away, these juices, which are under pressure, will gush out onto your cutting board. However, by allowing the meat to rest for 5 to 10 minutes (or even longer for larger cuts), the muscle fibers begin to relax, and the juices have a chance to redistribute evenly throughout the entire piece of meat. This redistribution ensures that when you do slice into it, most of those delicious, savory juices stay within the meat, guaranteeing a moist, flavorful bite every time.
For smaller cuts like steaks, pork chops, or chicken breasts, a 5-10 minute rest is usually sufficient. For larger roasts or whole chickens, you might need to allow 15-30 minutes, or even longer for very large cuts. To keep the meat warm during this resting period, loosely tent it with a piece of aluminum foil. Avoid wrapping it tightly, as this can steam the meat and affect the crust.
Complementary Tools: When to Use a Meat Thermometer or Fork
While the finger test is a fantastic, intuitive skill to develop, there are times when other tools can be incredibly beneficial or even essential. Understanding when and how to use them will only enhance your cooking prowess.
Meat Thermometers: For Accuracy and Larger Cuts
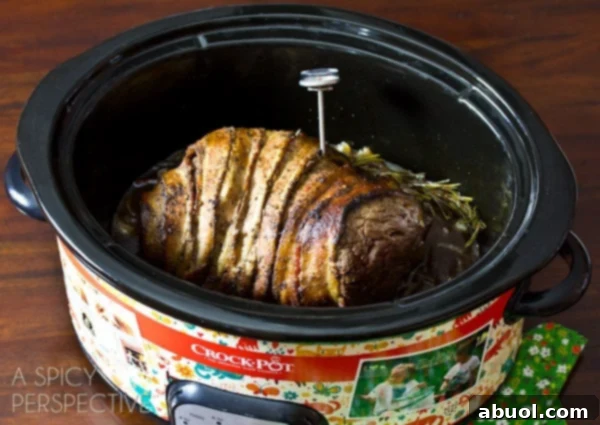
For very large pieces of meat, such as whole roasts, turkeys, or thick briskets, the finger test can be less reliable due to inconsistent heating and variations in thickness. This is where a good meat thermometer becomes an indispensable tool. For these situations, I highly recommend using a “leave-in” probe thermometer that you insert into the thickest part of the meat before cooking. This type of thermometer allows you to monitor the internal temperature throughout the cooking process without repeatedly opening the oven or grill, and more importantly, without piercing the meat multiple times and losing precious juices. Alternatively, an instant-read thermometer is excellent for quickly verifying the temperature in a single spot without leaving it in for the duration of cooking.
The Fork Test for Delicate Fish Fillets
Fish, with its delicate texture, requires a slightly different approach. While you *can* use the finger test for denser fish fillets like tuna or swordfish, the classic “fork test” is often preferred for thinner, flakier varieties. To perform this test, gently insert a fork into the thickest part of the fish and twist slightly. If the fish flakes away easily and looks opaque throughout the center (meaning it’s no longer translucent), it’s perfectly done. Be careful not to overcook, as fish can dry out very quickly.
Become a Confident Cook
By integrating the finger test into your cooking routine, understanding USDA temperature guidelines, and mastering the crucial step of resting meat, you’ll embark on a journey towards becoming a truly confident and skilled cook. No longer will you fear undercooking or dread overcooking; instead, you’ll approach every piece of meat with a knowing touch and deliver consistently juicy, perfectly cooked results that will impress both yourself and your guests. This simple yet profound technique is more than just a trick; it’s a fundamental skill that connects you intimately with the food you prepare, enhancing flavor, texture, and ultimately, the joy of cooking.