

Omelets are a fantastic breakfast staple, but preparing them individually for a large gathering can quickly turn into a culinary marathon, robbing you of precious time with your guests. That’s precisely why this Denver Omelet Casserole recipe is an absolute game-changer. It distills all the beloved components of a classic Denver omelet—savory ham, crisp bell peppers, sweet onions, and rich cheddar cheese—into a single, easy-to-manage pan. The result is a delightfully fluffy texture and perfectly melted cheese, all with significantly less effort and enough to generously feed a crowd. This casserole truly delivers the hearty flavors and satisfying experience of a traditional omelet, but with the unparalleled convenience of a baked dish.

If you’re a devoted fan of the timeless Denver omelet, prepare to be utterly captivated by this protein-packed, dump-and-bake casserole. It’s brimming with succulent ham, aromatic onions, vibrant bell peppers, and plenty of cheese, making it an instant crowd-pleaser. While a stovetop Denver omelet is a quick delight, it typically means making one at a time. This casserole offers the genius solution of preparing multiple omelet servings all at once, which you can effortlessly slice into squares, perfect for any brunch, holiday breakfast, or family get-together.
This remarkable dish bakes to golden perfection in under an hour, making it an ideal choice for busy mornings or when you need to serve a substantial meal without fuss. It’s wonderfully versatile and pairs beautifully with a range of Tex-Mex inspired condiments and delectable side dishes, transforming a simple breakfast into a memorable feast. Imagine serving warm slices alongside zesty salsa, cool sour cream, or perhaps a sprinkle of fresh cilantro – the possibilities are endless for customizing this already fantastic dish.
Table of Contents
- Why This Denver Omelet Casserole is a Must-Try
- Essential Ingredients and Expert Tips
- Step-by-Step Guide to Making Your Casserole
- Pro Tips for the Perfect Baked Omelet
- Delightful Serving Suggestions
- Storing and Reheating for Convenience
- Frequently Asked Questions
- Explore More Breakfast Recipes


Why This Denver Omelet Casserole is a Must-Try
This Denver Omelet Casserole isn’t just another breakfast dish; it’s a culinary triumph designed for ease, flavor, and satisfying a crowd. Here’s why it deserves a permanent spot in your recipe rotation:
Unbeatable Fluffy and Flavorful Experience – Get ready for the most delightfully spongy, tender, and fluffy eggs you’ve ever had in a casserole. Beyond the incredible texture, this dish bursts with sweet and savory Southwestern flavors. The combination of savory ham, sweet bell peppers, pungent onions, and a generous amount of sharp cheddar cheese creates a complex and deeply satisfying profile. Seriously, the taste and texture are virtually identical to a perfectly crafted Denver omelet, but without the individual pan-flipping. Each bite offers a harmonious blend of ingredients, making it a true breakfast sensation.
A True Protein Powerhouse – Fuel your day with this robust baked Denver casserole, a fantastic source of protein. A powerhouse trifecta of farm-fresh eggs, wholesome ham, and rich cheese ensures each slice is packed with about 13 grams of protein. This makes it an excellent choice for a filling breakfast that keeps you energized. Furthermore, with no potatoes or bread as fillers, this recipe stands out as a relatively low-carb option compared to many traditional breakfast casseroles, offering a healthier alternative without sacrificing flavor. While my ham and egg bake is undeniably delicious, this recipe offers a lighter yet equally satisfying profile.
Effortless Entertaining: Plenty to Share – One of the standout features of this baked Denver omelet is its incredible ability to feed a crowd. As mentioned, this fabulous breakfast casserole can comfortably serve up to a dozen people, making it perfect for brunches, holiday meals, or any large gathering. Alternatively, prepare a large pan for a smaller group and enjoy the convenience of quick, delicious breakfasts throughout the week. It reheats beautifully, providing a convenient and flavorful start to multiple mornings. Say goodbye to cooking multiple individual omelets and hello to seamless, stress-free entertaining!

Essential Ingredients and Expert Tips
Crafting the perfect Denver Omelet Casserole starts with selecting quality ingredients and applying a few key techniques:
- Butter for Richness – For sautéing the vegetables, I highly recommend using butter over oil. Butter not only prevents sticking but also imparts a rich, deep flavor that significantly enhances the overall taste of the onions and peppers, contributing to a more luxurious casserole experience.
- Room Temperature Eggs for Fluffiness – Always use large eggs for this recipe. A crucial tip for achieving the best fluffy texture is to let your eggs sit on the counter for about 15-20 minutes to bring them closer to room temperature before whisking. Cold eggs can sometimes slow down the cooking process and result in a denser texture, while room temperature eggs whip up more airily and cook more evenly.
- Classic Denver Veggies – To achieve the authentic “Denver” flavor, certain vegetables are non-negotiable. I use white onion, which offers a satisfying bite and sharpness. However, if you prefer a slightly sweeter profile, yellow onion works beautifully as well. Green bell pepper adds that characteristic crispness and vibrant color, while minced garlic provides an aromatic depth that ties all the flavors together.
- Versatile Ham Choice – This recipe is a fantastic way to utilize cooked and cubed leftover spiral ham from special occasions like Christmas, Thanksgiving, or Easter. The leftover ham carries a wonderful flavor that elevates the casserole. If you don’t have leftovers, a high-quality precooked ham from your local grocery store, diced into small cubes, will work just as well.
- Freshly Shredded Cheddar Cheese – For superior flavor and melt, I always advocate for shredding your own cheddar cheese by hand. Pre-shredded cheeses often contain anti-caking agents and preservatives that can prevent them from melting smoothly and can slightly alter the taste. Hand-shredding ensures a creamier, richer cheese layer that perfectly complements the other ingredients.
- Half & Half for Supreme Fluffiness – While whole milk can be used in a pinch, I strongly recommend sticking to half & half. The higher fat content in half & half is key to creating that wonderfully fluffy, tender, and moist casserole texture. It makes a noticeable difference in the final product’s richness and airiness.
- Thoughtful Seasonings – Keep it simple yet effective with salt and pepper to taste. For those who appreciate a gentle kick, a pinch of crushed red pepper flakes adds a delightful warmth without overwhelming the dish. Feel free to adjust the amount of red pepper flakes or omit them entirely if you’re sensitive to heat, ensuring the casserole perfectly suits your preference.
Step-by-Step Guide to Making Your Casserole
For precise ingredient proportions, comprehensive instructions, storage recommendations, and a helpful video tutorial, please refer to the printable recipe card located at the conclusion of this post.
Follow these simple steps to create a delicious Denver Omelet Casserole:
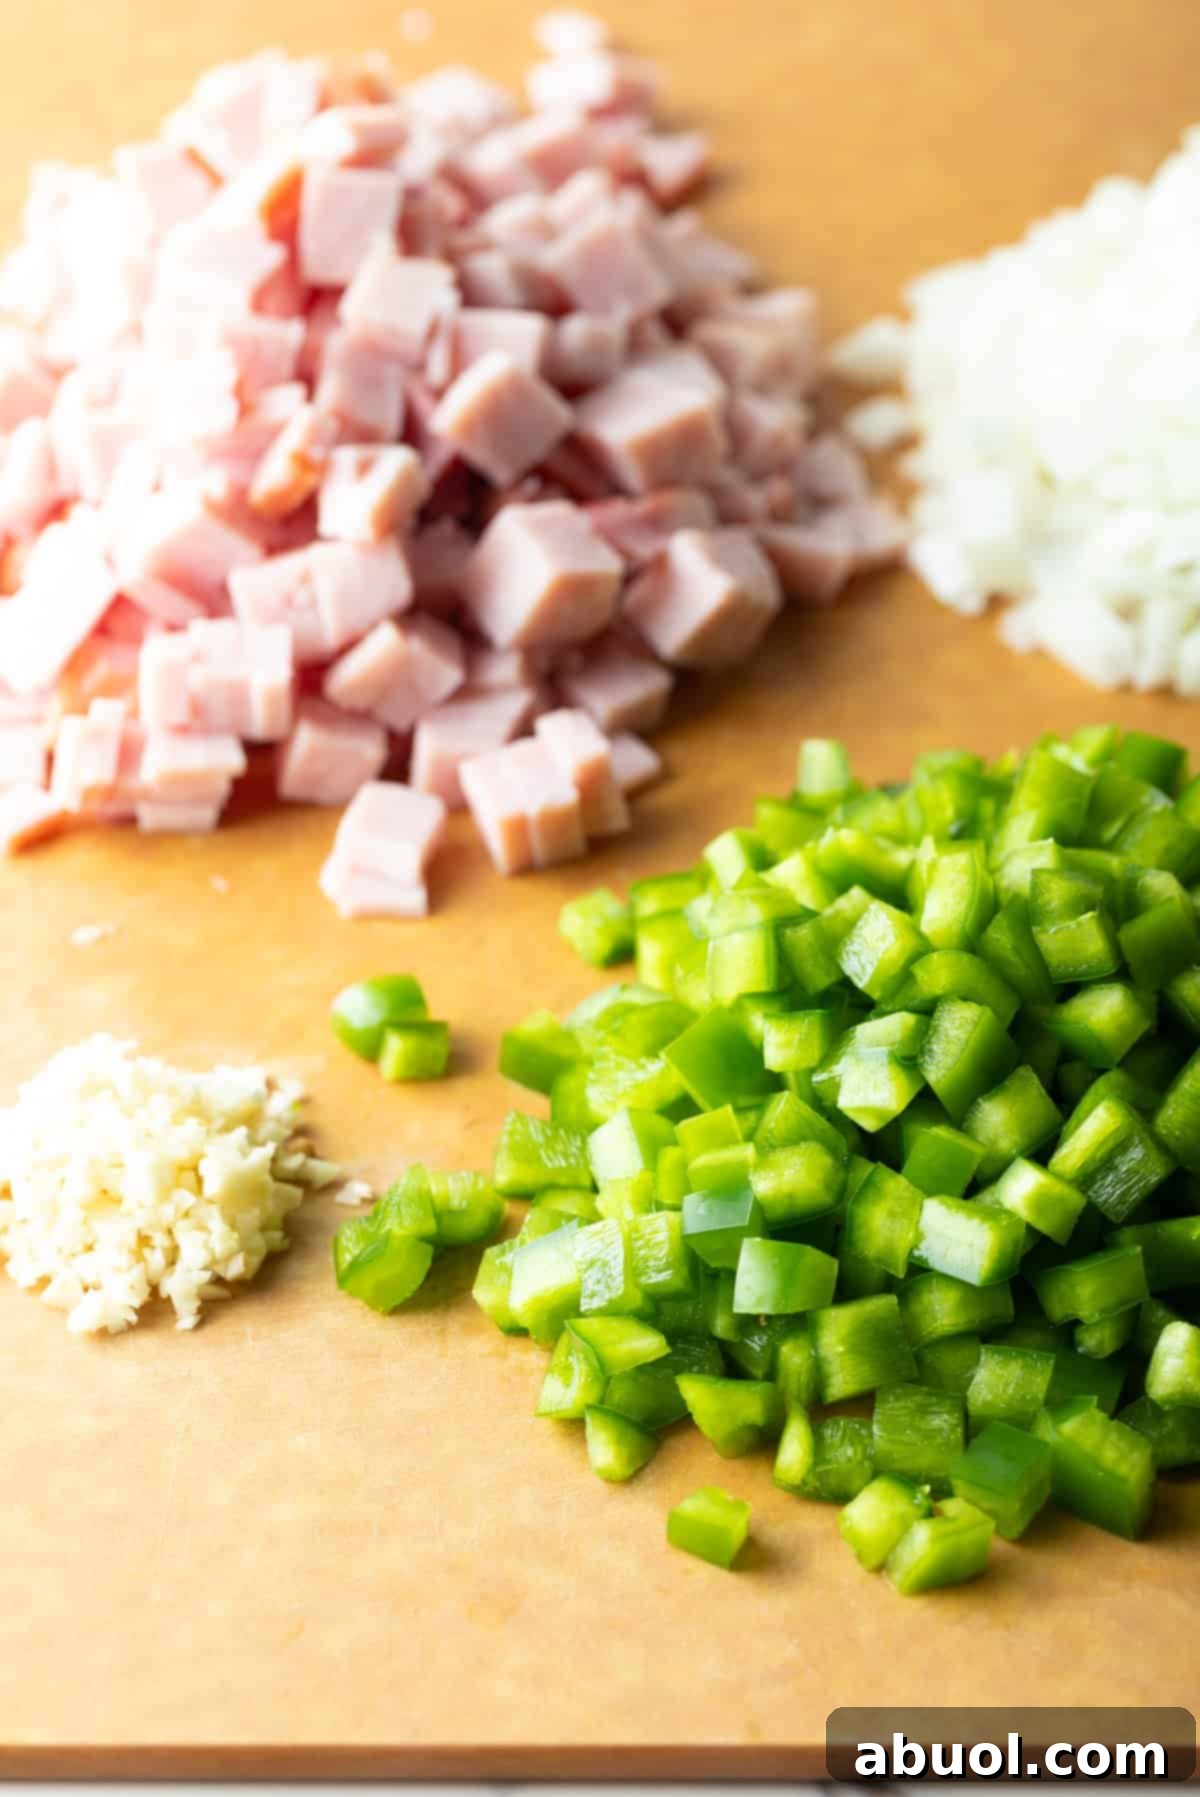
1. Chop and Prep for Efficiency – Begin by preheating your oven to 350°F (175°C). While the oven heats, thoroughly spray the inside of a large 9×13-inch casserole baking dish with nonstick cooking spray, ensuring easy removal later. Next, meticulously chop your cooked ham into small, even pieces. Peel and finely chop the onion, remove the seeds and dice the bell pepper, and mince the garlic. Finally, grate the cheddar cheese by hand and set it aside. Having all your ingredients prepped and ready will make the assembly process incredibly smooth.
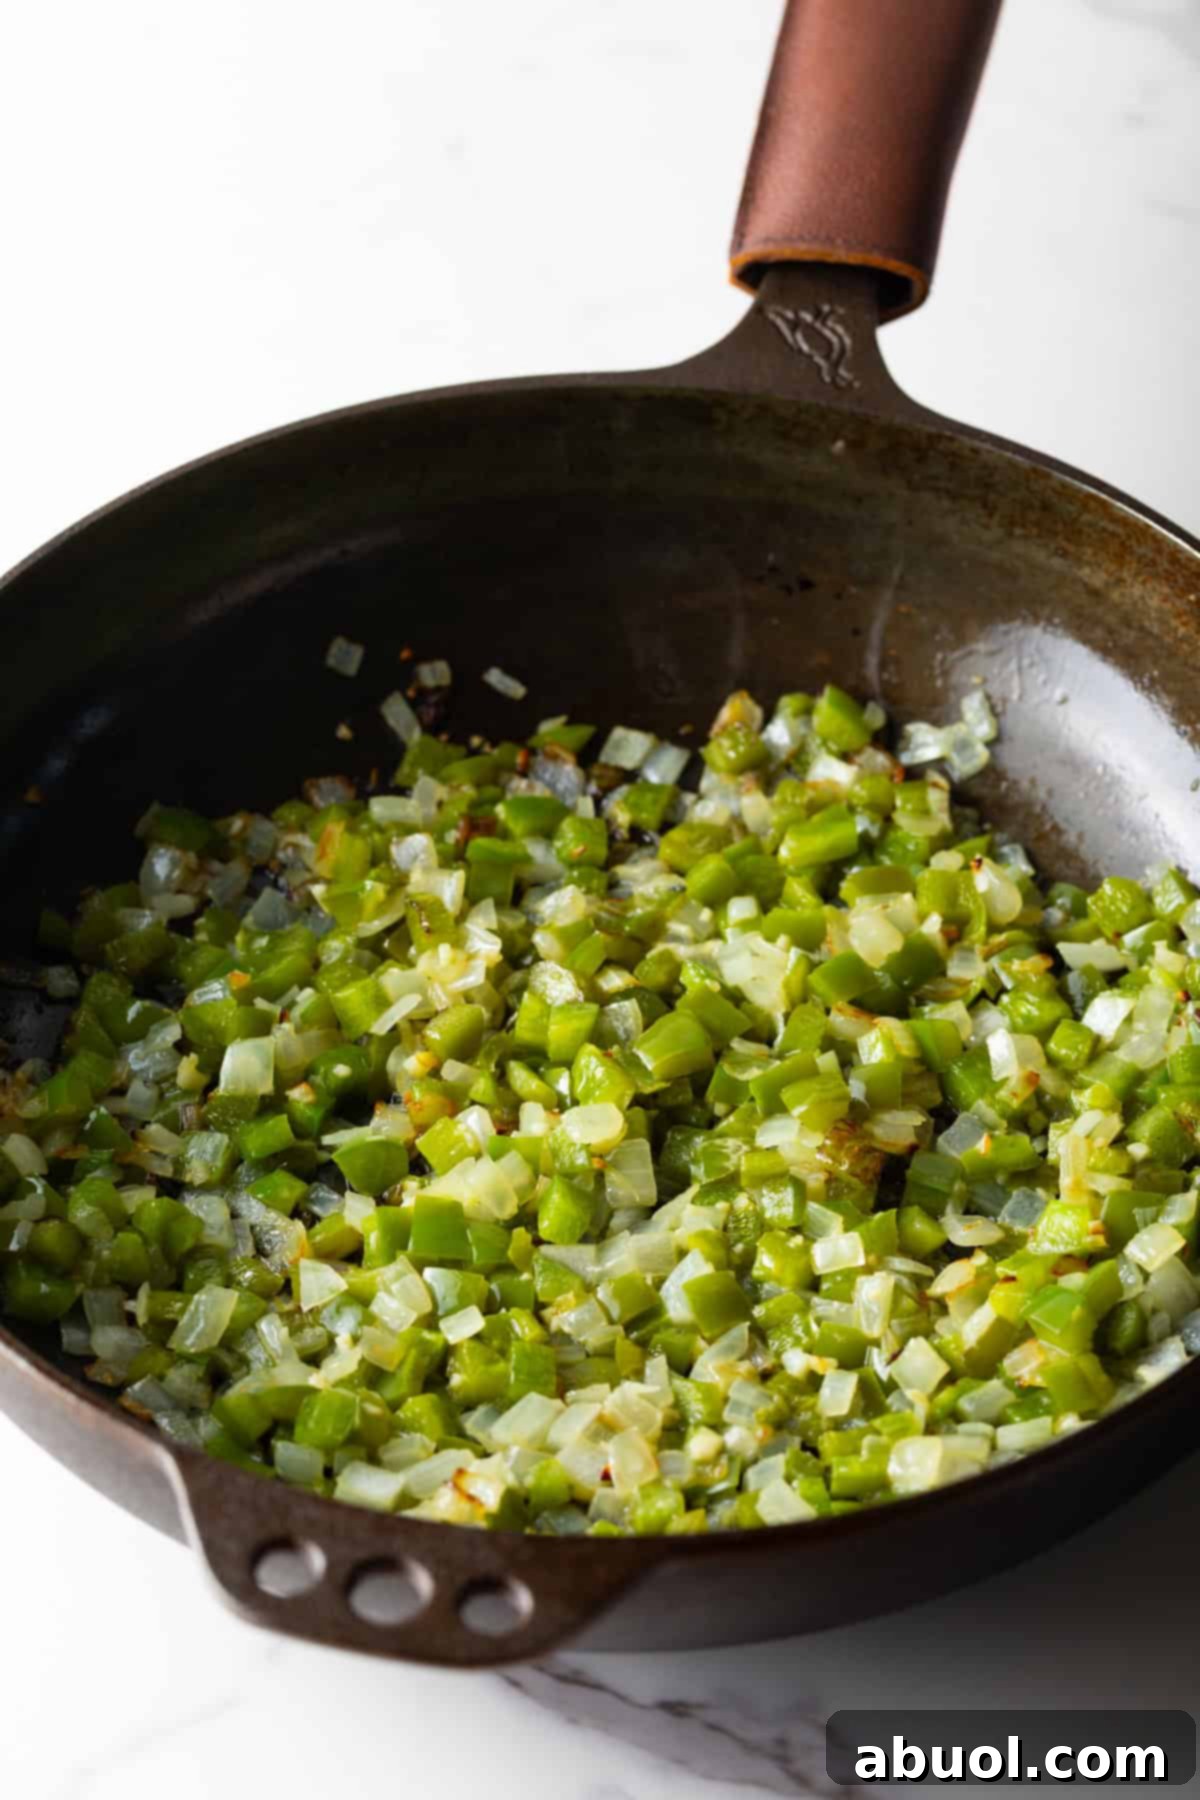
2. Sauté Your Veggies to Perfection – Melt the butter in a small skillet over medium heat. Be vigilant to prevent the butter from burning. Once the butter is hot and shimmering, add the diced bell peppers, chopped onion, and minced garlic to the skillet. Sauté them for only a few minutes, stirring continuously with a spatula, just until the onions become slightly tender and translucent. Immediately remove the skillet from the heat source. It’s crucial not to overcook the vegetables at this stage, as they will continue to cook and soften further during the baking process within the casserole, and we want to avoid any mushy textures.
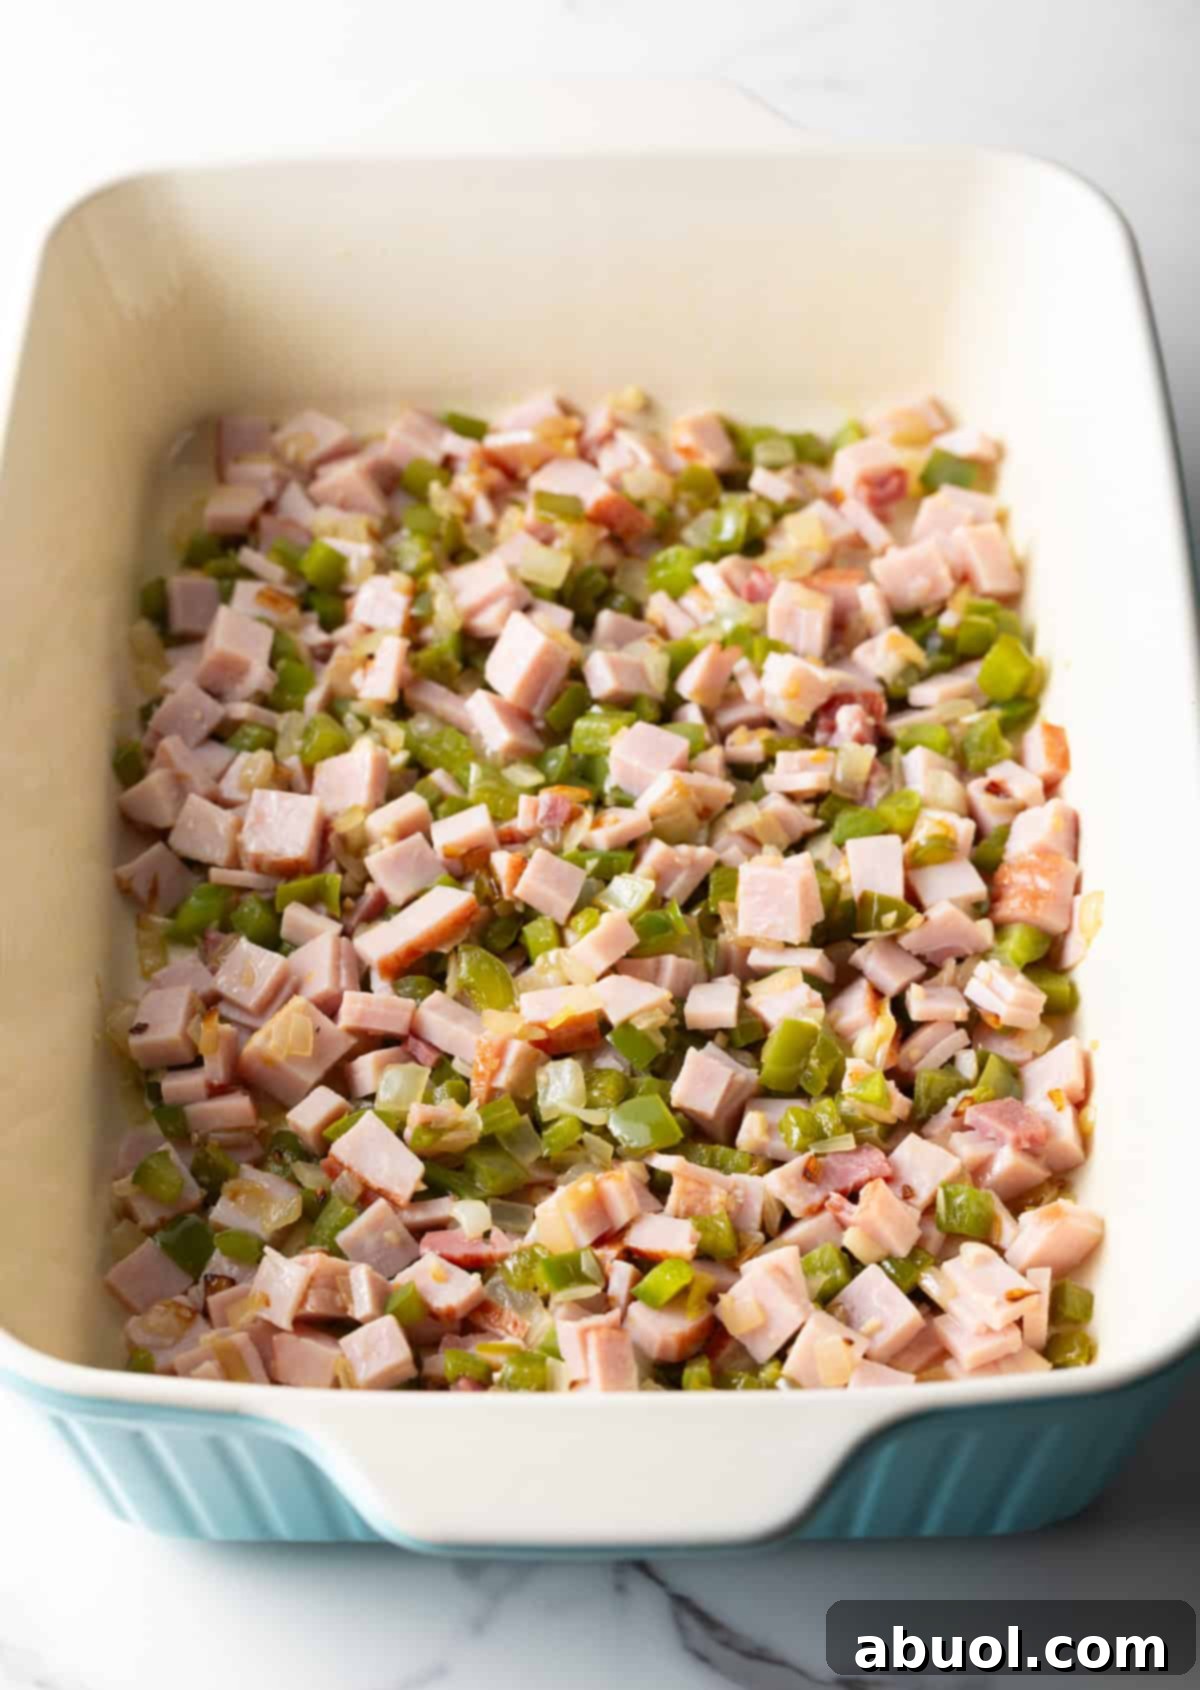
3. Assemble Ham and Sautéed Veggies in Baking Dish – While the sautéed onion, peppers, and garlic cool slightly in the skillet, evenly distribute the diced ham pieces across the bottom of the prepared baking dish. Once the vegetables have cooled sufficiently (this prevents the egg mixture from cooking prematurely), transfer them, along with all the flavorful melted butter from the skillet, into the baking dish, spreading them over the ham. Set the dish aside to allow the vegetables to cool completely, ensuring the eggs will set beautifully and evenly.
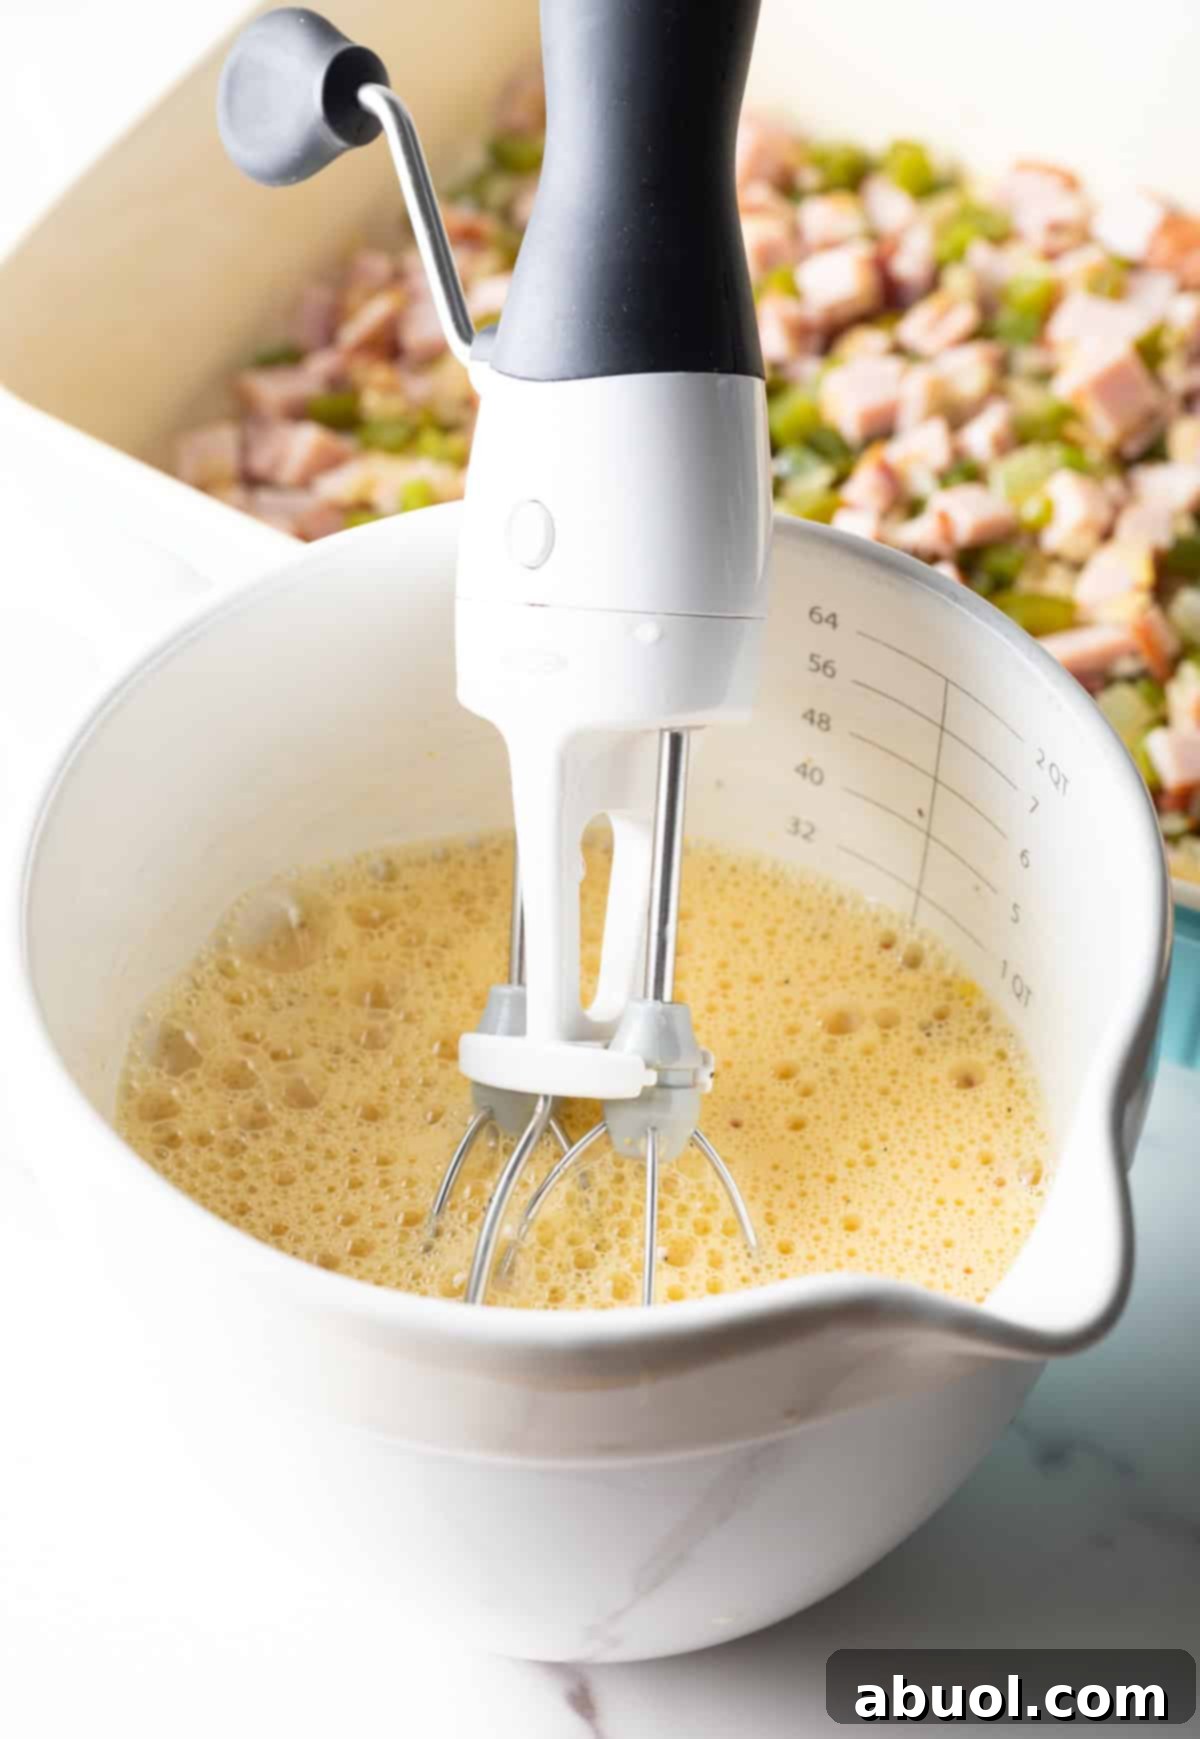
4. Prepare the Fluffy Egg Mixture – Now it’s time to whip up the heart of your casserole! Crack the large eggs into a medium-sized mixing bowl and add the half & half. Using a hand beater is highly recommended for this step, as it provides the vigorous aeration needed to make the mixture incredibly frothy and light. If you don’t have a hand beater, a whisk can be used, but you’ll need to put in more effort to achieve the desired frothiness. The picture below illustrates the ideal frothy consistency you’re aiming for. Once the eggs and half & half are perfectly frothed, beat in the salt, pepper, and the crushed red pepper flakes (if you desire that lovely touch of heat – and I certainly do!).
5. Incorporate Cheese and Distribute – Pause momentarily from the egg mixture and confirm that the ham and vegetables in the casserole dish are cool to the touch. Then, sprinkle the generous amount of shredded cheddar cheese evenly over the ham and veggies. Use a large spoon to gently toss and combine the cheese with the ham, peppers, onion, and garlic. Spread this flavorful mixture into an even layer within the dish, taking care not to pack it down too tightly. A gentle jiggle of the pan can help create small pockets and spaces between the cheese and vegetables, which will allow the egg mixture to flow into every nook and cranny, ensuring a cohesive and delicious bake.

6. Pour the Egg Mixture – Carefully pour the frothy egg and cream mixture over the seasoned vegetables, ham, and cheese in the baking dish. Do this slowly, moving the mixing bowl back and forth across the pan to ensure an even distribution. Again, a subtle shake of the dish will help the egg mixture settle down and thoroughly coat all the delicious ingredients below, ensuring every piece of your casserole is perfectly integrated and flavored.

7. Bake to Golden Perfection – Gently transfer the baking dish into your preheated oven. Bake the western egg casserole for approximately 45-50 minutes. You’ll know it’s perfectly done when the eggs are fully set, the center is puffed, and the top has achieved a beautiful golden brown color. A reliable indicator is when the edges begin to visibly separate from the sides of the pan. To confirm doneness, insert a knife into the center; it should come out clean and not “eggy.” While there will be some delightful cheesiness, the very center of the casserole should not appear wet. If it isn’t quite set, return it to the oven for another 5 minutes and check again, ensuring a thoroughly cooked and satisfying result.

Pro Tips for the Perfect Baked Omelet
Achieving an incredibly flavorful and fluffy baked omelet isn’t difficult, but it does hinge on a couple of crucial techniques:
Firstly, the secret to bursting flavor and a pleasant texture lies in properly sautéing your onions, peppers, and garlic beforehand. This initial step softens the vegetables and allows their natural sugars to caramelize slightly, creating a sweeter, more tender, and aromatic base for your casserole. By sautéing, you cook out excess moisture and prevent the dreaded rubbery onion texture in the final product. Skipping this essential step would mean missing out on a significant layer of flavor and could negatively impact the overall consistency.
Secondly, the method of preparing your egg mixture is paramount for achieving that desirable light and fluffy consistency. It’s not enough to simply combine the eggs and half & half; you must beat them vigorously until they are noticeably aerated and frothy. This incorporates air, which expands during baking, resulting in a wonderfully light and airy casserole. Without sufficient beating, your casserole might end up with a denser, more scrambled-egg-like texture. I personally find that a hand beater does an exceptional job of achieving this frothy texture, far superior to a standard whisk, though a whisk can work with enough effort and persistence. Invest a little extra time in this step, and your taste buds will thank you for the difference in fluffiness and lightness.

Delightful Serving Suggestions
While the Denver Omelet Casserole is incredibly satisfying on its own, it truly shines when served with a few complementary garnishes and sides:
I love to serve individual portions of the baked Denver omelet with a light sprinkle of fresh, sliced scallions for a pop of color and mild onion flavor. On the side, offer a vibrant salsa and a dollop of cool sour cream. The tanginess of the sour cream and the fresh, zesty flavors of salsa create a perfect balance with the rich casserole. I have several fantastic homemade salsa recipes on the site that would be ideal companions:
- Homemade Salsa Recipe (boasting nearly 5 stars from over 400 reviews – a true crowd-pleaser!)
- Roasted Tomato Salsa (for a deeper, smoky flavor)
- Avocado Salsa Verde (creamy and refreshing)
- Pico de Gallo (fresh, chunky, and vibrant)
And, for those who enjoy an extra kick, it’s no surprise that I also thoroughly enjoy my baked egg dish with a few dashes of my favorite spicy hot sauce. It adds another layer of flavor and excitement to each bite.
The casserole itself is already packed with plenty of protein and nutritious vegetables, making it a wholesome meal. However, to complete your breakfast or brunch spread, consider serving it alongside classic hearty accompaniments. Crispy home fries, homemade hash browns, or golden pan-fried potato cakes would add a comforting starchy element. Any of your preferred starchy or carb-rich breakfast foods will round out this delightful meal beautifully, ensuring everyone leaves the table feeling perfectly satisfied.
Storing and Reheating for Convenience
This Denver Omelet Casserole is not only delicious fresh from the oven but also makes for excellent leftovers, offering a convenient solution for meal prepping throughout the week.
When refrigerated and reheated, the leftover slices will naturally become a bit denser than when freshly baked. However, they will still retain a wonderfully tender texture and all those delightful Southwest flavors. To ensure optimal freshness, store the casserole in an airtight container in the refrigerator for up to 3-5 days. This makes it perfect for quick breakfasts on busy weekdays.
For longer storage, you can absolutely freeze individual slices. It’s important to note, however, that freezing may slightly alter the taste and texture, as is common with many egg-based dishes. To freeze, wrap each individual piece tightly in plastic wrap, then place all the wrapped portions together in an airtight freezer-safe Ziploc bag. This method helps prevent freezer burn. The casserole can be safely frozen for up to 3 months. When you’re ready to enjoy a frozen slice, simply take it out and let it thaw in the refrigerator overnight for best results.
For reheating, the best method to preserve texture is in the oven. Preheat your oven to 350°F (175°C) and reheat slices for 10-15 minutes, or until warmed through. If you’re short on time and need to use a microwave, you can do so in short 10-second bursts at 50% power. Be mindful that microwaving can sometimes result in slices being a bit moister and potentially rubberier in texture, so the oven is generally preferred for a better eating experience.

Frequently Asked Questions
This is a common concern with egg casseroles, but the solution is simple yet crucial: you absolutely must sauté the vegetables before incorporating them into the western omelet casserole. This vital step cooks out any excess moisture from the onions, bell peppers, and garlic. If you skip this, that moisture will inevitably leak into the delicate egg base as it bakes, leading to an undesirably soggy and watery casserole. Proper sautéing ensures a firm, fluffy, and flavorful result.
While I personally find the casserole to be at its peak when made and served fresh, allowing the eggs to maintain their ultimate fluffiness, you certainly can prepare components in advance. To save time on a busy morning, prep all your ingredients the night before. Keep the sautéed vegetables and diced ham stored separately from the egg mixture in the refrigerator. Then, in the morning, simply whisk the eggs, combine everything in the baking dish, pour, and bake! This method allows for a quick assembly and a fresh-baked breakfast experience.
Absolutely! This recipe, as written, is designed for a 9×13-inch baking dish and yields 12 generous pieces, perfect for a crowd. If you’re serving fewer people or prefer a smaller batch, simply halve all the ingredients. Then, bake the reduced recipe in a smaller 8×8-inch or 9×9-inch square pan. This will provide approximately 6 servings, making it ideal for a family meal or a week’s worth of individual breakfasts.

Help Me Spread the Word about this Fabulous Free Recipe! Sharing this recipe link on Pinterest and Facebook is super impactful, and I greatly appreciate it! Find the share buttons below the recipe form.
Explore More Breakfast Recipes

Print Recipe
Leave a Review »
Denver Omelet Casserole
Video
Ingredients
- 3 tablespoons butter
- 1 cup diced onion
- 1 cup green bell pepper
- 2 cloves garlic minced
- 2 cups diced ham
- 12 large eggs
- 1 cup half & half
- 1 ½ cups shredded cheddar cheese
- 1 ½ teaspoon salt
- 1 teaspoon pepper
- ¼ – ½ teaspoon crushed red pepper flakes
Instructions
-
Preheat the oven to 350°F (175°C). Set out a 9 x 13-inch baking dish and spray the inside with nonstick cooking spray. Proceed to chop and prepare all ingredients as directed.
-
Place a small skillet over medium heat and add the butter. Once melted, add the diced onions, green bell pepper, and minced garlic. Stir frequently and sauté until the onions are noticeably soft, which should take approximately 3-5 minutes. Then, turn off the heat immediately.
-
While the vegetables cool slightly, add the diced ham evenly to the bottom of the prepared baking dish, followed by the sautéed vegetables. Scoop all the melted butter from the skillet into the baking dish as well. Spread the vegetables out and allow them to cool completely before proceeding.
-
In a mixing bowl, crack the eggs and add the half-and-half. Beat them together vigorously until the egg mixture becomes frothy. Next, add the salt, pepper, and crushed red pepper flakes (if using). Beat again briefly to ensure all seasonings are well combined.
-
Once the vegetables in the baking dish are cool, toss the shredded cheddar cheese into the ham and vegetable mixture. Spread the mixture evenly in the baking dish, without compacting it too tightly. Then, carefully pour the frothy egg mixture over the top of all the other ingredients, ensuring it’s evenly distributed.
-
Carefully place the baking dish into the preheated oven. Bake for 45-50 minutes, or until the center is puffed, the eggs are set, and the edges are beautifully golden brown. Allow the baked omelet to cool for at least 5 minutes before slicing and serving. Garnish with a sprinkle of sliced scallions and serve alongside salsa and sour cream, if desired.
Notes
You also have the option to freeze individual slices for longer preservation, though be aware that freezing may subtly change the taste and texture of the eggs. To freeze, wrap each piece tightly in plastic wrap, then place all portions together in an airtight freezer-safe Ziploc bag. Freeze for up to 3 months. When ready to use, thaw slices in the refrigerator overnight.
For the best reheating results, use the oven. Warm the baked Denver omelet casserole for 10-15 minutes at 350°F (175°C). If you must use a microwave, reheat in short 10-second bursts at 50% power. Keep in mind that microwave reheating might make the slices a bit moister and potentially slightly rubberier.