
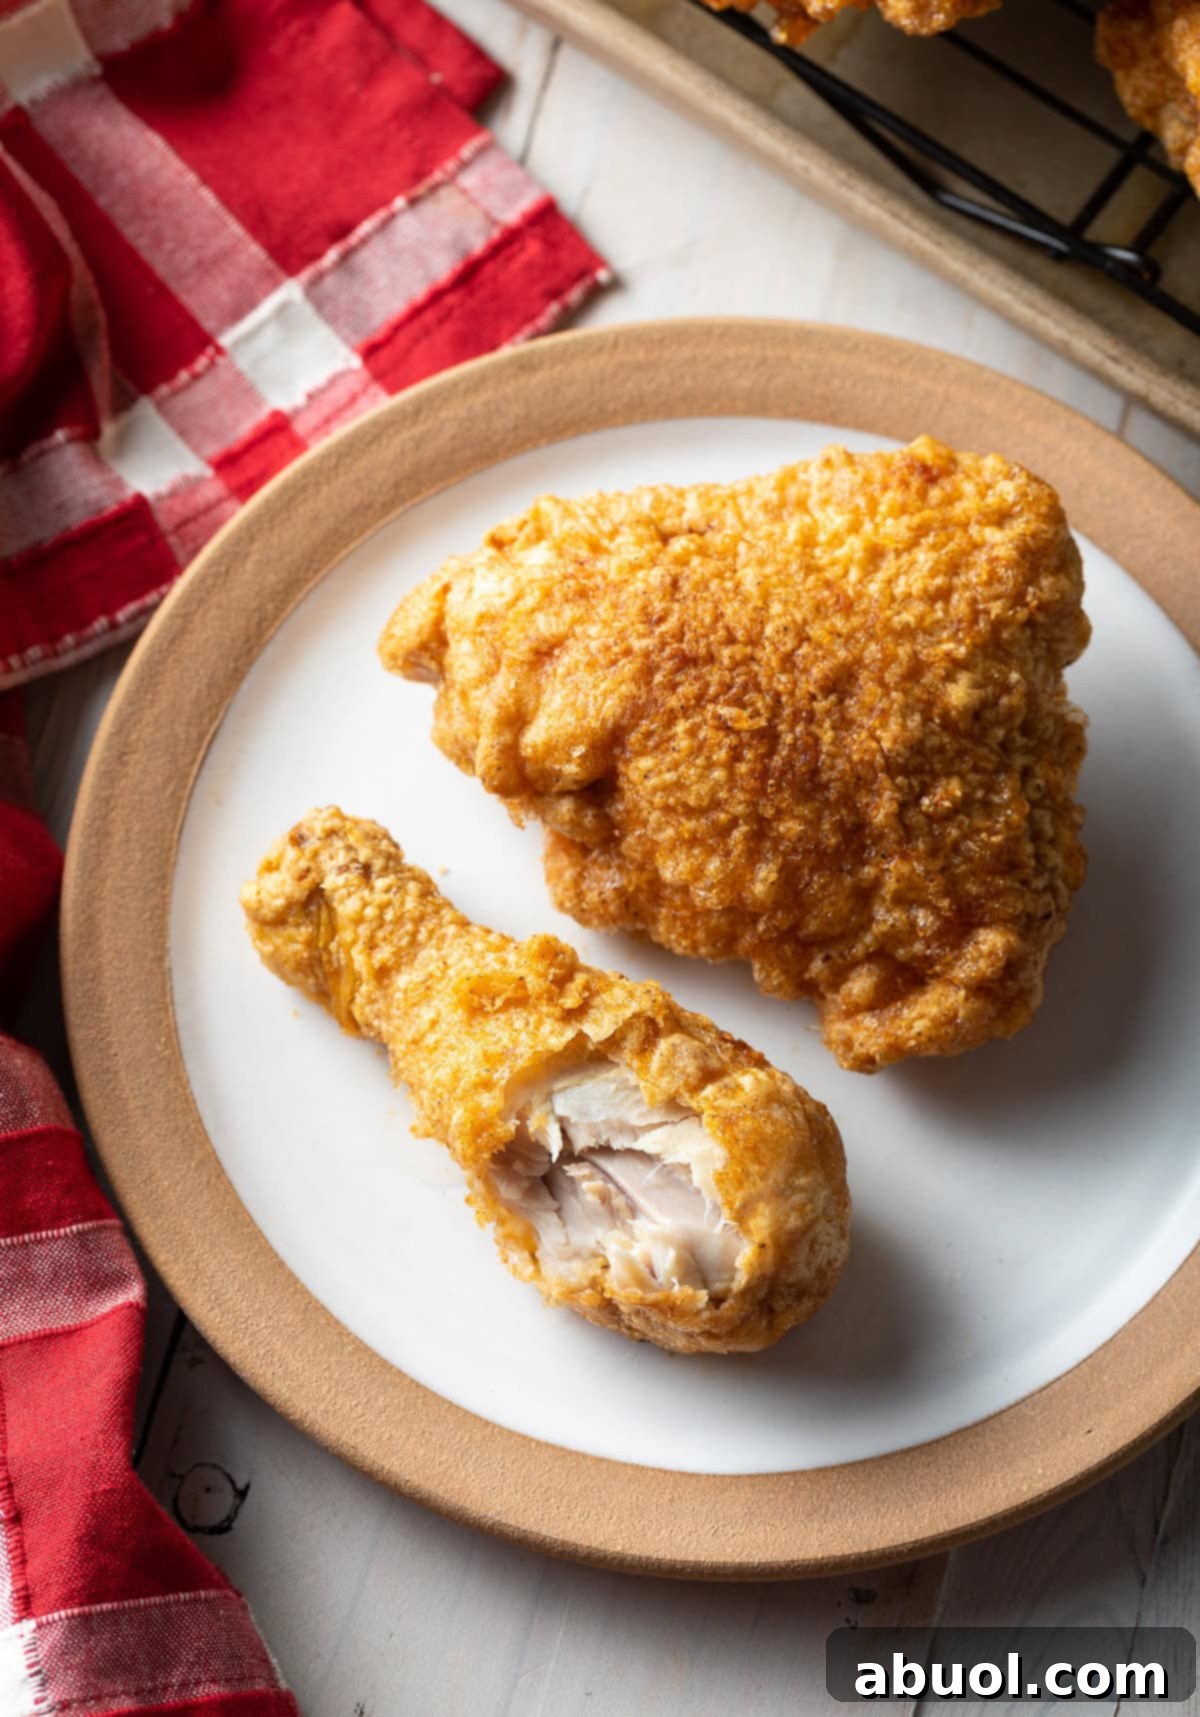
Experience the authentic taste of Northern-style fried chicken with our beloved Tavern Fried Chicken Recipe. Unlike traditional Southern recipes, this method foregoes buttermilk for a uniquely light, incredibly crispy skin and profoundly juicy meat. Prepare to delight your family and friends with this delicious, time-honored recipe that hails from the Yankee states!
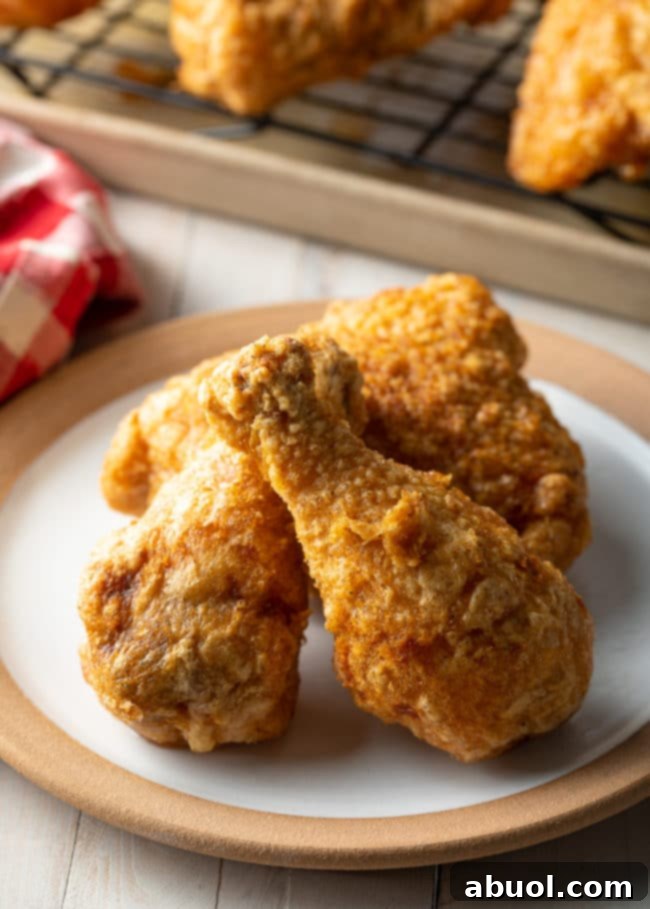
Unveiling the Best Northern Fried Chicken Recipe
Some of life’s greatest culinary treasures are passed down through generations, and our exceptional Tavern Fried Chicken recipe is certainly one of them. This cherished family secret comes from the kitchen of Lt. Dan’s grandmother, a wonderful woman affectionately known to us all as Mo. Her legacy lives on through this recipe, a true gift that has brought joy to countless meals over the years.
Decades ago, Mo and Papa owned a charming tavern in Northern Indiana, perfectly situated near the Michigan border. More than just a local watering hole for beer and classic cocktails, their establishment was renowned for a delightful array of “Northern” comfort foods. Patrons would gather for savory Pub cheese and crackers, adventurous frog legs, hearty burgers, soul-warming Hungarian goulash, creamy chicken and rice soup, and, of course, their legendary Tavern Fried Chicken. This particular fried chicken became a local favorite, celebrated for its distinct texture and irresistible flavor, setting it apart from any other.
The Secret to Our Exceptionally Crispy Fried Chicken (No Buttermilk Needed!)
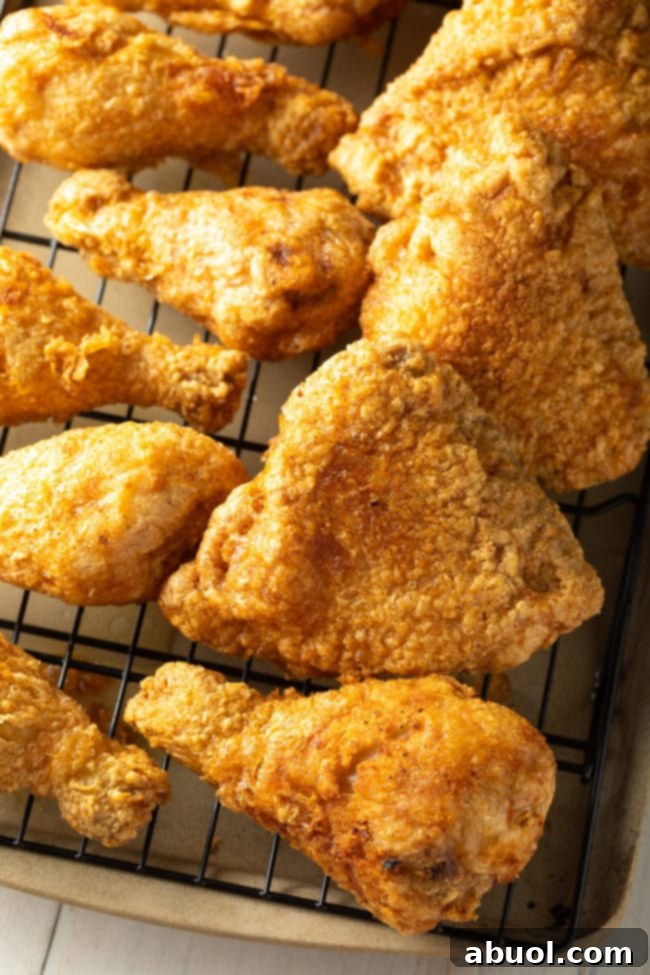
What makes Mo’s fried chicken truly unique, and why we adore this recipe, is its ingenious departure from the traditional Southern buttermilk method. Instead of the typical three-step flour-buttermilk-flour breading, Mo developed a signature dredge heavy on **cornstarch**. But the real game-changer was the final dip: pure **egg whites** just before the chicken hit the hot oil. Mo often explained that this innovative technique creates a profoundly lighter, crispier crust – a delicate, ethereal shell that stands in stark contrast to the thicker, knobby breading often found on Southern-style fried chicken.
The magic happens when the cornstarch and egg whites combine and interact with the intense heat of the oil. As Mo taught us, this combination causes the coating to puff up, filling with countless tiny air bubbles. This initial expansion contributes to its signature lightness. As cooking continues, these air bubbles gently compress, transforming the coating into an incredibly crispy, almost shattering crust. The result is a fried chicken where the focus isn’t solely on the coating, but rather a perfect harmony between the delicate crispness and the succulent, juicy meat within. And for an unparalleled depth of flavor and tenderness, Mo always insisted on brining the chicken beforehand – a step we wholeheartedly endorse and consider essential to achieving the best possible outcome.
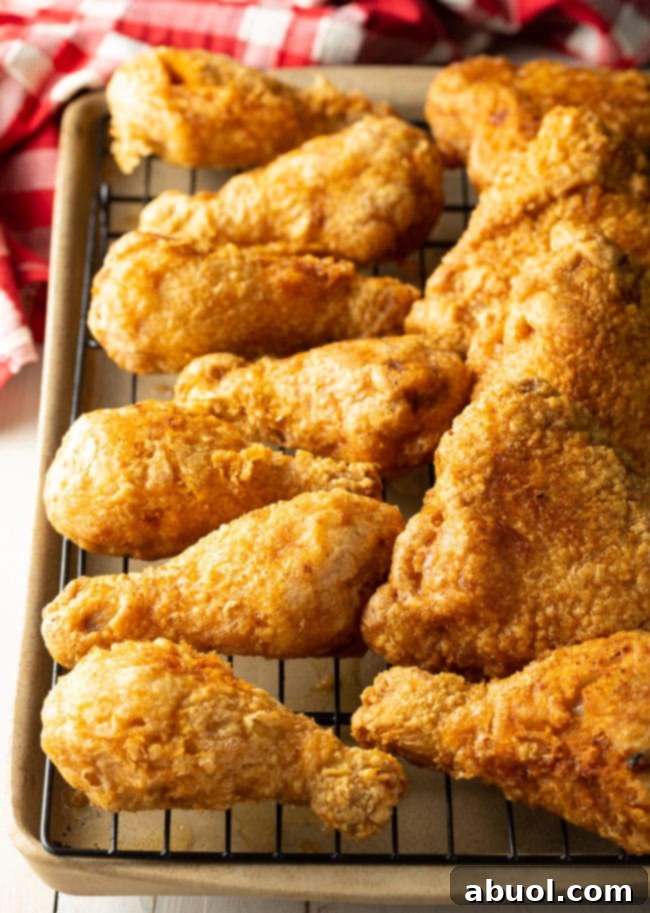
Northern Fried Chicken Vs. Southern Fried Chicken: A Delicious Comparison
While I hold Mo’s best fried chicken recipe in the highest regard for its remarkably thin and airy crust, an honest comparison with classic Southern buttermilk fried chicken reveals distinct characteristics, each with its own set of advantages and considerations.
Northern Fried Chicken: Light, Delicate, and Immediate
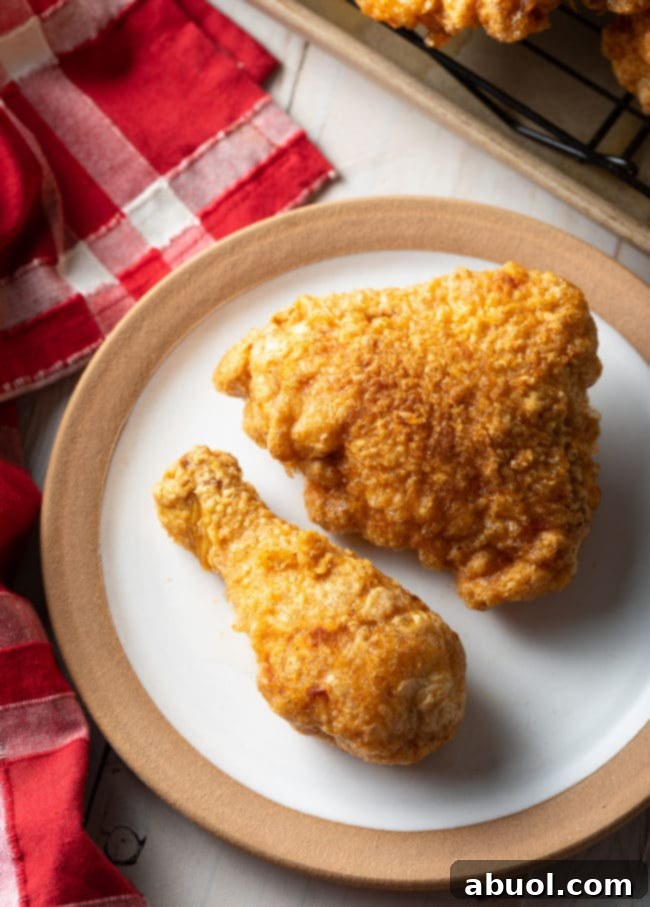
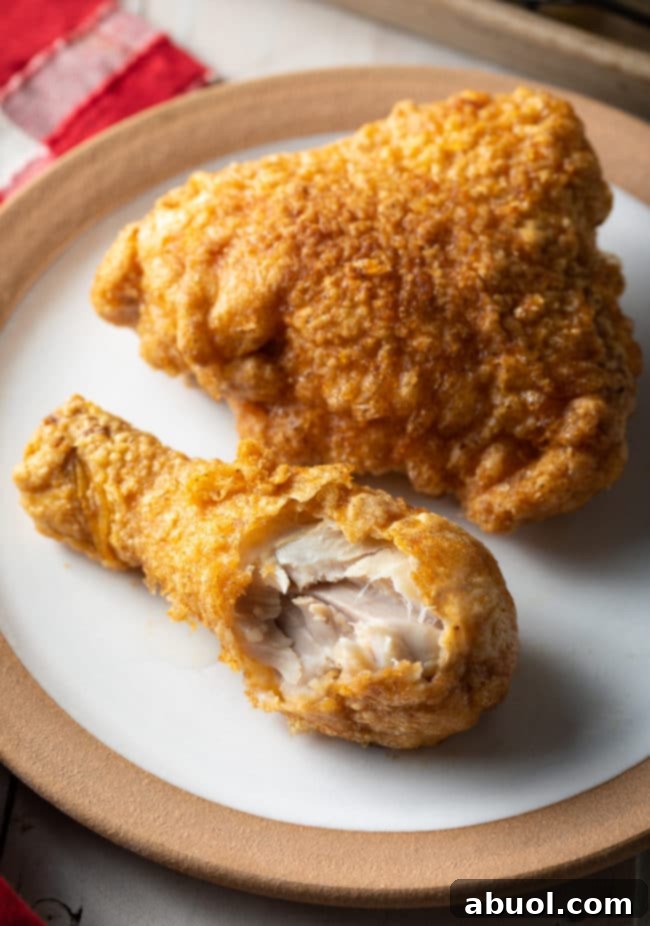
- Pro: An Ethereal Crunch. This Northern-style fried chicken boasts an exceptionally light and crunchy coating that is beautifully seasoned without overpowering the chicken itself. It acts as a delicate enhancement, allowing the natural flavors and juiciness of the chicken to shine through, rather than being completely overshadowed by a thick breading. The crispness is delicate and almost melts in your mouth.
- Pro: Juicy Meat. Because the coating isn’t as thick and dense, the heat penetrates efficiently, sealing in moisture and ensuring an incredibly juicy interior, especially when brined.
- Con: Best Eaten Fresh. Due to its delicate nature, the crust of Northern fried chicken doesn’t retain its peak crispness for as long as its Southern counterpart. This means it’s not ideal for making far in advance. For the ultimate experience, it should be enjoyed fresh out of the fryer, making it a perfect dish for immediate family dinners or smaller gatherings.
Southern Fried Chicken: Robust, Flavorful, and Great for Leftovers
- Pro: Hearty and Enduring. Southern fried chicken typically features a thicker, denser, and often craggier crust, achieved through the buttermilk dredge. This robust coating is excellent at locking in moisture for longer periods, making it a fantastic option for potlucks, picnics, or when you need a dish that holds up well for several hours after cooking. It’s a great make-ahead option.
- Pro: Flavorful Crust. The thicker breading provides a larger canvas for seasoning, often leading to a more intensely flavored crust that many find irresistible.
- Con: Can Overshadow the Chicken. Sometimes, the thick, heavily seasoned crust of Southern fried chicken can dominate the experience, potentially overshadowing the taste and texture of the chicken meat itself. The focus often shifts more towards the crunch and bold seasoning of the exterior.
Both styles offer unique and delicious experiences, but Mo’s Northern Tavern Fried Chicken offers a refined, delicate crispness that lets the quality of the chicken truly shine.
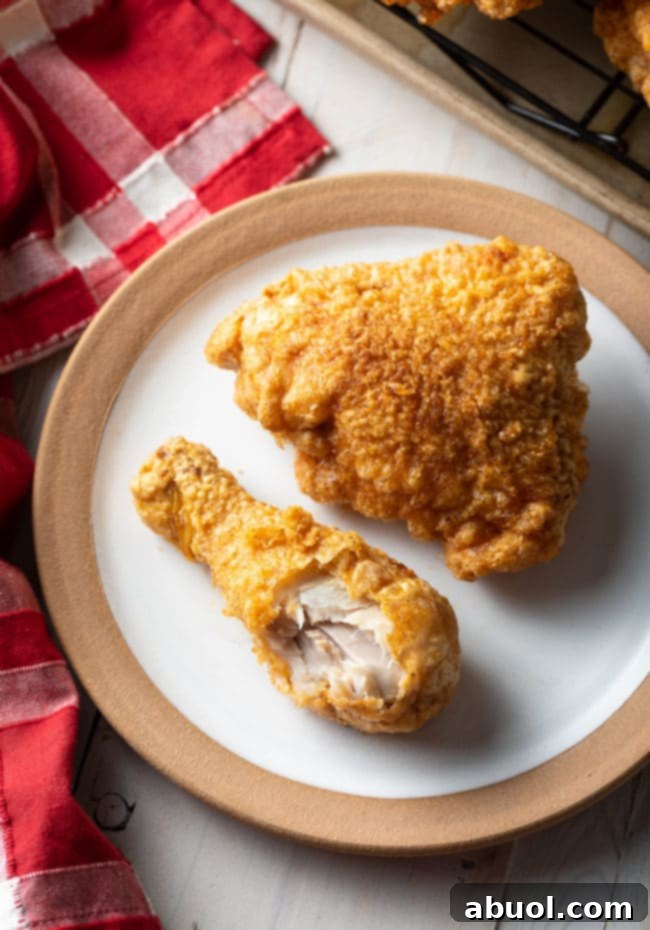
Essential Ingredients for Perfect Tavern Fried Chicken
Crafting this incredible Northern-style fried chicken requires a careful selection of ingredients, each playing a crucial role in achieving its signature flavor and texture. Here’s what you’ll need:
- Bone-In Chicken Pieces: For the most flavor and juiciness, we recommend using a mix of bone-in chicken legs and thighs. These cuts tend to stay moist and tender during frying, offering a rich flavor.
- Salt: Essential for both the pre-frying brine, which tenderizes and seasons the meat from within, and for seasoning the breading mixture, ensuring a flavorful crust.
- Cornstarch: This is the star ingredient for our light, crispy coating. A higher proportion of cornstarch to flour is key to creating that delicate, airy texture that sets Northern fried chicken apart.
- All-Purpose Flour: Provides structure to the coating. For those with dietary restrictions, a good quality gluten-free 1-to-1 baking mix can be substituted successfully.
- Paprika: We are utterly obsessed with smoked paprika for its depth and rich color, but sweet or hot paprika can be used according to your preference.
- Garlic Powder: Delivers a bold, savory, and zesty pop of flavor that complements the chicken beautifully.
- Onion Powder: Adds another layer of aromatic, savory zest, enhancing the overall seasoning profile.
- Black Pepper & Cayenne Pepper: A classic pairing for a touch of warmth and a delightful kick. Adjust the cayenne to your desired level of heat.
- Egg Whites: Crucial for Mo’s unique method. When beaten and used as a final dip, egg whites create the tiny air bubbles in the coating, leading to that characteristic puffed-up, delicate crispness.
- Peanut Oil: Our preferred oil for frying due to its high smoke point and neutral flavor. Alternatively, you can use lard, tallow, vegetable shortening, or any other oil suitable for high-heat frying.
Step-by-Step Guide: Crafting the Best Buttermilk-Free Fried Chicken
Follow these simple steps to recreate Mo’s legendary Tavern Fried Chicken in your own kitchen. Precision in each stage will ensure the most delicious and crispy results.
- Brine the Chicken for Maximum Juiciness: This initial step is non-negotiable for tender, flavorful chicken. Submerge your chicken pieces in a salty water solution for 1 to 2 hours. Brining significantly enhances both the taste and the succulent texture of the meat, ensuring it stays juicy even after frying.
- Thoroughly Dry the Chicken: After brining, remove the chicken and arrange the pieces on a wire rack. It is absolutely crucial that the chicken is thoroughly dry before proceeding to the next steps. Excess moisture can lead to a less crispy crust and splattering oil. Patting with paper towels can speed up this drying process.
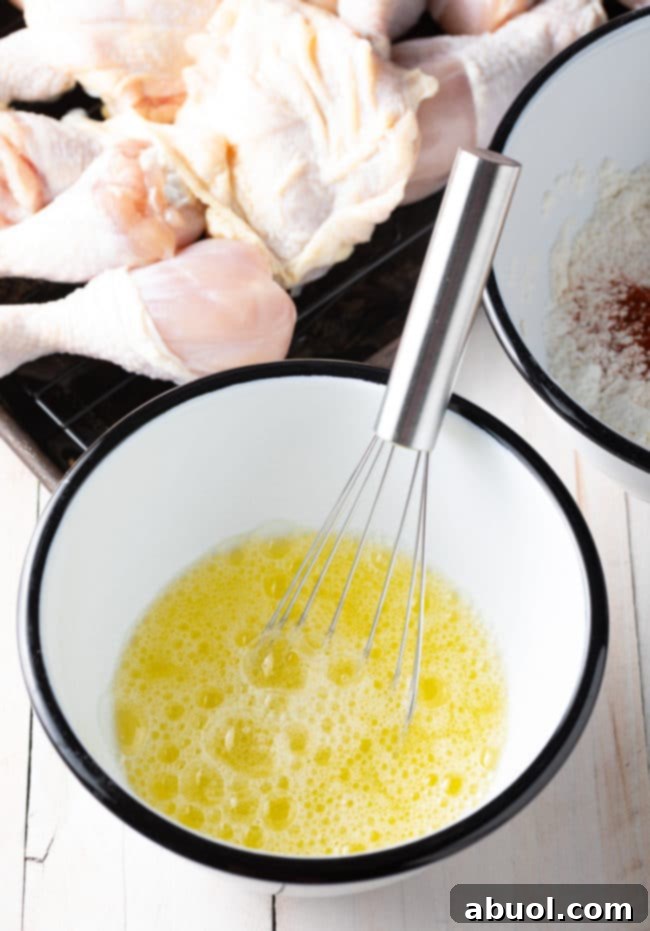
- Prepare the Signature Coating: In one large bowl, whisk together the cornstarch, all-purpose flour, and all your chosen seasonings (salt, paprika, garlic powder, onion powder, black pepper, and cayenne pepper). In a separate bowl, lightly beat the egg whites until slightly frothy to break them up and make them easier to work with.
- Preheat Your Oven: Set your oven to a low temperature (around 250°F / 120°C). This will serve as a warming drawer for your cooked chicken, keeping it crisp and hot while you fry subsequent batches.
- Prepare the Frying Oil: Place a large, heavy-bottomed Dutch oven or a wide, deep sauté pan over medium-high heat on your stovetop. Attach a reliable cooking thermometer to the side of the pan. Carefully pour your chosen high-heat oil into the pan, ensuring it’s deep enough to partially submerge the chicken pieces. Heat the oil gradually until it reaches a consistent temperature of 360°F (182°C). Maintaining this temperature is key to perfectly cooked chicken.
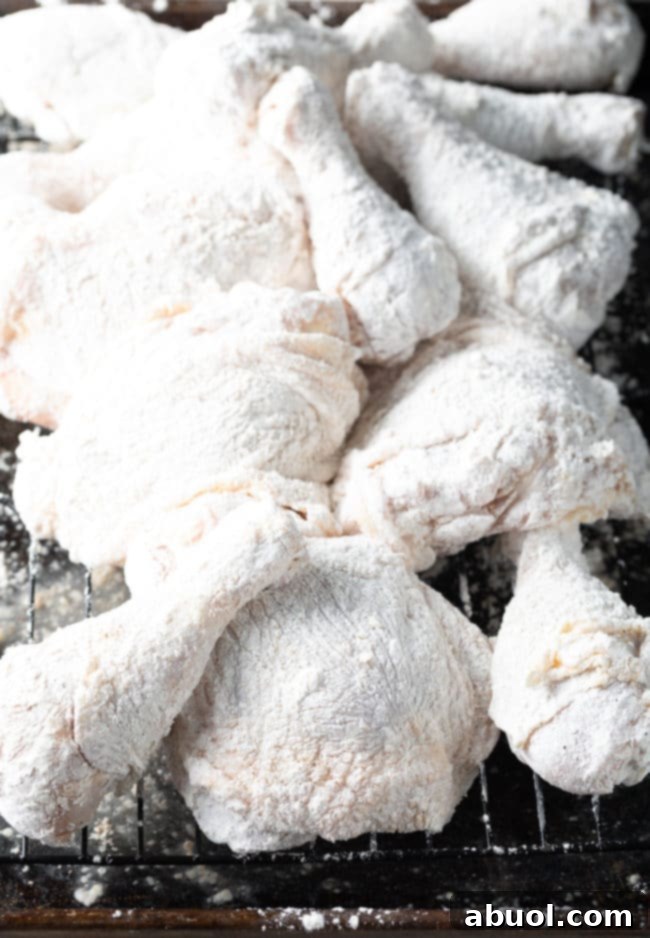
- Dredge the Chicken for Frying: This is where Mo’s unique method comes into play. Take one piece of the dry chicken and first dunk it thoroughly into the seasoned flour and cornstarch mixture, ensuring it’s completely coated. Then, immediately transfer that piece into the bowl of beaten egg whites, allowing any excess to drip off gently.
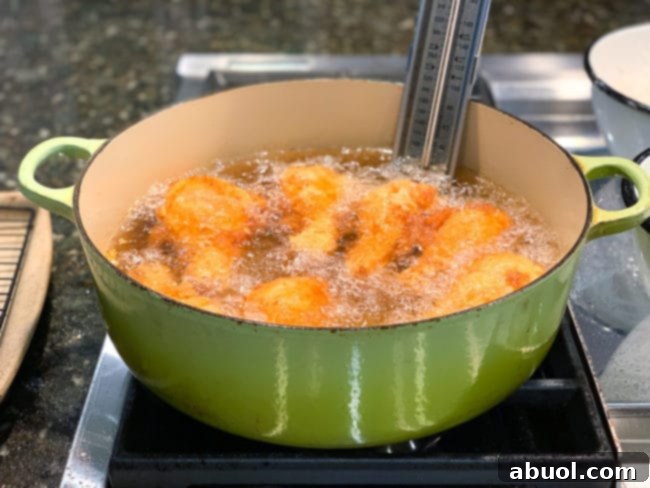
- Fry the Chicken to Golden Perfection: Carefully lower the battered chicken pieces into the preheated oil. Do not overcrowd the pan, as this will drop the oil temperature and result in soggy chicken. Fry the chicken for approximately 14-15 minutes, using tongs to flip the pieces every couple of minutes to ensure even cooking and browning on all sides. Continuously monitor your oil thermometer and adjust the heat as necessary to keep the temperature within the 350-360°F (175-182°C) range.
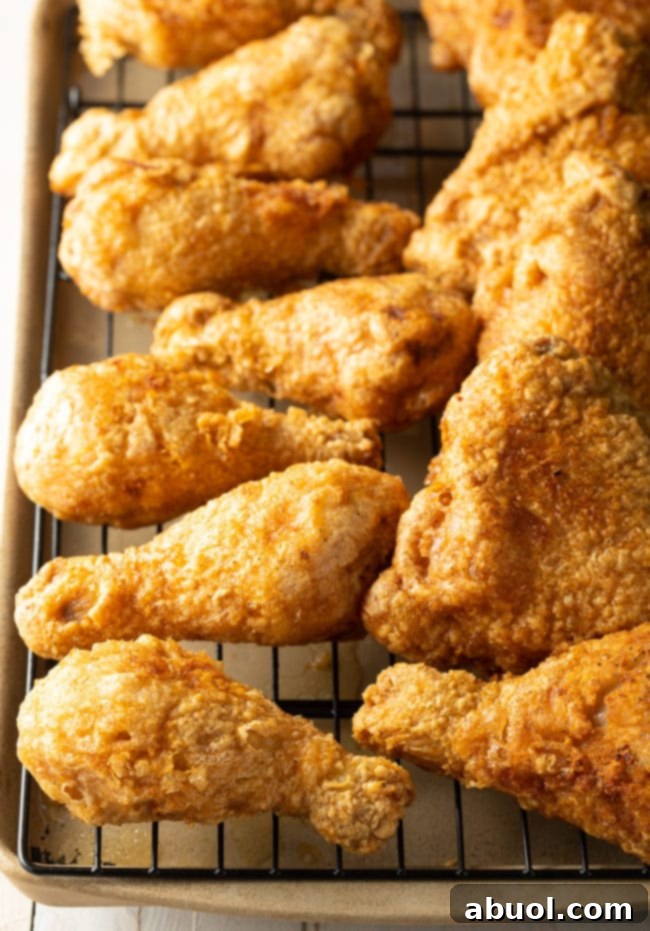
- Keep Warm While Finishing Batches: Once each batch of chicken is golden brown and cooked through, carefully remove the pieces from the oil using tongs. Place them on a clean wire rack set over a rimmed baking sheet; this allows any excess oil to drip away, keeping the crust crisp. Transfer the cooked chicken to your warm oven to maintain its temperature and crispness while you fry the remaining batches. Serve immediately once all chicken is cooked.
Find the complete, printable recipe card for Mo’s Extra Crispy Tavern Fried Chicken below. Enjoy every delightful bite!
Enhance Your Tavern Fried Chicken: Delicious Variations
While Mo’s original recipe is perfect as is, here are some thoughtful variations you can explore to customize your fried chicken experience:
- The Power of Brine: Although technically optional, we cannot stress enough the importance of brining. Skipping this step means sacrificing a significant boost in flavor and an unmatched level of juiciness. If time is a concern and you absolutely must skip the brine, ensure you generously salt the chicken pieces directly before rolling them in the cornstarch mixture to impart some essential seasoning.
- Using Whole Bone-In Chicken Breasts: If you prefer chicken breasts, feel free to use whole bone-in pieces. They will cook in roughly the same amount of time as the drumsticks and thighs, but remember they typically occupy more space in the frying pan. Adjust batch sizes accordingly to avoid overcrowding and maintain oil temperature.
- Boneless Chicken Options: This recipe adapts beautifully to boneless chicken cuts, such as boneless thighs or tenders. When using boneless chicken, significantly reduce the cooking time to approximately 8-10 minutes. Keep a very close eye on the chicken to prevent the breading from over-browning or burning, as boneless cuts cook much faster.
- Gluten-Free Adaptation: Making this fried chicken gluten-free is straightforward. The key is to verify that your cornstarch is 100% pure corn, without any added gluten-containing ingredients. Then, simply substitute the all-purpose flour with a reliable 1-to-1 gluten-free baking mix. The crispness and flavor will remain outstanding!
Perfect Pairings: What to Serve with Tavern Fried Chicken
Fried chicken is the quintessential American comfort food, and Mo’s Northern-style version is no exception. It harmonizes beautifully with a variety of side dishes, offering a delightful culinary experience.
For classic comfort, pair your crispy chicken with warm, carbohydrate-rich side dishes. Imagine fluffy mashed potatoes, rich and creamy mac and cheese, savory baked beans, or sweet and luscious creamed corn. These hearty options create a fulfilling and nostalgic meal.
Even though this is a Northern-style recipe, it beautifully complements traditional Southern dishes. Consider serving it alongside vibrant green beans, perfectly seasoned collard greens, crispy fried okra or stewed okra with tomatoes, comforting corn spoon bread, moist cornbread, and/or a creamy cheesy hominy casserole. This fusion of regional flavors creates an unforgettable feast.
Despite its lighter breading, deep-fried chicken is still a substantial dish. To balance its richness, incorporate some refreshing cold sides. A crisp coleslaw, creamy deviled egg potato salad, or a sweet and tangy carrot raisin salad can provide a welcome contrast and cut through the richness of the fried chicken.
For those who love an extra kick, we highly recommend drizzling a generous amount of homemade hot honey or your favorite hot sauce over the warm, crispy pieces of chicken. This adds a fantastic layer of sweet heat that elevates the entire dish.
Frequently Asked Questions About Fried Chicken
While generally a good practice for poultry, the beauty of deep-frying with a thermometer is that precise oil temperature management often negates the need for internal temperature checks. If you maintain your oil at the recommended 360°F (182°C) and cook the chicken for the full 14-15 minutes, your chicken pieces will be thoroughly cooked and safe to eat. For very large pieces, or if you’re unsure, you can always check with an instant-read thermometer at the thickest part of the meat (avoiding the bone) for 165°F (74°C).
If you find yourself with any delicious leftovers, store them in an airtight container in the refrigerator for up to 3 days. For best reheating results and to regain some of that wonderful crispness, we strongly recommend using an air fryer or a baking sheet in the oven for several minutes. Microwaving is generally not recommended as it tends to make the crust soggy and the chicken rubbery.
Technically, yes, you can freeze cooked fried chicken pieces for up to 3 months when stored in a sealed, freezer-safe container. However, it’s important to manage expectations: the breading will likely not regain its original crispy texture upon reheating, even with the best methods. While still tasty, it won’t be as delightfully crunchy as freshly-fried chicken.
Responsible Handling: What to Do With Leftover Cooking Oil
After enjoying your homemade tavern fried chicken, you’ll be left with used cooking oil. Proper handling and disposal are crucial, both for safety and environmental reasons.
For those who prefer to extend the life of their frying oil, the old-timers had it right: allow the oil to **cool completely** first. Once cool, carefully strain it through a fine-mesh sieve lined with cheesecloth to remove any food debris. Then, pour the filtered oil back into its original bottle or another airtight container and refrigerate it. You can typically reuse frying oil 3-4 times, depending on what you fried, before it should be discarded.
If you choose to discard the oil immediately after making this tavern fried chicken, again, wait until it is **fully cooled**. Once at room temperature, pour it back into its original container, secure the cap tightly, and then dispose of it in your household trash.
Here are a few key tips for safely managing used cooking oil:
- Never pour oil down your sink or drain! This is one of the most important rules. Oil solidifies in pipes, causing clogs and costly plumbing issues, and can harm municipal wastewater systems.
- Do not attempt to pour hot oil into any container. Hot oil can easily burn you or melt plastic containers, leading to dangerous spills. Always wait until it’s completely cool.
- Avoid pouring used cooking oil into your compost pile. While it might seem organic, cooking oil attracts various pests like rodents and insects, disrupting the composting process and creating unsanitary conditions.
Explore More Comforting Family-Inspired Recipes:
If you’ve enjoyed the taste of tradition with our Tavern Fried Chicken, you’ll love these other cherished family recipes, perfect for bringing warmth and flavor to your table:
- Nana’s Epic Ham Bone Navy Bean Soup
- Mom’s Best Pot Roast Recipe
- How To Make The BEST Potato Salad
- Hungarian Chicken Paprikash
- Homemade Lasagna with Sausage
- Skillet Turkey Pot Pie
- Grandma’s Corn Pudding Recipe
Get the Full (Printable!) Mo’s Extra Crispy Fried Chicken Recipe Below. Enjoy!

Print Recipe
Leave a Review »
Best Fried Chicken Recipe (Tavern Style!)
20 minutes
30 minutes
2 hours
2 hours 50 minutes
Our Best Fried Chicken is made northern style without buttermilk for a light and crispy skin and incredibly juicy chicken. Your family will love this uniquely delicious tavern fried chicken recipe from the Yankee states!
16 pieces
Video
Ingredients
US Customary – Metric
- 4 pounds chicken legs and bone-in thighs (about 16 pieces)
- 1/4 cup salt + 2 teaspoons, divided
- 1 1/2 cups cornstarch
- 1 cup all-purpose flour (could be gluten-free baking mix)
- 1 teaspoon paprika (I always use smoked paprika)
- 1 teaspoon garlic powder
- 1 teaspoon onion powder
- 1/2 teaspoon ground black pepper
- 1/4-1/2 teaspoon cayenne pepper
- 10 egg whites
- 48 ounce peanut oil (or another high-heat oil)
Instructions
For the Brine:
- Measure 1/4 cup salt into a large bowl, big enough to fit all the chicken. Add 1 cup hot tap water and stir until the salt dissolves. Then fill the bowl 1/3 full with cold water. Add the chicken pieces, then add additional cold water to ensure all pieces are covered. Place the bowl in the refrigerator and brine for 1-2 hours.
- Set a wire rack over a large rimmed baking sheet and move the brined chicken pieces to the rack to thoroughly dry out. They must be very dry before proceeding. You can assist the drying process by gently patting the chicken with paper towels. Air drying usually takes 30-60 minutes.
For the Breading:
- Set out two large, clean bowls. In the first bowl, whisk together the cornstarch, flour, remaining 2 teaspoons salt, paprika, garlic powder, onion powder, black pepper, and cayenne. In the second bowl, whisk the egg whites to break them up.
- Preheat your oven to 250 degrees F (120°C). Once the chicken is very dry, roll all the pieces in the seasoned cornstarch mixture and place them back on the wire rack. Allow the chicken to rest briefly while you prepare your frying oil.
To Fry:
- Place a large Dutch oven (or wide, deep sauté pan) over medium-high heat. Attach a cooking thermometer to the side of the pan. Pour the peanut oil (or chosen high-heat oil) into the pan and wait until it reaches 360 degrees F (182°C). Adjust the burner as needed to try and maintain this temperature.
- Dunk one piece of chicken at a time into the beaten egg whites, allowing any excess to drip off. Carefully place the chicken into the hot oil. Roll the chicken over with tongs to ensure even coating and cooking. Repeat until you fill the pan without overcrowding.
- Fry the chicken for 14-15 minutes, flipping the pieces with tongs every 2 minutes for even cooking and browning. Continuously monitor the cooking thermometer and adjust the heat if the temperature dips below 350°F (175°C) or rises above 360°F (182°C).
- Set a clean wire rack over another rimmed baking sheet, or line a tray with paper towels. Once cooked, place the golden-brown fried chicken on the rack (or paper towels) and transfer to the warm oven to keep crisp.
- Repeat with the remaining chicken in one to two more batches until all pieces are cooked. Once all the chicken is prepared, serve warm and enjoy!
Notes
Gluten-Free? Yes, this recipe can be made GLUTEN FREE by substituting a Gluten Free 1-to-1 Baking Mix for the all-purpose flour.
If you have leftovers, they can be stored in an airtight container in the fridge for up to 3 days. Reheat in an air fryer or on a baking sheet in the oven for several minutes to restore some crispness to the skin. Microwaving is generally not recommended for reheating fried chicken as it compromises the texture.
Nutrition Information
Calories: 287kcal,
Carbohydrates: 18g,
Protein: 14g,
Fat: 18g,
Saturated Fat: 4g,
Cholesterol: 60mg,
Sodium: 105mg,
Potassium: 175mg,
Fiber: 1g,
Sugar: 1g,
Vitamin A: 134IU,
Vitamin C: 1mg,
Calcium: 8mg,
Iron: 1mg
Main Course
American
Sommer Collier
YOU can help this recipe RANK on Google – TAP 5 STARS so other hungry people can find it. Thank you!