
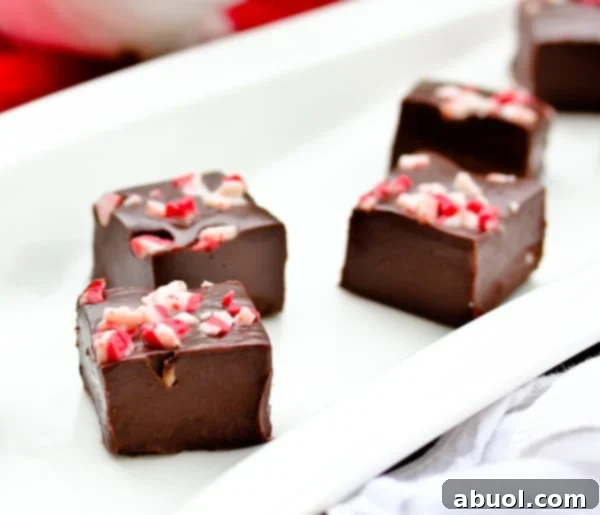
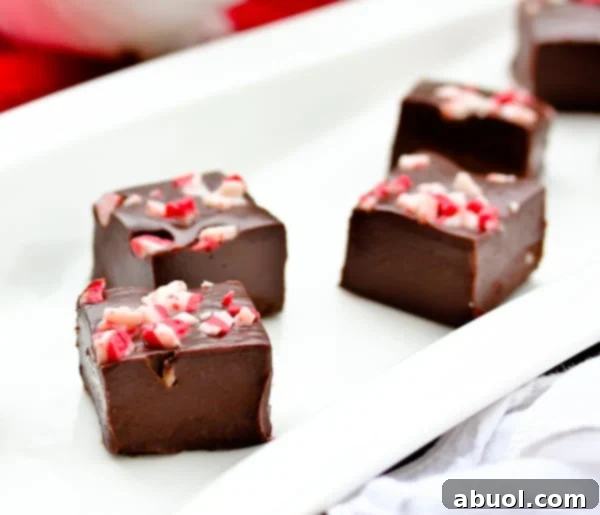
As the air chills and the days grow shorter, there’s a unique magic that whispers promises of festive gatherings, cozy evenings, and the irresistible allure of holiday treats. And what better way to embrace the spirit of the season than with a delightful batch of rich, chocolatey, and refreshingly minty Peppermint Fudge? This timeless classic is not just a dessert; it’s a celebration in every bite, perfect for sharing at holiday parties, gifting to loved ones, or simply indulging in a moment of pure, sweet bliss. Its ease of preparation makes it a standout choice for even the busiest holiday schedules, ensuring you can whip up a batch of homemade joy without any stress.
Embrace the Holiday Spirit with Peppermint Fudge
Life, much like the changing seasons, often presents its share of highs and lows. This past fall has certainly been a rollercoaster, peppered with moments of delightful spontaneity amidst the usual hustle and bustle. To lift my spirits, my thoughtful husband surprised me with an unforgettable hot air balloon ride. Soaring above the majestic mountain peaks, feeling the crisp, invigorating air, and marveling at the breathtaking scenery was an experience that truly reconnected me with a childlike sense of wonder and pure joy. It was a perfect, serene farewell to autumn’s vibrant palette.
Now, with fall’s beauty fading, my heart eagerly anticipates the vibrant energy and enchanting festivities that Christmas brings. This time of year invariably fills my thoughts with festive dreams—not just of sugar plums, but also of an exquisite array of dazzling holiday cookies and, of course, the incredibly smooth and luscious Peppermint Fudge. It’s the kind of treat that encapsulates the warmth and cheer of the holidays, making every moment feel a little more special.

The Secret to Effortless Peppermint Fudge: A No-Fail Recipe
Traditional chocolate fudge often comes with a daunting reputation. It’s frequently perceived as a culinary “diva”—temperamental, demanding precision, and notoriously unpredictable, leaving bakers wondering if their efforts will yield a grainy disappointment or a perfectly smooth delight. But I’m here to tell you that this Chocolate Peppermint Fudge recipe is nothing of the sort. Consider it the low-maintenance, dependable friend of the dessert world: simple, straightforward, and consistently delivers exceptional results.
Our easy peppermint fudge recipe serves as an excellent foundation for all your fudge-making adventures. With just a handful of readily available ingredients, you can create a fudge that is sinfully silky, wonderfully dense, and packed with a vibrant peppermint flavor that instantly evokes the magic of the holidays. This recipe transforms the art of fudge making from a challenging endeavor into an enjoyable and rewarding experience, guaranteeing a perfectly smooth, melt-in-your-mouth texture every single time.
The beauty of this recipe lies in its simplicity. You don’t need a candy thermometer or advanced baking skills to achieve a professional-quality fudge. The combination of high-quality dark chocolate, creamy sweetened condensed milk, and a touch of butter forms the luxurious base, while the crisp peppermint extract infuses it with that iconic holiday essence. Whether you’re a novice baker or a seasoned pro, you’ll appreciate how forgiving and delightful this recipe is, ensuring your holiday dessert table or gift baskets are always filled with homemade perfection.

Mastering the Art of Smooth Fudge: Essential Recipe Notes
Achieving the perfect, velvety texture in fudge is truly an art, and it hinges primarily on one crucial step: the slow and gentle melting of the chocolate into the mixture. This isn’t a step to rush; patience is your secret ingredient here. Rushing the melting process by applying too much heat too quickly is the primary culprit behind grainy fudge. When chocolate heats too fast, the sugar crystals don’t dissolve properly, leading to that undesirable gritty texture. Instead, opt for a method that ensures even, controlled heat.
The best technique for this is using a double boiler. Place your chocolate mixture in a heatproof glass bowl set over a small pot of simmering water, ensuring the bottom of the bowl does not touch the water. The steam from the simmering water will gently and gradually melt the chocolate, creating a beautifully smooth and unified mixture. If you prefer the microwave, use it in short 30-second bursts on medium power, stirring thoroughly after each interval until the chocolate is fully melted and integrated. This gradual approach prevents overheating and guarantees a sinfully smooth result.
What if your fudge does get grainy? Don’t panic! This usually indicates that it heated too quickly and started to dry out or that the sugar crystallized. The good news is, it’s often salvageable. Simply add about 1/4 to 1/2 cup of water to the grainy mixture. Return it to gentle heat (preferably over a double boiler again) and stir continuously. As the water is incorporated and the mixture reheats, the sugar crystals will redissolve, and the fudge will regain its smooth, yet appropriately thick, consistency. Keep stirring until you achieve that desired luscious texture.
For fudge to set properly and be easy to cut, it needs to reach a very specific consistency before being poured into the dish. Aim for a texture akin to a really thick cake batter – almost too dense to pour easily, but not quite solid. If your mixture appears too loose or watery at this stage, it won’t firm up enough in the fridge, resulting in a soft, sticky, and hard-to-handle fudge. Continue to gently heat the mixture, stirring occasionally, until it reaches this ideal thickness. It might take a few extra minutes, but this step is critical for fudge that holds its shape beautifully.
Once you’ve poured the velvety fudge into your prepared dish, there’s a simple trick to achieving a perfectly smooth, bubble-free consistency on the surface. Gently tap the fudge pan on your counter. Don’t just do it a couple of times; continue tapping for at least a minute or two. This action forces any trapped air bubbles to rise to the surface and pop, resulting in a dense, uniform texture and a visually appealing, glossy finish. This seemingly small step makes a big difference in the final presentation and mouthfeel of your homemade fudge.
While making fudge is surprisingly quick, requiring minimal active cooking time, it does demand patience during the setting phase. Plan for anywhere from 3 to 8 hours of refrigeration to allow the fudge to firm up completely before you attempt to cut it. Rushing this step will lead to messy cuts and a softer texture than desired. A well-chilled fudge will slice cleanly and hold its shape perfectly. For more delightful holiday treat recipes that are equally simple and satisfying, we’ve got you covered with a plethora of festive ideas right here!

Peppermint Fudge Ingredients: Quality Matters
Crafting exceptional Peppermint Fudge starts with selecting quality ingredients. Each component plays a vital role in achieving that perfect balance of flavor and texture:
- Sweetened Condensed Milk: This is the backbone of our easy fudge recipe, providing the essential sweetness and creamy base. It helps create that signature smooth, dense texture without the need for complex sugar cooking.
- Butter: A touch of butter adds richness and contributes to the fudge’s luxurious, melt-in-your-mouth quality. It also helps with the overall smoothness and prevents sticking. Remember to use extra butter for greasing your baking dish, ensuring easy removal.
- Dark Chocolate Chips or Chunks: For a robust chocolate flavor that pairs beautifully with peppermint, dark chocolate is preferred. However, you can adjust this to your taste, using semi-sweet or even milk chocolate for a sweeter, milder profile. High-quality chocolate will significantly enhance the final taste and texture of your fudge.
- Salt: A pinch of salt is crucial for balancing the sweetness and enhancing the deep chocolate flavors, preventing the fudge from being overly cloying.
- Peppermint Extract: This is where the magic happens! Use pure peppermint extract for the best, most authentic minty flavor. Start with the recommended amount and adjust to your liking, remembering that a little goes a long way.
- Vanilla Extract: Pure vanilla extract complements the chocolate and peppermint, adding a layer of warmth and depth to the overall flavor profile.
- Andes Peppermint Chunks (optional): These add an extra burst of minty chocolate flavor and a delightful textural contrast. If you can’t find Andes chunks, crushed candy canes are an excellent alternative for both flavor and festive appeal.
Discover More Fudge Recipe Creations:
- Maple Walnut Fudge – A classic, nutty delight perfect for fall and winter.
- Layered Peppermint Fudge – Explore variations on this minty favorite for a multi-dimensional treat.
- Chocolate Peanut Butter Candy (Old Fashioned Fudge) – The timeless pairing of chocolate and peanut butter in a smooth fudge.
- 4-Ingredient Pistachio Gelato Fudge – An unexpectedly easy and elegant fudge with a unique flavor.
- Peanut Butter Fudge ~ Brown Eyed Baker – A rich, creamy indulgence for peanut butter lovers.
- Red Velvet Fudge ~ I Am Baker – A vibrant and decadent option with a hint of cocoa.
- Coconut Milk Fudge ~ Smitten Kitchen – A tropical twist for a different kind of fudge experience.
Print Recipe
Leave a Review »
Peppermint Fudge Recipe
3
10
13
64 pieces
Ingredients
- 14 ounces sweetened condensed milk
- 1 tablespoon butter + extra for buttering the dish
- 1 pound dark chocolate chips or chunks
- 1/4 teaspoon salt
- 1/4 teaspoon peppermint extract
- 1 teaspoon vanilla extract
- 1 cup Andes Peppermint Chunks
Instructions
-
Lightly grease an 8×8-inch or 8×11-inch baking dish with butter. Evenly sprinkle half of the peppermint chunks into the bottom of the dish and set it aside.
-
Prepare a double boiler by placing a medium saucepan over medium heat with about 2 inches of water. Place a heatproof glass bowl over the saucepan, ensuring the bottom of the bowl does not touch the simmering water.
-
Into the glass bowl, pour the sweetened condensed milk and add the butter. Allow them to gently warm and melt together over the simmering water.
-
Once the butter is melted, add the dark chocolate chips (or chunks) and the salt to the bowl. Stir the mixture continuously, allowing the chocolate to slowly melt and combine with the milk and butter. This process should take approximately 5 minutes, resulting in a rich, smooth, and thickening mixture.
-
The mixture should reach a consistency similar to a very thick cake batter – it will be almost too thick to pour, but still manageable. This is the ideal thickness for proper setting.
-
Remove the bowl from the heat. Stir in both the peppermint extract and the vanilla extract until they are thoroughly combined into the chocolate mixture, infusing the fudge with its signature flavor.
-
Carefully pour the fudge mixture into the prepared baking dish. Gently tap the dish on the counter for at least one minute. This essential step helps release any trapped air bubbles, ensuring a smooth, uniform surface and a denser, more pleasant texture in your finished fudge.
-
Sprinkle the remaining half of the peppermint chips evenly over the top of the poured fudge. Transfer the dish to the refrigerator and allow it to chill and set completely for a minimum of 3 hours, or preferably longer, until firm.
-
To cut the fudge, fill a glass with hot tap water and dip a sharp knife into it, then wipe it clean and dry. Make quick, clean cuts into 1-inch squares. Re-dip and wipe the knife between each cut to ensure smooth, precise edges and prevent the fudge from sticking.
Nutrition
Calories: 80kcal,
Carbohydrates: 10g,
Protein: 1g,
Fat: 4g,
Saturated Fat: 4g,
Cholesterol: 3mg,
Sodium: 28mg,
Potassium: 68mg,
Fiber: 1g,
Sugar: 8g,
Vitamin A: 20IU,
Vitamin C: 0.2mg,
Calcium: 45mg,
Iron: 0.1mg
Cook It? Love It? Rate It!YOU can help this recipe RANK on Google – Share your experience and rating! Thank you!
Serving and Gifting Your Delightful Peppermint Fudge
Once your Peppermint Fudge is perfectly chilled and cut into immaculate squares, the possibilities are endless! For holiday gatherings, arrange the shimmering pieces on an elegant platter, perhaps alongside other festive treats like gingerbread cookies or sugar cookies. The vibrant green of the peppermint chunks against the deep chocolate makes for a stunning visual display that is sure to draw eyes and eager hands.
This easy Peppermint Fudge also makes for an incredibly thoughtful and appreciated edible gift. Package the squares in decorative tins, small cellophane bags tied with festive ribbons, or even elegant gift boxes. A homemade gift imbued with such holiday cheer is far more precious than anything store-bought. Don’t forget to include a little tag with serving suggestions or a warm holiday message. It’s a delicious way to spread joy during the festive season.
To ensure your fudge stays fresh and delicious, store it in an airtight container in the refrigerator. Properly stored, your homemade Peppermint Fudge will maintain its exquisite texture and vibrant flavor for up to two weeks, though it’s often so popular it rarely lasts that long! You can also freeze fudge for longer storage; wrap it tightly in plastic wrap and then aluminum foil, and it will keep well for up to 3 months. Thaw in the refrigerator before serving.
As the holiday season unfolds, filled with sparkling lights, joyful carols, and cherished moments with loved ones, let this indulgent Peppermint Fudge be a sweet reminder of the simple pleasures that make this time of year so special. Its rich chocolate, refreshing peppermint, and unbelievably smooth texture make it more than just a dessert—it’s a tradition in the making, a taste of comfort, and a testament to the joy of homemade goodness. We hope this recipe brings a little extra magic to your celebrations and creates lasting sweet memories.