
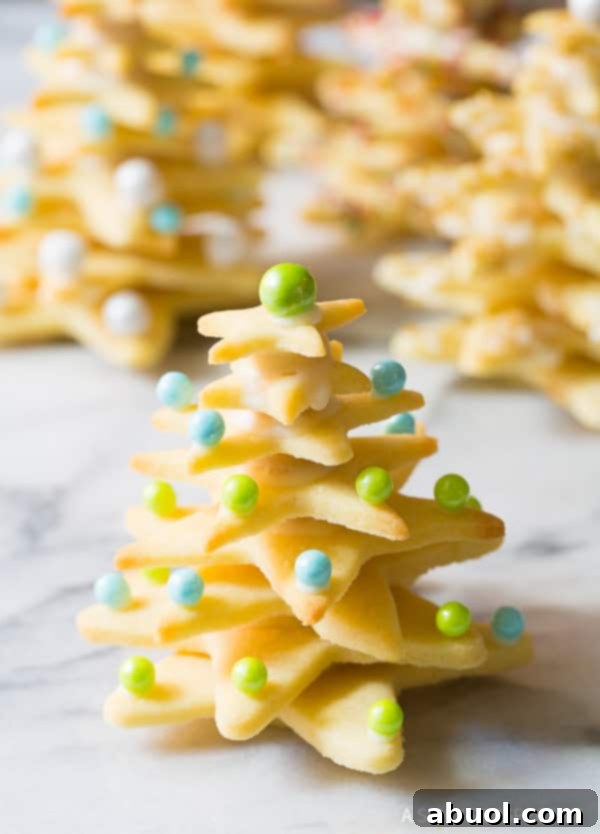
Searching for a unique and impressive treat to share this holiday season? Look no further than these enchanting 3D Christmas Cookies! They are not just cookies; they are miniature works of edible art that bring immense joy to both the baker and the lucky recipient. Imagine gifting a towering, sparkling Christmas tree, entirely made of delicious sugar cookies – it’s a fabulous, unforgettable gesture that truly captures the spirit of the season. These whimsical treats are sure to be the highlight of any holiday gathering or gift exchange, leaving a lasting impression with their stunning visual appeal and delightful taste.
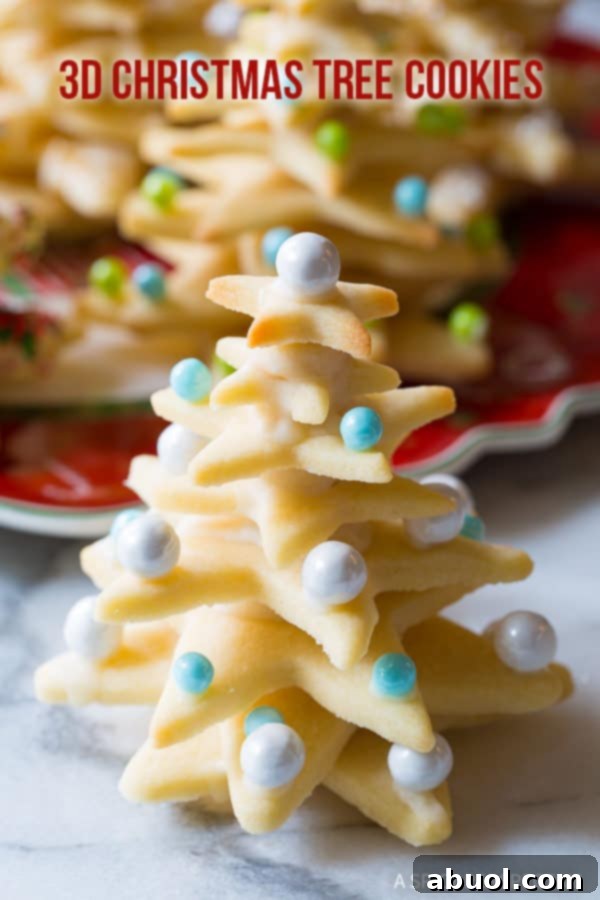
Holiday Baking Elevated: Crafting Spectacular 3D Christmas Tree Cookies
The holiday season has a magical way of inspiring us, and for many, that magic finds its way into the kitchen. Christmas baking, in particular, becomes a joyous ritual, transforming simple ingredients into festive delights. While we adore classic holiday cookies, there’s something extra special about treats that truly sparkle and stand out. At Christmas, cookies often get an upgrade – they become grander, more elaborate, and heavily decorated. However, achieving that “wow” factor doesn’t necessarily require the skills of a professional pastry chef or a seasoned artist. This year, let’s move beyond flat, intricately piped cookies and embrace the allure of dimension. Instead of relying solely on complex decorating techniques, we can create truly inspired cookies by focusing on height and visual depth. These 3D Christmas Tree Cookies are a perfect example, offering a breathtaking presentation with surprisingly simple construction. They are designed to impress your friends and family, making them believe you’ve spent hours perfecting an intricate design, when in reality, it’s all about clever stacking and a fantastic sugar cookie base.
The joy of holiday baking lies not just in the taste of the treats, but also in the process of creating something beautiful and memorable. These sculptural cookies provide an engaging baking experience that’s perfect for families and bakers of all skill levels. They offer a unique twist on traditional sugar cookies, transforming them into festive centerpieces or heartfelt edible gifts. Imagine the delight of presenting a recipient with a miniature, edible Christmas tree – it’s a moment of pure holiday magic that a flat cookie simply can’t replicate. With a little creativity and our straightforward guide, you can easily add this show-stopping dessert to your holiday repertoire.
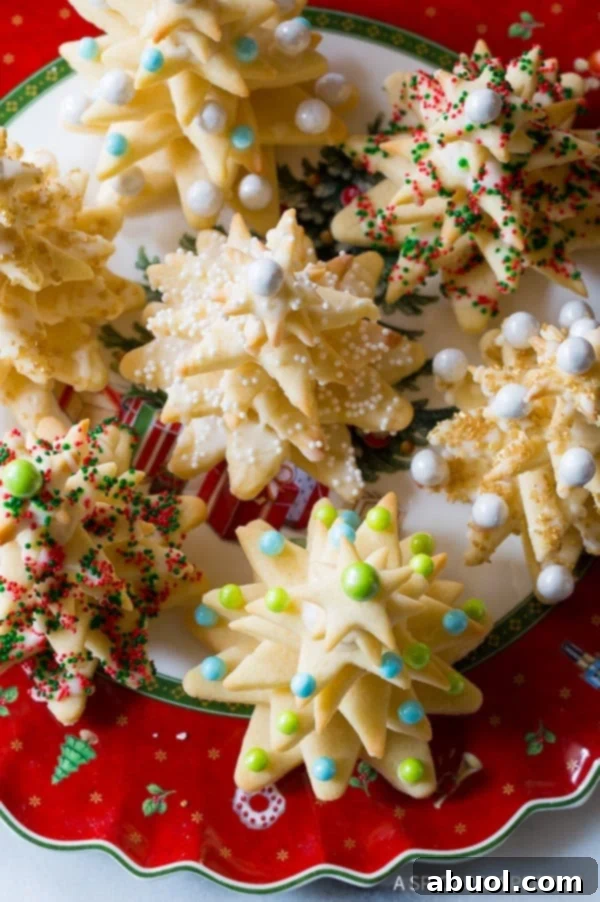
The Secret to Spectacular 3D Christmas Cookies: Simplicity and Style
What makes these 3D Christmas Tree Cookies so remarkable is their striking appearance combined with their straightforward preparation. You might look at these edible masterpieces and think they’re reserved for expert bakers, but the truth is, they require very little advanced technique. If you can confidently roll out dough, use a cookie cutter, and stack items, you possess all the skills needed to create these delightful holiday treats. It’s an accessible baking project that yields incredibly rewarding results, perfect for anyone looking to add a touch of whimsy to their festive spread.
The foundation of any marvelous 3D Christmas Cookie is, without a doubt, a truly exceptional roll-out sugar cookie recipe. A good recipe ensures your cookies hold their shape beautifully during baking, provide a sturdy base for stacking, and taste absolutely divine. A reliable sugar cookie dough won’t spread excessively, allowing the crisp edges and distinct star shapes to remain perfectly defined, which is crucial for the structural integrity and visual appeal of your festive cookie trees. The key is to select a dough that is firm enough to be handled and cut precisely, yet still bakes up tender and buttery. Our tried-and-true recipe, detailed below, guarantees success every time, providing a buttery, tender cookie that’s ideal for this three-dimensional project. Achieving perfect cutout cookies is easier than you think, especially when you start with the right foundation. This ensures your hard work in stacking is not undermined by misshapen or crumbly cookies.
Step-by-Step Guide: How to Assemble Your Own 3D Christmas Tree Cookies
Creating these charming 3D Christmas Tree Cookies is an enjoyable process that promises a dazzling display. Follow these detailed steps to ensure your cookie trees stand tall and proud, becoming a focal point of your holiday celebrations:
1. Essential Cookie Cutter Selection & Dough Preparation:
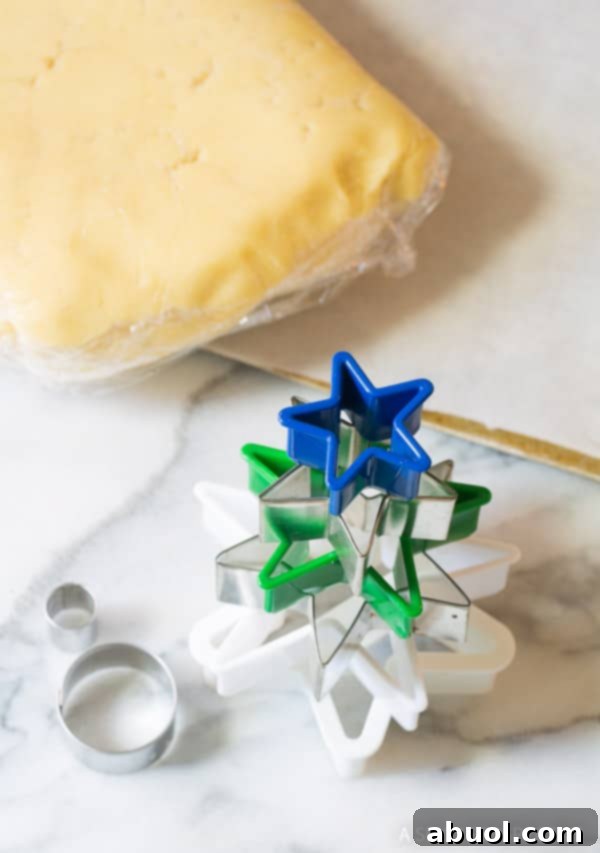
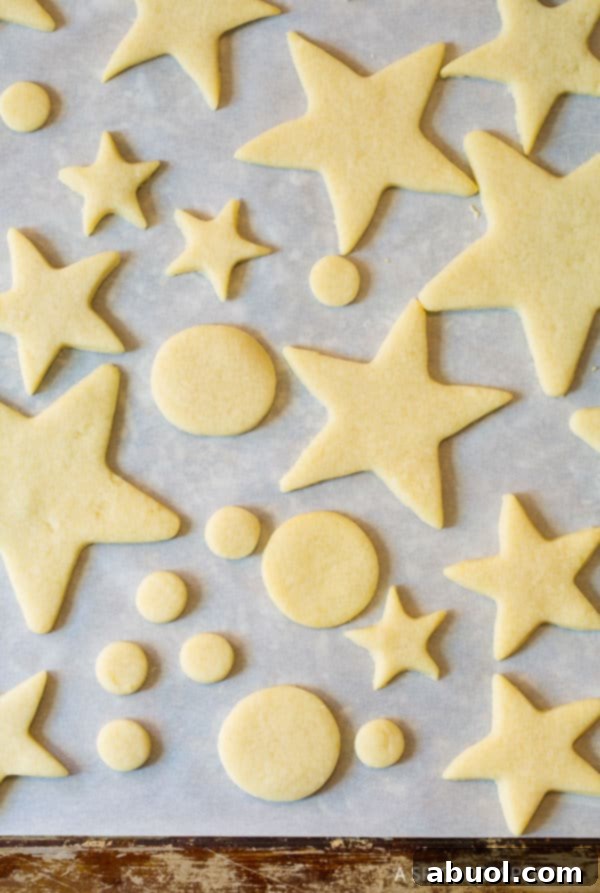
The magic begins with your cookie cutters. For each magnificent Christmas tree, you’ll need a set of at least four different sizes of star-shaped cookie cutters, progressing from a large base to a tiny top. A set offering even more incremental sizes is fantastic if you have one, as it allows for a smoother, more tapered tree shape and a more natural silhouette. For each tree, you will cut out eight star cookies in total (two of each size, or varying pairs if you have more cutters). Additionally, you’ll need one larger round cookie cutter (approximately 1.5 inches in diameter) for the sturdy base of each tree. Crucially, you’ll also need several smaller round cutters (about half an inch) to create seven “connector” cookies per tree. These small rounds are essential for adding height and creating distinct separation between your star layers, giving the tree its impressive, multi-dimensional stature.
Regarding the dough, follow the recipe precisely. Ensure your butter is properly softened before creaming with sugar; this creates a light and fluffy foundation. Incorporate eggs and vanilla for flavor, then gradually add flour, mixing just until combined. Overworking the dough can lead to tough cookies that won’t hold their shape as well. After mixing, a vital step is to chill the dough for at least 30 minutes. This firms up the butter, making the dough easier to roll and cut, and significantly reduces spreading during baking, ensuring your star and connector shapes remain crisp and defined.
2. Precision Cutting and Perfect Baking:
Once your dough is thoroughly chilled and firm, lightly flour a clean work surface. Divide the dough in half for easier handling and roll out one portion into an even 1/8-inch thick sheet. Use your selected star cutters to cut out the required number of stars, trying to maximize cuts and minimize scraps to avoid re-rolling the dough too many times. Also, cut out your 1.5-inch round bases and the small half-inch connector circles. For optimal tenderness, cut the cookies as close together as possible. The more you gather and re-roll the dough, the tougher the final cookies will be.
Carefully arrange all your cut cookies – stars, bases, and connectors – on parchment-lined baking sheets. Ensure there’s adequate space (about 1.5 inches) between each cookie to prevent them from merging as they bake. Bake them in a preheated 375°F (190°C) oven for approximately 6-7 minutes, or until they are just barely golden at the edges. The centers should still look slightly pale and soft. The key here is not to overbake; you want them to be firm enough to hold their shape but still tender and delicious. Overbaking can make them brittle, which isn’t ideal for stacking. As soon as they are out of the oven, transfer the baking sheets to a wire rack and allow the cookies to cool completely on the sheets before attempting to move them. This step is crucial, as warm cookies are delicate and prone to breaking or warping.
3. Crafting the “Edible Glue” Icing for Stability:
With your cookies cooled and ready, it’s time to prepare the simple yet effective “edible glue” that will hold your trees together. A basic two-ingredient icing, typically made from powdered sugar and a touch of half-and-half (or milk), works perfectly. In a medium bowl, whisk these ingredients together thoroughly until you achieve a thick, smooth consistency, similar to school glue or thick paint. The consistency is paramount here: it needs to be thick enough to bind the cookies firmly without running off the sides, but still fluid enough to spread easily. If it’s too thick, add a tiny bit more half & half, a teaspoon at a time. If it’s too thin, whisk in a little more powdered sugar. This icing will not only act as an adhesive but also provide a subtle sweetness that complements the sugar cookies beautifully.
4. The Art of Stacking and Assembling Your Trees:
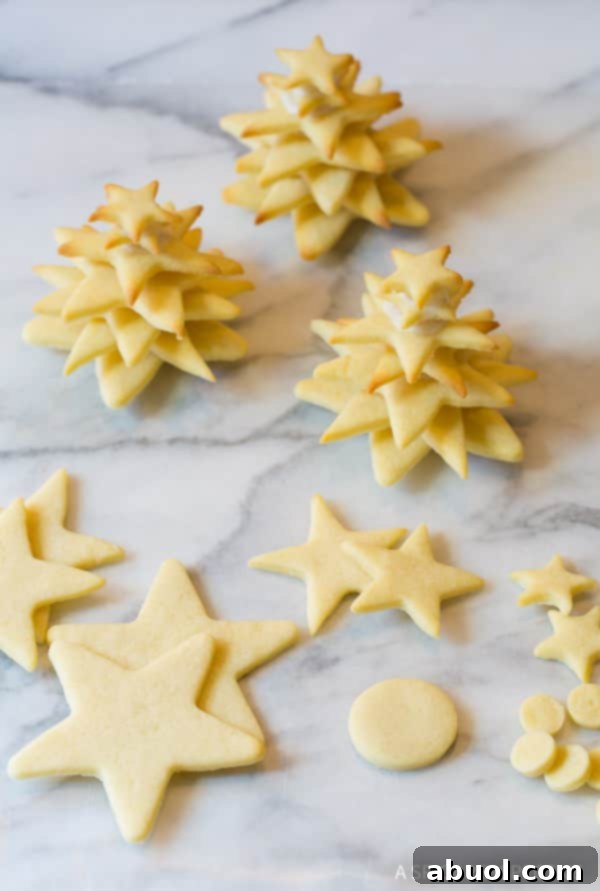
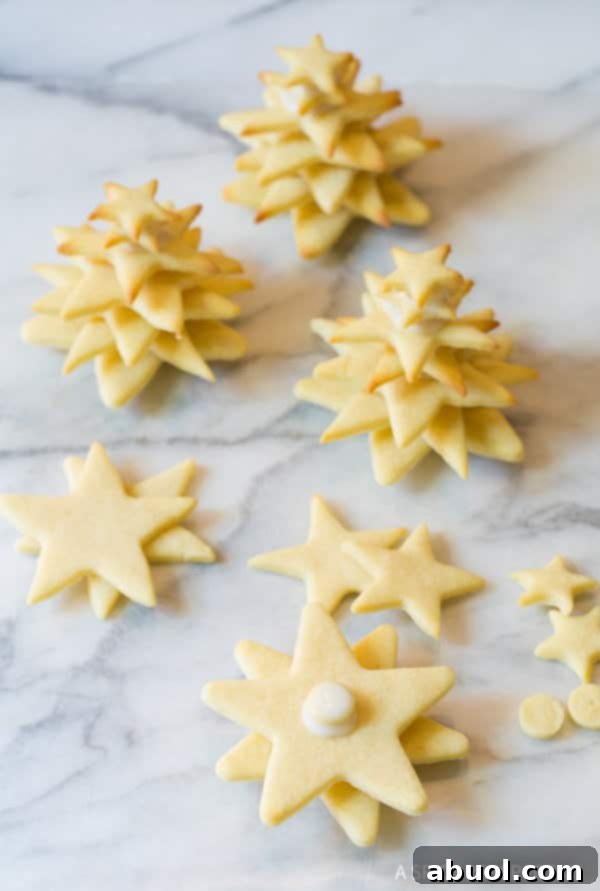
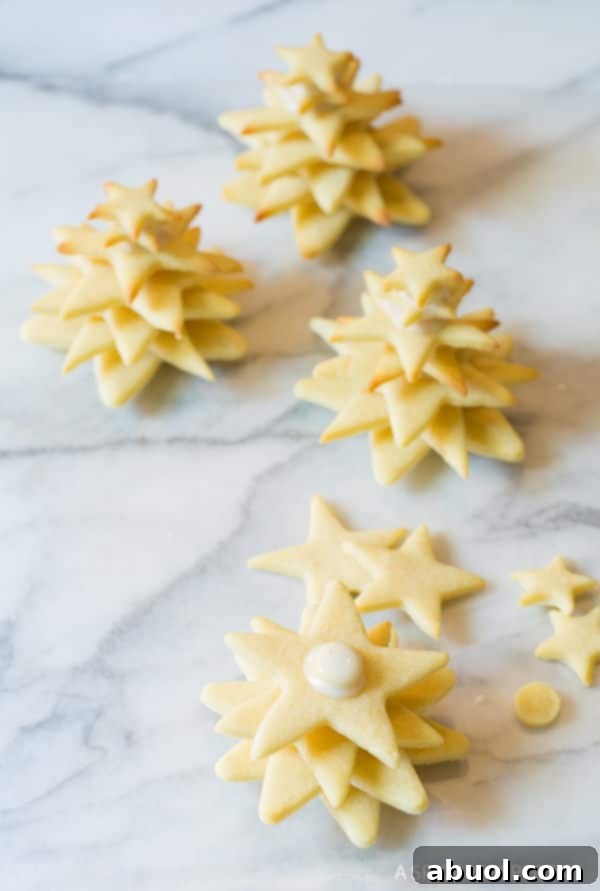
Now for the truly fun and artistic part – assembling your 3D masterpieces! Begin with one of your larger 1.5-inch round base cookies as the sturdy foundation. Apply a small dollop of your prepared icing to its center. Carefully place one of the largest star cookies on top, ensuring it’s centered. Apply another small amount of icing to the center of this star, then meticulously place one of the small round “connector” cookies on it. This small round is absolutely key to creating the iconic tapered tree shape, lifting each subsequent star layer and providing necessary space. Next, add another thin layer of icing on top of the connector cookie, followed by the second largest star. This time, deliberately offset its points from the points of the star layer below. This offsetting technique is what creates the beautiful, bushy, and realistic effect of a real Christmas tree.
Continue this precise pattern – a dollop of icing, a connector cookie, another dollop of icing, and then a star (remembering to offset the points) – working your way up from the largest stars to the smallest. You will use all eight star cookies and seven connector cookies per tree, meticulously stacking them to form a beautiful, tapering Christmas tree shape. The smallest star should be placed at the very top, forming a charming peak. Take your time with this step, ensuring each layer is centered and the points are offset correctly. Refer to the images provided in the article for visual guidance on achieving the perfect stacking technique.
5. Allowing for Proper Drying Time:
Patience is a virtue, especially when it comes to stacked cookies. Once your 3D Christmas Tree Cookies are fully assembled, it’s crucial to allow ample time for the icing to set and dry completely. This “gluing” process ensures that each cookie piece is firmly bonded, making your trees stable and easy to handle without fear of collapse. Depending on the humidity levels in your environment and the temperature, this could take several hours, or even overnight. It’s best to place them in a cool, dry place and resist the urge to move or decorate them prematurely, as this could lead to collapses. A well-dried cookie tree is a sturdy cookie tree, ready for its final festive touches!
6. Decorating Your Festive Masterpieces:
Once your cookie trees are perfectly dry and stable, the real festive fun begins: decorating! You can keep it simple and elegant by drizzling any remaining icing over the “branches” to mimic a dusting of freshly fallen snow, then immediately showering them with sparkling sugar sprinkles in white, silver, or iridescent hues. For a more playful and colorful touch, you can dip small candies, like colorful sixlets, mini M&M’s, small gumdrops, or even small silver dragees, into a bit of icing and gently press them onto the cookie branches as cheerful ornaments. Edible glitter or finely chopped nuts can also add a delightful texture and shine, making your trees truly sparkle. You might even consider using edible food markers to draw tiny details. Let your imagination guide you – each tree can be a unique reflection of your holiday cheer and personal style!
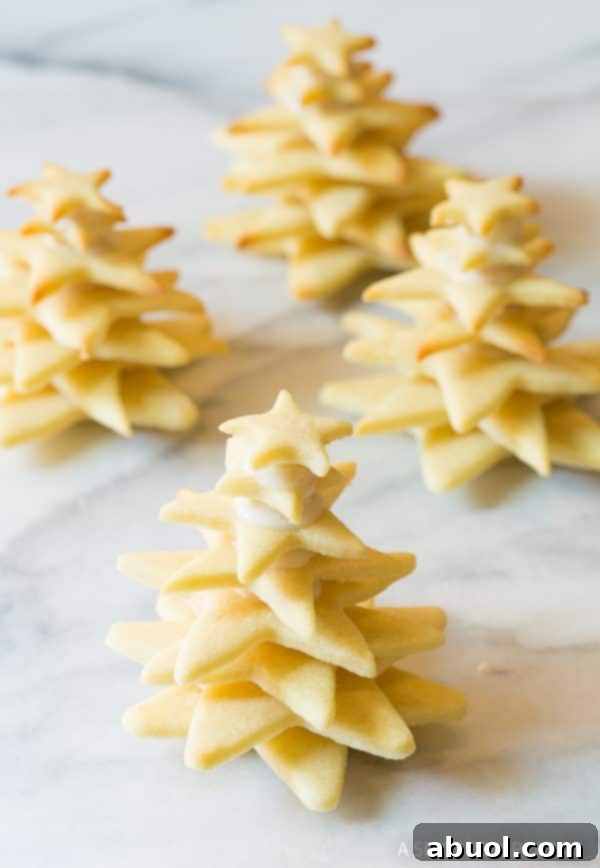
These 3D Christmas Cookies are not just visually appealing; they also make for genuinely fun and thoughtful edible gifts. Once completely dry, carefully place them into small gift boxes lined with festive tissue paper or individually wrap them in clear cellophane bags tied with a beautiful, vibrant ribbon. They are perfect for sharing with neighbors, coworkers, teachers, or as a delightful host/hostess gift that is sure to impress. And the best part? These whimsical creations taste even better than they look, offering a delightful crunch and sweet, buttery flavor with every bite! They embody the spirit of homemade goodness and holiday generosity.
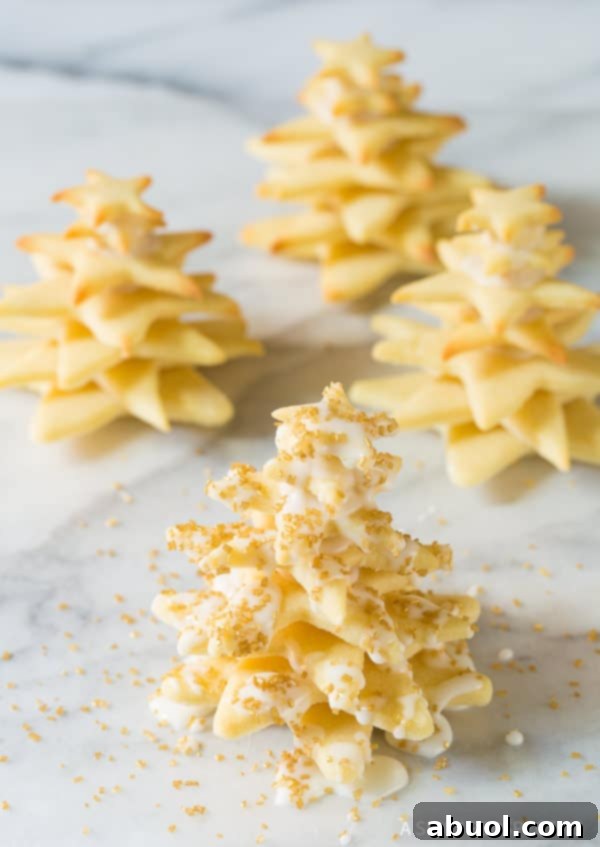
Creative Variations for Your 3D Christmas Cookies: Beyond the Classic Tree
While the star-shaped Christmas tree is a timeless classic, these 3D cookies offer incredible versatility for customization. Feel free to experiment and make these festive treats uniquely your own, catering to different tastes and aesthetic preferences:
- Alternative Shapes: Instead of traditional star cookie cutters, try using only circle cookie cutters of varying sizes to create chic, modern cone-style Christmas trees. You could also experiment with other holiday shapes like snowflakes, gingerbread men, or even simple squares, stacking them cleverly to create abstract festive sculptures or unique towering treats.
- Flavor Infusions for the Dough: Elevate the taste of your basic sugar cookie dough by adding warming spices. A teaspoon of pumpkin pie spice or apple pie spice blend can introduce a delightful aromatic complexity, perfect for chilly winter evenings. For a brighter, zesty flavor, incorporate the finely grated zest of an orange or lemon into the dough. Almond extract can also provide a sophisticated nutty undertone.
- Simple Dustings: For an elegant, understated finish, forgo the elaborate icing and simply dust your assembled trees with a generous coating of powdered sugar to mimic freshly fallen snow. Alternatively, try a mix of cinnamon and sugar for a warm, spiced aroma, or sweetened cocoa powder for a rich, chocolatey hint that appeals to chocolate lovers.
- Colored Dough: For a vibrant and playful look, divide your cookie dough after mixing and tint portions with green, red, or even blue food coloring before rolling and cutting. This can add an extra layer of visual interest and makes the trees even more festive and eye-catching.
- Different Icings: While our simple icing is fantastic, you could experiment with a thin royal icing for a crisper finish, or a cream cheese frosting for a richer, tangier flavor, though the latter might be softer for stacking.
Serving and Gifting Your 3D Christmas Cookies: Ideas for Every Occasion
These impressive 3D Christmas Cookies are not just delicious; they are also incredibly versatile for serving and gifting during the holiday season. Their unique dimension makes them stand out, whether on a dessert table or as a thoughtful present:
- Charming Edible Gifts: Once completely dry and stable, these cookies are perfect for wrapping individually in clear cellophane bags and tying with a festive ribbon. They make adorable, homemade gifts for friends, family, teachers, neighbors, and colleagues, showcasing your effort and holiday spirit.
- Stunning Table Centerpieces: Arrange a collection of your 3D cookie trees on festive holiday treat platters, multi-tiered cake stands, or even a decorative sleigh to create a truly enchanting edible centerpiece for your holiday gatherings. Mix and match different sizes and decorations for an even more dynamic display.
- Creative Dessert Decorations: Use these whimsical cookie trees to adorn larger holiday desserts. They can stand majestically atop a holiday cake, nestled amongst festive cupcakes, or even as a playful accent on a platter of cheesecake brownie bars, instantly elevating their presentation and adding a delightful surprise.
- Cookie Exchange Standouts: Bring these unique 3D cookies to your next cookie exchange party and watch them become the star of the show! They are guaranteed to draw compliments and be a memorable addition.
- Children’s Delight: These cookies are particularly engaging for children. Involve them in the decorating process once the trees are dry, letting them add their favorite sprinkles and small candies.
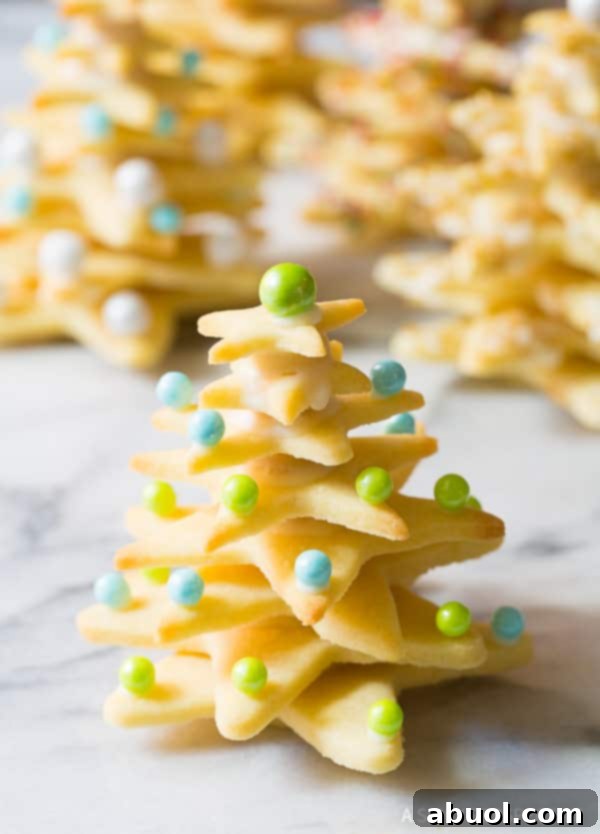
Explore More Decadent Christmas Cookie Recipes
If you’re looking to expand your holiday baking repertoire and explore other delightful treats, here are some beloved Christmas cookie recipes that are sure to delight your taste buds and impress your guests:
- Italian Wedding Cookies
- Mexican Biscochitos Cookies
- Fluffy Lemon Crinkle Cookies
- Cream Cheese Cookies
- Soft Key Lime Cookies with Glaze
- Chocolate Mint Cookies
- Best Cut Out Sugar Cookies + Sugar Cookie Icing
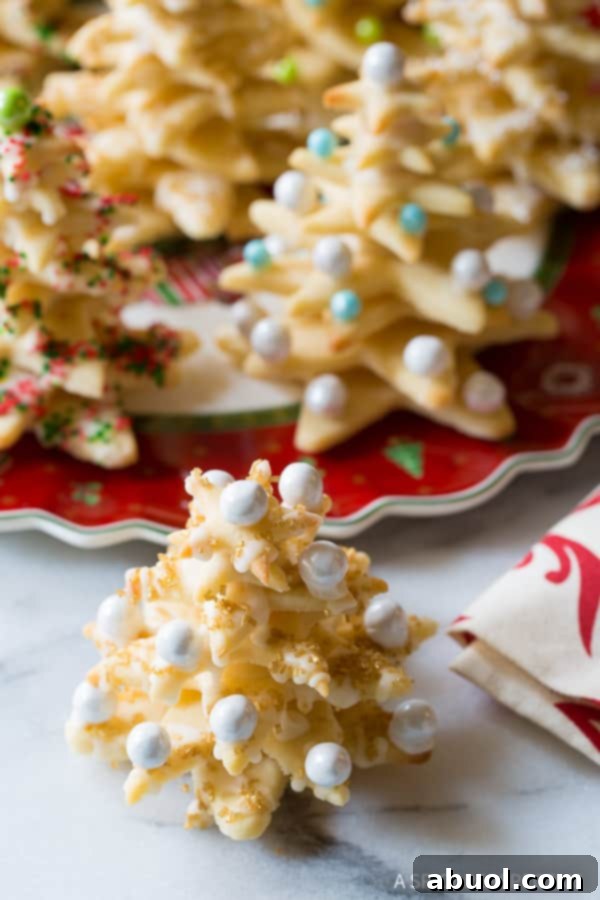
3D Christmas Cookies Recipe
Prep Time: 45 minutes
Cook Time: 7 minutes
Total Time: 52 minutes
Servings: 12 trees
These 3D Christmas Tree Cookies are an adorable and incredibly tasty edible gift idea! This stacked Christmas cookie recipe, complete with easy icing and festive sprinkles, fits perfectly into a gift box, ready to delight all your friends and family.
Ingredients
- For the Cookies:
- 1 1/2 cups unsalted butter, softened (3 sticks)
- 1 1/2 cups granulated sugar
- 1 teaspoon salt
- 2 large eggs
- 1 tablespoon pure vanilla extract
- 3 3/4 cups all-purpose flour
- For the Icing & Decoration:
- 2 cups powdered sugar
- 3-4 tablespoons half & half (or milk)
- Sprinkles and small candies for decorating
Instructions
- Preheat your oven to 375 degrees F (190 degrees C). Line several large baking sheets with parchment paper and set them aside.
- In a large bowl, using an electric mixer, cream together the softened butter and granulated sugar until the mixture is light and fluffy, which usually takes about 3-5 minutes. Scrape down the sides of the bowl with a spatula, then turn the mixer to low speed. Gradually beat in the salt, eggs, and vanilla extract until well combined. Finally, slowly add the all-purpose flour, mixing just until everything is incorporated. Be careful not to over-mix the dough. Wrap the cookie dough tightly in plastic wrap and chill it in the refrigerator for at least 30 minutes. This chilling step is essential to prevent the cookies from spreading excessively during baking and helps them hold their intricate shapes.
- Once the dough is cold and firm, lightly flour a clean work surface. Divide the dough in half. Roll out one portion into an even 1/8-inch thick sheet. Using your star cookie cutters (e.g., 4-inch, 3-inch, 2-inch, and 1-inch), cut out two stars of each size for every tree you plan to make. Additionally, cut one 1 1/2-inch circle for the base of each tree and seven smaller half-inch circles to serve as “connector” cookies. For each complete 3D tree, you should have a total of eight star cookies (two of each size), seven small connector circles, and one medium base circle. Gather any dough scraps, gently re-roll them, and repeat the cutting process until all dough is used. Try to minimize re-rolling to keep the cookies tender.
- Carefully place the cut cookies onto the prepared baking sheets, leaving about 1 1/2 inches of space between them. Bake for approximately 6-7 minutes, until the edges are just barely golden. The centers should still look slightly soft. Transfer the baking sheets to a wire rack and allow the cookies to cool completely on the sheets before handling. This cooling period ensures the cookies are firm enough to withstand stacking without breaking.
- While the cookies are cooling, prepare your icing. In a medium bowl, whisk together 2 cups of powdered sugar and 3 tablespoons of half & half (or milk). The goal is to achieve a thick, smooth consistency, similar to school glue or thick paint. If the icing is too thick, add a tiny bit more half & half, a teaspoon at a time, until the desired consistency is reached. If it’s too thin, whisk in a little more powdered sugar.
- Now for assembly! Take one of the 1 1/2-inch round base cookies and spread a small amount of icing on its center. Place one of the largest star cookies on top. Apply another small dollop of icing to the center of this star, then carefully place one of the small round “connector” cookies on it. Spread a thin layer of icing on top of the connector cookie, then add the second largest star, gently shifting it so its points are offset from the points of the star below. Continue this pattern: icing, connector cookie, icing, star (offsetting points), working your way up from the largest stars to the smallest. You will use all eight star cookies and seven connector cookies per tree, stacking them to form a beautiful, tapering Christmas tree shape. The smallest star will form the top. Refer to the images in the article for visual guidance on stacking.
- Once all your 3D Christmas Tree Cookies are assembled, allow them to dry undisturbed for several hours, or preferably overnight. This drying time is crucial for the icing to set firmly and “glue” all the pieces together, ensuring your trees are stable and sturdy. Do not rush this step.
- When the trees are completely dry, it’s time to decorate! Drizzle any remaining icing over the “branches” of your trees to create a snowy effect, then immediately sprinkle with your favorite sugar sprinkles. For extra festive flair, you can dip small candies (like sixlets, mini M&M’s, or edible pearls) into a bit of icing and gently press them onto the points or flat surfaces of the cookie stars as ornaments. Let all decorations dry completely before wrapping the cookies as gifts or arranging them for display.
Notes
- Dough Handling: To ensure the most tender cookies, try to cut your shapes as close together as possible on the first roll. The more you gather and re-roll the dough, the tougher the cookies will become.
- Tree Height: Feel free to cut extra stars and connector circles if you wish to make some of your 3D Christmas trees even taller and more dramatic!
Nutrition
(Approximate values per 1 tree serving)
- Serving: 1 tree
- Calories: 539 kcal
- Carbohydrates: 75g
- Protein: 5g
- Fat: 25g
- Saturated Fat: 15g
- Cholesterol: 90mg
- Sodium: 210mg
- Potassium: 64mg
- Fiber: 1g
- Sugar: 45g
- Vitamin A: 760 IU
- Calcium: 21mg
- Iron: 1.9mg
Course: Cookies
Cuisine: American
Author: Sommer Collier
Print Recipe
We hope you enjoy baking and sharing these incredible 3D Christmas Cookies as much as we do. They are truly a delightful way to add an extra touch of magic and impress your loved ones during your holiday celebrations!