
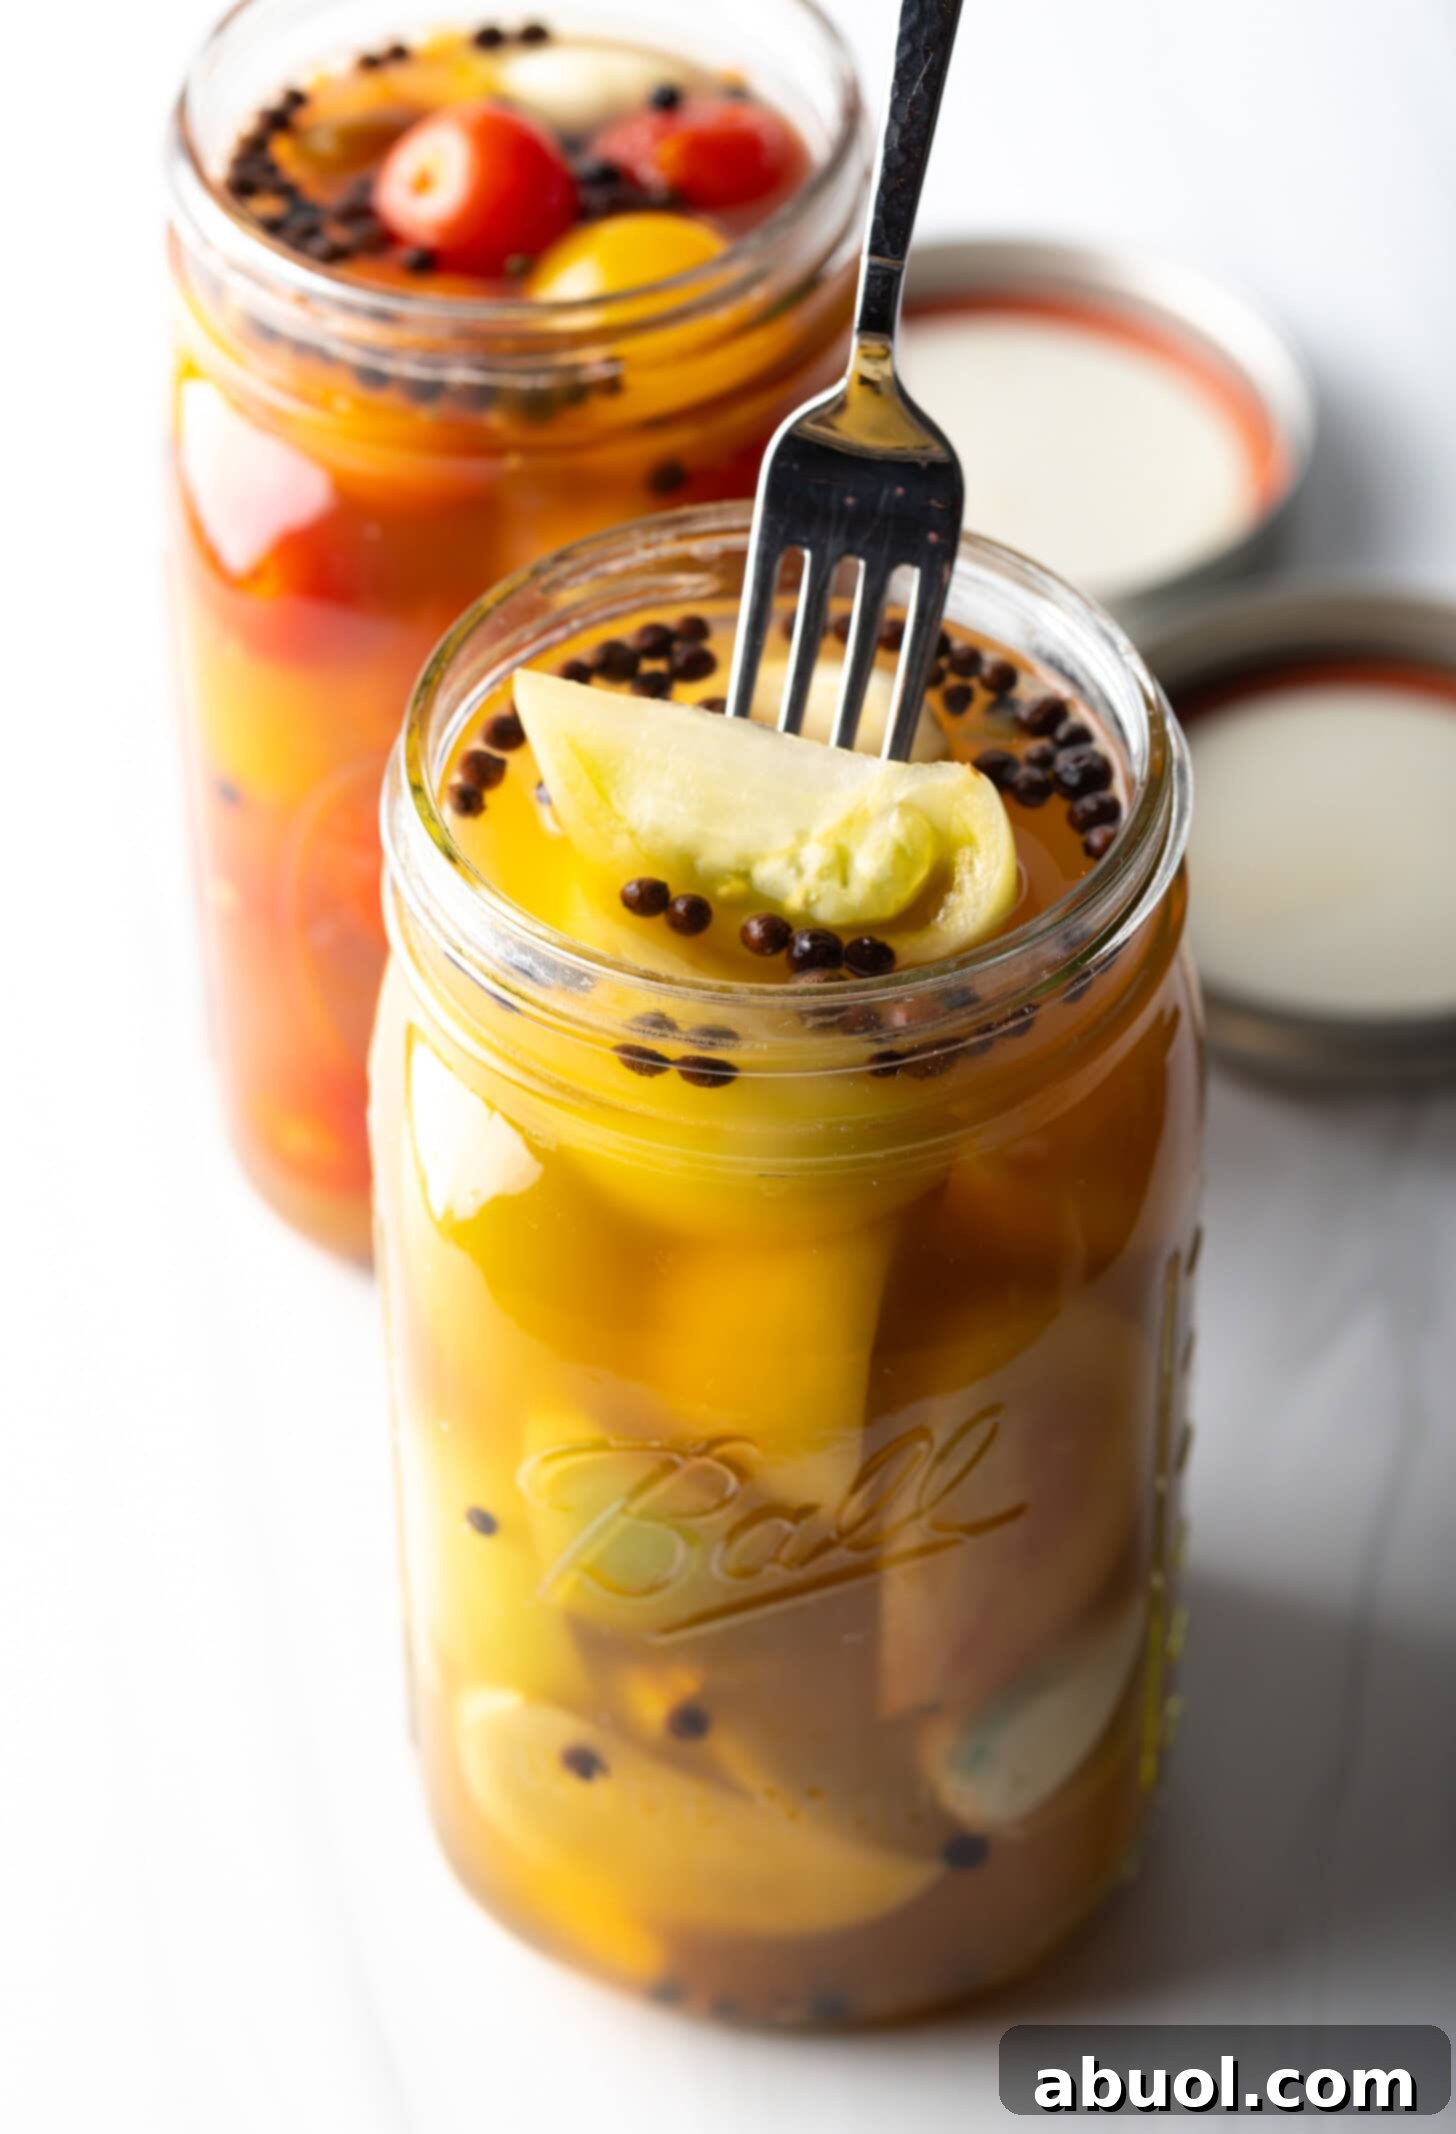
Homemade Pickled Tomatoes – Transform your summer garden’s abundant harvest into delicious, tangy pickled green and cherry tomatoes with these easy steps and expert tips!
Discover the Zesty Delight of Homemade Pickled Tomatoes
There’s a special joy that comes with harvesting fresh tomatoes from your summer garden. The vibrant colors, the juicy sweetness, the sheer abundance! But what do you do when your garden produces more tomatoes than you can possibly eat fresh or turn into sauces? While stewed tomatoes and marinara are classic ways to preserve your bounty, why not try something uniquely refreshing and incredibly flavorful? Enter homemade pickled tomatoes – a fantastic way to transform your surplus into a versatile, perky snack or a bright accompaniment to almost any meal.
This comprehensive guide will walk you through the simple process of pickling both crisp green tomatoes and sweet cherry tomatoes. Whether you’re a seasoned canner or a beginner looking for an exciting new recipe, you’ll find everything you need here to create jars of irresistible pickled goodness. We’ll cover everything from selecting the best tomatoes to preparing the perfect brine, and even offer options for quick refrigerator pickles or long-term pantry storage through proper canning techniques.
Why You’ll Adore This Pickled Tomatoes Recipe
This recipe isn’t just about preserving tomatoes; it’s about elevating them. Here’s why these pickled tomatoes will become a new favorite in your kitchen:
- Uniquely Flavorful: Forget bland tomatoes! Pickling infuses them with a delightful tangy, sweet, and savory kick from the brine and aromatic spices. They offer a burst of flavor that can brighten up even the simplest dishes.
- Versatile Snack & Side: These aren’t just for sandwiches. Enjoy them straight from the jar, add them to salads, charcuterie boards, or serve them alongside grilled meats. Their vibrant acidity cuts through rich flavors beautifully.
- Easy & Rewarding: With straightforward steps and minimal specialized equipment (especially for the refrigerator method), this recipe is incredibly accessible. The satisfaction of seeing your garden’s produce transformed into delicious pantry staples is immense.
- Preserves Your Harvest: If you’re drowning in tomatoes, pickling is an excellent method to extend their enjoyment far beyond the summer months. It’s a sustainable way to reduce food waste and enjoy garden-fresh flavors all year.
- Boosts Gut Health: Like many fermented and pickled foods, these tomatoes, especially those made with the quick pickling method (where some beneficial bacteria can survive), can contribute to a healthy gut microbiome.
Choosing the Best Tomatoes for Pickling
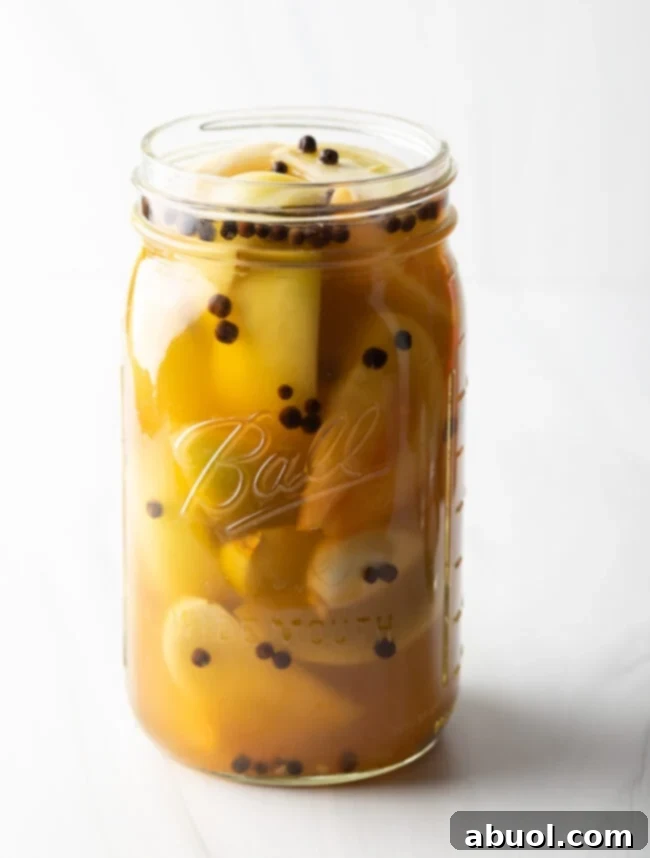
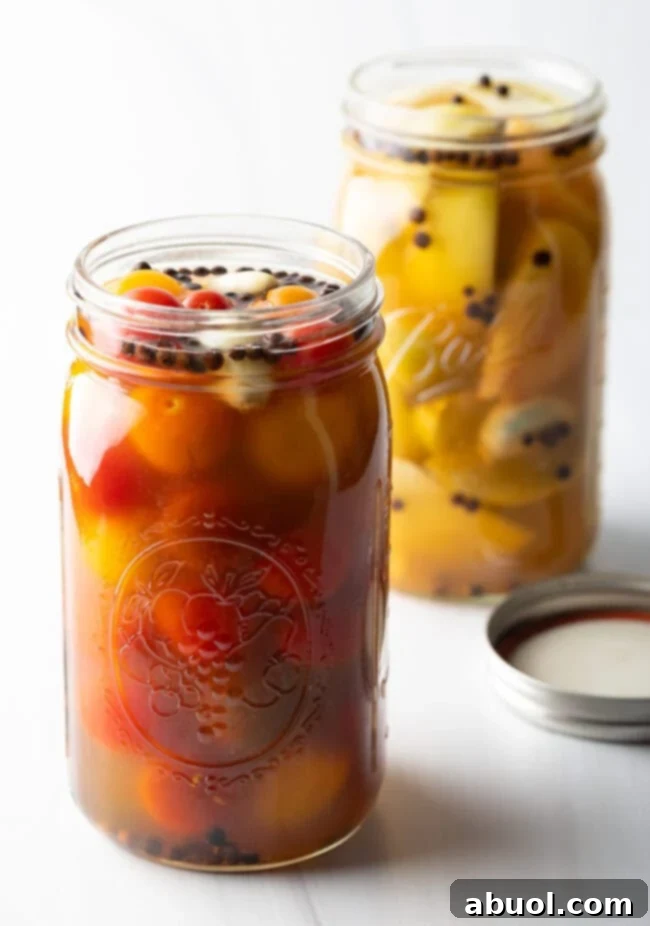
While you might be tempted to pickle any tomato, the best results come from choosing the right varieties. Traditionally, unripe green tomatoes are favored for their firm texture and tart flavor, which holds up beautifully during the pickling process. However, this recipe also shines with sweet, firm cherry tomatoes.
- Green Tomatoes: These are simply unripe tomatoes. Their inherent firmness is crucial, ensuring they maintain their shape and a pleasant bite even after soaking in the brine. Their tartness also provides a fantastic counterpoint to the sweet and savory notes of the pickling liquid.
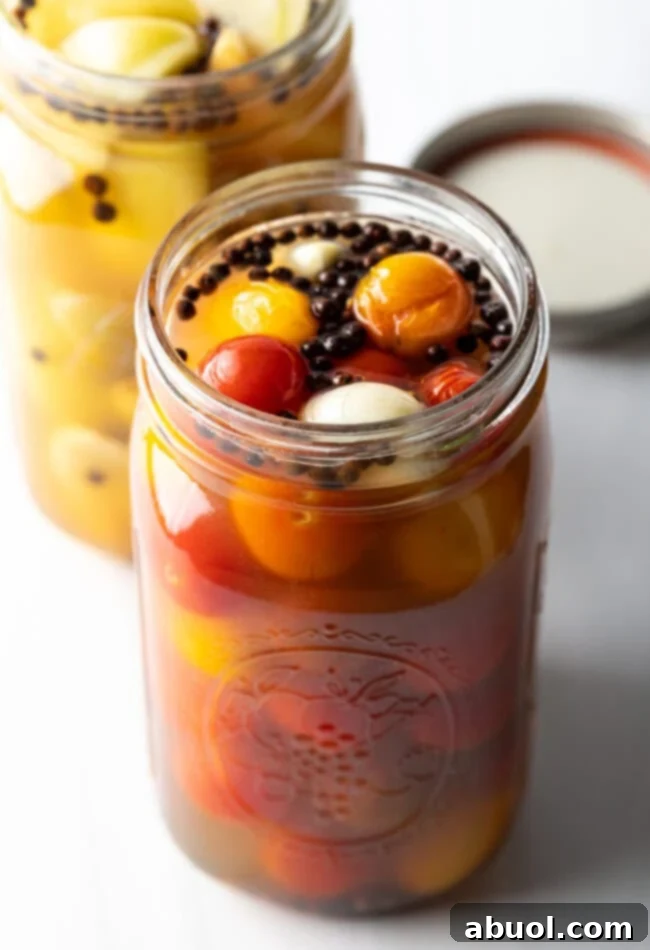
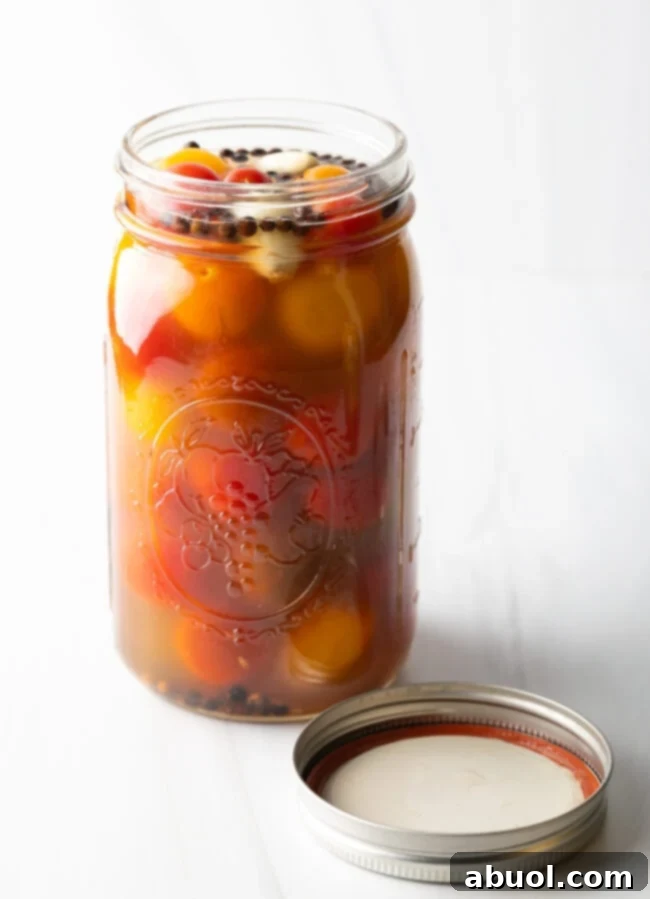
- Cherry Tomatoes: Small, round, and often bursting with natural sweetness, cherry tomatoes are ideal for pickling whole. Their thick skin helps them stay intact, creating delightful little flavor bombs. You can even pickle green cherry tomatoes for a dual-textured treat!
Why not ripe, soft tomatoes? The key to successful pickling is a firm tomato. If you try to pickle soft, ripe, sliced tomatoes, you’ll often end up with a mushy, unappetizing result. The goal is a crisp or tender-firm texture, not a stewed one. Stick with green or cherry tomatoes for the best pickled experience.
Quick Pickling vs. Water Bath Canning: Your Preservation Options
This recipe offers two primary methods for enjoying your pickled tomatoes: the quick refrigerator method and the traditional water bath canning method. Each has its own benefits and considerations:
- Refrigerator Method (Quick Pickles): This is the simplest and fastest way to enjoy homemade pickled tomatoes. After preparation, the jars are stored in the refrigerator. This method yields a brighter, fresher flavor and a firmer texture, as the tomatoes aren’t cooked for an extended period. They’re perfect for immediate enjoyment and can last for several months unopened in the fridge.
- Water Bath Canning: For long-term, shelf-stable storage at room temperature, water bath canning is the way to go. This process involves submerging sealed jars in boiling water for a specific duration, which creates a vacuum seal and kills potential spoilage organisms. Canned tomatoes will have a slightly softer texture and a milder flavor due to the longer cooking time, but they offer the convenience of pantry storage for up to a year or more.
Essential Ingredients for Your Pickled Tomatoes
Crafting the perfect pickle brine requires a balance of flavors and preservatives. Here’s a closer look at the key ingredients:
- Tomatoes: As discussed, firm green tomatoes or small cherry tomatoes are your best bet. You’ll need about 1 to 1 ¼ pounds for a quart jar or two pint jars. Ensure they are fresh and free of blemishes.
- Apple Cider Vinegar: This provides the essential acidity for pickling and a slightly sweeter, more mellow flavor compared to white vinegar. Its fruit notes complement the tomatoes beautifully.
- Alternatives: You can experiment with white wine vinegar, champagne vinegar, or rice vinegar for different subtle flavor profiles. Always use vinegar with at least 5% acidity for safe pickling.
- Water: Used to dilute the vinegar, creating a less harsh brine while still maintaining sufficient acidity for preservation.
- Kosher Salt: A coarse sea salt free of anti-caking agents and iodine, which can cloud the brine or affect flavor. It’s crucial for preservation and seasoning.
- Granulated Sugar: Balances the tartness of the vinegar and the saltiness of the brine, adding a touch of sweetness that makes the pickles truly addictive. Adjust the amount to your preference for a sweeter or more tangy pickle.
- Garlic Cloves: Fresh, smashed garlic cloves infuse the brine with a pungent, savory aroma that is classic in many pickle recipes. Smashing them slightly helps release their flavor more effectively.
- Whole Black Peppercorns: Provide a subtle peppery warmth without the grittiness of ground pepper, which can cloud your brine.
- Whole Allspice: Adds a warm, complex, slightly sweet and spicy note reminiscent of cloves, cinnamon, and nutmeg.
- Alternative: Whole cloves can be used for a similar warm spice profile.
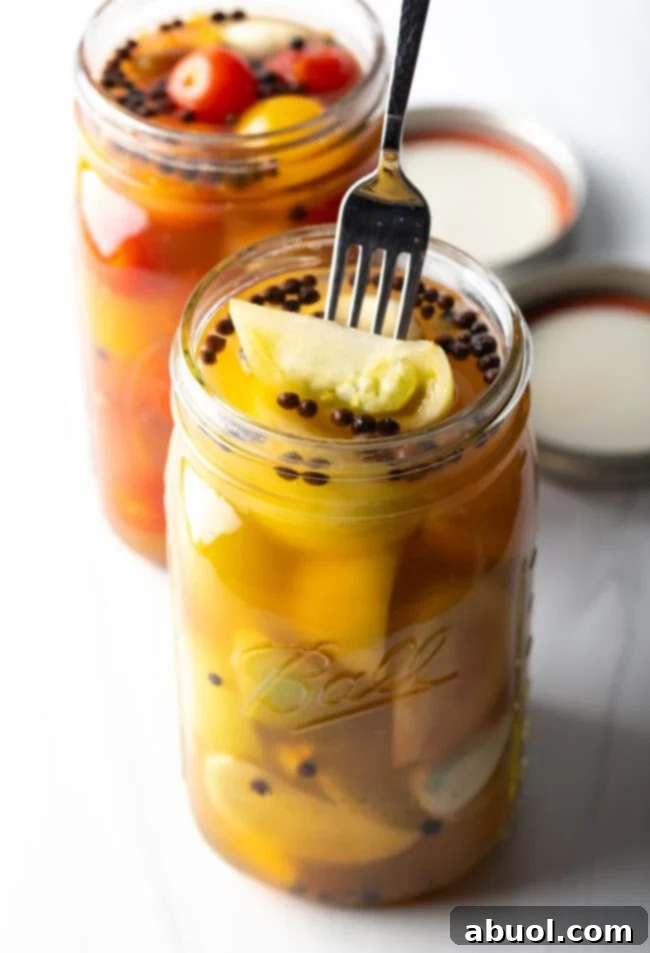
Step-by-Step: How to Pickle Green Tomatoes and Cherry Tomatoes
Before you begin, ensure your workspace is clean and organized. Having all your ingredients prepped and jars ready will make the process smooth and enjoyable.
1. Prepare Your Jars
Proper jar preparation is crucial, especially if you plan to can your tomatoes for long-term storage.
- For Refrigerator Pickles: Thoroughly wash your mason jars and lids with hot, soapy water. Rinse well and allow them to air dry or dry with a clean towel. Sanitization is not strictly necessary for refrigerator pickles, but cleanliness is key.
- For Water Bath Canning: Jars for canning *must* be sterilized to prevent spoilage. Wash jars and lids in hot, soapy water, then rinse thoroughly. Sterilize jars by submerging them in boiling water for at least 10 minutes. Keep them hot until ready to fill. New canning lids should be warmed in simmering (not boiling) water to soften the sealing compound.
2. Prepare Your Tomatoes
The way you prep your tomatoes depends on their type:
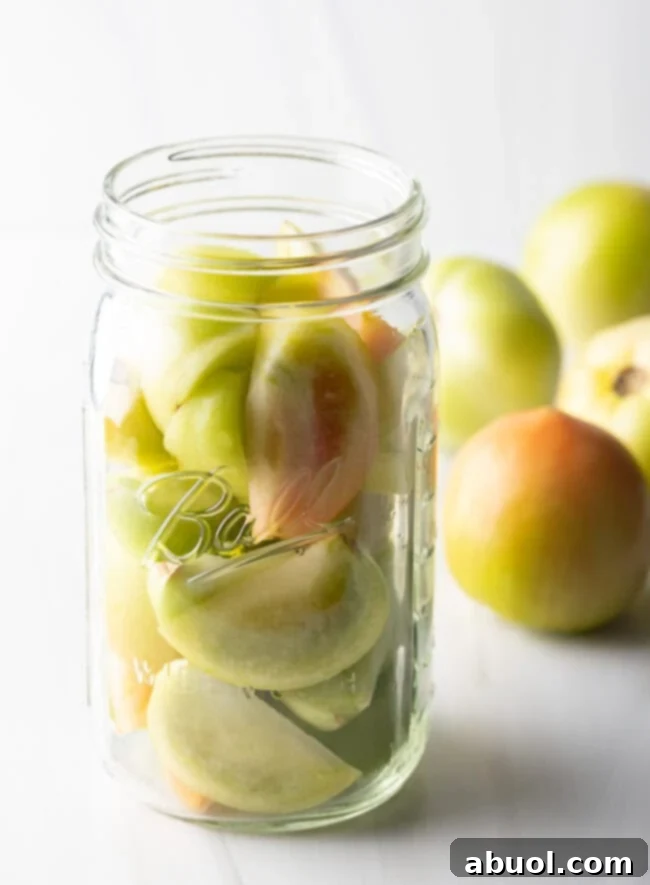
- Green Tomatoes: Wash them thoroughly. For ideal pickling, slice each green tomato into eight uniform wedges. This size allows them to fit neatly into jars and ensures they pickle evenly.
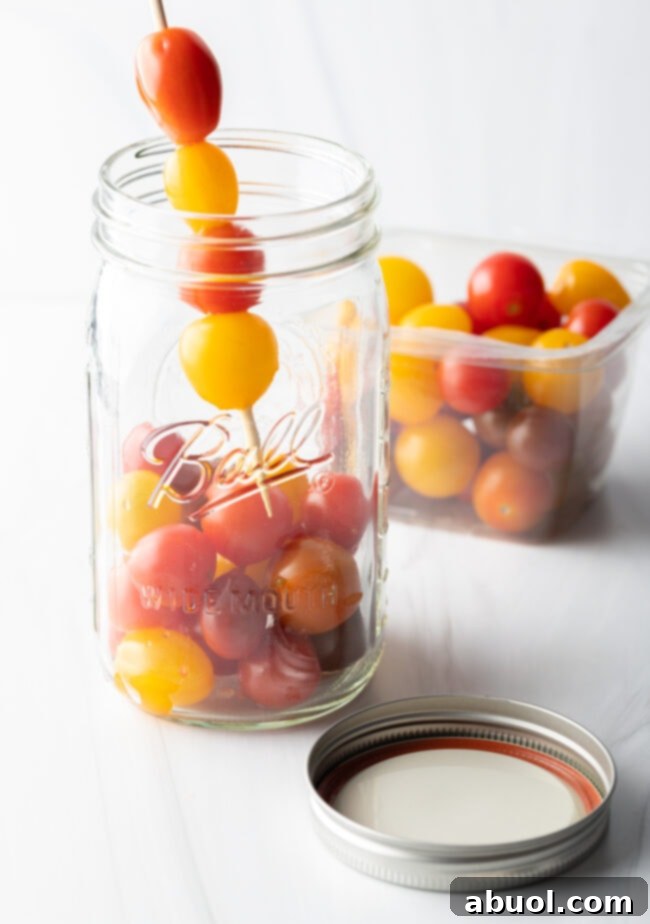
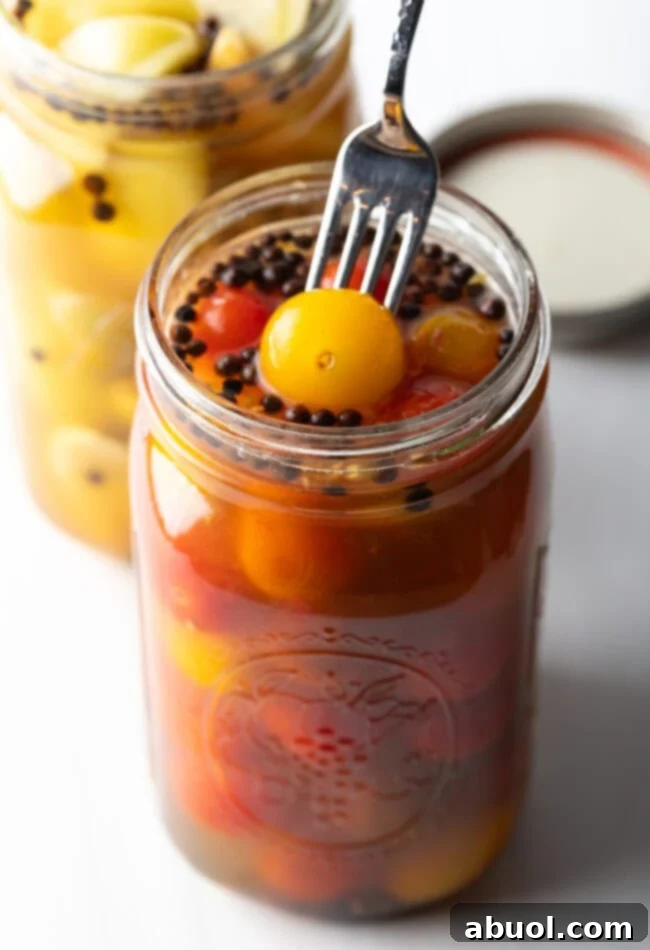
- Cherry Tomatoes: Wash them well. To ensure the brine penetrates the cherry tomato flesh and infuses it with flavor, use a toothpick or wooden skewer to poke a few holes through the center of each tomato. This prevents the tomatoes from bursting and allows for better pickling.
3. Prepare the Pickling Brine
The brine is the heart of your pickled tomatoes, imparting flavor and ensuring preservation.
- Gather your apple cider vinegar, water, kosher salt, and granulated sugar.
- Combine these ingredients in a small sauce pot.
- Place the pot over medium-high heat. Stir continuously until the salt and sugar are completely dissolved. This ensures an even flavor distribution throughout the brine.
- Bring the mixture to a rolling boil, then immediately turn off the heat. The hot brine is now ready to be poured over your tomatoes.
4. Pack the Jars with Tomatoes and Spices
While your brine is heating, arrange your tomatoes and spices in the clean jars:
- Set out one quart jar or two pint jars.
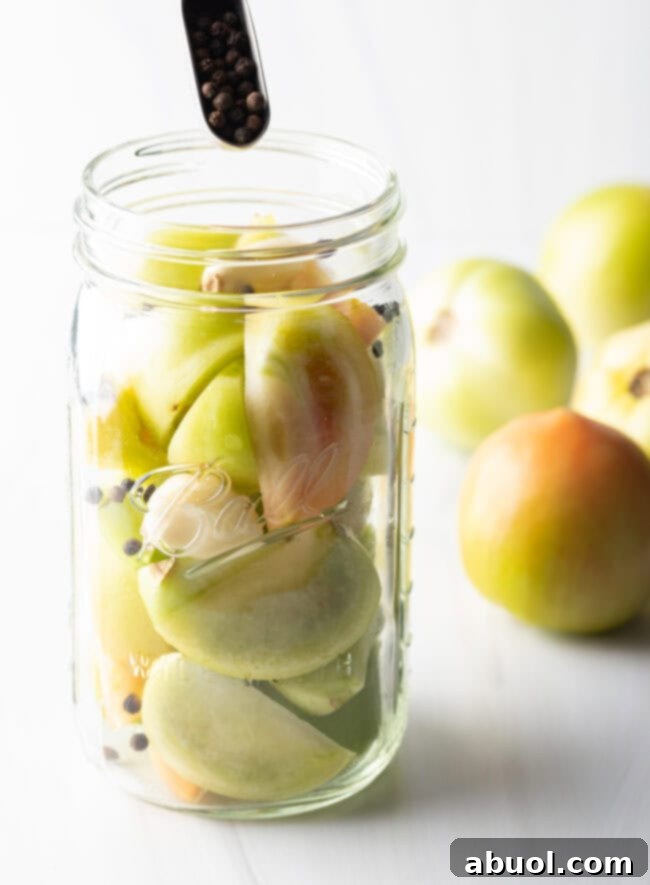
- Evenly distribute the smashed garlic cloves, whole black peppercorns, and whole allspice among your chosen jars.
- Carefully pack the sliced green tomatoes (or whole cherry tomatoes) into the jars. Pack them snugly but avoid crushing them. You want to maximize space without compromising the tomatoes’ integrity.
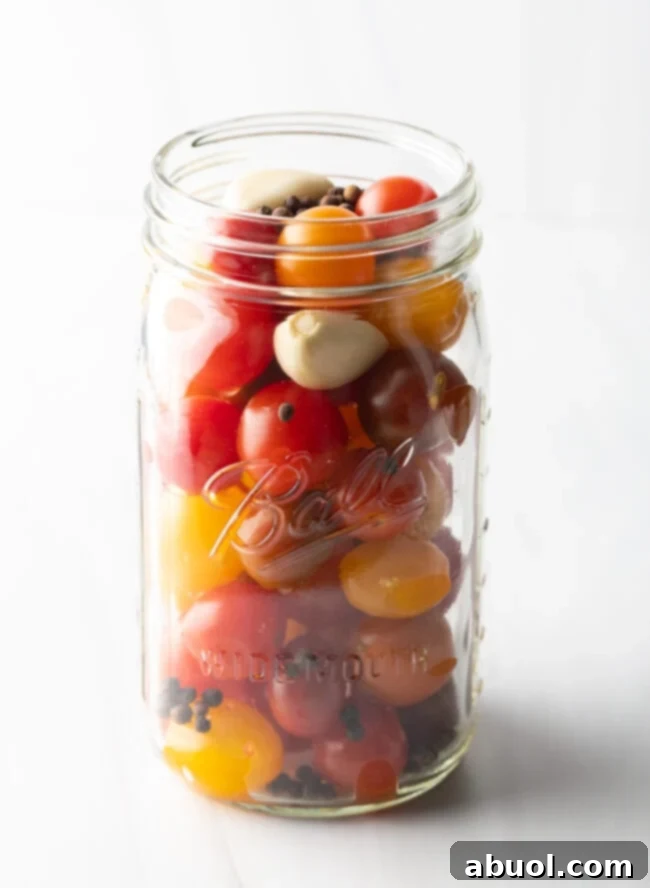
5. Pour the Hot Brine
This step requires caution as you are working with hot liquid.
- Once the pickling mixture has come to a boil and you’ve turned off the heat, carefully pour the hot brine over the tomatoes in each jar.
- Fill the jar close to the top, leaving a crucial ½-inch of headspace from the top rim. This space is essential for proper sealing and to prevent liquid from overflowing during processing (if canning).
- Use a non-metallic utensil (like a chopstick or plastic knife) to gently release any trapped air bubbles from around the tomatoes. Add more brine if necessary to maintain the ½-inch headspace.
Get the Complete (Printable) Guide for Pickled Green Tomatoes and Pickled Cherry Tomatoes + Video Below. Enjoy!
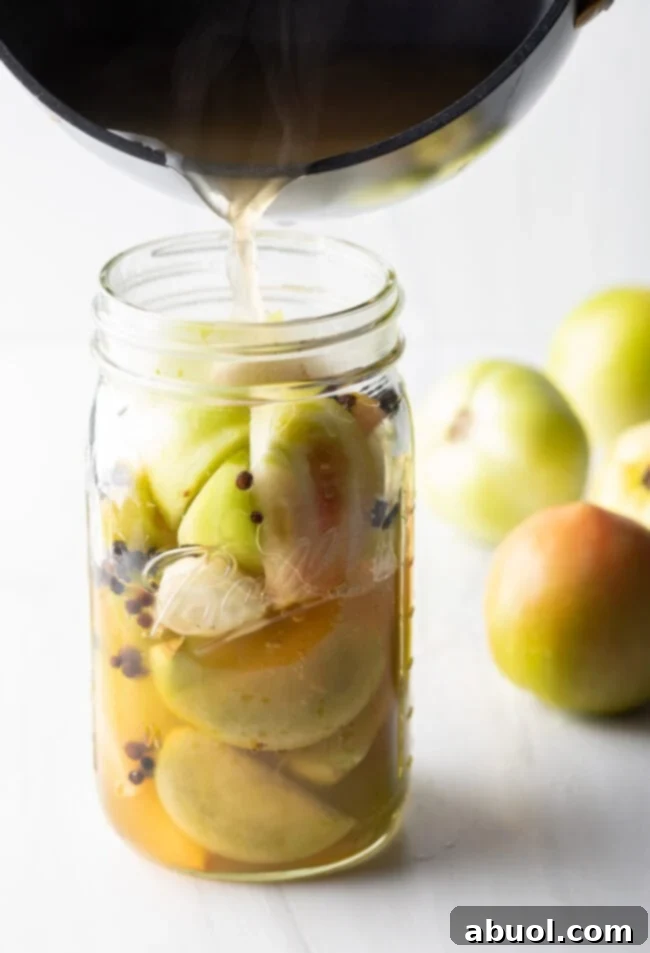
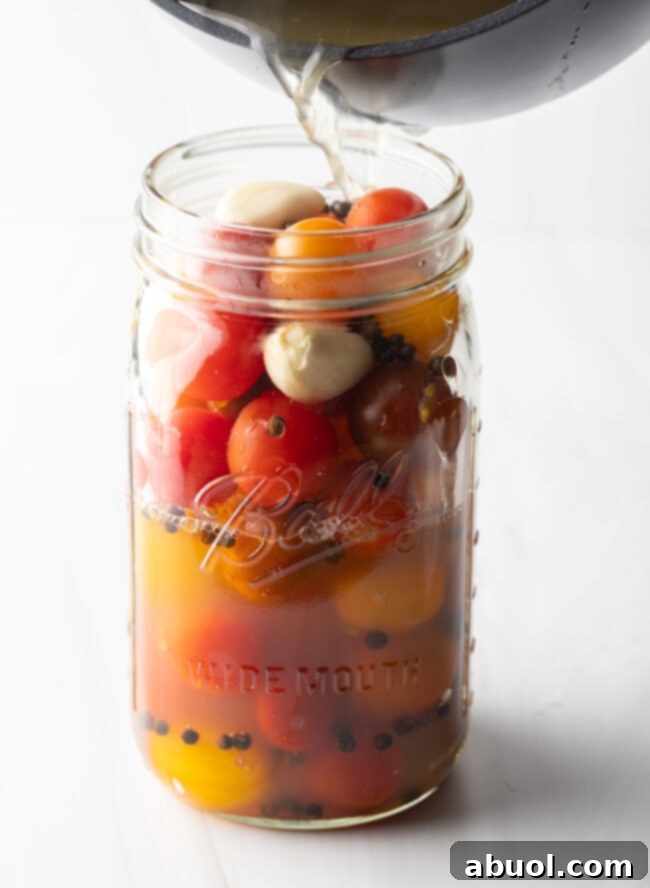
Refrigerator Method for Pickling
For those who prefer quick gratification and a fresh, bright flavor:
- After pouring the hot brine, screw the lid on the mason jar tight to seal.
- Allow the jar to cool completely to room temperature on your counter. This can take several hours.
- Once cooled, place the jar in the refrigerator.
- Allow the tomatoes to pickle for at least 48 hours before serving. This waiting period allows the flavors to meld and develop properly, transforming the tomatoes into tangy delights.
Refrigerator pickles, also known as quick pickles, offer a crisp texture and vibrant flavor. Unopened, they will keep well in the refrigerator for up to six months. Once opened, store them in the fridge and consume within a month for optimal taste and quality.
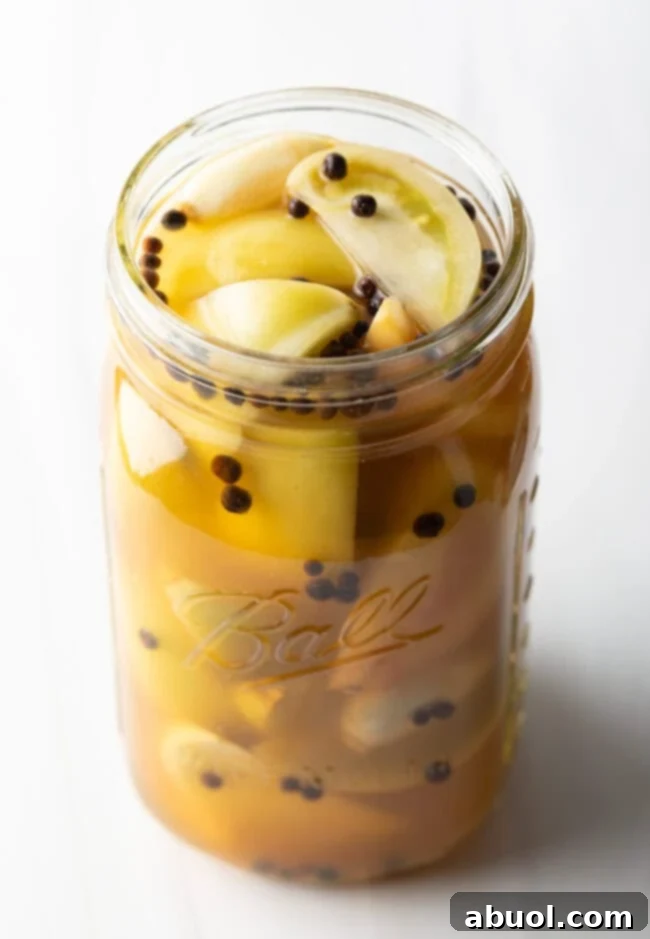
How to Can Tomato Pickles for Pantry Storage
If you’re aiming for a long-lasting, shelf-stable product, water bath canning is the technique you’ll need. This process ensures your pickled tomatoes are safe for room-temperature storage.
Before Canning:
- Sterilize Jars & Warm Lids: Ensure your jars are sterilized (boiled for 10 minutes) and still hot. Place new canning lids in simmering water (do not boil) to soften the sealing compound. Rings do not need to be sterilized, just clean.
- Clean Rims: After filling jars with tomatoes and brine, always wipe the rim of the jar thoroughly with a clean, damp paper towel. Even a tiny bit of tomato or brine on the rim can prevent a proper seal.
- Apply Lids and Rings: Center a warm lid on each jar. Apply the screw band (ring) and tighten it “fingertip tight” – meaning just enough resistance, but not overly tight. This allows air to escape during processing and helps create a vacuum seal.
Water Bath Processing:
- Prepare Your Canner: Place a rack at the bottom of a large stockpot or canning kettle. Fill the pot with enough water to cover your jars by at least 1 inch when they are submerged. Bring the water to a rolling boil.
- Load Jars: Using canning tongs, carefully lower the sealed jars into the boiling water bath, ensuring they do not touch each other or the sides of the pot. Make sure the water level is at least 1 inch above the jar lids. If not, add more boiling water.
- Process: Once all jars are in, cover the canner with its lid. Bring the water back up to a full, rolling boil. Start your timer only once the water is boiling vigorously. For quart jars, process for 15 minutes. (Adjust processing time for altitude if you live above 1,000 feet above sea level).
- Cool Down: Once the processing time is complete, turn off the heat. Carefully remove the jars from the boiling water bath using canning tongs, lifting them straight up without tilting.
- Set to Cool: Place the hot jars on a clean towel or a cooling rack, spaced apart, in a draft-free area. Do not tighten the rings further.
- Check Seals: As the jars cool, you’ll hear “pings” – this is the sound of the lids sealing! Allow them to cool completely for 12-24 hours. Once cool, check for a proper seal by pressing on the center of the lid. If it doesn’t flex, it’s sealed. If a lid did not seal, refrigerate that jar and consume its contents within a month.
- Store: Remove the rings (they can trap moisture and cause rust), wipe the jars clean, label with the contents and date, and store them in a cool, dark place. Properly canned tomatoes will keep for at least a year.
Creative Ways to Enjoy Your Pickled Tomatoes
These homemade pickled tomatoes are incredibly versatile! Their bright, tangy, and slightly sweet flavor makes them a fantastic addition to a wide array of dishes. They cut through richness, add a zing to savory meals, and bring a refreshing element to almost anything. Here are some of our favorite serving suggestions:
- Spicy Cowboy Burger: A few slices of pickled green tomato can elevate a hearty burger, providing a tangy contrast to the rich meat and spicy elements.
- Choripan: Pair the vibrant pickles with this flavorful Argentine chorizo sandwich for a burst of freshness that balances the savory sausage.
- Air Fryer Hot Dogs: Move beyond traditional relish! Finely chop or slice your pickled tomatoes to top hot dogs for a gourmet twist.
- Antipasto Salad: Add whole pickled cherry tomatoes or sliced green tomatoes to your antipasto salad for an extra layer of flavor and texture alongside olives, cheeses, and cured meats.
- Charcuterie Board: These pickles are a natural fit for any cheese or charcuterie board. Their acidity complements rich cheeses and meats, making them a palate cleanser.
- Smoked Bologna: The tang of pickled tomatoes can wonderfully offset the smoky richness of smoked bologna, whether in a sandwich or as a side.
- Smoked Cream Cheese: Serve finely diced pickled tomatoes with smoked cream cheese and crackers for an unexpectedly delightful appetizer.
- Eggs: Chop them and add to scrambled eggs, omelets, or serve alongside a fried egg for breakfast.
- Salads: Toss them into green salads, potato salads, or pasta salads for an instant flavor upgrade.
- Garnish: They make an excellent garnish for a Bloody Mary or a dirty martini.
- Straight from the Jar: Sometimes, the best way to enjoy them is simply on their own as a healthy, tangy snack!
Frequently Asked Questions About Pickled Tomatoes
Yes, pickled tomatoes can be quite good for you! Tomatoes themselves are incredibly healthy fruits, packed with vitamins (especially C and K), minerals, and antioxidants like lycopene. Pickled foods are also known for promoting gut health, as they can be rich in probiotics (especially quick pickles that aren’t excessively heated). However, it’s worth noting that pickling brine contains a fair amount of sodium, so as with all pickles, moderation is key for a balanced diet.
No, firm unripe green tomatoes do not need peeling for pickling or canning. Their skin is typically thin and contributes to their desirable crisp texture. Simply wash them well, slice them into wedges, and they’re ready to go straight into the jar, skin and all!
Both pickled green and cherry tomatoes are incredibly versatile! They make a fabulous perky snack on their own. They’re excellent accompaniments to sandwiches, burgers, and hot dogs, adding a zesty kick. Toss them into green salads, pasta salads, or grain bowls. They’re a fantastic addition to charcuterie boards, antipasto platters, or even chopped and sprinkled over pizzas. Don’t forget them as a tangy garnish for a Bloody Mary or other cocktails!
The shelf life depends on the preparation method:
- Refrigerator Pickles: Unopened, these quick pickles will keep well in the refrigerator for up to six months. Once opened, they should be stored in the refrigerator and consumed within a month or so for best flavor and texture.
- Fully Canned Tomatoes: If properly processed via water bath canning, shelf-stable tomatoes will keep well sealed at room temperature in a cool, dark pantry for at least a year, often longer. Once a jar is opened, it must be refrigerated and consumed within a month.
The beauty of pickling is customization! To mix up the flavor profile, consider adding some of these aromatic ingredients to your jars:
- Herbs: Fresh dill sprigs or dill seed, bay leaf, fresh rosemary.
- Spices: Mustard seeds, celery seeds, coriander seeds, red pepper flakes (for heat), a slice of fresh ginger, star anise.
- Vegetables: Thinly sliced onions, a few jalapeño slices for extra spice.
These additions can significantly alter and enhance the final taste of your pickled tomatoes, allowing for endless experimentation.
Looking for More Homemade Pickles Recipes?
If you’ve discovered the joy of homemade pickling, there’s a whole world of tangy delights waiting for you! Expand your pickling repertoire with these other fantastic recipes:
- Refrigerator Bread and Butter Pickles
- Quick Pickled Jalapeño Peppers
- Pickled Banana Peppers
- Quick Pickled Red Onions
- Pickled Watermelon Rind
- How to Make Pickled Eggs with Beets
- Best Homemade Refrigerator Pickles
- Pickled Garlic (Preserved)
- Pickled Radish Recipe

Print Recipe
Leave a Review »
Pickled Tomatoes Recipe
10
5
15
8
servings (4 cups)
Video
For a visual guide, check out the video for this recipe!
Ingredients
-
1 – 1 ¼
pounds
green tomatoes
or cherry tomatoes -
1
cup
apple cider vinegar -
1
cup
water -
2
tablespoons
kosher salt -
2-3
tablespoons
granulated sugar -
2
whole
smashed garlic cloves -
1
teaspoon
whole peppercorns -
¾
teaspoon
whole allspice
or whole cloves
Instructions
-
If pickling green tomatoes, slice each tomato into eight wedges. If pickling cherry tomatoes, use a toothpick or wooden skewer to poke a hole through the center of each cherry tomato, so the pickling brine can penetrate the tomato flesh inside.
-
Set a small sauce pot over medium-high heat. Place the apple cider vinegar, water, salt, and sugar in the pot. Stir well, then bring to a boil.
-
Meanwhile, set out one quart jar or two pint jars. Fill the jars with the sliced green tomatoes (or whole cherry tomatoes) and add the garlic cloves, peppercorns, and allspice to the jars.
-
Once the pickling mixture has come to a boil, turn off the heat. Carefully pour the hot pickling liquid over the tomatoes, filling the jar close to the top, leaving only a ½-inch of space from the top rim.
For Refrigerator Method
-
Screw the lid on the jar, and allow it to cool to room temperature. Then place in the refrigerator and allow the tomatoes to pickle for at least 48 hours before serving.
Canning Instructions
-
If you plan to can the pickled tomatoes for long-term room temperature storage, make sure to wipe the rim of the jar with a wet paper towel before sealing with a lid.
-
Set a large pot of water over the stovetop and bring to a boil. Use canning tongs to gently lower the jar(s) into the boiling water. Make sure there is at least 1-inch of water over the top of the lids after the jars are in the pot. Bring the water back up to a boil and simmer for 15 minutes. Once the timer goes off, carefully remove the jars from the boiling water and allow them to cool to room temperature before storing.
Notes
Refrigerator pickles will keep well unopened for up to six months. Fully canned tomatoes will keep well sealed at room temperature for at least a year.
Once opened the tomatoes should be kept in the refrigerator and eaten within a month or so.
Nutrition
Serving:
0.5
cup
,
Calories:
22
kcal
,
Carbohydrates:
4
g
,
Protein:
0.1
g
,
Fat:
0.1
g
,
Saturated Fat:
0.02
g
,
Polyunsaturated Fat:
0.02
g
,
Monounsaturated Fat:
0.01
g
,
Sodium:
1748
mg
,
Potassium:
37
mg
,
Fiber:
0.3
g
,
Sugar:
3
g
,
Vitamin A:
6
IU
,
Vitamin C:
0.4
mg
,
Calcium:
11
mg
,
Iron:
0.2
mg
Side Dish, Snack
American, Southern
Sommer Collier
Cook It? Love It? Rate It!
YOU can help this recipe RANK on Google – TAP 5 STARS so other hungry people can find it. Thank you!