
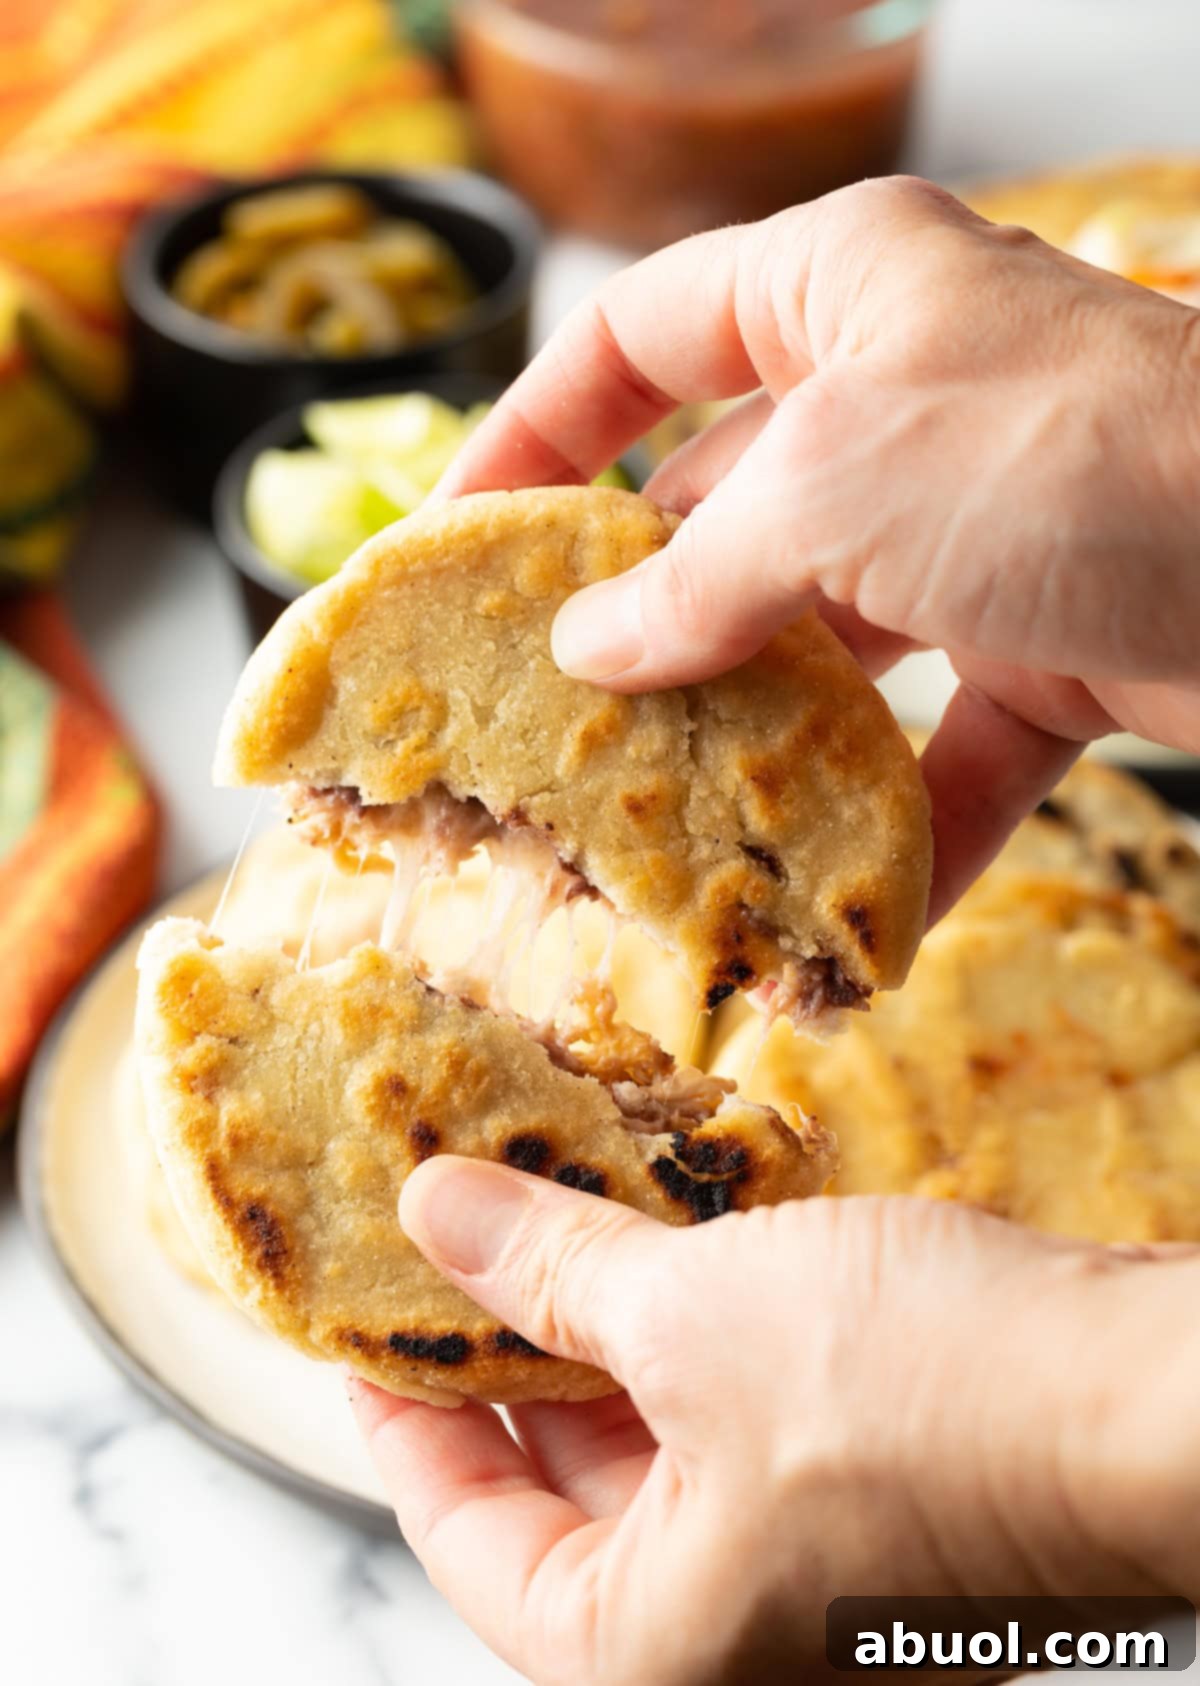
Embark on a culinary adventure with our authentic Pupusas recipe! These delightfully thick and chewy corn tortillas, bursting with savory beans and gooey melted cheese, are pan-fried to golden perfection. Each warm pupusa is traditionally topped with a vibrant, tangy fresh cabbage slaw, known as curtido, offering a balanced and utterly satisfying experience. Our easy-to-follow guide is perfect for creating a hearty snack, a memorable lunch, or a casual yet flavorful dinner for the whole family.
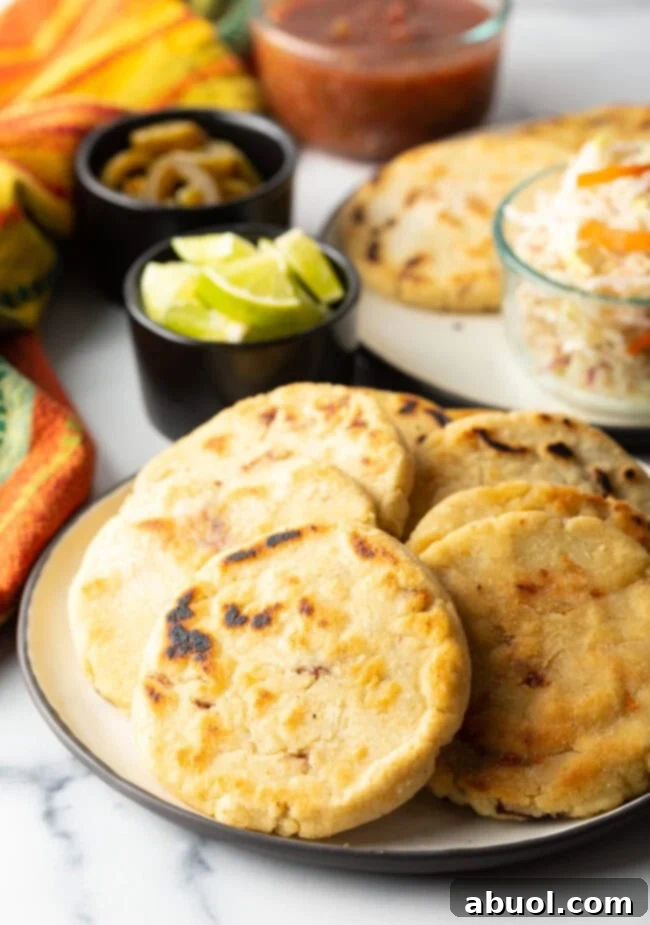
What Are Pupusas? An Introduction to El Salvador’s National Dish
Pupusas (sometimes playfully spelled papusas) are much more than simple corn tortillas; they are a cherished emblem of Salvadoran culinary heritage. These thick, hearty griddle cakes are crafted from masa harina, a specialized instant corn flour, and distinctively stuffed with a variety of delicious fillings before being cooked. This method sets them apart from other corn-based dishes like gorditas or arepas, where fillings are often added after cooking. In El Salvador, pupusas are not just a meal, but a cultural phenomenon, designated as the national dish and celebrated annually on the second Sunday of November. While occasionally you might find variations made with wheat flour in certain regions, the most traditional and universally beloved pupusas always honor their corn-based roots, delivering an authentic taste of Central America.
The creation of a pupusa begins with a simple yet magical dough: masa harina combined with warm water and a touch of salt. This mixture transforms into a wonderfully soft, pliable, and easy-to-handle dough. Once the dough is ready, it’s carefully filled with your chosen ingredients, shaped into a flat disk, and then swiftly pan-fried. The result is a golden-brown exterior with a delightful crispness that gives way to a tender, steaming interior, where the rich flavors of the filling melt together harmoniously. Making pupusas from scratch is not only a delightful cooking experience but also a fantastic way to introduce yourself and your loved ones to the vibrant and comforting world of authentic Latin American cuisine. It’s a hands-on activity that’s perfect for getting the entire family involved in the kitchen, creating delicious memories together.
The Rich History and Cultural Significance of Pupusas
The story of pupusas is deeply intertwined with the history of El Salvador, tracing its origins back to the indigenous Pipil tribes who inhabited the region centuries ago. These ancient peoples prepared a similar corn-based dish, highlighting the enduring legacy of maize in Central American diets. Over generations, this humble corn creation evolved, adapting to new ingredients and culinary influences, eventually blossoming into the beloved pupusa we know today.
For Salvadorans, pupusas are more than just food; they are a symbol of national pride, community, and tradition. They are a staple at family gatherings, festive celebrations, and everyday meals, embodying the warmth and hospitality of Salvadoran culture. The act of making pupusas, often a communal effort, reinforces familial bonds and preserves culinary heritage. Every bite tells a story of history, resilience, and the vibrant spirit of a nation. This deep cultural connection makes pupusas an incredibly special dish, cherished by millions and celebrated around the world. Serving pupusas is truly sharing a piece of Salvadoran heart and soul.
Endless Pupusa Filling Variations: Customize Your Culinary Creation
One of the most exciting and appealing aspects of pupusas is their incredible versatility, especially when it comes to fillings. While the classic combination of savory refried beans and melted cheese is a perennial favorite, the possibilities for customization are virtually limitless. This makes pupusas an ideal dish for creative cooks, allowing you to personalize each one to perfectly match your taste or to ingeniously use up leftover ingredients.
Beyond the simple bean and cheese, traditional Salvadoran pupusas boast a diverse range of popular fillings:
- Queso: A pure cheese filling, typically made with a mild, easily meltable Salvadoran cheese like quesillo, or a blend of Monterey Jack and mozzarella for a wonderfully gooey interior.
- Frijoles: A rich and creamy refried bean filling, most commonly prepared with red or black beans, seasoned to perfection.
- Revuelta: The ultimate classic, this combines refried beans, cheese, and finely ground chicharrón (fried pork belly). The fusion of these three elements creates a deeply satisfying, complex, and iconic flavor profile that is a must-try.
- Queso con Loroco: A beloved regional specialty featuring cheese mixed with loroco, an edible flower bud native to Central America. Loroco imparts a unique, subtly floral, and savory flavor that elevates the cheese.
- Chicharrón: A robust filling made exclusively from finely ground or pureed fried pork belly, offering a concentrated burst of savory meatiness.
But why stop at tradition? Feel empowered to explore new and exciting filling ideas:
- Savory Meat Options: Incorporate flavorful meats like leftover taco meat, tender carne asada, succulent shredded rotisserie chicken, slow-simmered stewed chicken, or rich shredded pork carnitas. Spicy chorizo also makes for an incredibly flavorful and robust filling option. Ensure all meats are cooked, cooled, and finely chopped or shredded to prevent tearing the dough during shaping.
- Vibrant Vegetarian & Vegan Alternatives: For those seeking plant-based options, pupusas can be incredibly satisfying. Consider fillings such as roasted butternut squash, sweet potatoes, sautéed mushrooms, spinach, corn kernels, or even a mix of finely diced bell peppers and onions. To make pupusas entirely dairy-free and vegan, simply omit the cheese or use your favorite plant-based shredded cheese alternative. Serving them with a creamy cashew sauce or vegan sour cream will complete the experience beautifully.
- Piquant Additions: For a delightful kick, mix finely chopped pickled jalapeños, fresh pico de gallo, or a pinch of red pepper flakes into your fillings.
- Diverse Cheese Choices: While Monterey Jack is excellent for its melting qualities and mild taste, don’t hesitate to experiment with other cheeses. Sharp or medium cheddar, Colby Jack, Oaxaca cheese, or even crumbly cotija cheese can offer unique textures and flavors. A blend of two or three cheeses can also create a more complex and appealing filling.
Regardless of your chosen filling, the key is to ensure it is well-cooked, cooled, and finely textured (mashed, shredded, or minced) to facilitate easy encapsulation within the delicate masa dough. This attention to detail will help you achieve perfectly shaped and leak-free pupusas every time.
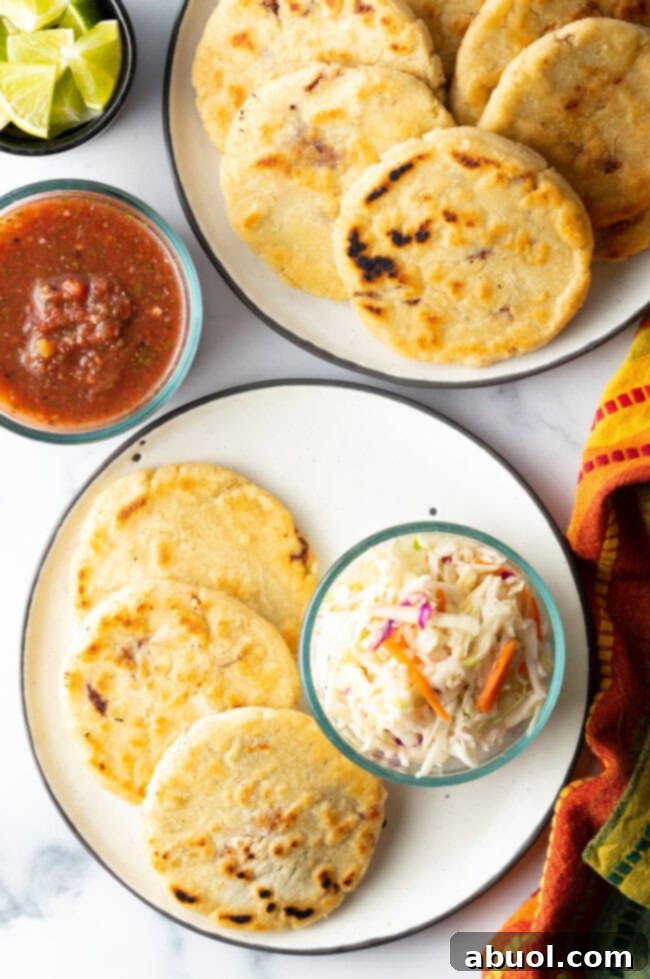
Essential Ingredients for Authentic Pupusas and Tangy Curtido
Crafting delicious pupusas and their indispensable companion, the tangy curtido slaw, requires a thoughtful selection of fresh and authentic ingredients. Each component plays a vital role in achieving the perfect balance of flavors and textures.
For the Bright and Refreshing Curtido Slaw
Curtido is more than just a garnish; it’s an essential counterpoint to the rich pupusas, offering a crucial tangy crunch that cuts through the richness. Our quick recipe captures its vibrant essence.
- Cabbage Slaw Mix: For convenience, a pre-packaged mix of finely shredded green cabbage and carrots works wonderfully. Alternatively, you can easily prepare this yourself by thinly slicing half a head of green cabbage and grating a couple of fresh carrots. You can even add a touch of finely shredded red cabbage for a pop of color and a slightly different bite.
- Fresh Lime: The juice of a freshly squeezed lime is paramount. It provides the essential bright, acidic tang that “quick pickles” the cabbage, infusing it with flavor and contributing to its delightful crispness. Lemon juice can be a substitute, but lime offers a more authentic profile.
- Salt: A crucial seasoning that not only enhances the overall flavor but also helps to draw out excess moisture from the cabbage, ensuring a crisper texture.
- Optional Traditional Enhancements: To delve deeper into authentic curtido flavors, consider incorporating finely sliced white onion for a subtle bite, a dash of dried Mexican oregano for earthy aromatic notes, and a pinch of red chili flakes for a gentle, warming heat. A tablespoon of white vinegar can also boost the pickling effect and add another layer of acidity.
For the Perfectly Pliable Pupusa Dough
The dough is the foundation of every great pupusa. Its texture and consistency are critical for a successful outcome.
- Masa Harina: This is the hero ingredient for authentic pupusas. Masa harina is a unique, finely ground corn flour that has undergone a process called nixtamalization, which improves its nutritional value and creates its distinctive flavor and dough-making properties. It is not interchangeable with regular cornmeal or cornflour. Brands like Maseca or Bob’s Red Mill are widely available. Importantly, masa harina is naturally gluten-free.
- Salt: Just like with the curtido, salt is vital here. It seasons the dough itself, ensuring that every part of the pupusa is flavorful and not bland.
- Warm Water: The temperature of the water is key for properly hydrating the masa harina. Warm water helps the masa absorb moisture more effectively, resulting in a smooth, soft, and pliable dough that is easy to shape and less prone to cracking. Be prepared to adjust the quantity slightly, as humidity and specific masa harina brands can influence how much water is needed.
For the Classic and Customizable Pupusa Fillings
Our base recipe focuses on a beloved combination, but provides ample room for personal touches.
- Refried Black Beans: For convenience, high-quality, low-sodium canned refried black beans are an excellent choice. Ensure they are thick and well-mashed; watery beans can make the pupusas difficult to seal. Alternatively, making your own refried beans from dried black beans offers an even richer, more profound flavor. Refried pinto beans are also a popular and delicious alternative.
- Monterey Jack Cheese: This cheese is a fantastic option for pupusas due to its mild, creamy flavor and exceptional melting capabilities. For the best melt and texture, always opt for a block of Monterey Jack and shred it yourself, rather than using pre-shredded varieties which often contain anti-caking agents. Other excellent melting cheeses include Oaxaca cheese, mild mozzarella, or a blend of Mexican cheeses.
- Cooking Oil: A neutral-flavored oil with a relatively high smoke point is ideal for pan-frying. Avocado oil, olive oil, or canola oil are all great choices to achieve a beautiful golden crust without overpowering the delicate flavors of the pupusa.
Broadening Your Horizons with Optional Fillings:
The beauty of pupusas truly shines with custom fillings. Don’t hesitate to experiment with savory additions like finely shredded stewed chicken, tender carnitas, well-seasoned ground beef, crumbled and cooked chorizo, a hint of spicy, chopped pickled jalapeños, comforting roasted squash, or fresh pico de gallo for added zest and texture. When using optional fillings, ensure they are cooked, cooled, and finely prepared (mashed, shredded, or minced) to integrate smoothly into the pupusa without tearing the dough.
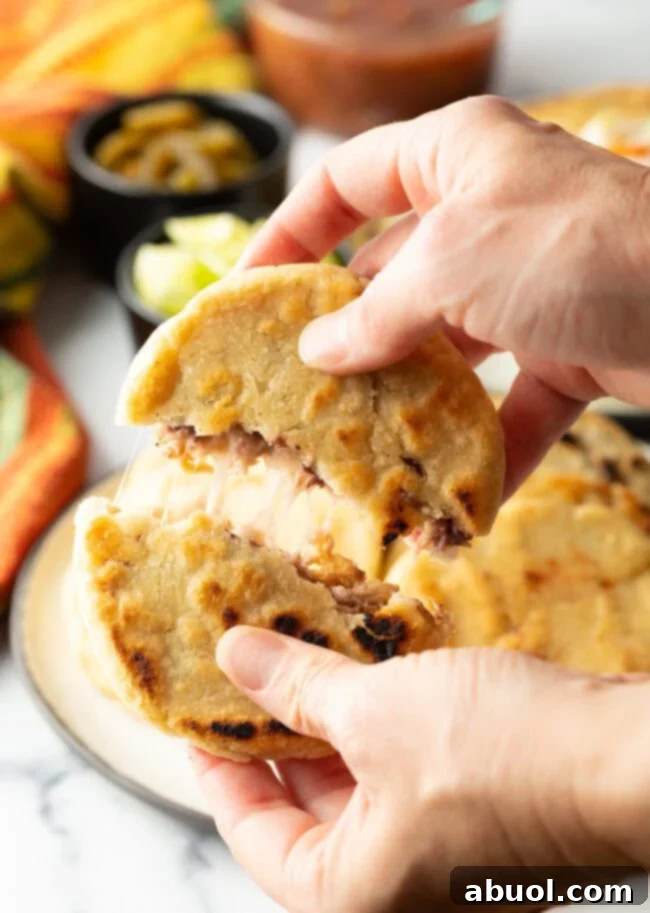
How to Make a Simple and Refreshing Curtido Slaw: The Perfect Pupusa Accompaniment
Curtido is an absolute essential when serving pupusas. Its crisp texture and tangy, slightly sour flavor provide a delightful contrast to the warm, rich pupusas, creating a balanced and authentic eating experience. While traditional curtido can be fermented for days, this simplified version delivers fantastic flavor and crunch in just minutes, making it perfect for a quick preparation. It’s always best to prepare your curtido a little ahead of time to allow the flavors to meld and for the cabbage to soften slightly while retaining its delightful crispness.
- Gather Your Bowl: Set out a medium-sized mixing bowl, ensuring it’s clean and ready for your slaw ingredients.
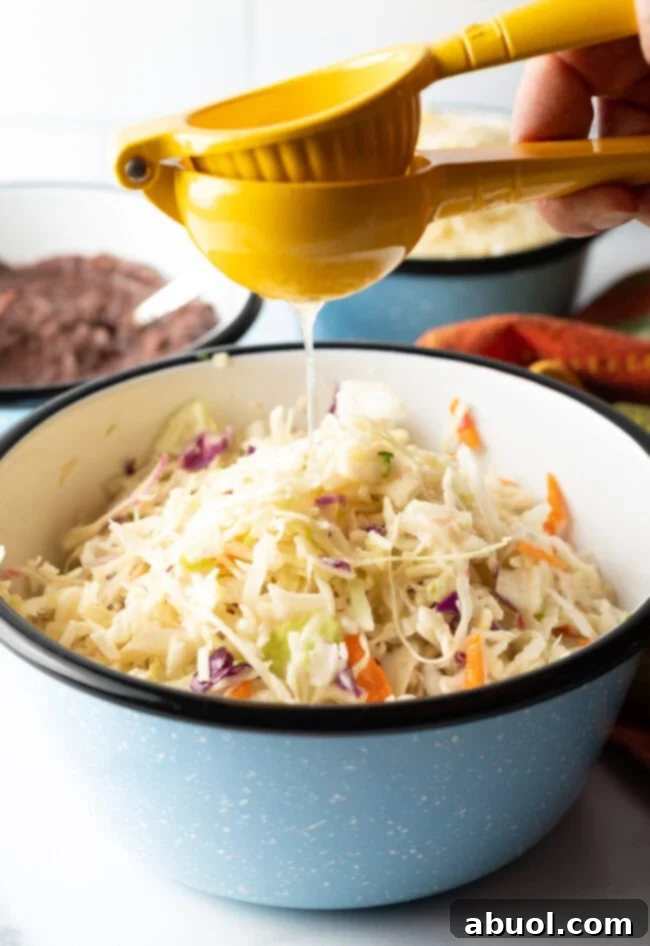
- Combine Ingredients: Add your chosen cabbage slaw mix (or freshly shredded cabbage and carrots) to the bowl. Squeeze in the juice of one fresh lime, ensuring no seeds fall in. Add ½ teaspoon of salt.
- Mix Thoroughly: Using your clean hands or a large sturdy spoon, mix the ingredients together vigorously. Really get in there and massage the cabbage with the lime juice and salt. This process helps to break down the cabbage fibers slightly, allowing it to absorb the flavors more effectively and achieve that desired crisp-tender texture.
- Cover and Chill: Once thoroughly mixed, cover the bowl tightly with plastic wrap or a lid. Place it in the refrigerator for at least 30 minutes. Ideally, let it chill for 1 to 2 hours. This resting period allows the flavors to meld and deepen, enhancing the tanginess and refreshing quality of the curtido.
- Pro Tip for Optimal Crunch: To ensure your curtido retains its delightful crunch, I highly recommend preparing it no more than a few hours before you plan to serve your pupusas. If the slaw sits for too long, the cabbage can start to lose its crispness, becoming too soft. For an extra layer of authentic flavor, consider adding a tablespoon of white vinegar, a pinch of dried Mexican oregano, and a tiny amount of red chili flakes to the mix. These small additions can significantly elevate the taste profile of your homemade curtido.
Mastering the Art: How to Make Pupusas from Scratch, Step-by-Step
Creating authentic pupusas at home is a rewarding culinary journey that brings the vibrant flavors of El Salvador directly to your kitchen. While it might seem intricate, breaking the process down into simple steps makes it enjoyable and achievable for any home cook. Follow this detailed guide for perfectly delicious, homemade pupusas every time.
Part 1: Preparing the Masa Dough
The dough is the soul of the pupusa. Achieving the right consistency is paramount for easy shaping and a tender final product.
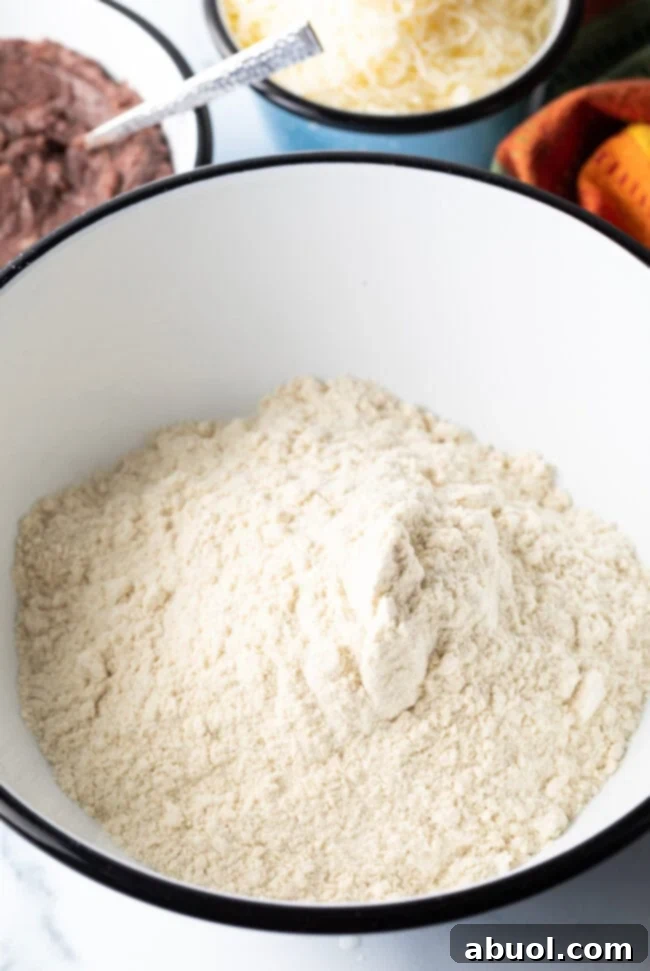
- Combine Dry Ingredients: In a large, spacious mixing bowl, add the 4 cups of masa harina and 2 teaspoons of salt. Use a whisk or your hands to briefly combine these dry ingredients, ensuring the salt is evenly distributed.
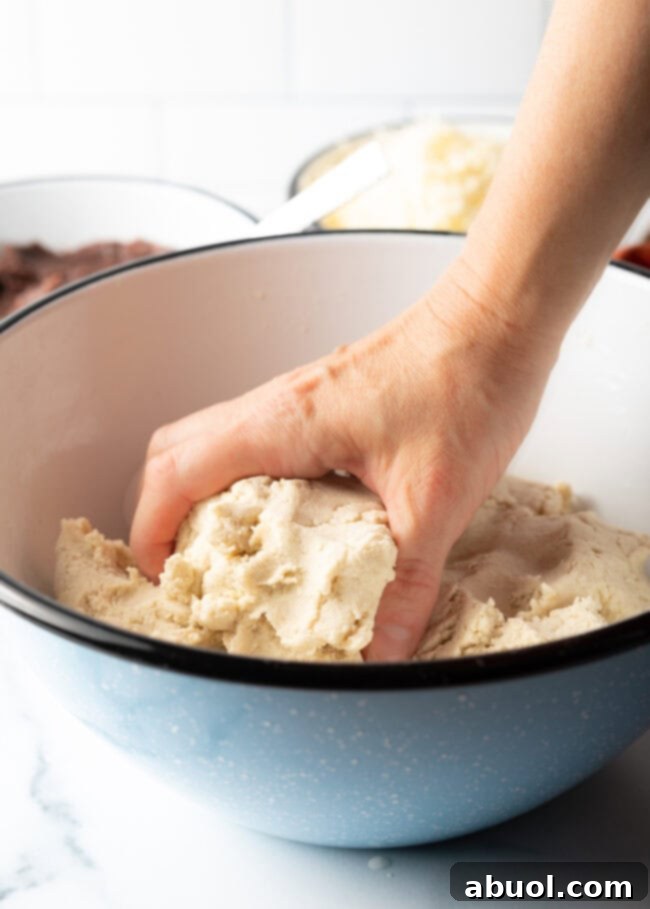
- Gradually Add Water and Mix: Begin by pouring in about 2.5 cups of the warm water. Start mixing the ingredients by hand. As you mix, gradually add the remaining ½ cup of water, and more if needed, one tablespoon at a time. The goal is to achieve a dough that is remarkably soft, smooth, and highly pliable. It should feel similar in texture to a soft play-doh, but with a slight stickiness.
- Knead for Smoothness: Continue mixing and kneading the dough with your hands for about 5 to 7 minutes. This kneading process is crucial as it helps hydrate the masa harina thoroughly and develops a smooth, consistent texture. The dough should be moist enough that it doesn’t crack when gently pressed, yet firm enough to hold its shape without being overly sticky.
- Adjust Consistency: If your dough feels too dry and crumbly, slowly incorporate more warm water, one tablespoon at a time, kneading after each addition until the desired soft and pliable consistency is reached. Conversely, if the dough is too wet and excessively sticky, add a little more masa harina, one tablespoon at a time, until it becomes manageable.
- Rest the Dough: Once your dough has reached the perfect smooth and soft consistency, cover the mixing bowl with a damp cloth or plastic wrap. Allow the dough to rest for a minimum of 10 to 15 minutes. This resting period is vital as it gives the masa harina ample time to fully hydrate, resulting in a dough that is much easier to work with during the shaping process.
Part 2: Setting Up Your Workstation and Preparing Fillings
An organized workstation will make the pupusa-making process much smoother and more enjoyable.
- Prepare Cooking Surface: Place a large cast-iron skillet or a heavy-bottomed, non-stick pan on your stovetop. This will be used for frying the pupusas. Do not heat it yet.
- Organize Fillings: Arrange your refried beans, shredded Monterey Jack cheese, and any other selected optional fillings (such as stewed chicken, pickled jalapeños, etc.) on a clean, spacious work surface. Ensure all fillings are in separate bowls and are easily accessible, allowing for quick and efficient assembly.
- Moisture for Hands: It’s essential to keep your hands moist while working with masa dough to prevent it from sticking. Have a small bowl of water close by to dip your hands into periodically. Alternatively, you can lightly coat your hands with a small amount of extra masa harina to keep them dry and prevent stickiness, as per traditional methods.
Part 3: Shaping and Stuffing the Pupusas
This is where the magic happens! Don’t stress about perfection; the rustic charm of homemade pupusas is part of their appeal. Practice makes perfect!
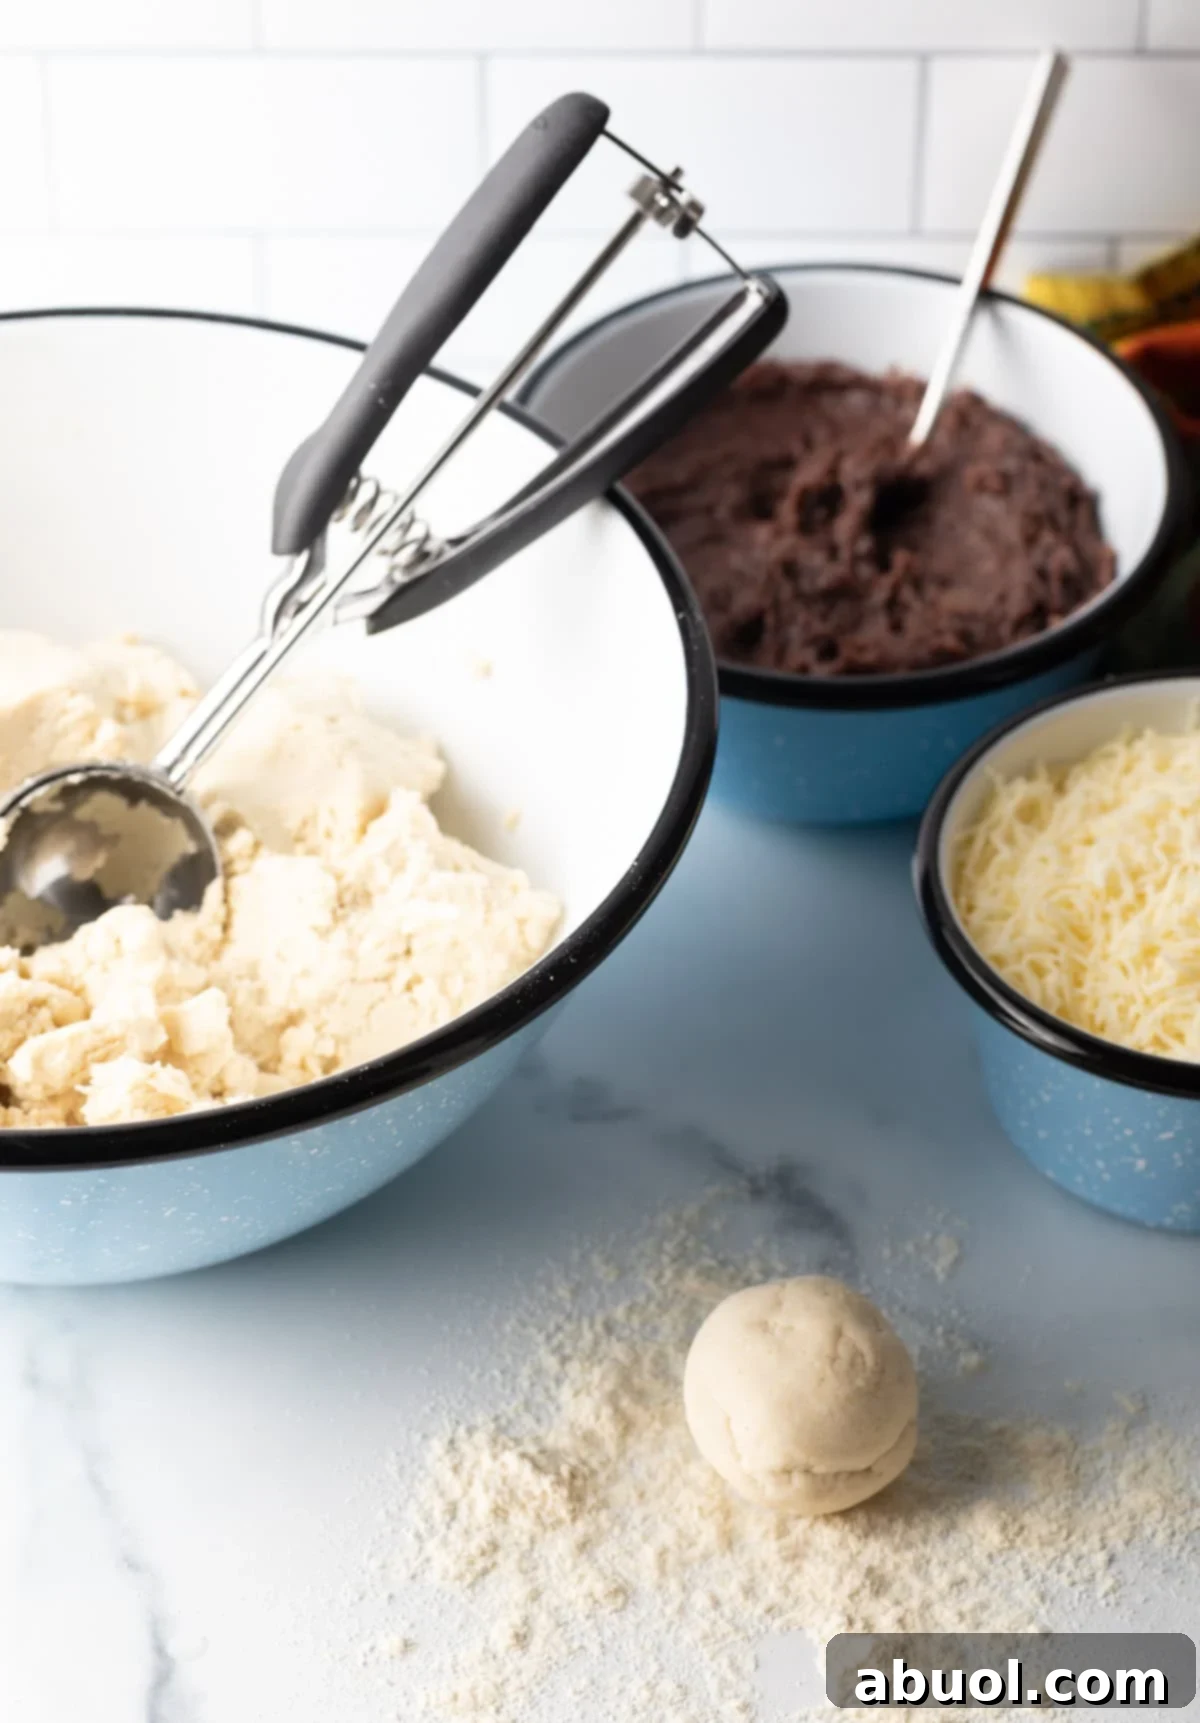
- Portion the Dough: Use a large spoon, an ice cream scoop, or your hands to portion out approximately 3 to 4 tablespoon-sized balls of pupusa dough. Each ball should be slightly larger than a golf ball. This size ensures a manageable pupusa.
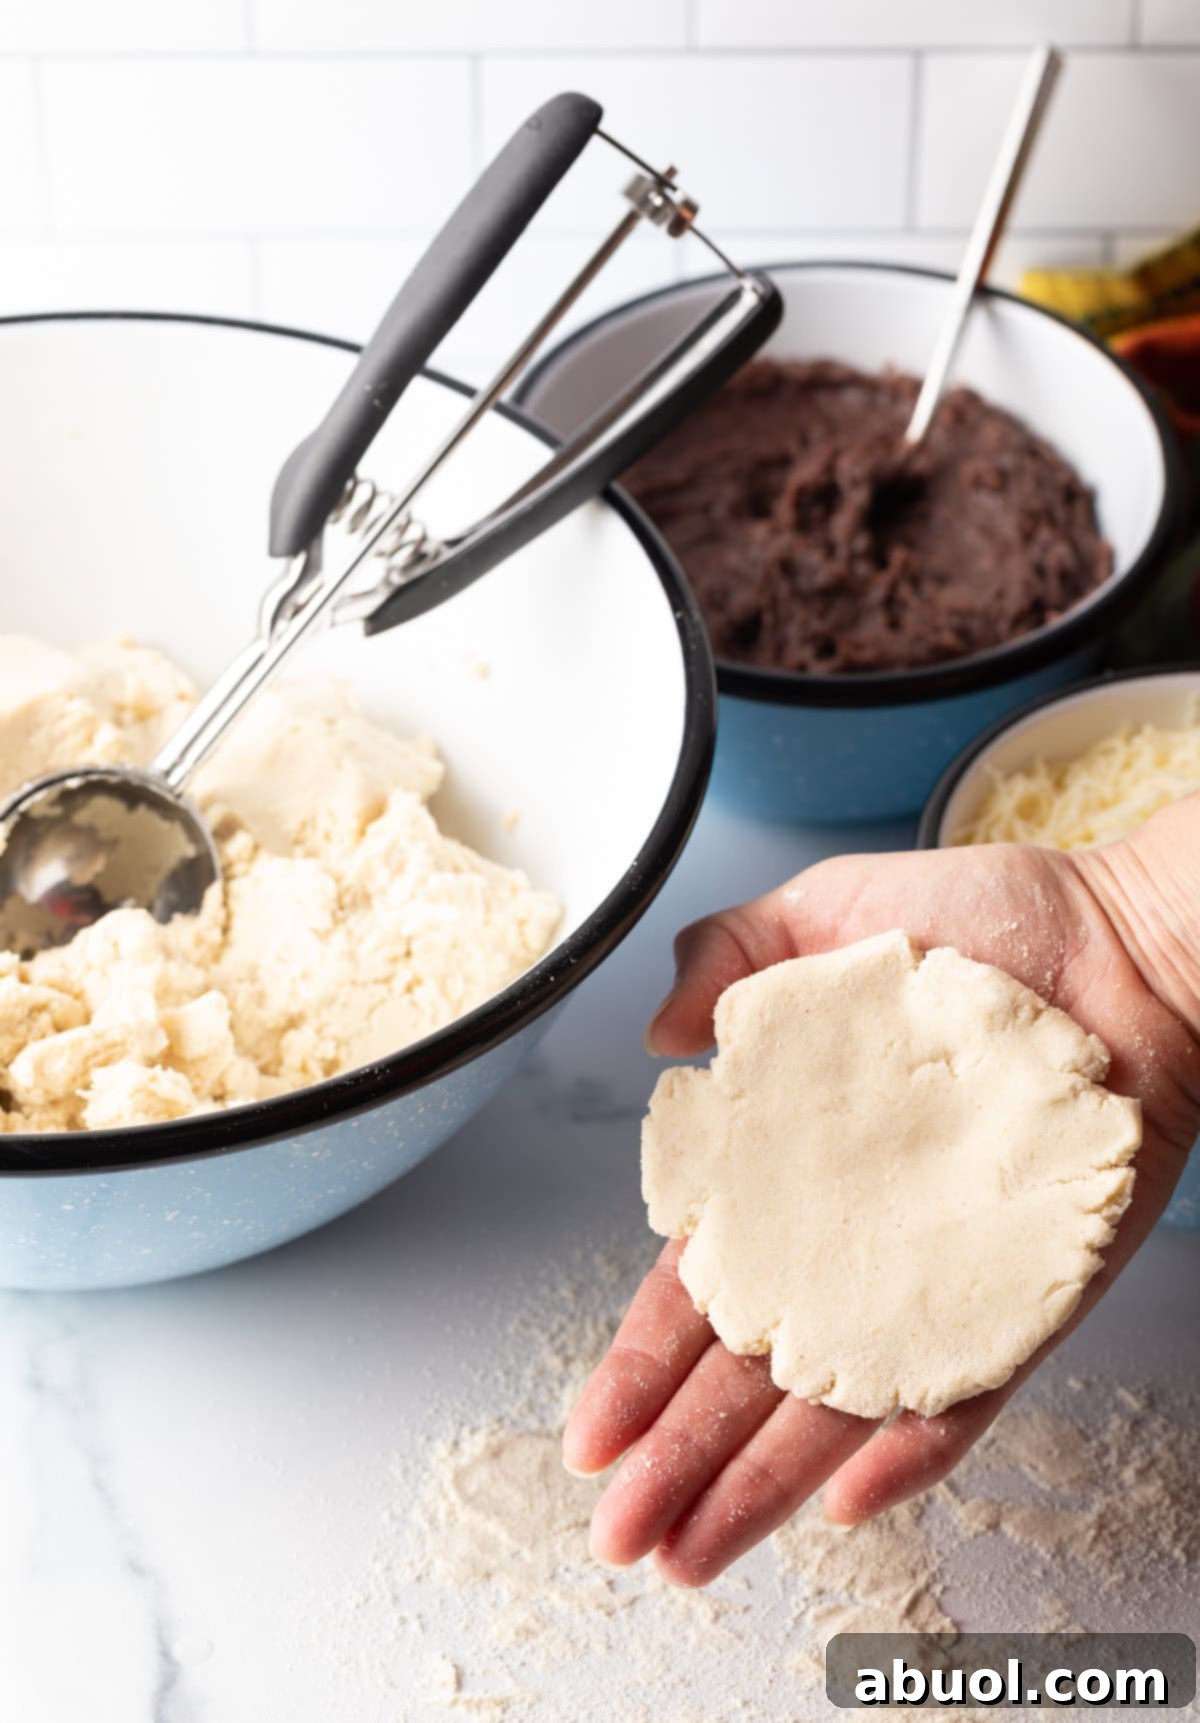
- Form Dough Disks: Take one dough ball at a time and gently press it into a flat disk. You can do this by repeatedly pressing it between your palms, rotating it as you go, or by gently patting it onto a clean surface until it reaches about 5 inches in width (roughly the size of your palm). Don’t worry if they aren’t perfectly round; they don’t need to be immaculate or look conventionally “pretty” at this stage.
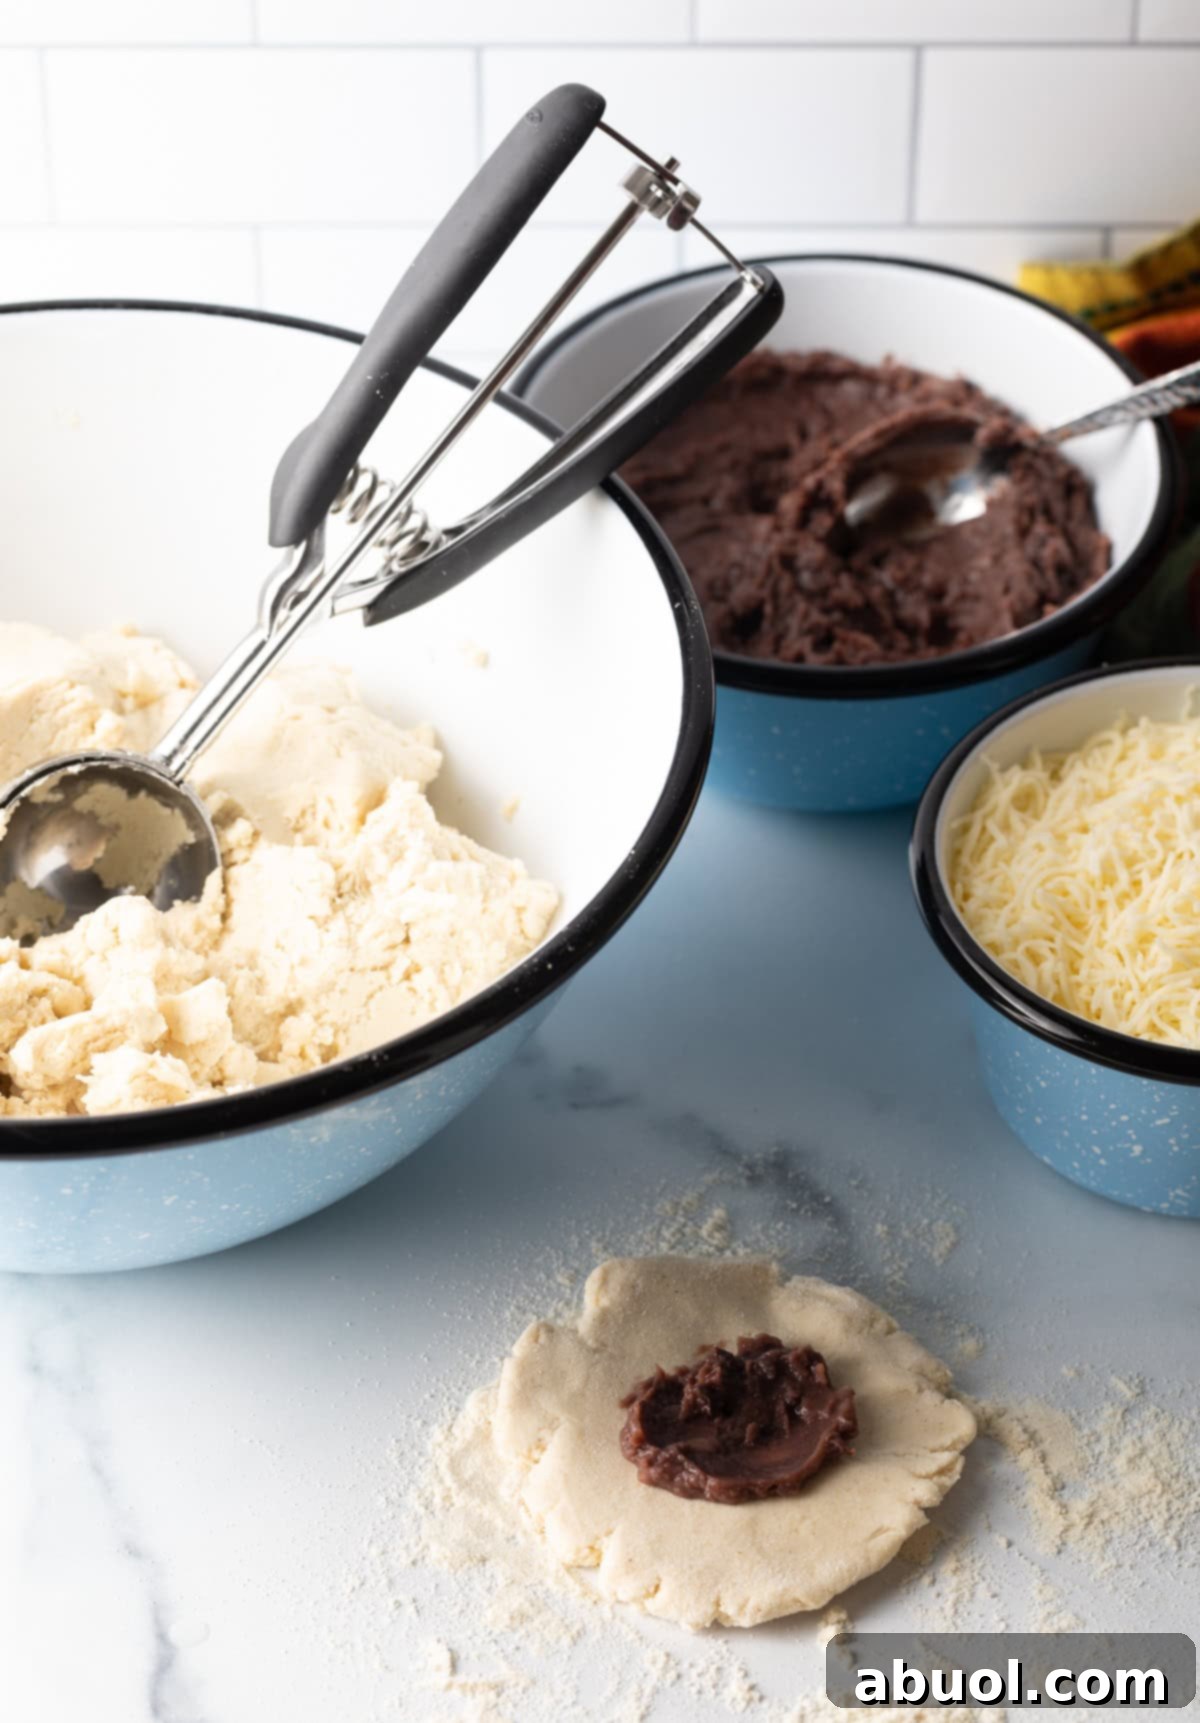
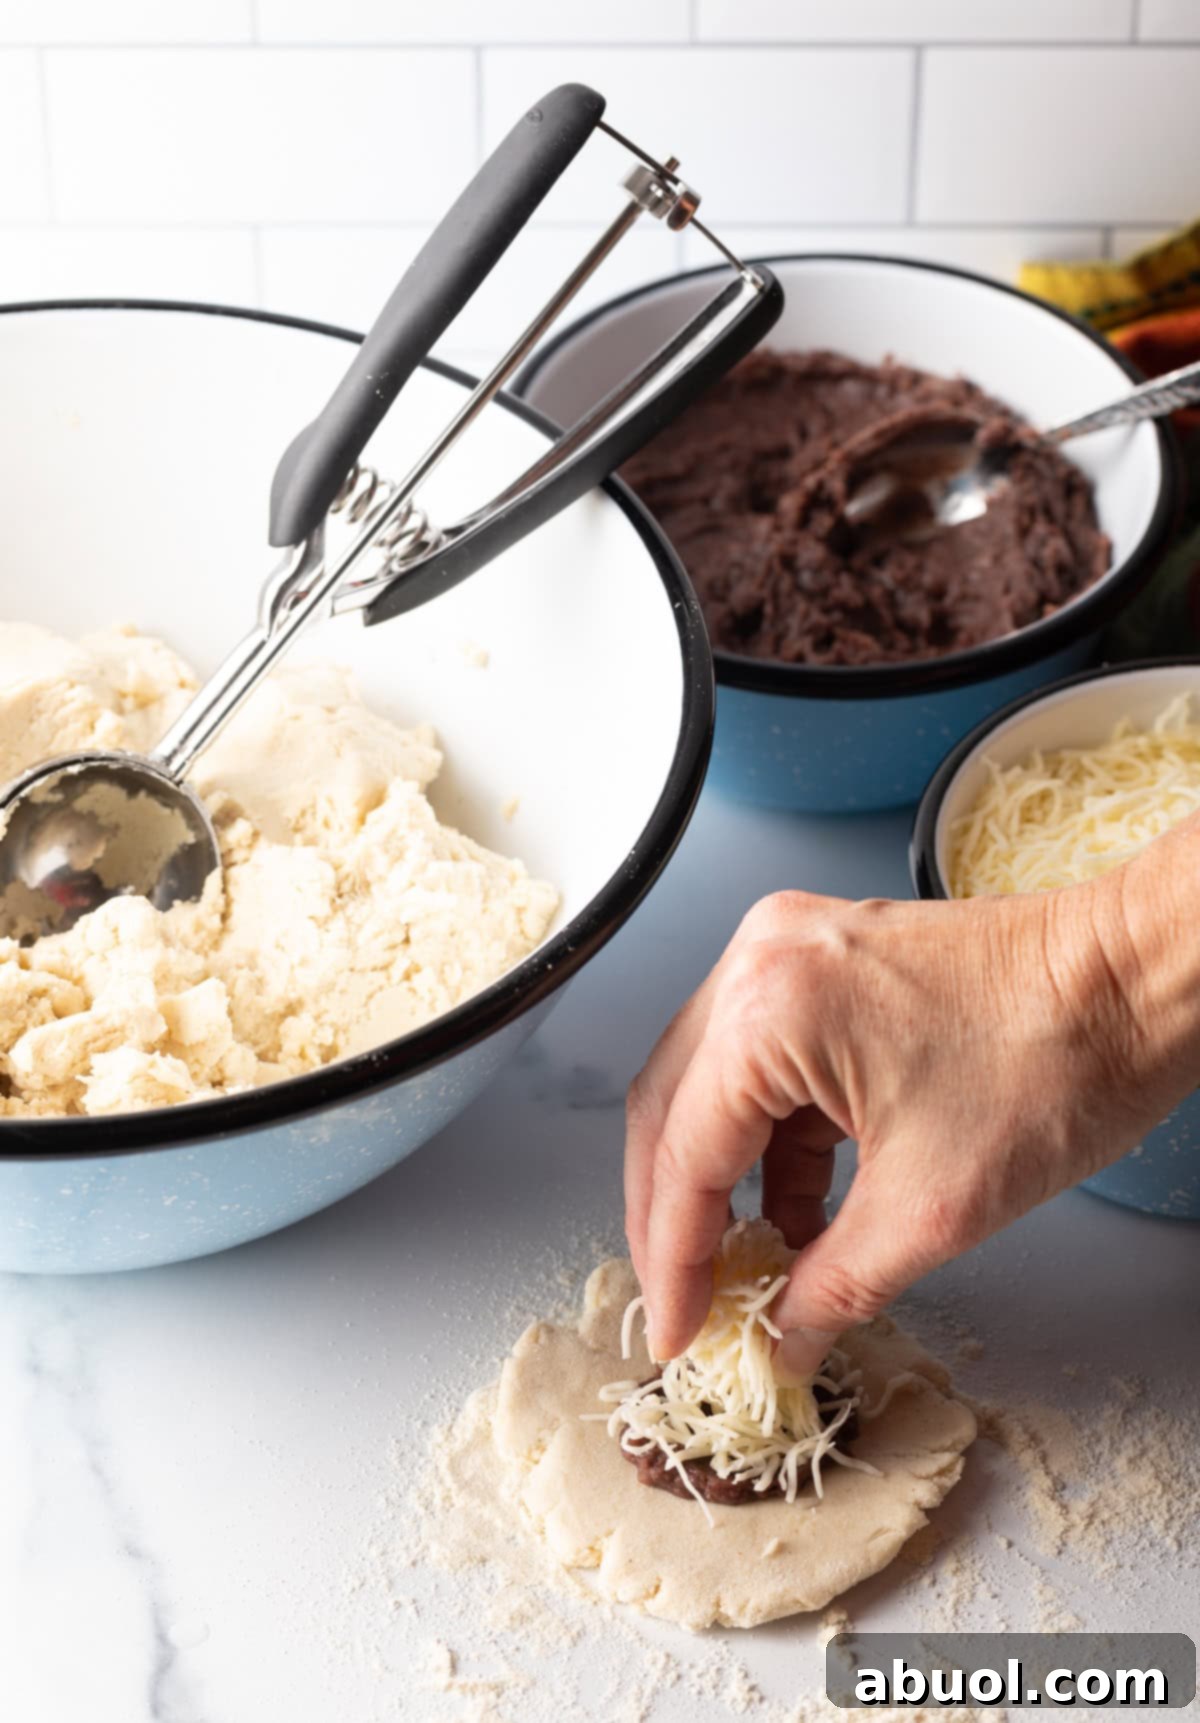
- Add Fillings: Carefully place about 1 teaspoon of refried beans in the absolute center of the flattened dough disk. Then, generously cover the beans with approximately 1 tablespoon of shredded cheese. If you are incorporating any other optional fillings, add a scant amount on top of the cheese and beans.
- Crucial Tip: Do Not Overfill! This step is critical. Be exceptionally cautious not to overfill your pupusas. Excessive filling will make it incredibly difficult to seal the dough without tearing, and it can cause the pupusas to burst during cooking. It’s always better to slightly underfill than to overfill.
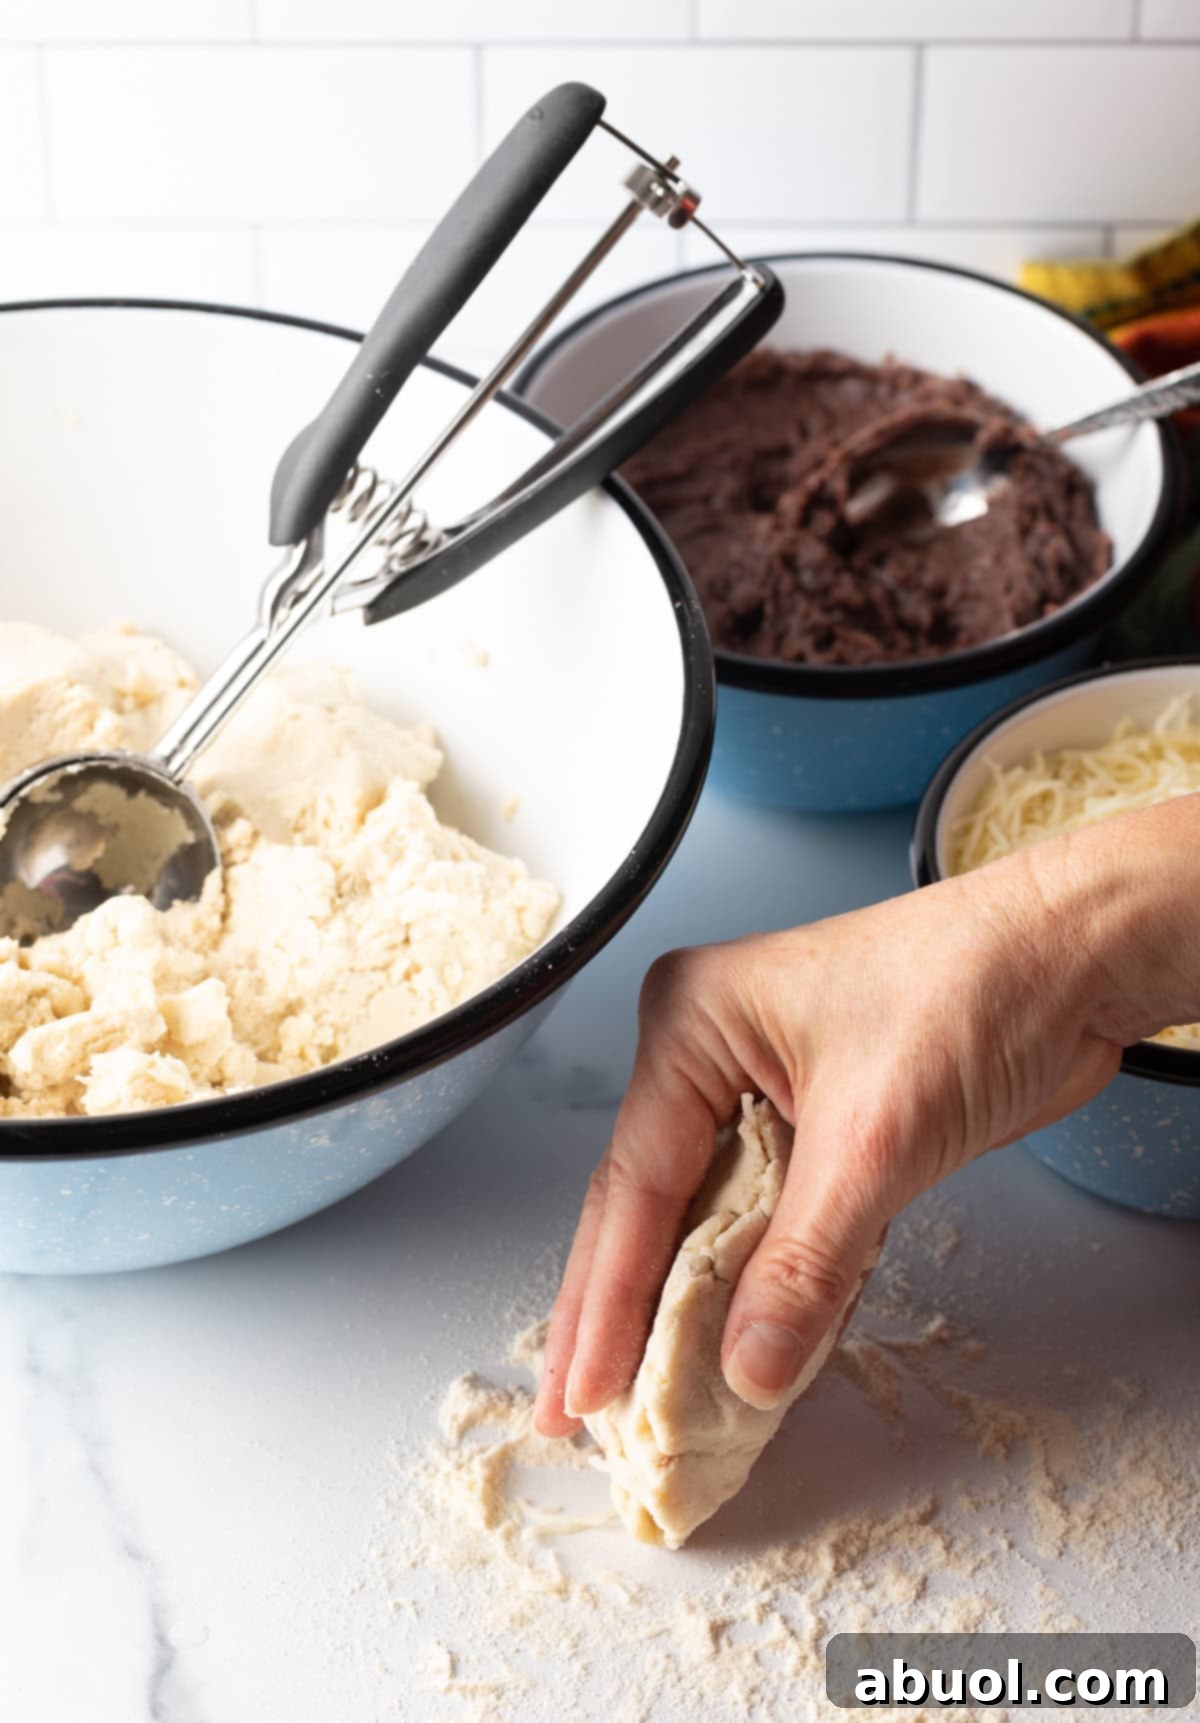
- Seal the Pupusa: With great care and gentleness, begin to fold the sides of the dough upwards and over the mound of fillings, bringing the edges together at the very top to completely enclose the filling. Pinch the dough firmly where the edges meet to create a secure seal. Continue pinching along the entire seam of the dough, gradually shaping it into a compact, clam-shell or dome-like form.
- Form a Smooth Ball: Once sealed, gently rotate the enclosed pupusa in your cupped hands, lightly rolling it to form a smooth, uniform ball. This further helps to secure the filling and prepares the pupusa for the final flattening stage.
Get the Complete Printable Guide for How to Make Pupusas (Recipe + Video) Below. Enjoy!
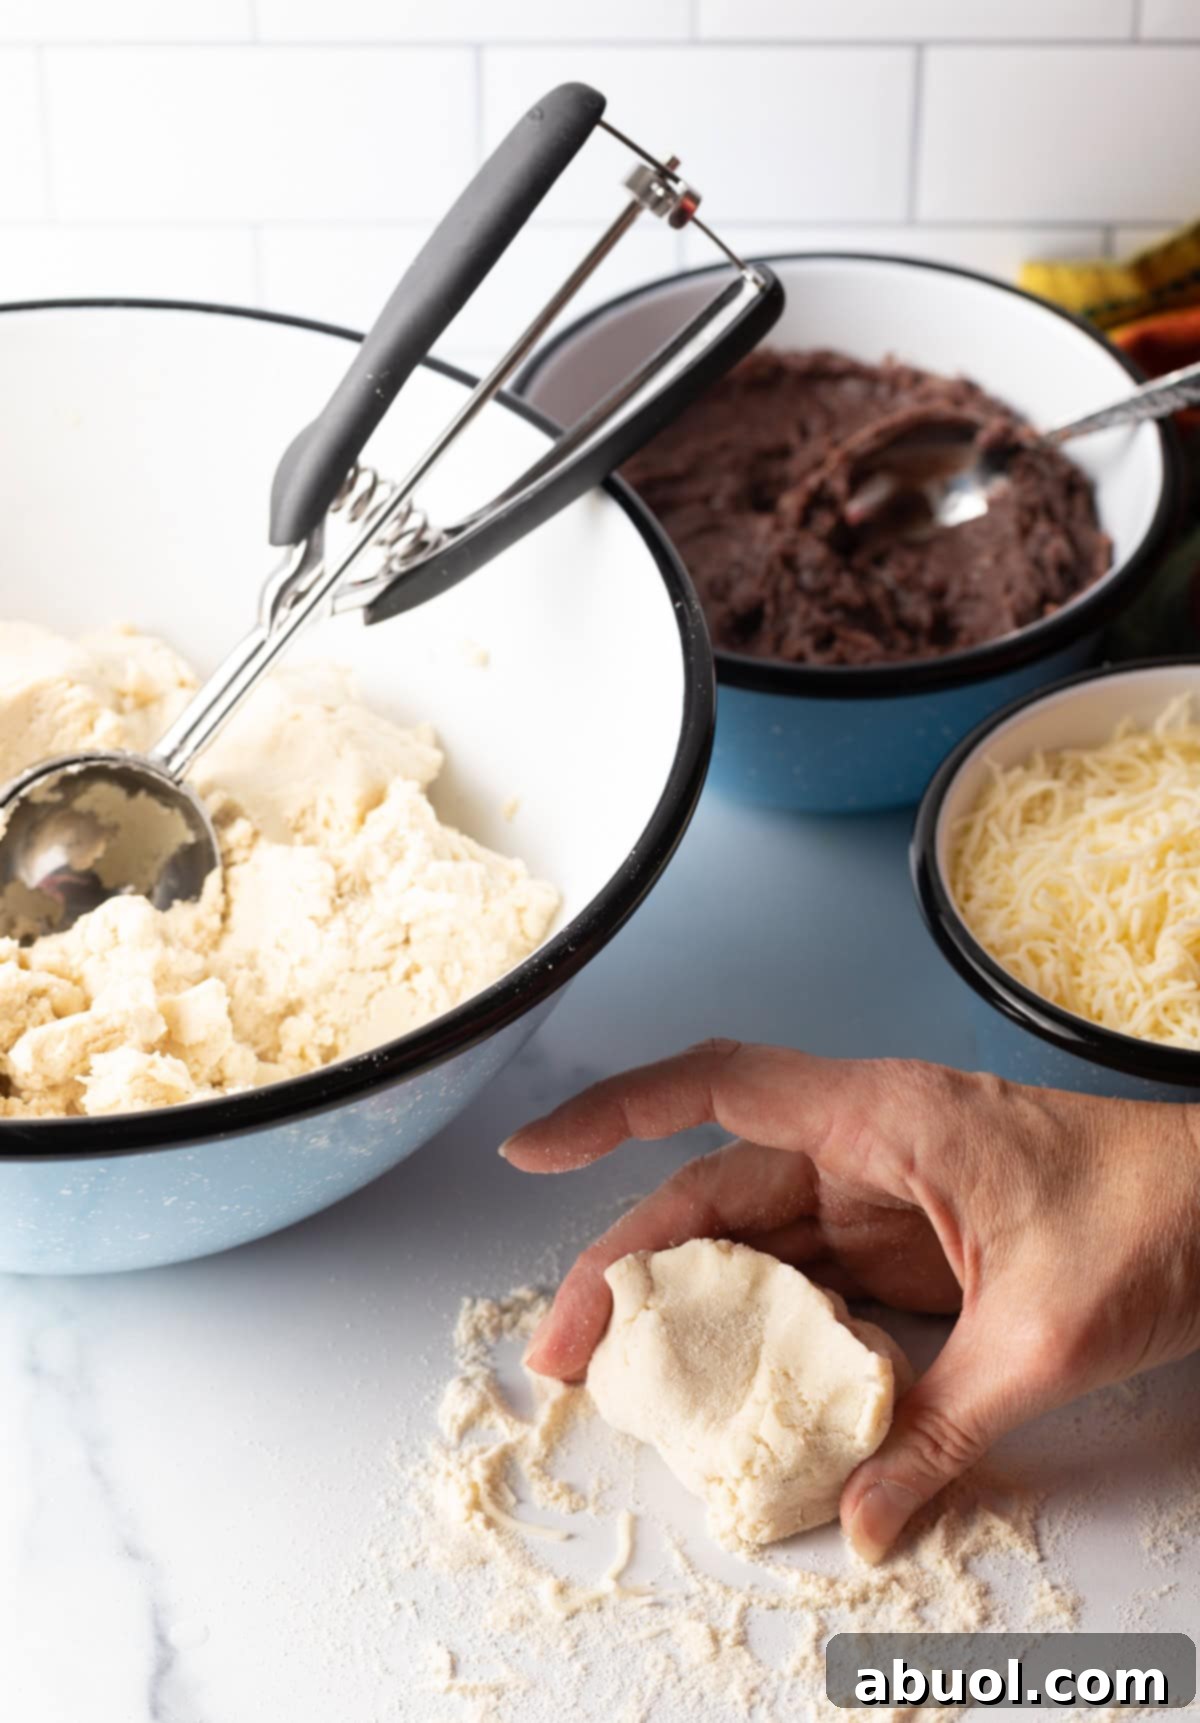
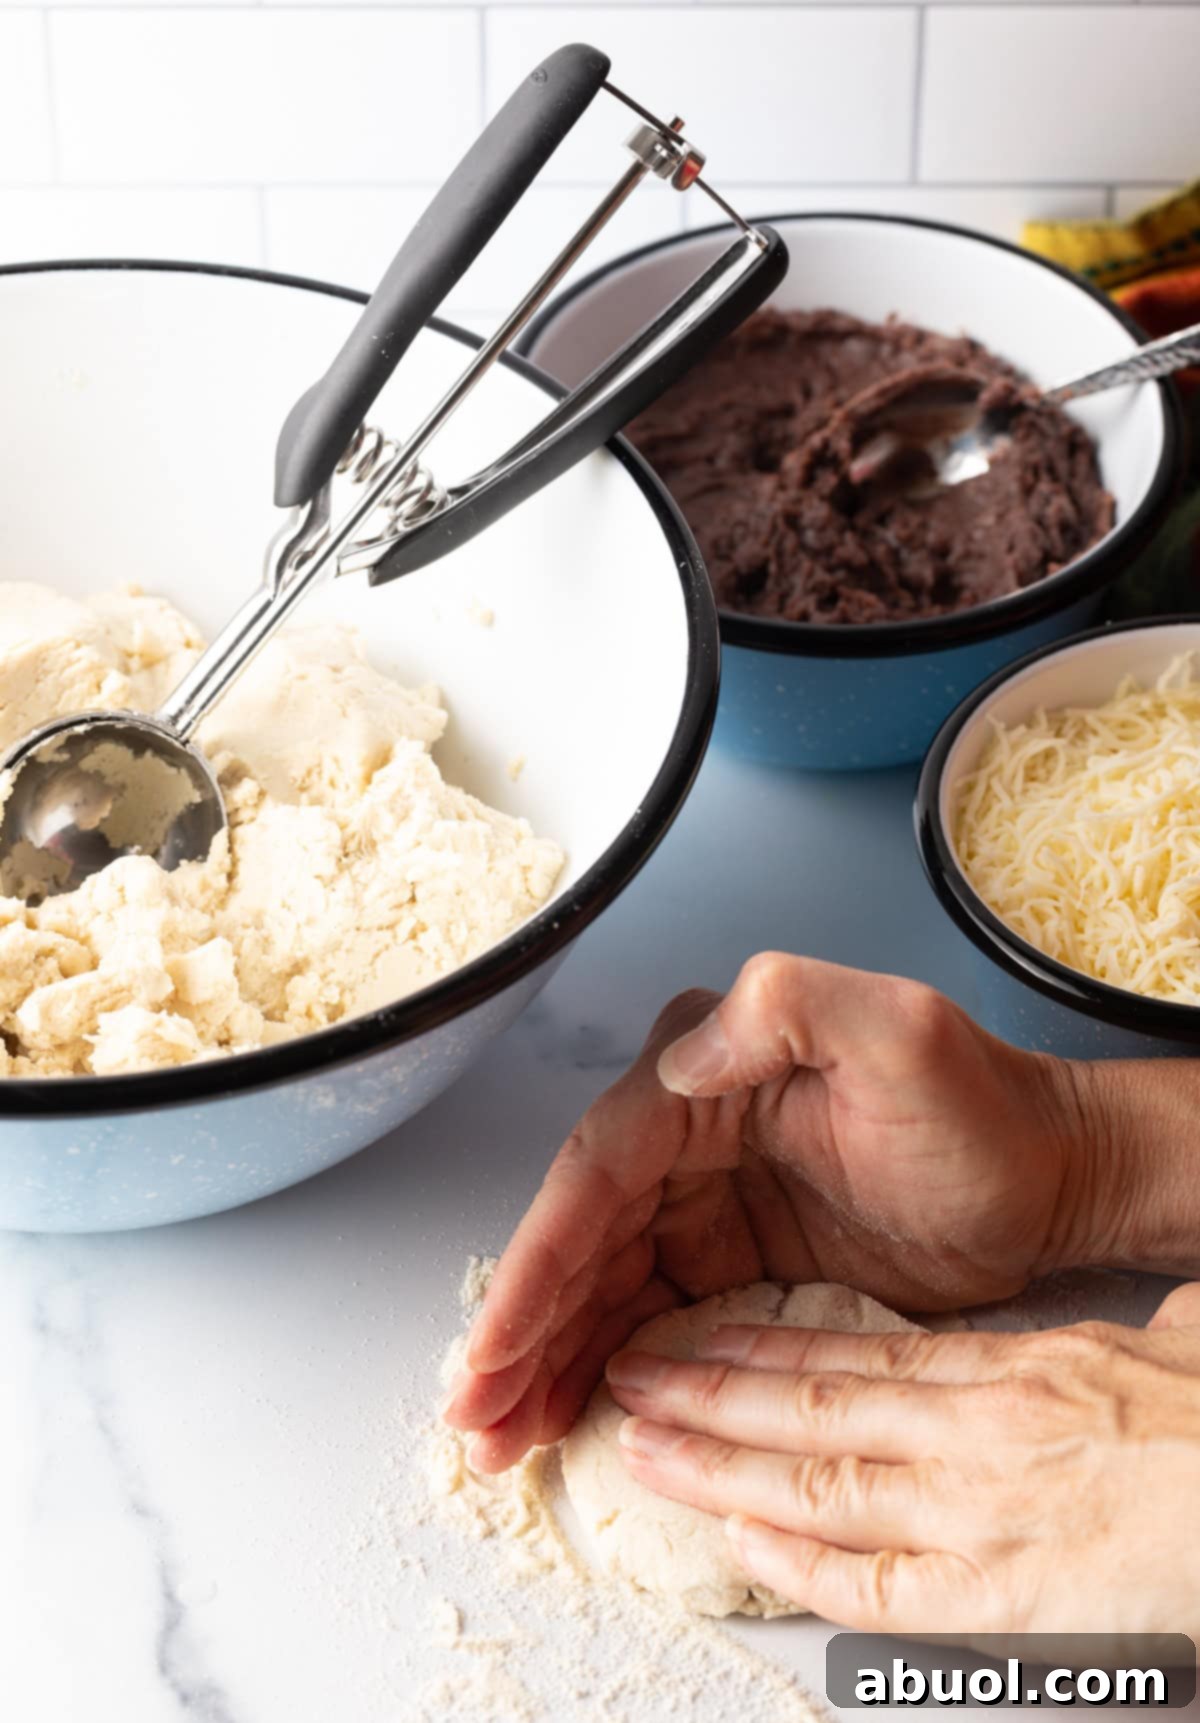
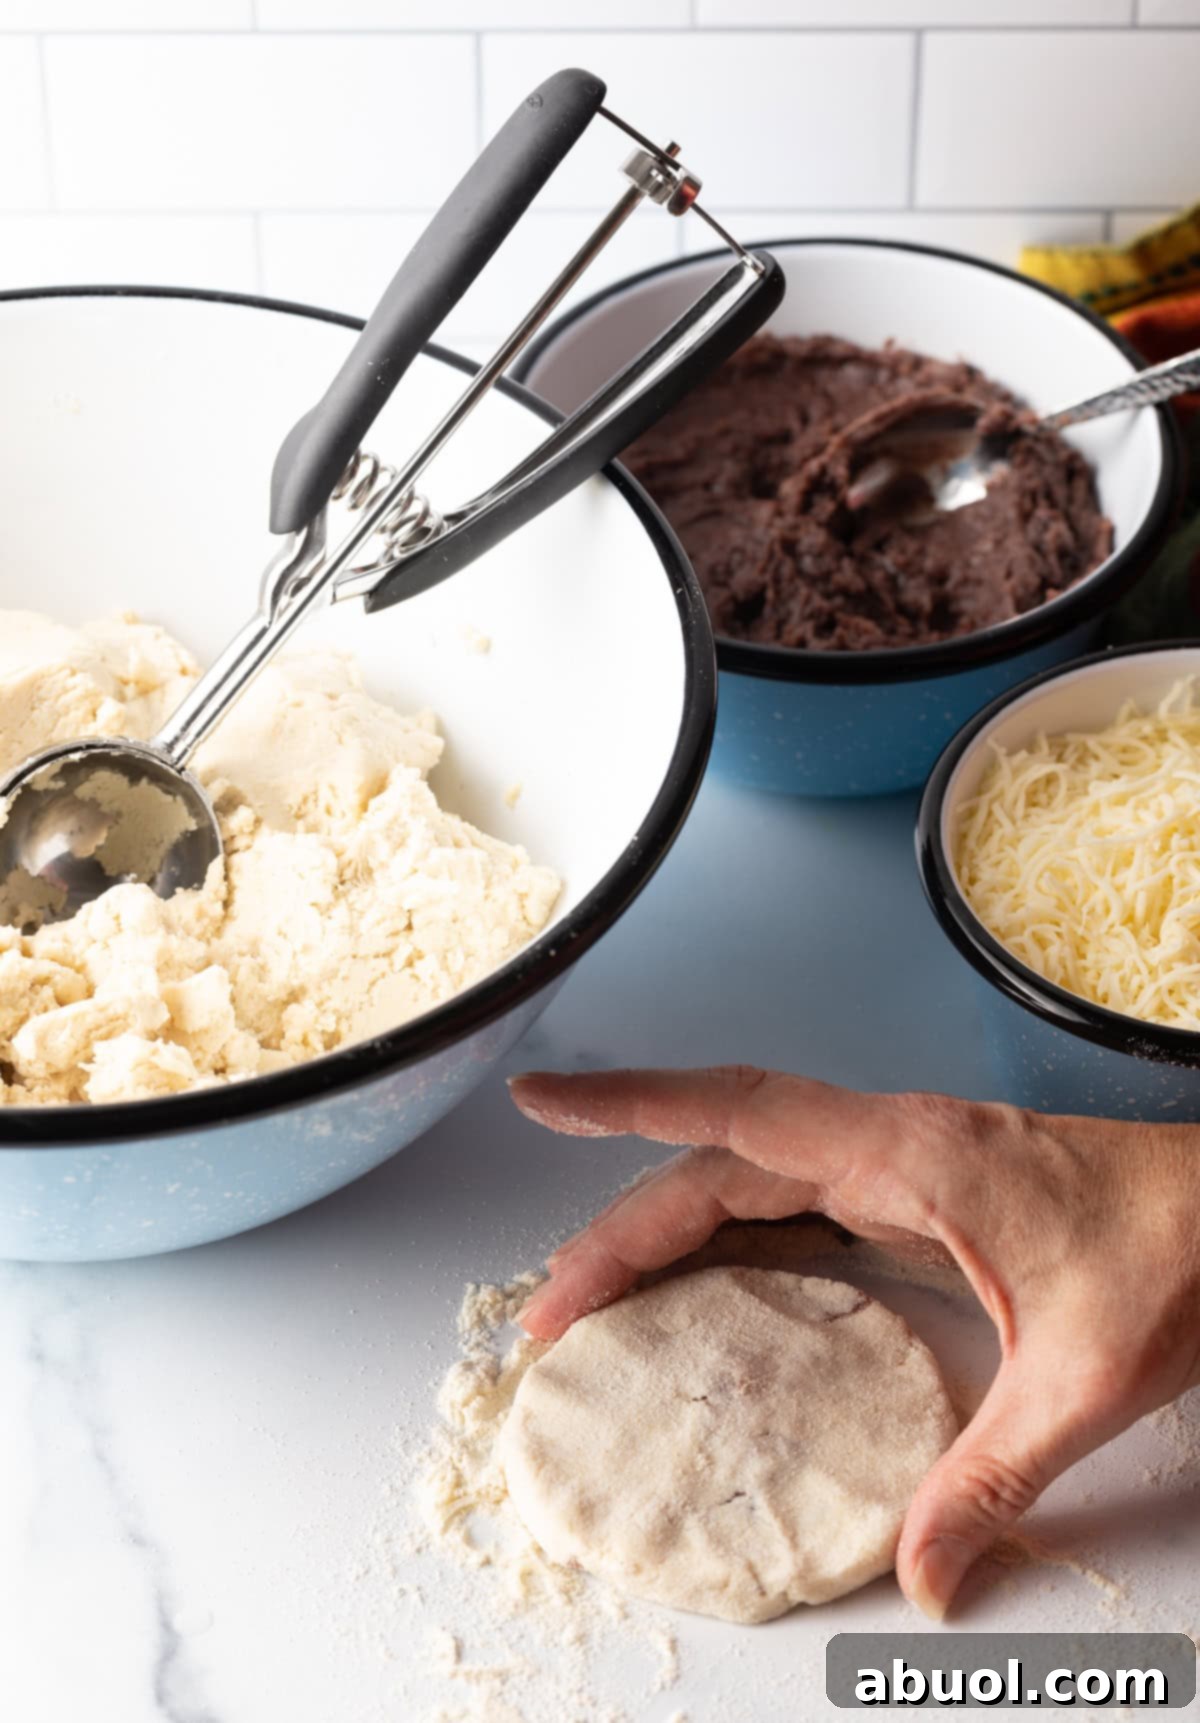
- Final Flattening: Now, gently but firmly flatten the dough ball into a thin, even disk, aiming for approximately 4 inches across and about ½ to ¾ inch thick. Be careful to apply even pressure to ensure the filling spreads uniformly within the dough without causing tears. If the dough starts to stick to your hands, lightly moisten them with a little water.
- Inspect and Seal Edges: As you flatten, carefully inspect the entire surface and edges of the pupusa. Pinch to securely seal any areas where the filling might be trying to escape or where the dough looks particularly thin. It’s absolutely okay if you see a tiny bit of black beans or cheese peeking through in a few small spots – this adds to the authentic, homemade charm. However, strive to avoid any large, fully open areas that could lead to significant leakage during frying.
Part 4: Pan-Frying to Golden Perfection
The final step brings your pupusas to life, transforming them into golden, crispy, and irresistible delights.
- Heat Skillet and Oil: Place your cast-iron skillet (or heavy-bottomed pan) over medium heat. Add approximately 1 tablespoon of your chosen cooking oil (avocado, olive, or canola). Allow the oil to heat thoroughly. It should shimmer slightly and gently ripple, indicating it’s hot enough, but it should not be smoking.
- Fry the Pupusas: Carefully place 4 to 6 pupusas into the hot skillet at a time, ensuring you do not overcrowd the pan. Overcrowding can lower the pan’s temperature and result in steamed rather than crispy pupusas. Fry each side for 3 to 4 minutes, or until they achieve a beautiful golden-brown color and a slightly crispy texture. The cheese inside should be wonderfully melted and gooey, and the masa dough cooked through to a tender finish.
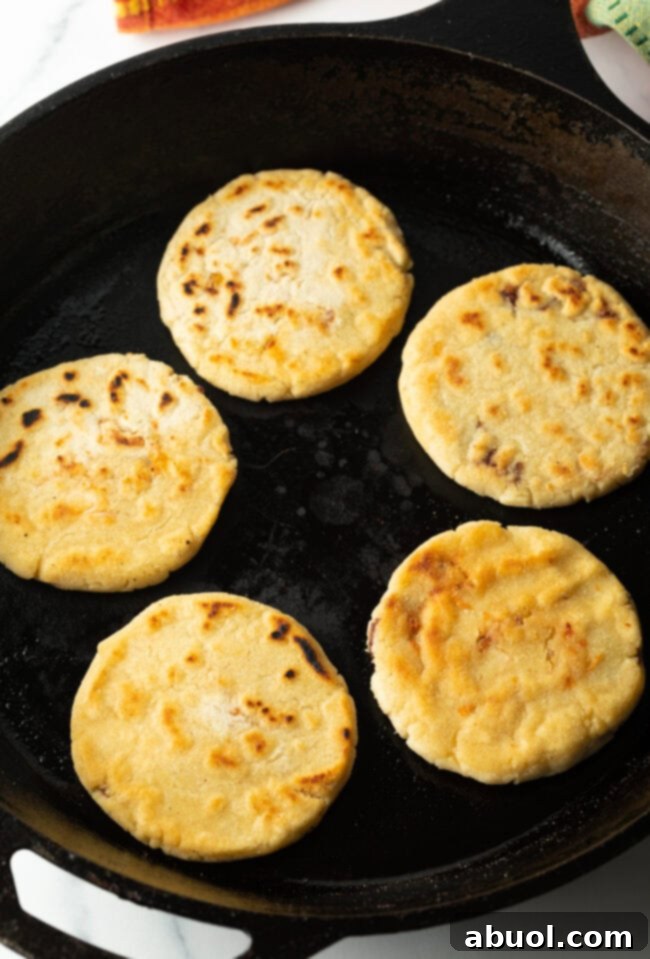
- Repeat and Replenish: Continue the entire process of filling, shaping, and frying until all your pupusa dough has been used. Remember to add an additional tablespoon of oil to the skillet as needed between batches to ensure consistent frying and prevent sticking.
- Serve or Keep Warm: For the freshest and most authentic experience, serve your pupusas immediately, right off the skillet. If you are preparing a large batch, you can keep the cooked pupusas warm in a low-heat oven (around 200°F or 95°C) on a baking sheet until all are ready to be served. This ensures everyone gets to enjoy warm, delicious pupusas together.
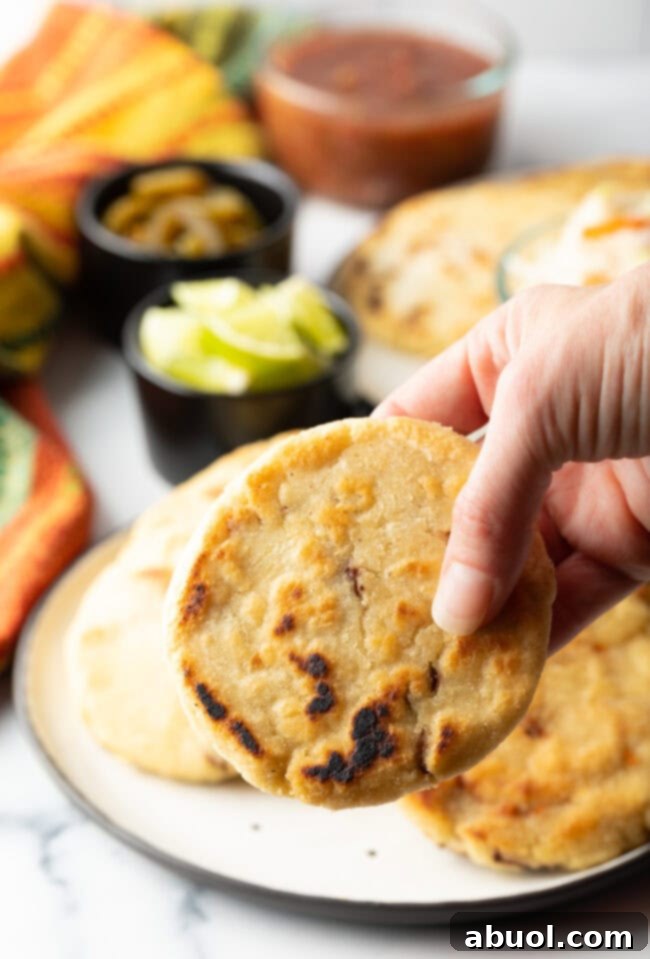
Serving Suggestions and Traditional Pairings for Pupusas
Pupusas are a wonderfully versatile and satisfying dish, equally perfect as a hearty snack, a fulfilling lunch, or a casual yet flavorful dinner centerpiece. They are at their absolute best when served warm, directly from the skillet, allowing the fillings to remain perfectly melted and the masa dough to be at its most tender and fresh.
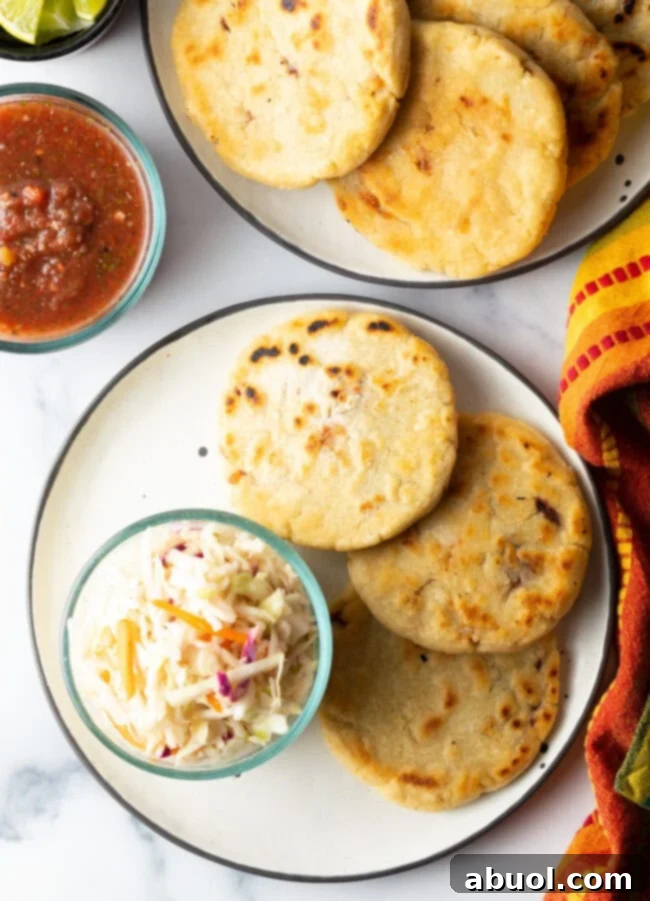
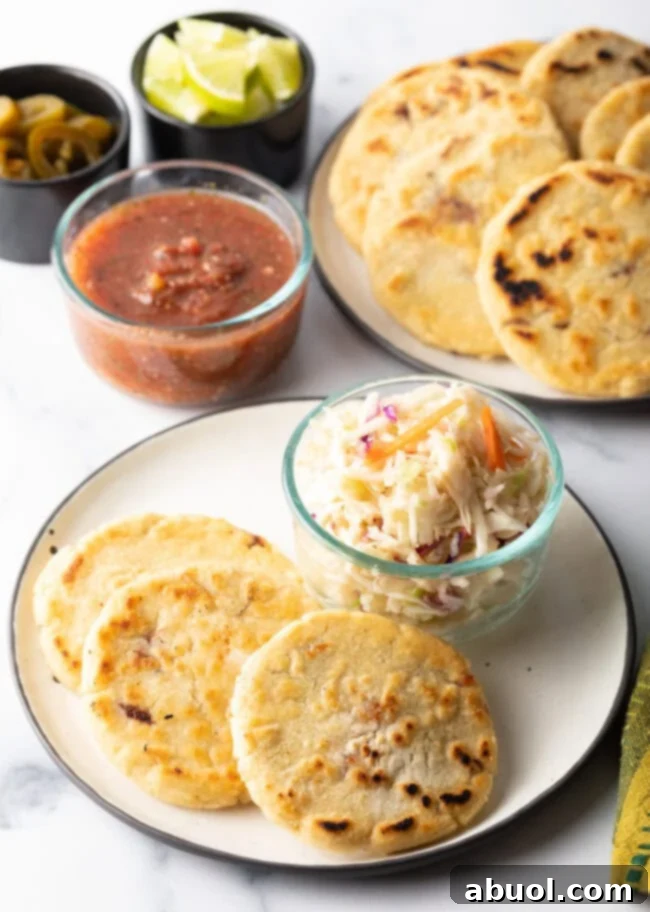
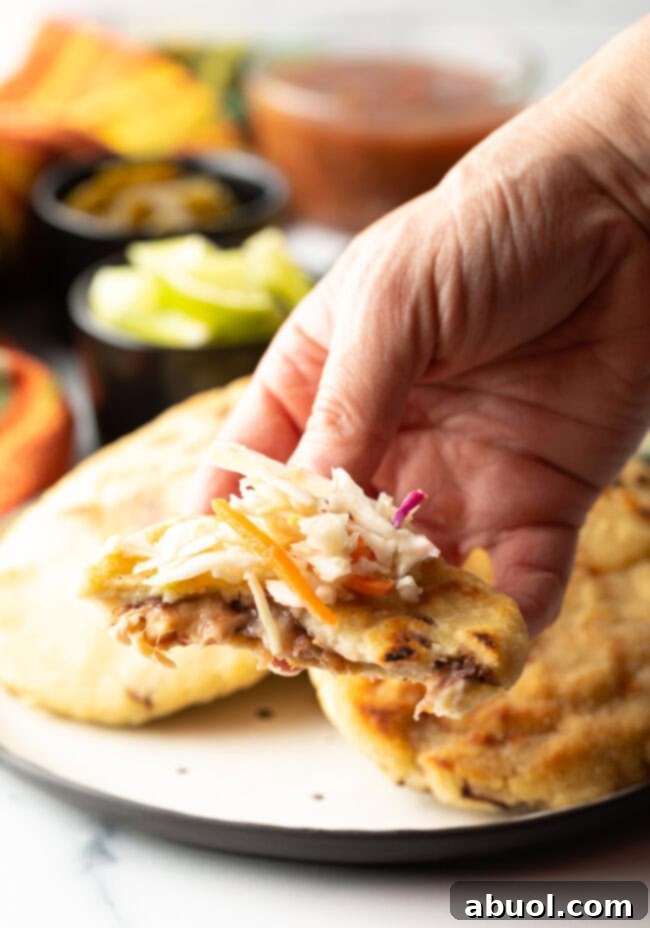
Traditionally, pupusas are enjoyed with two indispensable accompaniments: a generous side of homemade curtido (the tangy cabbage slaw you just prepared) and a mild salsa roja (a fresh, often slightly chunky, tomato sauce). The refreshing crunch and vibrant acidity of the curtido, alongside the subtle tang of the salsa roja, create a magnificent contrast to the rich, savory flavors of the pupusas. This balance is key to the authentic Salvadoran experience. Embrace the casual nature of pupusas – eating them with your hands is not just common, it’s encouraged! Don’t hesitate to tear them open, pile on your favorite toppings, and savor every bite.
To further enhance your pupusa feast, consider setting out an array of delicious toppings, allowing everyone to customize their meal. We highly recommend:
- Freshly Prepared Guacamole or simple, creamy slices of ripe avocado for a smooth, cool, and rich counterpoint.
- Silky Avocado Crema, offering a light, herby, and dairy-free creamy sauce option.
- Vibrant Homemade Fresh Salsa or Pico de Gallo for bursts of fresh, chopped vegetables and bright flavors.
- Cool and Creamy Sour Cream or traditional Mexican crema to add a rich, cooling element that beautifully balances the savory fillings.
- For those who enjoy a bit of heat, a dash of your favorite hot sauce can add an extra layer of excitement.
Whether you adhere strictly to tradition or explore new flavor combinations, pupusas are guaranteed to become a beloved and frequently requested dish in your home, bringing joy and a taste of authentic Central American comfort to your table.
Recipe Variations and Dietary Adjustments for Everyone
The inherent adaptability of pupusas makes them a fantastic dish for customization, allowing you to easily adjust the recipe to fit various dietary preferences or to simply explore new and exciting flavor profiles. Don’t shy away from experimenting with these delicious variations:
- Enhanced Meat Options: For meat lovers, pupusas are a blank canvas. Incorporate additional cooked meats like savory stewed chicken, tender, slow-cooked carnitas, well-seasoned ground beef, or crumbled, spicy chorizo. Always ensure any meat added is fully cooked, cooled, and finely shredded or crumbled to seamlessly integrate into the dough without causing tears.
- Hearty Vegetarian and Plant-Forward Options: To keep this recipe vegetarian-friendly or to boost its vegetable content, consider incorporating robust veggies. Delicious choices include tender roasted squash, caramelized sweet potatoes, sautéed mushrooms, or a vibrant mix of finely diced bell peppers and corn. These additions contribute wonderful textures, flavors, and nutritional value.
- Alternative Bean Choices: While classic black beans are superb, feel free to swap them with creamy refried pinto beans if that’s your preference. You can also experiment with other types of cooked and well-mashed beans, seasoned to your liking, for a unique twist.
- Explore Different Cheeses: Monterey Jack is praised for its mild flavor and excellent melting properties. However, a wide array of other melty shredded cheeses will perform beautifully. Consider sharp or medium cheddar for more robust flavor, Colby Jack for a smooth blend, Oaxaca cheese for authentic stretch, or even crumbly, salty cotija cheese for a tangier bite. Combining two or more types of cheese can also create a more complex and satisfying filling.
- Completely Dairy-Free and Vegan Pupusas: It’s wonderfully simple to transform this into an entirely dairy-free and vegan pupusa recipe. Just omit the cheese or substitute it with your favorite plant-based shredded cheese alternative. For a creamy, rich topping, serve them with our Magical All-Purpose Cashew Cream or a dollop of vegan sour cream.
- Spice It Up: For those who enjoy a bit of heat, finely dice fresh or pickled jalapeños and mix them directly into your filling. A dash of your favorite hot sauce in the refried beans can also add a fiery kick that complements the other flavors beautifully.
Frequently Asked Questions About Pupusas: Your Top Queries Answered
What is the difference between Pupusas, Gorditas, and Arepas?
While pupusas, gorditas, and arepas are all beloved corn-based dough creations popular across Latin America, their defining difference lies in their preparation and filling method. Pupusas are uniquely characterized by being stuffed with their delicious fillings *before* being cooked on a hot griddle. In contrast, Gorditas and Arepas typically involve cooking a thick corn tortilla first, then slicing it open (much like a pita pocket) to add the fillings afterward. Furthermore, while gorditas are often made with a similar masa harina to pupusas, resulting in a comparable texture, arepas are usually prepared with a different type of pre-cooked corn flour (like Harina P.A.N.), which yields a distinct texture that is often crispier on the outside and softer, more bread-like on the inside.
Are pupusas gluten-free?
Yes, absolutely! Traditional pupusas are made from masa harina, which is a type of corn flour. Corn is naturally gluten-free, making authentic pupusas an excellent and flavorful option for individuals with celiac disease, gluten sensitivities, or those following a gluten-free diet. Always double-check ingredient labels if you have severe allergies, but masa harina itself is gluten-free.
Can I prep pupusas ahead of time?
You can certainly prepare pupusas in advance and freeze them for future enjoyment, which is a fantastic time-saver! The best method is to make the dough, stuff, and meticulously shape the pupusas, but do not cook them. Instead, arrange the uncooked, shaped pupusas in a single layer on a baking sheet and flash freeze them for approximately one hour until they are completely solid. Once frozen, transfer them to a freezer-safe zipper bag or an airtight container. They can be stored in the freezer for up to 3 months. When you’re ready to cook, simply fry them directly from frozen in a hot skillet, adding a few extra minutes to the cooking time to ensure they are heated through and perfectly golden. However, it’s generally not recommended to keep uncooked pupusas in the refrigerator for extended periods (more than a few hours), as the masa dough tends to dry out and become crumbly very quickly.
How long can I keep cooked pupusas in the fridge?
Cooked pupusas are best enjoyed fresh, but leftovers can be stored in the refrigerator for approximately 1 to 2 days. To maintain their freshness and prevent them from drying out, ensure they are placed in a tightly sealed airtight container. For optimal quality, allow them to cool completely to room temperature before refrigerating to prevent condensation buildup.
Can I freeze cooked pupusas?
While it is technically possible to freeze pupusas after they have been cooked, I generally do not recommend this method. The process of freezing, thawing, and then reheating cooked pupusas often compromises the texture of the masa dough, causing it to become dry, tough, or crumbly. For the best possible results and texture retention, always opt to freeze pupusas uncooked, as described in the “Can I prep pupusas ahead of time?” section above.
What’s the best way to reheat pupusas?
For the most delicious and satisfying results, the best way to reheat cooked pupusas is to lightly pan-fry them on the stovetop. Place them in a hot skillet over medium heat for a few minutes per side until they are warmed through and have regained some of their original crispness. This method helps to revive their texture. Alternatively, if you’re in a hurry, you can reheat them in a microwave. To prevent them from drying out, wrap each pupusa individually in a slightly damp paper towel and microwave in short 20-second intervals at 50% power until heated thoroughly. A toaster oven or conventional oven can also be used, offering a good balance of internal heating and external crisping.
Looking for More Easy and Delicious Snack and Appetizer Recipes?
If you thoroughly enjoyed the process of making and savoring these authentic pupusas, you’ll be thrilled to explore other flavorful and easy-to-prepare snack and appetizer recipes. Expand your culinary repertoire and discover new favorites that are perfect for entertaining, family meals, or simply satisfying a craving. Here are some fantastic options to try next:
- Easiest Brazilian Cheese Bread (Pao de Queijo)
- Golden Pan-Fried Potato Cakes
- Old Fashioned Corn Pone
- Belizean Garnachas (Salbutes)
- How to Make Mexican Sopes

Authentic Salvadoran Pupusas with Tangy Curtido Slaw
These wonderfully thick and chewy corn tortillas, lovingly filled with savory beans and rich, melted cheese, are pan-fried to a beautiful golden perfection. Crowned with a vibrant and tangy fresh cabbage slaw (curtido), this easy pupusa recipe is your gateway to an authentic Salvadoran culinary delight, perfect for any snack or a delightful casual dinner.
Prep Time: 30 minutes
Cook Time: 30 minutes
Total Time: 1 hour
Yields: Approximately 21 pupusas
Ingredients
For the Curtido Slaw –
- 2 cups cabbage slaw mix (finely shredded green cabbage and carrots)
- 1 large lime, freshly juiced
- ½ teaspoon salt
- Optional additions: 2 tablespoons finely sliced white onion, ½ teaspoon dried Mexican oregano, a pinch of red chili flakes for a subtle heat, or 1 tablespoon white vinegar.
For the Pupusa Dough –
- 4 cups masa harina (such as Maseca)
- 2 teaspoons fine sea salt
- 3 cups warm water (plus 1-3 tablespoons more if needed)
For the Classic Fillings –
- ½ cup refried black beans (low sodium, thick consistency preferred)
- 1 cup shredded Monterey Jack cheese (freshly shredded melts best)
- 4 tablespoons cooking oil (avocado, olive, or canola oil)
- Optional fillings for variety: finely shredded stewed chicken, cooked carnitas, seasoned ground beef, crumbled chorizo, chopped pickled jalapeño, roasted squash, or fresh pico de gallo.
Instructions
- Prepare the Curtido Slaw: In a medium mixing bowl, combine the cabbage slaw mix with the freshly squeezed lime juice and ½ teaspoon of salt. Mix thoroughly, using your hands to gently massage the cabbage, ensuring the liquids and salt are evenly distributed. Cover the bowl and refrigerate for at least 30 minutes, or until ready to serve, allowing flavors to meld.
- Prepare the Pupusa Dough: In a large mixing bowl, combine the masa harina, 2 teaspoons of salt, and 2.5 cups of warm water. Begin mixing by hand. Gradually add the remaining ½ cup of water, and additional tablespoons if necessary, kneading for 5-7 minutes until the dough is very soft, smooth, and pliable, resembling play-doh but slightly sticky. Adjust water (if too dry) or masa harina (if too sticky) as needed. Cover with a damp cloth and let rest for 10-15 minutes to fully hydrate.
- Set Up Workstation: Place a large cast-iron skillet on the stovetop (do not heat yet). Arrange your refried beans, shredded Monterey Jack cheese, and any other chosen fillings on a clean work surface within easy reach. Have a small bowl of water or extra masa harina nearby to moisten/dry your hands during shaping.
- Form and Fill Pupusas: Scoop out 3-4 tablespoon-sized balls of pupusa dough. Lightly moisten your hands with water (or use a little masa harina) to prevent sticking. One at a time, press each dough ball into a flat disk about 5 inches wide. Place 1 teaspoon of refried beans in the center, then top with 1 tablespoon of shredded cheese, and a scant amount of any other optional fillings. Be careful not to overfill.
- Seal and Shape: Gently fold the edges of the dough up and over the fillings, pinching firmly at the top to seal. Continue pinching along the sides to create a clam-shell shape. Rotate the sealed pupusa in your hands to form a smooth ball. Then, gently flatten this ball into a thin disk, about 4 inches across and ½-¾ inch thick. Inspect and pinch to seal any exposed filling areas.
- Pan-Fry to Perfection: Heat the skillet over medium heat and add 1 tablespoon of cooking oil. Once the oil is hot and shimmering, carefully place 4-6 pupusas into the skillet, ensuring not to overcrowd the pan. Fry for 3-4 minutes per side, or until they are golden brown and cooked through. Repeat the filling, shaping, and frying process until all dough is used, adding more oil to the skillet as needed between batches.
- Serve Immediately: Serve the pupusas immediately while warm for the best taste. If preparing a large batch, you can keep them warm in a low-heat oven (200°F / 95°C) on a baking sheet until all are cooked.
Notes
Serve the warm pupusas generously topped with the tangy curtido slaw. For an even richer experience, include traditional salsa roja, creamy guacamole, fresh avocado slices, or a dollop of sour cream or Mexican crema. Embrace the hands-on eating experience for authentic enjoyment!
Nutrition Facts (per pupusa)
Serving: 1 pc, Calories: 108kcal, Carbohydrates: 18g, Protein: 4g, Fat: 3g, Saturated Fat: 1g, Polyunsaturated Fat: 0.5g, Monounsaturated Fat: 1g, Cholesterol: 5mg, Sodium: 353mg, Potassium: 89mg, Fiber: 2g, Sugar: 0.3g, Vitamin A: 102IU, Vitamin C: 3mg, Calcium: 77mg, Iron: 2mg
Course: Appetizer, Main Dish, Main Course, Snack, Lunch
Cuisine: Central American, Salvadoran, Mexican, South American, Tex-Mex
Author: Sommer Collier