
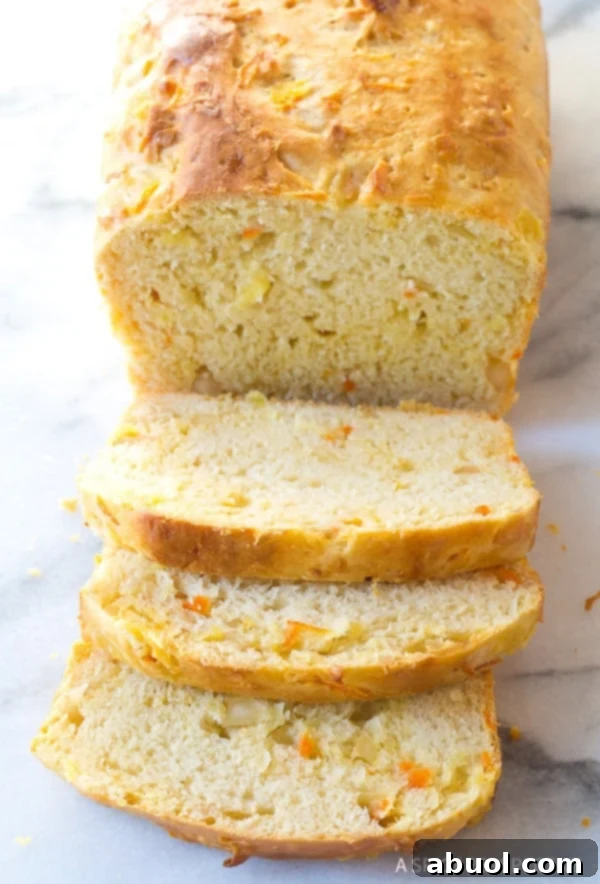
Welcome to a culinary journey that transports you straight to the sun-drenched beaches and lush landscapes of the Hawaiian Islands. This delightful, incredibly tender, and wonderfully fluffy Hawaiian Bread Recipe isn’t just a loaf; it’s an experience. Infused with the iconic flavors of pineapple, coconut, and macadamia nuts, each bite promises a genuine taste of paradise, bringing a tropical escape right into your kitchen.
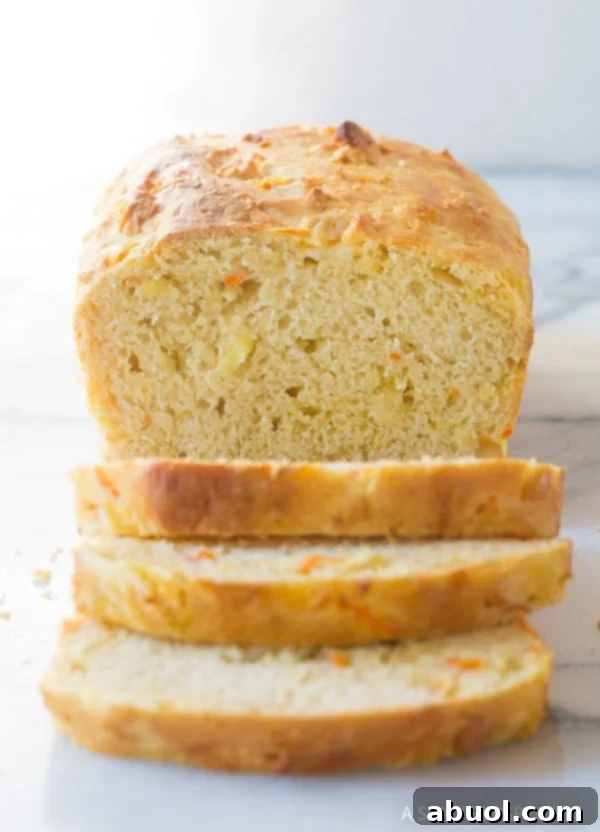
Why You’ll Love This Authentic Hawaiian Bread Recipe
My love affair with Luau Bread began on a memorable family trip to Hawaii. Amidst the stunning scenery and warm hospitality, I discovered this incredible bread at one of our cherished local spots, The Coffee Shack. Perched precariously on the side of a mountain, overlooking the vast, sparkling ocean, The Coffee Shack offers more than just breathtaking views and exceptional Kona coffee; it’s home to a unique take on comfort food with an unmistakable tropical twist, and most notably, the bread!
The Coffee Shack’s Luau Bread truly captivated me. It was an otherworldly delight – a soft, moist, and subtly sweet yeast bread generously studded with delicate chunks of coconut, tangy pineapple, finely shredded carrots, and crunchy macadamia nuts. This combination creates an irresistible texture and a symphony of flavors that evoke the very essence of the islands.
It’s the kind of bread that dreams are made of: versatile enough to elevate a simple French toast or make an extraordinary sandwich, yet so perfect it requires no accompaniment to shine. Its inherent flavor and rich texture stand gloriously on their own. Upon returning home, I knew recreating that magical Luau Bread was a top priority on my recipe development list. And now, I am thrilled to share my very own version of this magnificent Homemade Hawaiian Bread, perfected for your enjoyment.
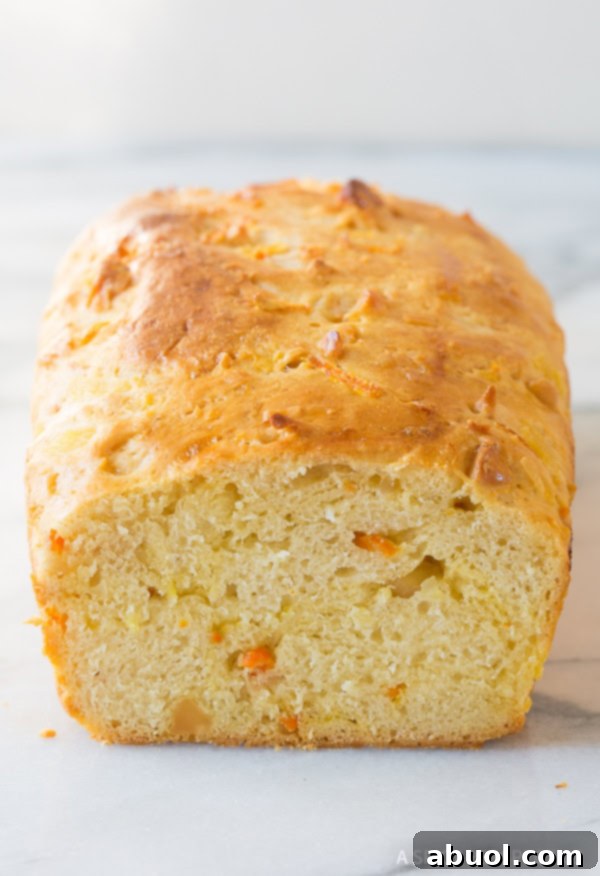
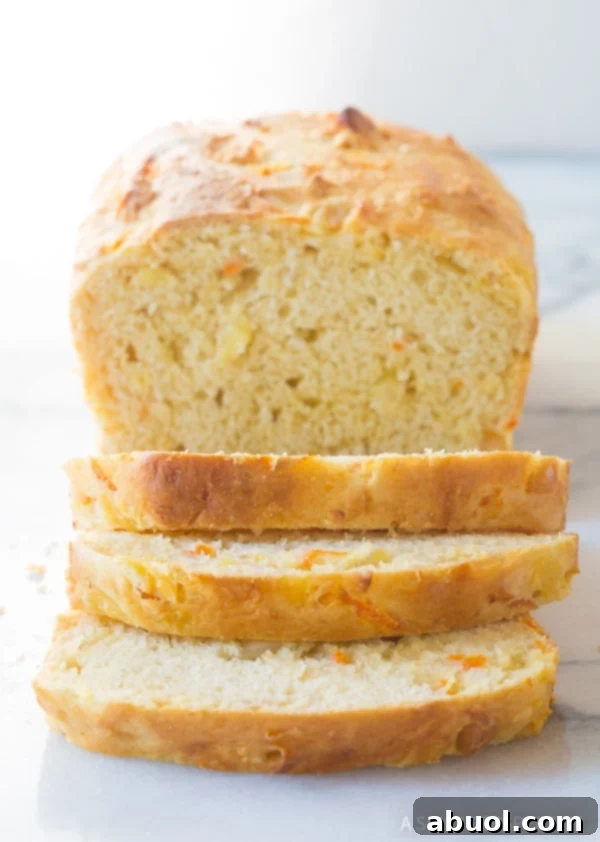
My recipe yields a bread that is luxuriously soft and rich, boasting just the right hint of sweetness. Much like a classic brioche, it offers a decadent buttery flavor and a wonderfully pliable texture. Each slice is a treasure trove of tropical goodness, featuring moist carrot, sweet coconut, juicy pineapple, and crunchy macadamia nuts, all harmoniously blended to deliver an authentic Hawaiian experience.

Essential Ingredients for Tropical Hawaiian Bread
Crafting this exquisite Hawaiian bread requires a thoughtful selection of ingredients, each playing a vital role in achieving its signature flavor and texture. Here’s what you’ll need:
- Bread Flour: This is crucial for developing a strong gluten structure, resulting in a wonderfully chewy and airy crumb, characteristic of the best yeast breads.
- Unsalted Butter: Melted butter is incorporated directly into the dough, providing richness, moisture, and that signature tender, almost brioche-like quality. Using unsalted butter allows you to control the overall salt content in the recipe.
- Granulated Sugar: Essential for activating the yeast, providing a delicate sweetness, and contributing to the beautiful golden-brown crust.
- Pineapple Tidbits (in syrup): Not only do the finely diced tidbits add bursts of juicy, tropical flavor and moisture, but reserving ½ cup of the pineapple syrup for the dough also infuses the bread with an extra layer of fruity essence.
- Dry Active Yeast: The leavening agent that gives this bread its incredible lift and soft, airy texture. Proper activation is key to a successful rise.
- Large Eggs: Two eggs are mixed into the dough to add richness, color, and structure. An additional egg white is reserved for an egg wash, which creates a glossy, golden finish on the crust.
- Salt: A fundamental ingredient that balances the sweetness, enhances all the other flavors, and helps regulate gluten development, ensuring the dough isn’t too tough or too slack.
- Vanilla Extract: A touch of pure vanilla extract complements the tropical flavors, adding warmth and depth to the bread’s aroma and taste profile.
- Shredded Carrots: Finely shredded carrots contribute natural sweetness, moisture, and a beautiful subtle color, echoing the traditional Luau Bread.
- Sweetened Shredded Coconut: These flaky pieces provide a distinct tropical flavor and delightful chewiness, making each bite feel like a mini-vacation.
- Macadamia Nuts: Finely chopped macadamia nuts are the crown jewels of this Hawaiian bread, offering a buttery crunch and an irresistible nutty flavor that truly defines its paradise-inspired character.
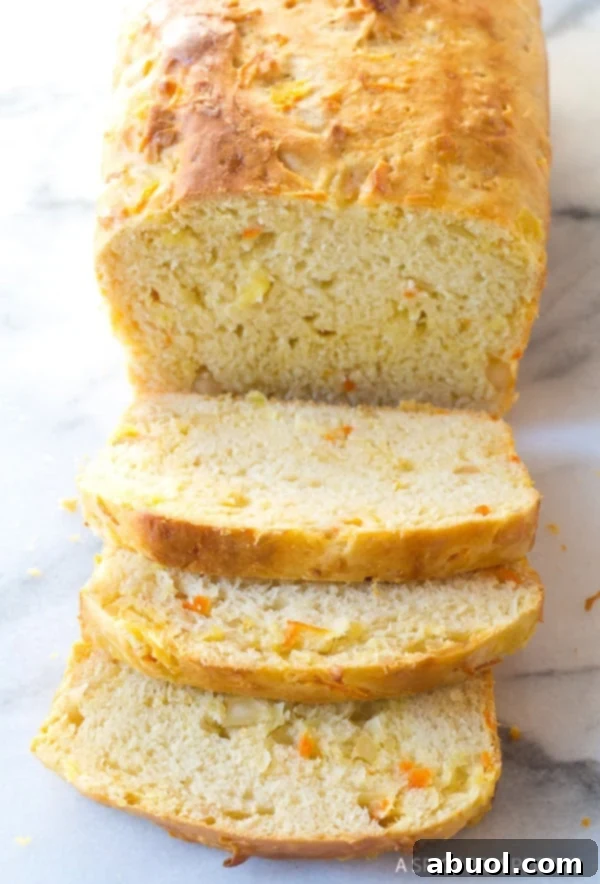
Step-by-Step Guide to Making Fluffy Hawaiian Bread
Creating this delightful Hawaiian bread is a rewarding process. Follow these detailed instructions to achieve perfect, fluffy loaves every time:
- Prepare the Yeast Mixture: Begin by carefully draining ½ cup of pineapple juice from your can of pineapple tidbits; set the tidbits aside for later. In the bowl of an electric stand mixer fitted with the bread hook, combine ¼ cup of bread flour, 8 tablespoons of melted unsalted butter, the reserved pineapple syrup, and the granulated sugar. Mix these ingredients on low speed for about 10 seconds until just combined.
- Activate the Yeast: Sprinkle the dry active yeast evenly over the surface of the mixture in the mixer bowl. Allow this mixture to rest undisturbed for 10-15 minutes. During this time, the yeast will absorb the liquid and activate, forming a visible foamy layer on top. This foam indicates your yeast is alive and ready to work its magic!
- Build the Dough: After the yeast has bloomed, add the two large eggs, salt, and vanilla extract to the bowl. With the mixer running on low speed, gradually incorporate the remaining bread flour, adding it slowly until a shaggy dough forms. Once all the flour is added, increase the mixer speed to medium-low and continue kneading the dough for 6-8 minutes. This thorough kneading develops the gluten, which is essential for the bread’s soft and airy texture.
- First Rise (Proofing): Once kneaded, drizzle 1 tablespoon of melted butter around the inner edges of the mixer bowl. This prevents the dough from sticking during its rise. Cover the bowl tightly with plastic wrap or a clean kitchen towel. Place the covered bowl in a warm, draft-free spot. Allow the dough to rise until it has visibly doubled in size, which typically takes between 90 to 120 minutes. Patience is key here; a good first rise sets the foundation for a fluffy final product.
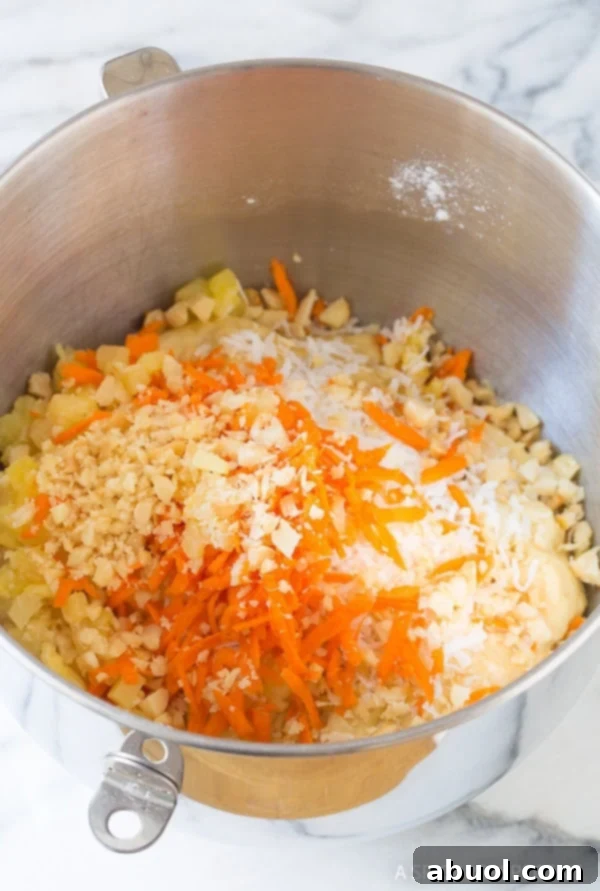
- Prepare the Tropical Fillings: While your dough is undergoing its first rise, prepare the flavorful additions. Finely chop the reserved pineapple tidbits into even smaller pieces; you’ll need ½ cup of these. Also, measure out ½ cup each of shredded carrots, sweetened shredded coconut, and finely chopped macadamia nuts. Set these aside.
- Incorporate the Fillings: Once your dough has successfully doubled in size, return the mixer bowl to the stand. With the mixer running on low, gradually add the prepared pineapple, shredded carrot, shredded coconut, and macadamia nuts. Mix just until these tropical ingredients are evenly distributed throughout the dough, being careful not to overmix.
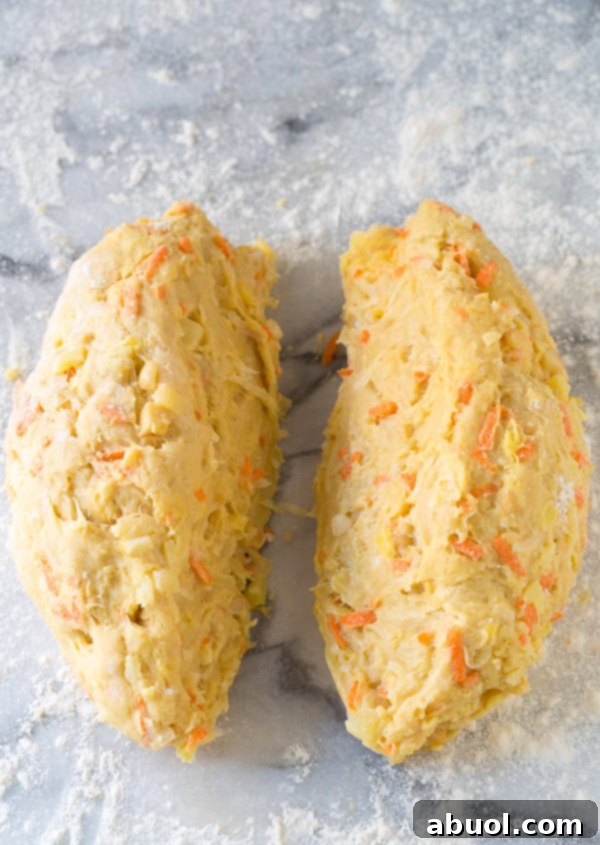
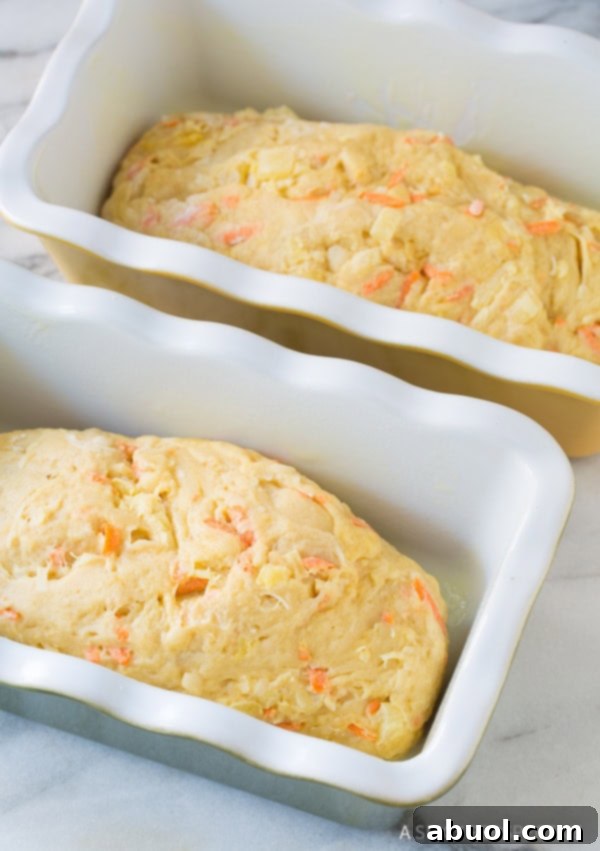
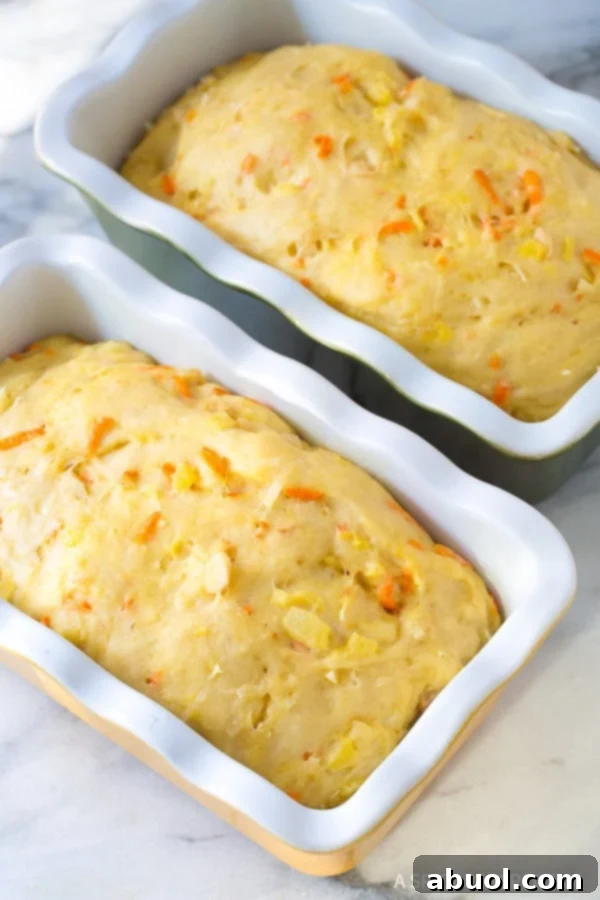
- Shape the Loaves and Second Rise: Lightly grease and flour two standard 9×5-inch bread loaf pans. Divide the enriched dough into two equal portions. Gently shape each portion into a smooth log and place it into a prepared bread pan. To prevent the tops from drying out during the second rise, brush each loaf with the final tablespoon of melted butter. Cover the loaf pans loosely with plastic wrap and place them back in a warm spot for their second rise. The loaves need to double in size again, expanding to fill the pans and rise just above the rim. This usually takes approximately 40-60 minutes.
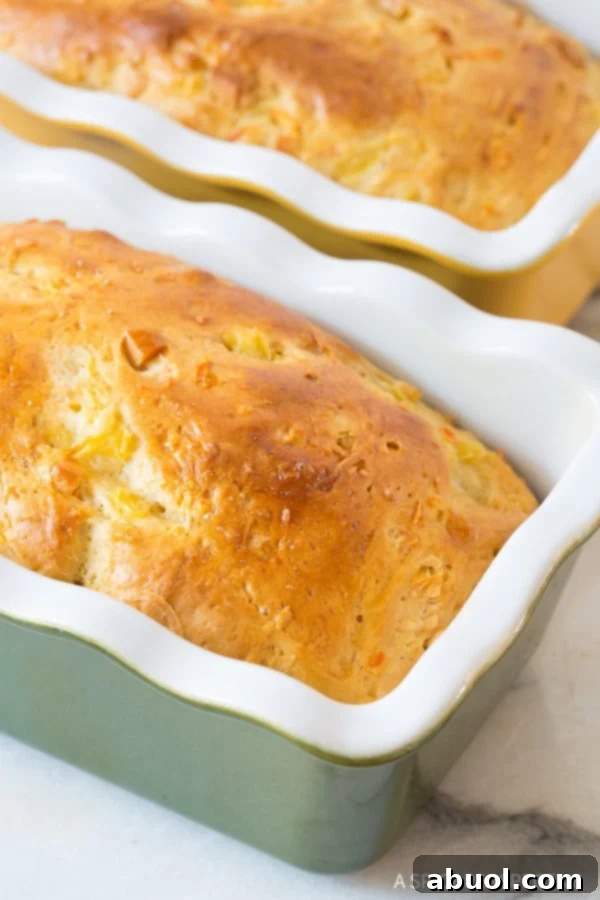
- Bake to Golden Perfection: While the loaves are rising for the second time, preheat your oven to 350 degrees F (175 degrees C). Once the loaves have completed their second rise, whisk the reserved egg white with 1 tablespoon of water to create an egg wash. Carefully remove the plastic wrap from the loaves and gently brush the egg wash over the tops of each. This will give them a beautiful golden sheen and a slightly crispy crust.
- Baking and Cooling: Place the pans in the preheated oven and bake for 35-45 minutes, or until the tops are a rich golden brown and the internal temperature reaches 200-205 degrees F (93-96 degrees C) with an instant-read thermometer. Remove the loaves from the oven and let them cool in their pans for 10 minutes. This allows them to set before removal. After 10 minutes, gently invert the loaves onto a cooling rack to cool completely to room temperature. Once cooled, wrap the loaves tightly in plastic wrap until you are ready to serve them.
Pro Tips for Perfect Hawaiian Bread
Achieving that perfect soft and airy texture for your Hawaiian bread is all about proper dough management. This is a rich, buttery dough, and the added chunks of fruit and nuts make it heavier than a standard yeast dough. Here are some key tips to ensure success:
- Embrace the Double Rise: The most crucial aspect of this recipe is allowing the dough to rise until it doubles in size, *twice*. Do not rush this process. Even if it takes longer than the suggested times, let it complete its full rise. A full second rise, where the dough truly fills the pans and slightly crests the rim, is vital for a light and fluffy crumb.
- Ensure a Warm Environment: Yeast loves warmth. If your kitchen is cool or prone to drafts, finding a warm spot for your dough to rise is essential. Consider using a warming drawer if you have one, or utilize your oven’s “proofing” function, which typically maintains a temperature of around 100°F (38°C).
- Oven Proofing Trick: No warming drawer or proofing setting? No problem! You can create a makeshift warm environment by preheating your oven to its lowest setting (usually around 180°F/80°C) for just 5-10 minutes, then turning it OFF. Place your covered dough in the slightly warm oven to rise. Be cautious not to leave it in a hot oven for too long, as this can dry out the dough or even kill the yeast. Check frequently.
- Don’t Overbake: Keep a close eye on your loaves as they bake. Overbaking can lead to dry bread. The beautiful golden-brown color and an internal temperature of 200-205°F (93-96°C) are your best indicators of doneness.
- Cool Completely: Resist the urge to slice into the warm bread too soon. Cooling completely on a rack allows the internal structure to set and prevents a gummy texture.
Serving Suggestions for Your Tropical Delight
Our Hawaiian Luau Bread recipe is so inherently flavorful and tantalizing that it genuinely needs no embellishments. Its soft texture and tropical notes make it a complete delight on its own. However, if you’re inclined to add another layer of paradise, we certainly won’t judge if you decide to spread a vibrant passion fruit preserve or a creamy coconut butter over a warm slice!
This exquisite bread is the ultimate comfort food, perfect for brightening spirits during colder months or for adding a touch of sunshine to any day. We highly recommend serving it for a leisurely breakfast alongside a freshly brewed cup of tea or rich coffee. It also makes for an incredibly satisfying and exotic afternoon snack, or even as a unique base for savory ham and cheese sliders with a tropical twist for dinner. The possibilities are endless when you have such a versatile and delicious loaf!
Frequently Asked Questions About Hawaiian Bread
Hawaiian bread is traditionally a sweet, enriched yeast bread, often characterized by its soft, fluffy texture and subtle sweetness. My unique version elevates this classic by incorporating vibrant tropical ingredients like juicy pineapple, fragrant coconut, finely shredded carrots, and crunchy macadamia nuts, adding incredible flavor and a delightful textural complexity.
To maintain its freshness and soft texture, store any leftover Hawaiian bread in an airtight container or tightly wrapped in plastic at room temperature for up to 3-4 days. For longer storage, you can also keep it in the refrigerator. Before serving, if you prefer it warm, a quick toast or a few seconds in the microwave will bring it back to its delectable best.
Absolutely! This bread freezes beautifully. Once the loaves have cooled completely, wrap them tightly in several layers of plastic wrap, then an additional layer of aluminum foil. You can store them in the freezer for up to 2-3 months. Thaw frozen bread at room temperature, then warm slightly before serving for optimal enjoyment.
While many Hawaiian bread recipes focus solely on the sweet, enriched dough, my recipe stands out by including the authentic “Luau Bread” elements of fresh pineapple, shredded coconut, carrots, and macadamia nuts. These additions aren’t just for flavor; they contribute to the bread’s unique moistness and delightful texture, making it a truly immersive tropical experience.
Yes, this Hawaiian bread is an excellent make-ahead option. You can bake the loaves a day or two in advance and store them properly. Alternatively, you can prepare the dough through its first rise, then punch it down, shape it into loaves, and place it in the pans. Cover tightly and refrigerate overnight. On the day of baking, let it come to room temperature and complete its second rise before baking as directed.
Discover More Irresistible Bread Recipes
If you’ve fallen in love with the comforting warmth of homemade bread, explore our other fantastic bread creations:
- Kahlua Banana Bread
- Best Yeast Rolls
- Quick Garlic Knots
- Ice Cream Bread Recipe
- Crazy Bread Recipe (Homemade Breadsticks)
- Lemon Poppy Seed Bread
- Challah Bread with Apples
- Sweet Irish Soda Bread
- Croatian Lepinja Bread
- Focaccia Bread
Print Recipe
Hawaiian Bread Recipe
Cook Time: 35 minutes
Total Time: 55 minutes
Hawaiian Luau Bread Recipe – Straight from the shores of the Hawaiian Islands, this soft, tender yeast bread is speckled with macadamia nuts, carrots, pineapple, and coconut!
Servings: 30 slices (2 loaves)
Ingredients
(US Customary units)
- 3 cups sifted bread flour, divided
- 10 tablespoons unsalted butter, melted and divided
- 1/4 cup granulated sugar
- 10 ounces pineapple tidbits (in syrup)
- 1 tablespoon dry active yeast
- 2 large eggs + 1 egg white
- 1 1/2 teaspoon salt
- 1 teaspoon vanilla extract
- 1/2 cup shredded carrots
- 1/2 cup sweetened shredded coconut
- 1/2 cup macadamia nuts, finely chopped
Instructions
- Drain 1/2 cup pineapple juice from the can of pineapple tidbits. Place 1/4 cup flour, 8 tablespoon melted butter, pineapple syrup, and sugar in the bowl of an electric stand mixer.
- Place the bread hook on the mixer and mix the ingredients for 10 seconds. Then sprinkle the dry active yeast over the top. Allow the mixture to rest for 10-15 minutes. It should look very foamy. (The liquid will absorb the yeast on its own.)
- Mix in 2 eggs, salt, and vanilla. Then with the mixer running on low, slowly add in the remaining flour. Leave the mixer running for 6-8 minutes to knead the bread dough.
- Drizzle 1 tablespoon melted butter around the edges of the bowl so the dough doesn’t stick, and cover the bowl tightly with plastic wrap. Place in a warm spot and allow the dough to rise until it doubles in size. (Usually 90-120 minutes.)
- Meanwhile, chop the pineapple tidbits into fine pieces and measure out 1/2 cup. Prepare 1/2 cup each of shredded carrot, shredded coconut, and finely chopped macadamia nuts.
- Once the dough has doubled in size, turn the mixer on low and mix in the pineapple, shredded carrot, shredded coconut, and macadamia nuts.
- Grease and flour two standard 9×5 bread pans. Cut the dough into two equal pieces. Roll each piece into a log and place in the bread pans. Then use the last tablespoon of melted butter to brush the tops of the loaves, so they don’t dry out.
- Preheat the oven to 350 degrees F. Cover the loaves with plastic and place in a warm place to rise. They need to double in size again to fill the pans and rise above the edge of the rim. (About 45-60 minutes.)
- Whisk the egg white with 1 tablespoon of water. Remove the plastic and gently brush the egg wash over the tops of the loaves. Bake for 35-45 minutes, until the tops are golden brown.
- Cool in the pans for 10 minutes, then gently flip the loaves out onto a cooling rack to cool the rest of the way. Once the bread is room temperature, wrap well in plastic until ready to serve.
Notes
IMPORTANT: This is a rich, buttery dough, and the inclusion of fruit and nut chunks makes it heavier, meaning it will rise slower than regular yeast dough. However, it must at least double in size, twice, to achieve that wonderfully soft and airy texture.
If your kitchen is cool or drafty, place the dough in a warming drawer or use your oven’s “proofing” function (around 100°F/38°C) to aid the rise. If these aren’t available, you can preheat your oven to 180°F (80°C), turn it off, and then place the covered dough inside for 20-30 minutes. Be careful not to leave it in for too long at this temperature, as the dough may start to dry out.
Nutrition Information
Serving: 1 slice, Calories: 120kcal, Carbohydrates: 13g, Protein: 2g, Fat: 6g, Saturated Fat: 3g, Cholesterol: 20mg, Sodium: 126mg, Potassium: 49mg, Fiber: 0g, Sugar: 3g, Vitamin A: 495IU, Vitamin C: 1mg, Calcium: 9mg, Iron: 0.3mg
Course: Side Dish
Cuisine: Hawaiian
Author: Sommer Collier