
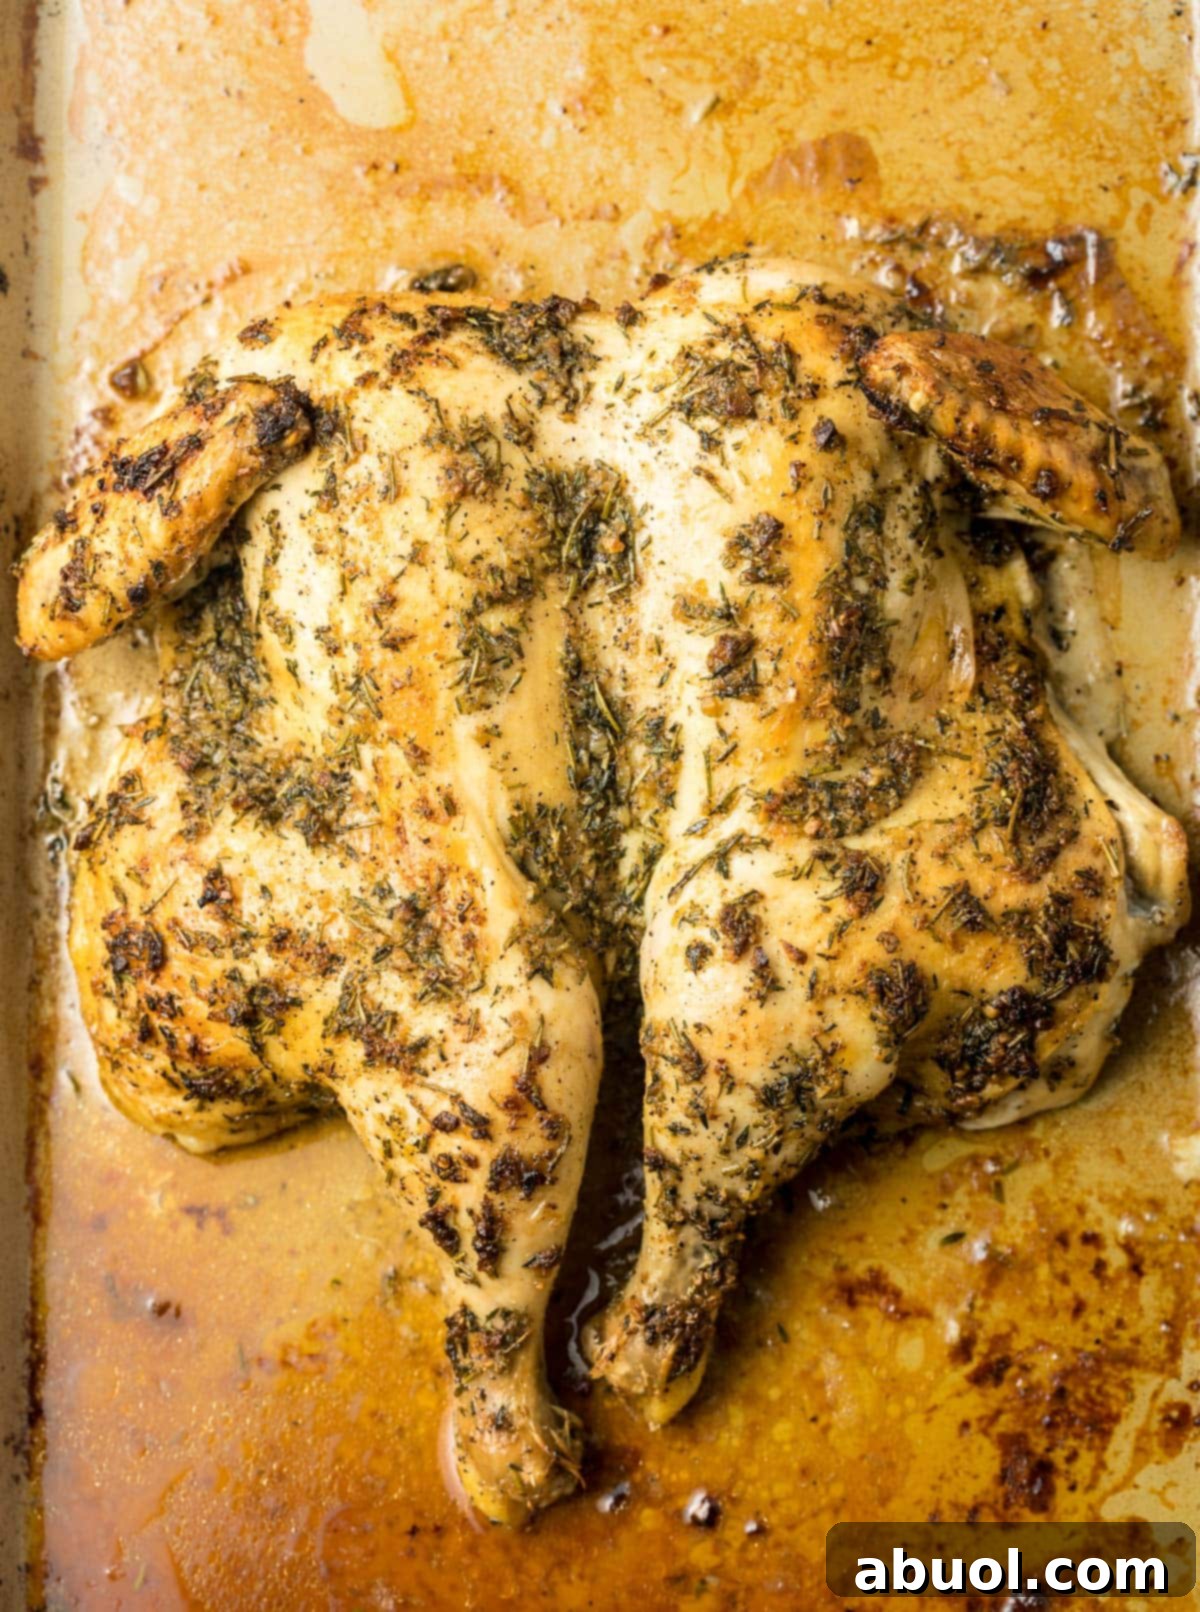
Discover the Ultimate Guide to Spatchcocking Chicken in 3 Simple Steps! Elevate your home cooking with this ingenious method, allowing you to prepare an elegant Garlic Herb Spatchcock Chicken in significantly less time than traditional roasting methods. Achieve unparalleled crispiness and perfectly even cooking every single time. This comprehensive guide will walk you through the process, from preparation to a delicious finished meal, ensuring success for both novice and experienced cooks.
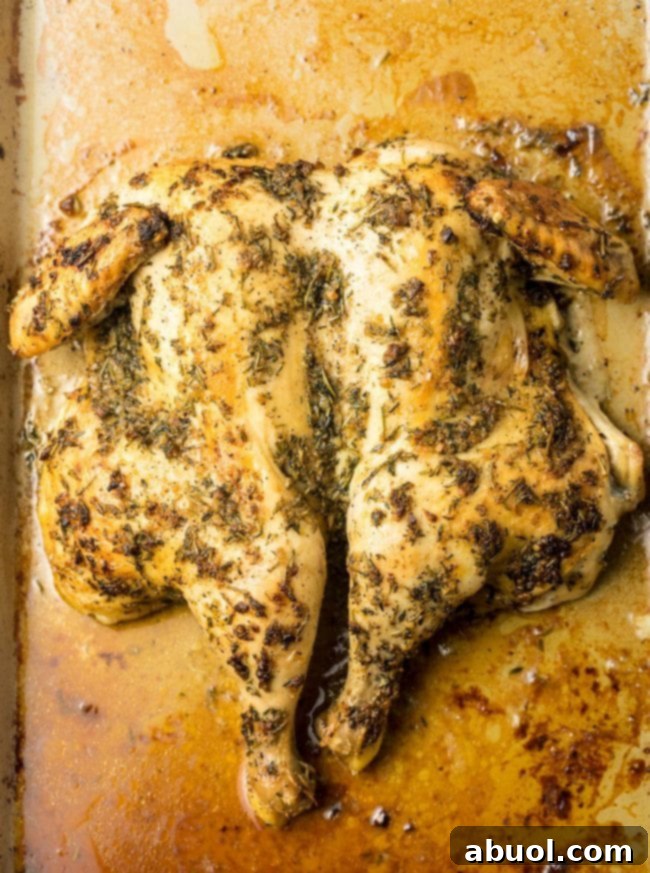
What is Spatchcock Chicken: Your Ultimate Guide to Faster, Juicier Roasts
Often hailed as a culinary secret weapon, spatchcocking, also commonly known as butterflying a whole bird, is a specialized technique where the backbone of a whole poultry – most typically a chicken or turkey – is carefully removed. This strategic removal allows the entire carcass to be flattened out, laying completely flat on a cooking surface. This preparation method fundamentally transforms the traditional roasting experience, enabling the chicken to cook far more evenly and rapidly, whether you’re utilizing an oven for roasting or a grill for a smoky char.
Instead of wrestling with a bulky, unevenly cooked bird where some parts might be dry while others are undercooked, spatchcocking delivers a consistently golden, impeccably crispy-skinned, and perfectly moist meal from end to end. The technique ensures that both the leaner breast meat and the fattier, darker meat in the thighs and drumsticks reach their optimal doneness simultaneously, preventing the common dilemma of dry white meat or undercooked dark meat. This innovative approach is believed to have originated in Ireland, where resourceful chefs sought a more efficient and effective way to prepare poultry. Over time, its undeniable practical benefits and superior results led to its widespread adoption in kitchens worldwide, solidifying its status as a game-changer for anyone looking to simplify their holiday feasts or elevate their weeknight dinners.
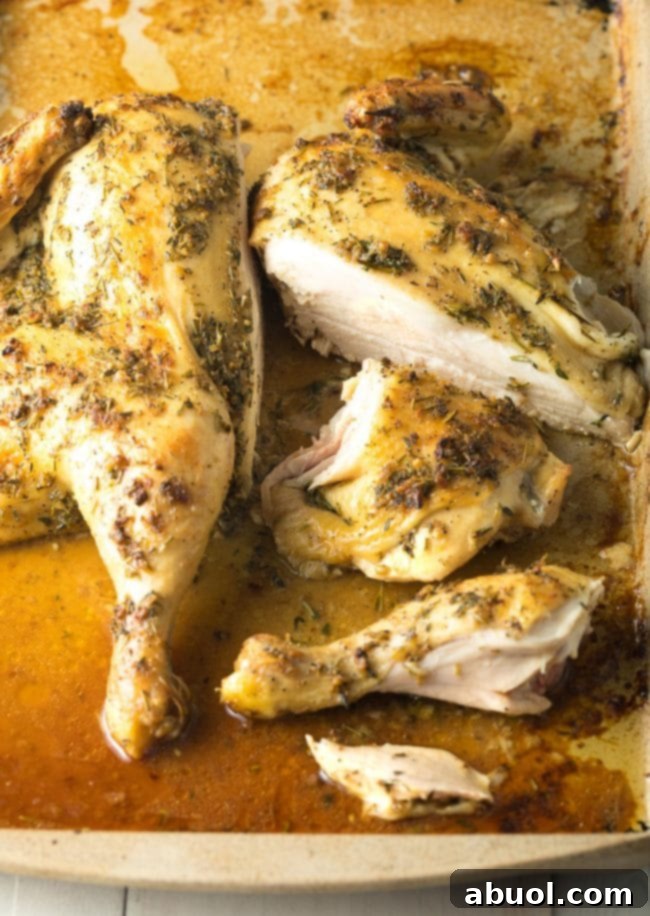
Spatchcock vs. Butterflied: Understanding the Culinary Nuances
While the terms “spatchcocked” and “butterflied” are frequently used interchangeably in the culinary world, they do possess subtle distinctions in their application and context. To clarify, the term butterflying is generally used to describe the technique of cutting a thicker piece of meat, such as a single chicken breast, pork chop, or even a large shrimp, horizontally through its thickness. The cut is made without going all the way through, allowing the piece of meat to be opened up and flattened, much like opening a book. The primary purpose of butterflying individual cuts is to increase the surface area for seasoning, promote quicker cooking times, and ensure more even cooking, particularly beneficial for pan-frying or grilling thinner cuts.
Conversely, when we discuss a whole chicken, spatchcocking specifically refers to the more comprehensive process of removing the entire backbone to facilitate the flattening of the entire bird. If one were to explicitly use the phrase “whole butterflied bone-in chicken,” they would, in essence, be describing the identical preparation method as spatchcocking. Therefore, the key difference largely lies in the scale and primary intent: butterflying can be applied to various smaller cuts for diverse culinary preparations, whereas spatchcocking is almost exclusively reserved for whole poultry, focusing on the strategic removal of the spine to create a uniform, flat cooking surface for superior roasting or grilling. Recognizing these distinctions ensures precise communication in the kitchen and helps you select the most appropriate technique for your specific culinary goals.
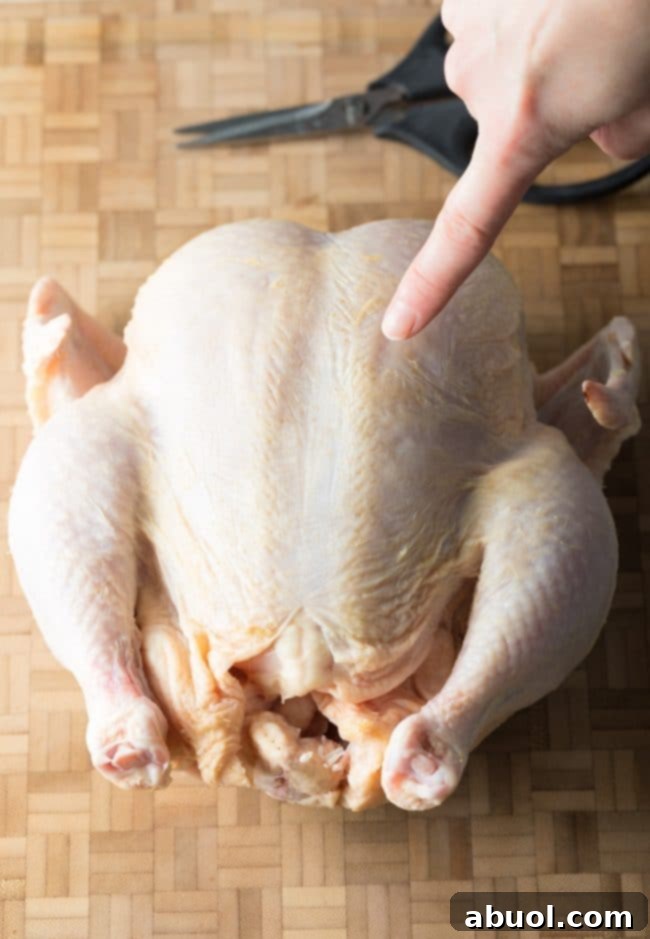

Unveiling the Benefits: Why Spatchcocking is the Superior Roasting Method
You might initially wonder why you should take an “extra” step before roasting your chicken. However, the truth is, spatchcocking offers a multitude of distinct advantages that significantly improve the end result, transforming a good roast into an exceptional one. This makes it a highly favored technique among both home cooks and professional chefs alike. Here’s a deeper dive into the compelling reasons why you should absolutely consider spatchcocking your next whole chicken:
- Unmatched Speed and Efficiency: One of the most compelling reasons to embrace spatchcocking is the dramatic reduction in overall cooking time. By flattening the entire bird, you expose a significantly greater surface area to the direct heat source. This superior heat distribution ensures that all parts of the chicken cook more efficiently and quickly, meaning your chicken will be perfectly done in as little as half to two-thirds the time compared to a traditionally trussed bird. For instance, a typical 4-pound chicken that might usually take well over an hour to roast can be ready in an impressive 35-45 minutes. This remarkable efficiency makes spatchcocking an ideal choice for busy weeknights, last-minute gatherings, or whenever you need a fantastic meal on the table faster.
- Superior Crispy Skin: The hallmark of an outstandingly roasted chicken is undeniably its irresistibly crispy, golden-brown skin. Spatchcocking is the ultimate secret weapon for achieving this. By laying the chicken flat, nearly all of its skin is exposed and facing upward, directly towards the heat source. This direct and uniform exposure promotes optimal browning, rendering of fat, and caramelization across the entire surface. The result is a much larger quantity of gloriously golden, crackling skin that everyone will eagerly fight over, adding an incredible depth of flavor and satisfying texture to every single bite.
- Even Cooking, Every Time: The traditional method of roasting a whole chicken often leads to the frustrating problem of uneven cooking. The leaner breast meat tends to cook faster and dry out before the denser, fattier dark meat (thighs and drumsticks) is fully cooked through. Spatchcocking brilliantly resolves this culinary challenge. The flattened shape ensures that both the white and dark meat receive similar, consistent heat exposure. This allows all parts of the bird to cook at a more uniform rate, leading to exceptionally succulent breasts and perfectly tender, juicy thighs and drumsticks simultaneously. Bid farewell to dry chicken forever and welcome consistently moist results!
- Enhanced Flavor Penetration: With the backbone removed and the bird splayed open, there’s a significantly increased surface area for your seasonings, rubs, and marinades to adhere to and deeply penetrate the meat. This means you can infuse your chicken with even more robust and complex flavors, from aromatic fresh herbs and pungent spices to zesty citrus notes or rich garlic. The direct contact of your chosen flavor profile with more of the meat results in a more thoroughly seasoned and ultimately, a much more delicious chicken that tastes amazing inside and out.
- Elegant Presentation: Beyond its practical benefits, a spatchcocked chicken also boasts a strikingly elegant and appealing presentation when served on a platter. Its uniformly flattened form, adorned with perfectly golden and crispy skin, looks incredibly sophisticated and inviting. This simple preparation transforms an average roasted chicken into a true show-stopping centerpiece, making it perfect for impressing guests at dinner parties, holiday gatherings, or simply elevating a family meal without adding unnecessary culinary complexity.
- Easier Carving and Serving: Carving a traditional, round roasted chicken can often be a somewhat awkward and challenging task, especially for those less experienced. With a spatchcocked chicken, the flat, open profile greatly simplifies the carving process. The backbone is already removed, and the chicken essentially falls apart into easily manageable portions along its natural joints. This makes serving a breeze, significantly reducing mealtime stress and allowing you to present neat, appealing portions effortlessly.


Master the Art: How to Spatchcock a Chicken in 3 Easy Steps
The idea of transforming a whole chicken into a spatchcocked bird might initially sound daunting or highly technical, but rest assured, it is surprisingly simple and requires only one essential tool. Don’t let the somewhat technical name “spatchcocking” intimidate you – with a bit of confidence and the correct equipment, anyone can achieve this culinary feat. Here’s a detailed guide on how to effortlessly flatten a roasting chicken or expertly butterfly a whole chicken, ensuring a perfect roast every time:
Essential Tools for Spatchcocking
The most critical and indispensable tool for successfully spatchcocking a chicken is a sturdy, sharp pair of kitchen shears. It’s imperative that your shears are robust enough to cut cleanly through bone without excessive effort or slipping. In addition to the shears, a large and stable cutting board is highly recommended to provide a safe and spacious work surface. A roll of paper towels will also prove invaluable for ensuring the chicken is thoroughly dry before seasoning and for easy cleanup, which is crucial for achieving that coveted crispy skin.
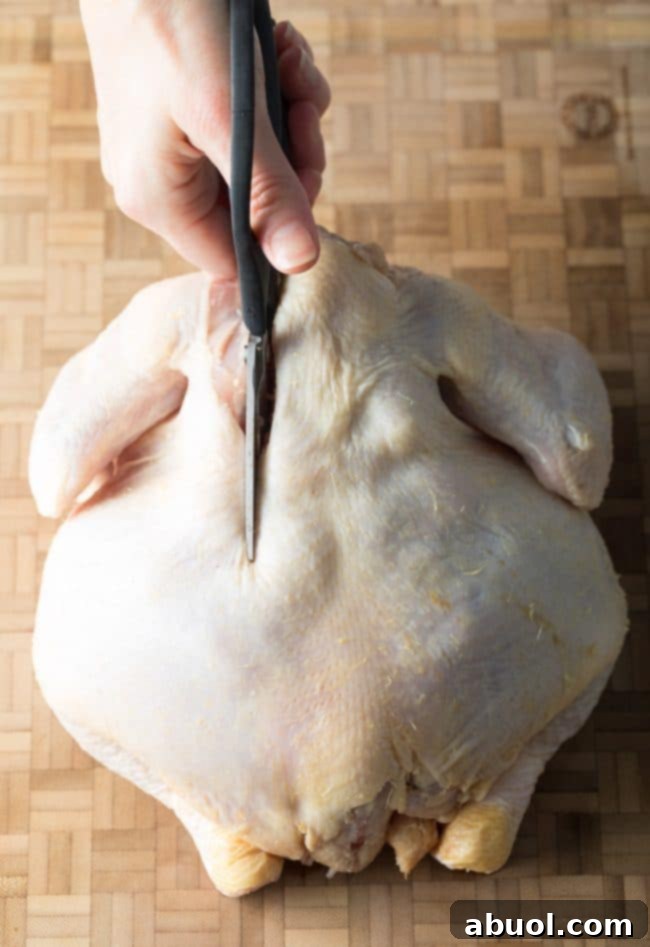
- Remove the Backbone with Precision: Begin by placing your whole chicken breast-side down on your stable cutting board. Take a moment to visually locate the backbone, which runs distinctly down the center of the chicken’s back. Grasping one side of the bird firmly, use your strong kitchen shears to carefully cut alongside one side of the backbone, starting from the tail end and steadily working your way up towards the neck. Apply firm, consistent pressure to cut through the rib bones. Once you’ve successfully cut down one side, rotate the chicken slightly and repeat this precise cutting process along the other side of the backbone to remove it completely. It’s crucial to keep your shears as close to the bone as possible during these cuts to avoid unnecessarily losing any valuable meat. A bonus tip: do not discard the removed backbone! It is an excellent ingredient for making a rich, flavorful chicken stock, which is a foundational component in many culinary creations.
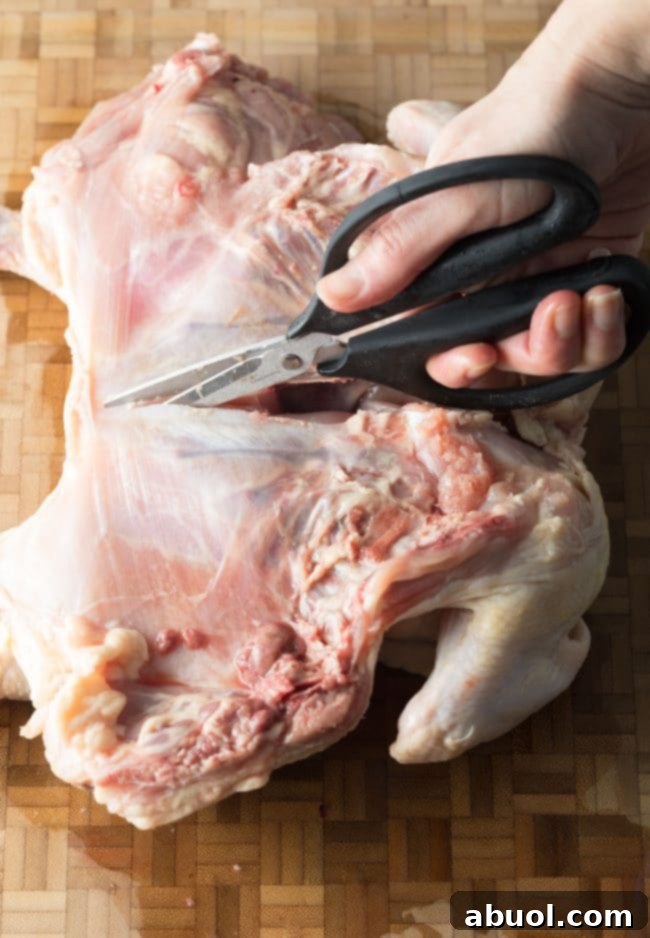
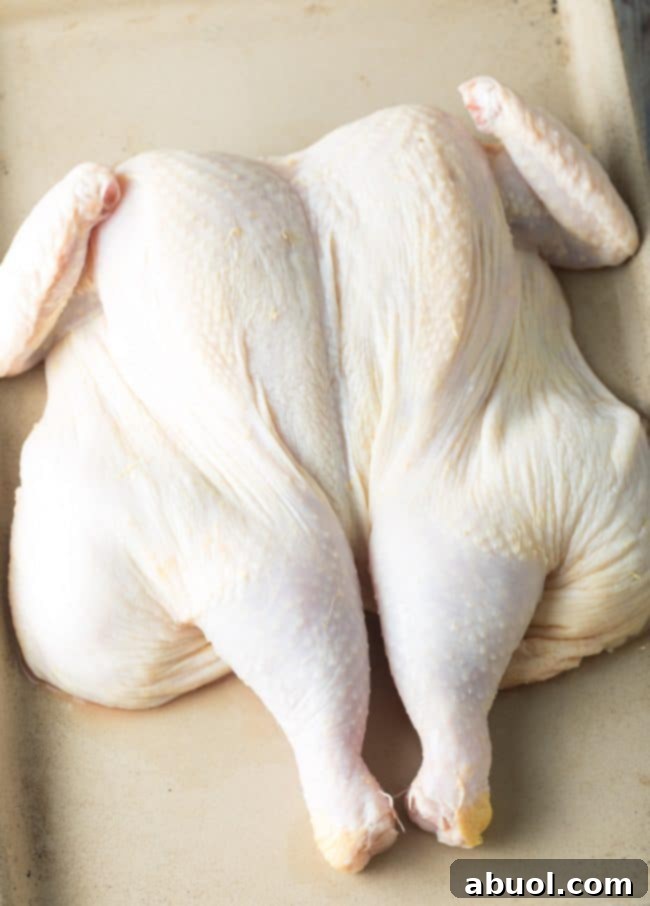
- Score the Breastbone and Flatten: Once the backbone has been successfully removed, gently open up the chicken, much like you would open a book. You will now clearly see the breastbone, also known as the keel bone, running prominently down the center of the breast cavity. While this bone is somewhat flexible due to cartilage, it will still prevent the chicken from lying perfectly flat. To remedy this and allow for complete flattening, make a shallow, careful incision directly through the cartilage of the breastbone. It is vital to note that you should NOT cut all the way through the breast meat and the skin on the other side; the primary goal here is merely to score the bone to release the tension and make it more pliable. Now, flip the chicken breast-side up, place the heels of your hands firmly on top of the breasts, and press down with significant, confident force until you hear a satisfying crack. This sound indicates that the breastbone has broken or flattened, allowing the chicken to splay out perfectly flat on your cutting board. This action effectively breaks the cartilage and ribs, ensuring the bird lays completely flat for even cooking.
- Manage the Wing Tips for Even Roasting: The wing tips are notoriously delicate and thin, making them highly prone to burning and becoming crisp beyond enjoyment during the roasting process due to their direct exposure to heat. Some chickens are commercially sold with their wing tips already neatly trimmed; if this is the case for your bird, no further action is required for this step. However, if the wing tips are still intact, you have two practical options to prevent them from scorching and ensure a more aesthetically pleasing final product:
- Trim them off: Using your reliable kitchen shears, carefully snip off the very tips of the wings at the joint. These small, trimmed pieces can also be added to your stockpot along with the backbone to enhance your chicken stock’s flavor.
- Tuck them under: Alternatively, for a tidier presentation and excellent protection, you can simply tuck the wing tips neatly underneath the breast meat. This clever technique shields them from the direct, intense heat and also helps to create a more compact, streamlined shape for the chicken, which can aid in uniform cooking and presentation.
Once these three essential steps are meticulously completed, your chicken is now perfectly spatchcocked, expertly prepared, and eagerly awaiting your chosen seasonings and the roasting process!
Optimal Roasting Times and Temperatures for Spatchcock Chicken
One of the most appealing and celebrated advantages of spatchcocking is the significantly reduced cooking time it offers, all without compromising on the succulent flavor or desirable moisture content of the chicken. Understanding the ideal duration and temperature for roasting a spatchcocked chicken is absolutely crucial for perfecting this delectable dish. Generally speaking, a spatchcocked chicken will cook in a remarkable 30-50% less time than a conventionally roasted chicken of the exact same size. This impressive efficiency is a direct result of the flattened structure, which allows for vastly more even and direct heat penetration across all parts of the bird, ensuring everything cooks harmoniously.
For a smaller chicken, typically weighing approximately 3 to 4 pounds, you can confidently expect it to be fully cooked and ready to serve in roughly half the time compared to a traditional, whole roast. Larger chickens, weighing around 5 to 6 pounds, will still benefit immensely and will typically require only about two-thirds of the standard cooking duration. To illustrate, if a 4-pound whole chicken would normally necessitate about an hour to an hour and fifteen minutes to reach optimal doneness, a perfectly spatchcocked version will be gloriously ready in an impressive 35-45 minutes when roasted at a high temperature, ideally between 425-450°F (220-230°C). This high heat not only accelerates the cooking process but also plays a vital role in achieving that highly sought-after, irresistibly crispy skin.
To guarantee food safety and perfect doneness, always ensure you cook your spatchcock chicken until a reliable instant-read meat thermometer, when inserted into the thickest part of the thigh (making sure to avoid touching any bone), registers an internal temperature of 165°F (74°C). After removing the chicken from the oven, allowing it to rest for 10-15 minutes is a critical, often-overlooked step; this essential resting period allows the juices to redistribute throughout the meat, resulting in an incomparably more tender, flavorful, and moist bird that is a joy to carve and eat.
Garlic Herb Oven Roasted Spatchcock Chicken: A Recipe for Perfection
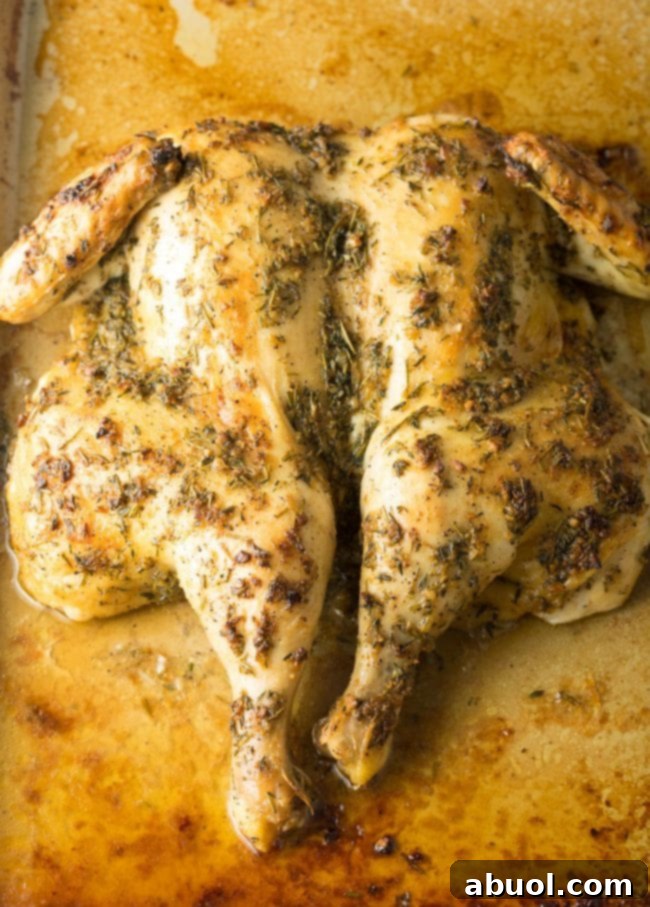
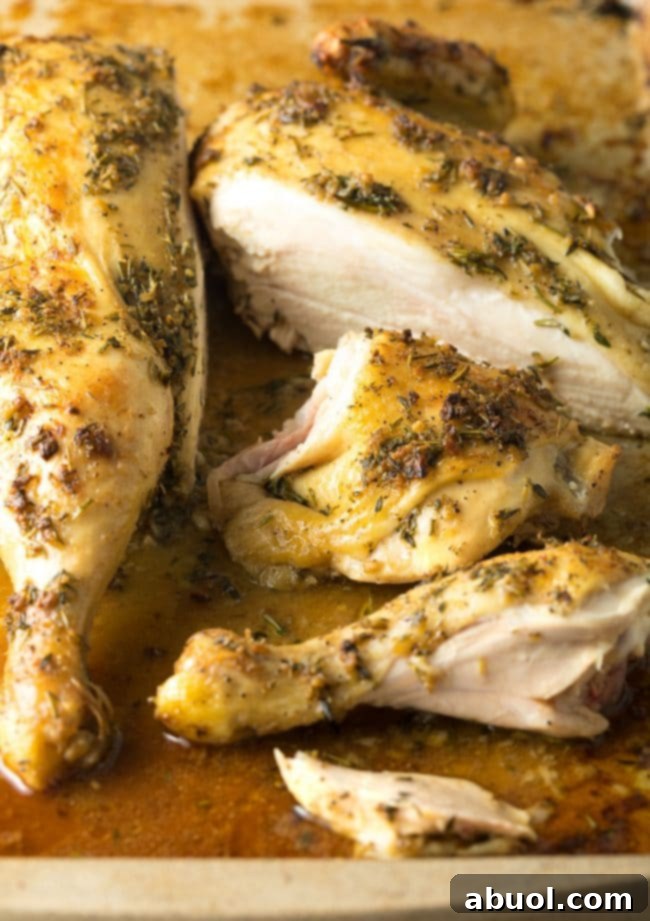
Once you’ve confidently mastered the straightforward art of spatchcocking your chicken, a world of exciting seasoning possibilities and flavor combinations opens up before you! While a simple rub of salt and pepper can indeed yield delicious results, one of our absolute favorite and most highly recommended preparations is to generously slather the spatchcocked chicken with a fragrant, homemade garlic herb butter. This exquisite butter mixture not only infuses every morsel of the chicken with an incredible depth of flavor but also plays a crucial role in achieving that coveted, irresistibly golden-brown and extra-crispy skin that makes any roast truly special. The harmonious combination of fresh, aromatic herbs, pungent minced garlic, and bright, zesty lemon creates an intoxicating aroma and a taste profile that is so outstanding, this recipe is sure to become a cherished staple in your kitchen. This vibrant and aromatic butter creates a stunning, flavorful crust and ensures an exceptionally juicy interior, making every single bite an absolute delight. You’ll discover the full, detailed, and easy-to-follow recipe below, providing comprehensive guidance to help you create this mouth-watering dish from initial prep to the final, perfectly plated meal.
More Delicious Chicken Recipes to Try
If you’ve thoroughly enjoyed the surprising simplicity and outstandingly delicious results achieved through spatchcocking, you’re in for a treat as you explore the vast world of other incredibly versatile chicken dishes. Chicken remains an enduringly fantastic and adaptable protein, perfect for virtually any meal, offering endless possibilities for diverse flavors and varied cooking methods. Whether you’re seeking quick weeknight meals, impressive holiday fare, or comforting classics, chicken always delivers. Here are some more easy, inspiring, and mouth-watering chicken recipes to enthusiastically add to your expanding culinary repertoire:
- Keto Chicken Lasagna Cups
- Creamy Coq au Vin
- French Onion Chicken
- Crispy Baked Chicken Cutlets
- Bacon Wrapped Chicken
- Chipotle BBQ Chicken Skewers
- Miso Honey Chicken
- Perfect Herb Roasted Chicken Thighs
- Instant Pot Sweet Soy Chicken
- Honey Orange Roasted Chicken
- Croatian Chicken Skillet
- See More How To Guides and Delicious Recipes!
Print Recipe
Garlic Herb Spatchcock Chicken Recipe
Learn how to effortlessly spatchcock a whole chicken in 3 simple steps, then roast it to glorious golden perfection with a fragrant and flavorful garlic herb butter. This ingenious method guarantees an irresistibly crispy skin and incredibly juicy, evenly cooked meat in significantly less time than traditional roasting techniques. An impressive dish perfect for any occasion!
Video Tutorial
For a complete visual guide to spatchcocking your chicken and preparing this exceptionally delicious Garlic Herb Roast Chicken, we invite you to watch our step-by-step video tutorial. It provides clear demonstrations for each part of the process, ensuring your success:
Watch Spatchcocking Chicken Tutorial
Ingredients
Units: US Customary (default) – Metric
- 4-5 pound whole roasting chicken
- 4 tablespoons melted unsalted butter
- Zest of 1 fresh lemon (about 1 teaspoon)
- 2-3 cloves garlic, finely minced or pressed
- 1 tablespoon fresh rosemary leaves, roughly chopped
- 1 tablespoon fresh thyme leaves, roughly chopped
- 1 teaspoon fine sea salt, or to taste
- ½ teaspoon freshly ground black pepper, or to taste
Instructions
- Preheat your oven to a robust 450°F (230°C). Carefully unwrap the whole roasting chicken from its packaging. Reach inside both the front and back cavities to thoroughly remove any giblets, the neck, or any plastic timer pop-ups. It is absolutely crucial to ensure the chicken is completely empty and clean before moving on to the next steps.
- Place the chicken breast-side down on a clean, sturdy cutting board. Take a moment to familiarize yourself with the bird’s structure, specifically identifying the backbone that runs distinctly down the center of its back.
- Using a strong and sharp pair of kitchen shears, begin cutting alongside one side of the backbone. Start from the tail end of the bird and steadily work your way up towards the neck, applying firm, consistent pressure to cut through the rib bones. Once you’ve successfully cut down one side, rotate the chicken as needed and repeat this precise cutting process along the other side of the backbone to remove it entirely. Strive to cut as close to the bone as possible to retain maximum succulent meat on your chicken. Remember, you can save the removed backbone (and any giblets) to make a rich, flavorful homemade chicken stock – a truly invaluable kitchen staple!
- Flip the chicken over so it is now breast-side up. Observe the breastbone (also known as the keel bone) running prominently along the center of the breast. To ensure the chicken lies completely flat, which is key for even cooking, make a shallow, careful incision directly through the cartilage of the breastbone. It is important to emphasize: do NOT cut completely through the breast meat and the skin on the other side. This incision is primarily to make the bone flexible. After scoring, firmly place the heels of your hands on top of the breasts and press down with significant, confident force until you hear a satisfying crack. This sound indicates that the breastbone has broken or flattened, allowing the chicken to splay out perfectly flat on your baking sheet. (Refer to the photos provided earlier in the article for visual guidance on this critical step).
- Once the chicken is flattened, carefully transfer it breast-side-up onto a large, rimmed baking sheet. Adjust the drumsticks so they are pulled down and positioned together, helping to create the classic, compact spatchcock shape. Next, address the wing tips:
- Inspect the wing tips. Some commercially processed chickens are sold with their wing tips already neatly trimmed; if this is the case for your bird, no further action is required for the wings. However, if the wing tips are still intact, they are quite thin and exposed, making them highly prone to burning and becoming overly crisp during the high-heat roasting process. You have two excellent options to prevent this: either cut them off at the first joint with your kitchen shears (these small pieces can also join your stockpot ingredients) or, for a tidier presentation and excellent protection, tuck them neatly underneath the breast meat. This clever tucking technique shields them from direct, intense heat and helps maintain a uniform appearance.
- Thoroughly pat the entire surface of the chicken dry with paper towels. Additionally, wipe any excess moisture or juices from the baking sheet itself. Achieving a very dry skin is an essential prerequisite for developing that optimal, irresistibly crispy skin.
- In a small mixing bowl, combine the melted butter, the bright fresh lemon zest, the finely minced garlic, the fragrant chopped fresh rosemary, the aromatic chopped fresh thyme, 1 teaspoon of fine sea salt, and ½ teaspoon of freshly ground black pepper. Mix these ingredients thoroughly until a wonderfully fragrant and uniform herb butter mixture forms.
- Generously brush this aromatic garlic herb butter mixture over the entire surface of the chicken, ensuring an even coating. For an extra boost of flavor and moisture, you can gently loosen the skin over the breasts and work some of the butter mixture underneath as well. Roast the chicken in the preheated oven for 35-45 minutes, or until an instant-read meat thermometer, when accurately inserted into the thickest part of the thigh (ensuring it avoids touching any bone), registers an internal temperature of 165°F (74°C). The skin should be deeply golden brown and audibly crispy.
- Once cooked to perfection, carefully remove the chicken from the oven. Allow it to rest uncovered on the baking sheet or transfer it to a clean cutting board for 7-10 minutes before carving. This crucial resting period is vital, as it allows the delicious juices to redistribute throughout the meat, resulting in an exceptionally more tender, moist, and flavorful chicken. After resting, carve the chicken into desired portions and serve immediately. Enjoy your perfectly roasted Garlic Herb Spatchcock Chicken!
Nutrition Information
Serving: 0.25 chicken,
Calories: 340 kcal,
Carbohydrates: 1g,
Protein: 20g,
Fat: 27g,
Saturated Fat: 11g,
Cholesterol: 111mg,
Sodium: 176mg,
Potassium: 216mg,
Fiber: 0g,
Sugar: 0g,
Vitamin A: 600 IU,
Vitamin C: 5.3mg,
Calcium: 32mg,
Iron: 1.4mg
Did you try this Garlic Herb Spatchcock Chicken recipe? We would absolutely love to hear about your experience! Share your thoughts and culinary successes in the comments below, and inspire other hungry home cooks to discover this fantastic method for roasting chicken.